UPDATE: All new featured RV tours will be posted on my other website, Wanderful RV Interiors. Existing tours will slowly be moved to the new website, and anything already moved will automatically redirect.
Disclaimer: This post may contain affiliate links, meaning, if you click through and make a purchase we (or those featured in this post) may earn a commission at no additional cost to you. View our full-disclosure here.
Have you ever had a vision in your head of a piece of furniture that would be perfect for your home, only you have trouble actually finding it, at a price you can afford? That happens to me more often than I would like to admit, but then again that’s the beauty of DIY. If you’re unable to find exactly what you’re looking for you can create it yourself, and oftentimes for less than what you would pay retail. This is what led us to build our own custom RV sofa.
I’ll admit that building a sofa was low on our priority list. We really wanted to find something that would work within a budget because we had never built one before. I mean, what if it turned out ugly or even worse… uncomfortable? Yeah, sofa making seemed like something we should leave to the pros.
However, after spending countless hours scouring the web for the “perfect” RV sofa we had trouble finding one that fit the following criteria:
- Specific Dimensions we needed
- Was lightweight (or at least not super heavy)
- Was multi-functional – specifically being able to hold storage
- Could be bolted down
- Modern Rustic Design
- Within Budget
Oh the challenges of renovating an RV
The space our sofa needed to go was shorter than a typical sofa but longer than most loveseats. Go figure. Another concern we had was weight. Being in an RV means we need to be really careful about any added weight, which can make furniture shopping a bit more challenging.
You can see the space the sofa would go below, however, this is before we installed the passenger captain’s chair, so it’s a smaller area than it looks.

Eric and I also went back and forth about the functionality of the sofa. At first, we wanted something that could turn into a bed, hold storage, and have footrests. We found some really creative designs out there, but none that fit all of our criteria. Holding storage was the most important aspect for us so that’s what we focused on.
Design-wise, RV specific furniture just isn’t my style as it’s generally more traditional. It can also be pretty expensive. We looked at other online retailers, discount stores, Ikea, Craigslist, etc. but still couldn’t find what we were looking for.
The couch that came with our RV was bolted down, and although we have read that not everyone does this, we felt it was an important component. So we ultimately decided we would need to have some way of securing our new sofa to the floor of the RV.
On the plus side, the majority of designs I liked had a wooden base, which made us feel a little better about building our own sofa since we planned to build the outside frame out of plywood. I recently shared 10 of the rustic modern designs that influenced our custom RV sofa design.
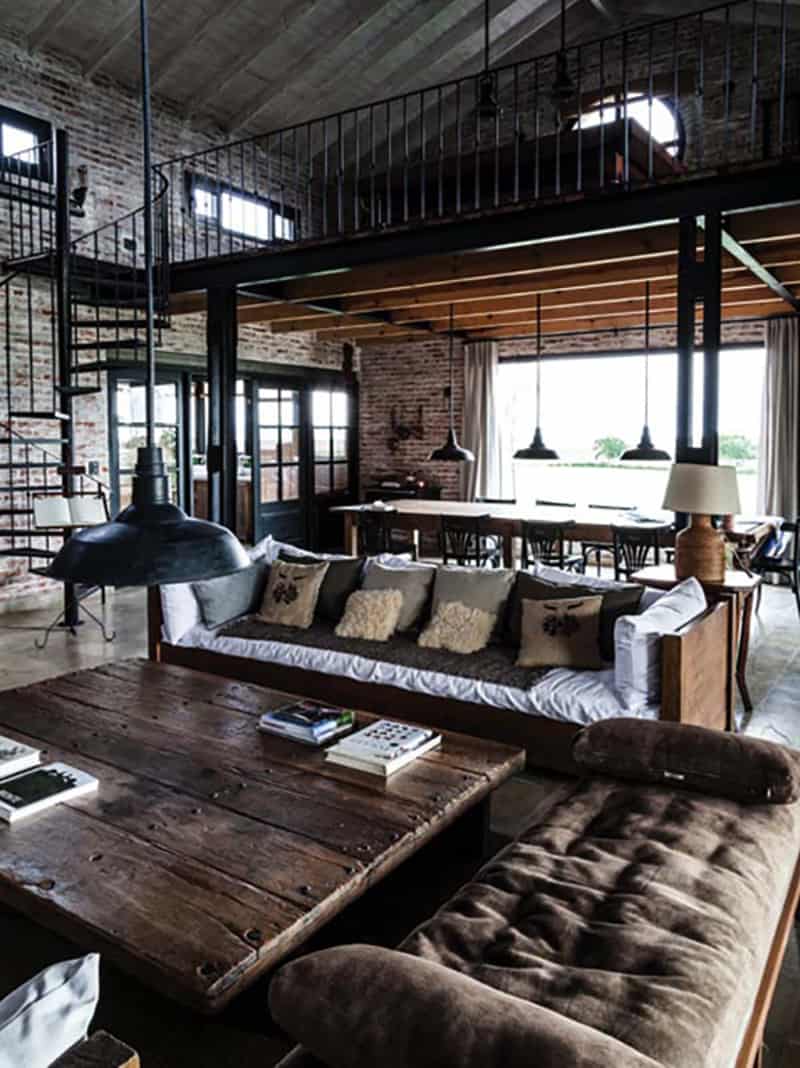
Photo Source: Railway Shed Conversion | Pragmata
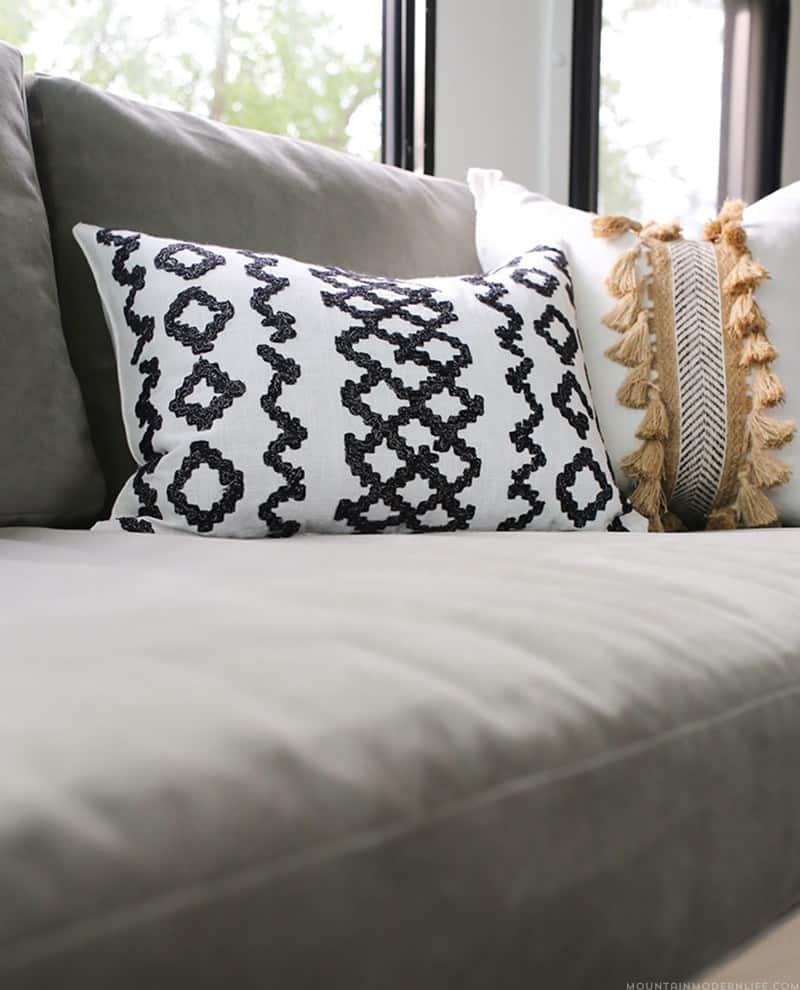
In the end, we simply couldn’t find a sofa that had everything we needed and didn’t cost an arm and a leg. We were lucky enough to have my mom volunteer to make the sofa cushions for us out of this fabric, so that put as at ease (thanks Mom!).
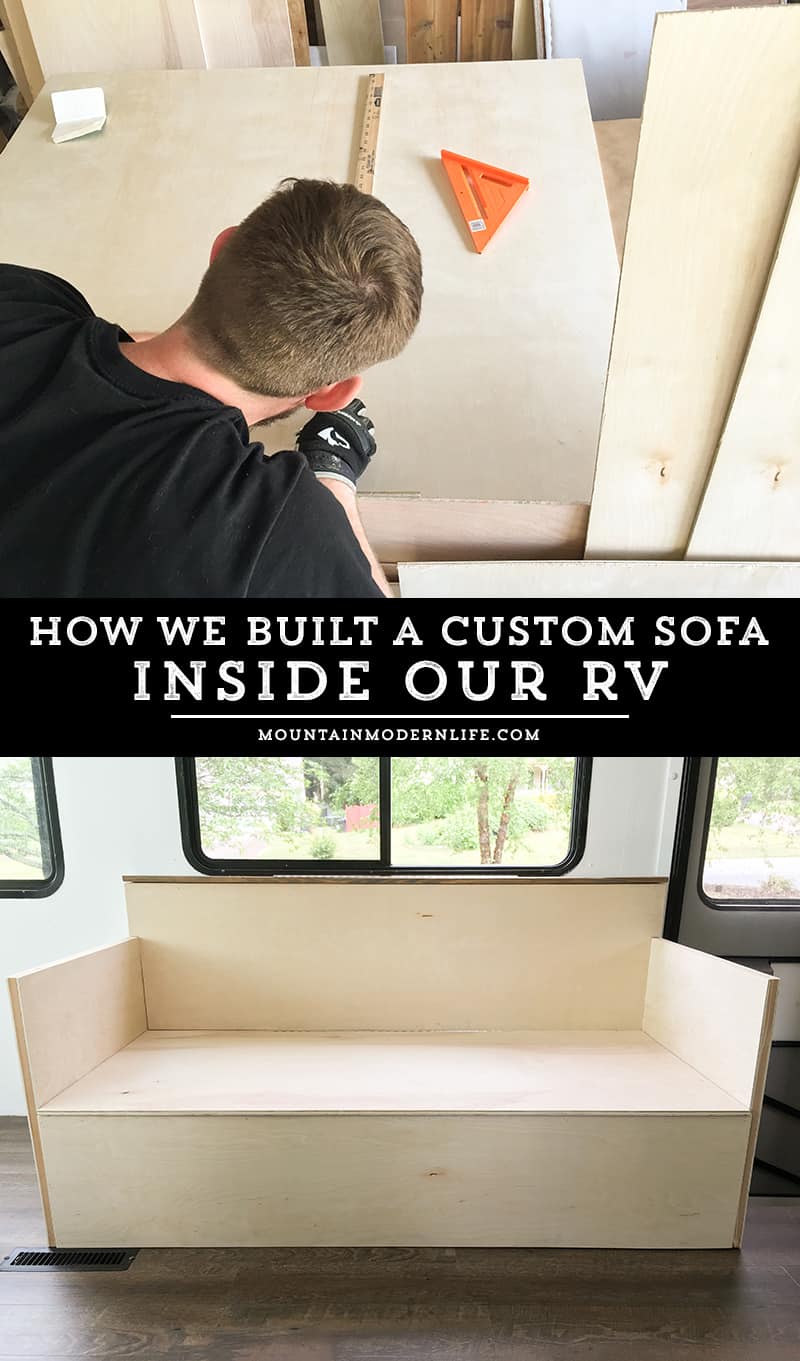
Although I helped throughout the building process, Eric did the majority of the work so I’ll let him explain in more detail how we built the custom sofa for our RV.
Whether you’re looking to build a sofa for your RV, or you’re looking to create custom seating for your sticks and bricks home, we hope you can find some inspiration from this post.
Custom RV Sofa: Part 1
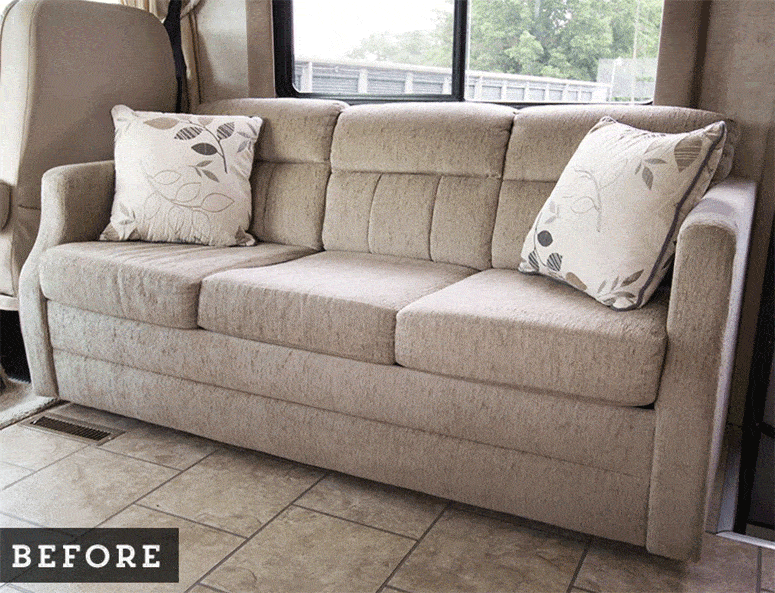
Katie and I knew we were going to be making some major adjustments in the RV in order to create an awesome living space for us to hang out in. The sofa was the only piece of furniture that was already in the right spot but it was heavy and really wasn’t our style. It had a pull-out bed which was nice but wasn’t anything we needed.
Out with the Old
The first thing we needed to do was remove the old pull-out sofa that was in the spot our new sofa was going to go. We were able to sell it which helped purchase the wood for our new sofa build.
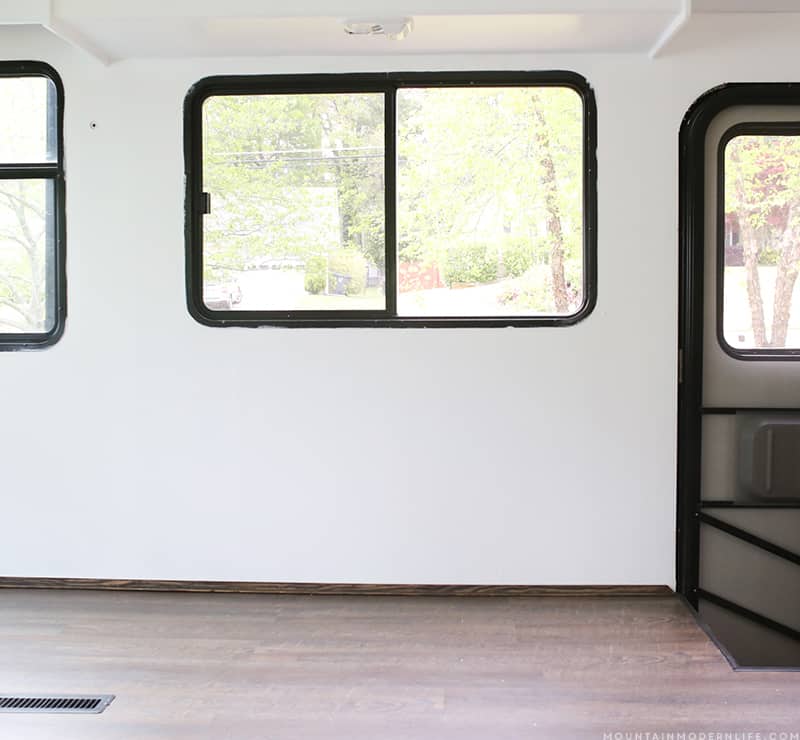
Below you can see what the RV looked like with the old sofa out of the way.

With the old sofa out of the way, it was time to determine the size of the sofa we would build. We wanted it to be as big as possible, but there were a few things we needed to consider. One being the passenger side captain’s chair, I mean we could’ve gone right up to the back of it, but we wanted to make sure it was able to move in all the ways it’s supposed to. Second, we wanted it to go as close to the door as possible but also wanted to make sure it didn’t create an uncomfortable entrance to the RV. We also needed to make sure it wasn’t too deep so that there was still a decent walkway, especially when our pull-out table was in use.
We decided to leave 3 inches between the frame of the door and the edge of the sofa. For the captain’s chair we pushed it back as far as possible, then leaned it back to a comfortable position for Katie. With those two spots decided on, we measured in-between and came up with 63 3/4 inches.
Now that we have our width we needed to figure out our depth and height, both of which ended up being pretty straight forward. For the depth we marked how far the previous sofa had come out and matched it, bringing our depth to 32 inches. The sofa in the RV was a little lower than we wanted, so we ended up measuring the height of the sofa in our house to get that perfect level.
When measuring the sofa height in our house we measured it with the cushions still on, that way we could decide on cushion thickness and height of the frame together. That measurement was 18 1/2 inches which became the height of our new sofa, including the sofa cushions.
Below is a picture from after we replaced the flooring and had the walls painted, basically right before we began to bring the sofa frame in.
Let me say that because we were building this sofa for the inside our RV, we tried to save on weight by building a frame out of mostly lighter wood. Had this been built for a “sticks and bricks” home, we could have made this process a lot easier by using wider, heavier wood.

- (5) 8ft Cedar 1 x 2s
- (5) 8ft Pine 2 x 4s
- (2) 8ft x 4ft Stain Grade 1/4 inch Birch Plywood
- (1) 8ft x 4ft Stain grade 1/2 Birch Plywood
- Circular Saw
- Table Saw
- Miter Saw
- Drill
- Nail Gun
- Kreg Jig
- Screws (for 2 x 4 connection)
- Screws (for 1 x 2 connection)
- Screws (for floor connection)
- Stain (use your preference)
- Piano Hinges
- Sander
- Sand Paper
- Clamps (pick the size that’s right for you)
![]()
Building the Frame
While the information below is not a step by step guide on how to build a sofa we do hope it will help give you the confidence to take on your own DIY sofa project.
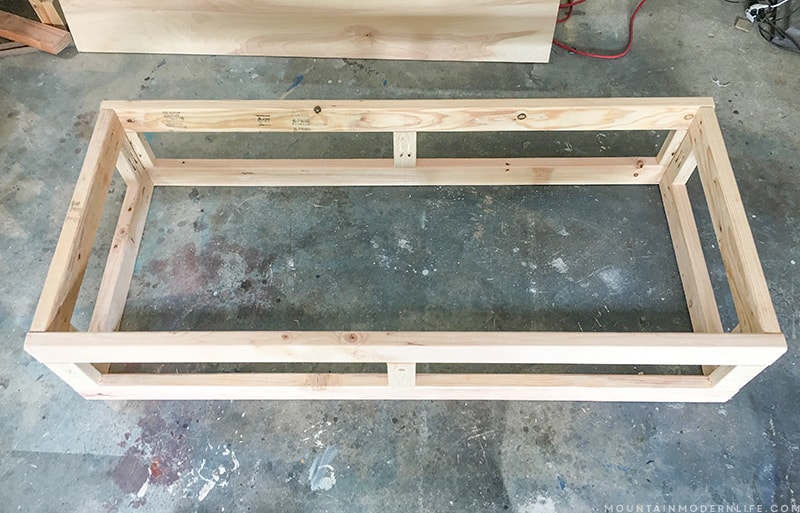
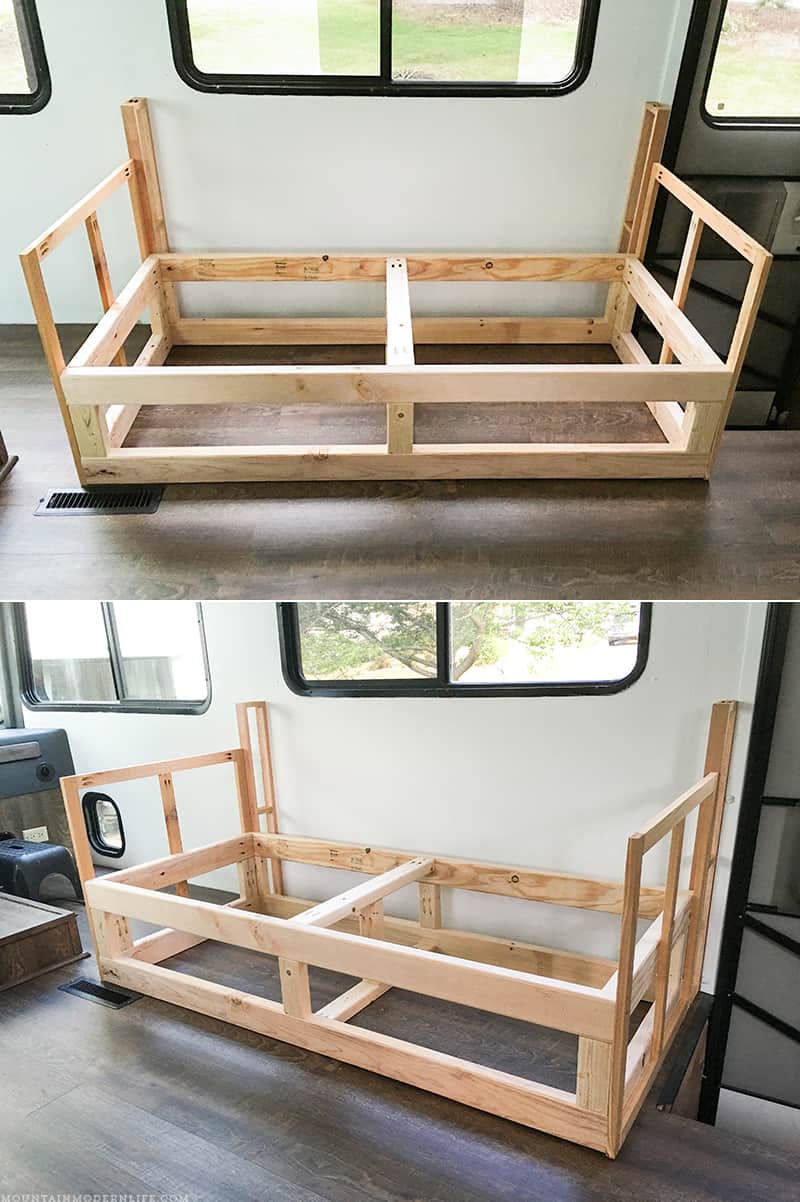
Alright, we have the measurements we need in order to construct the frame. Throughout the RV I used mostly cedar 1 x 2’s in order to conserve on weight, however with the sofa I wanted to make sure it was sturdy enough to hold two people. Because of that, I elected to build the main sitting frame out of 2 x 4’s.
The picture below will show you the basic structure.
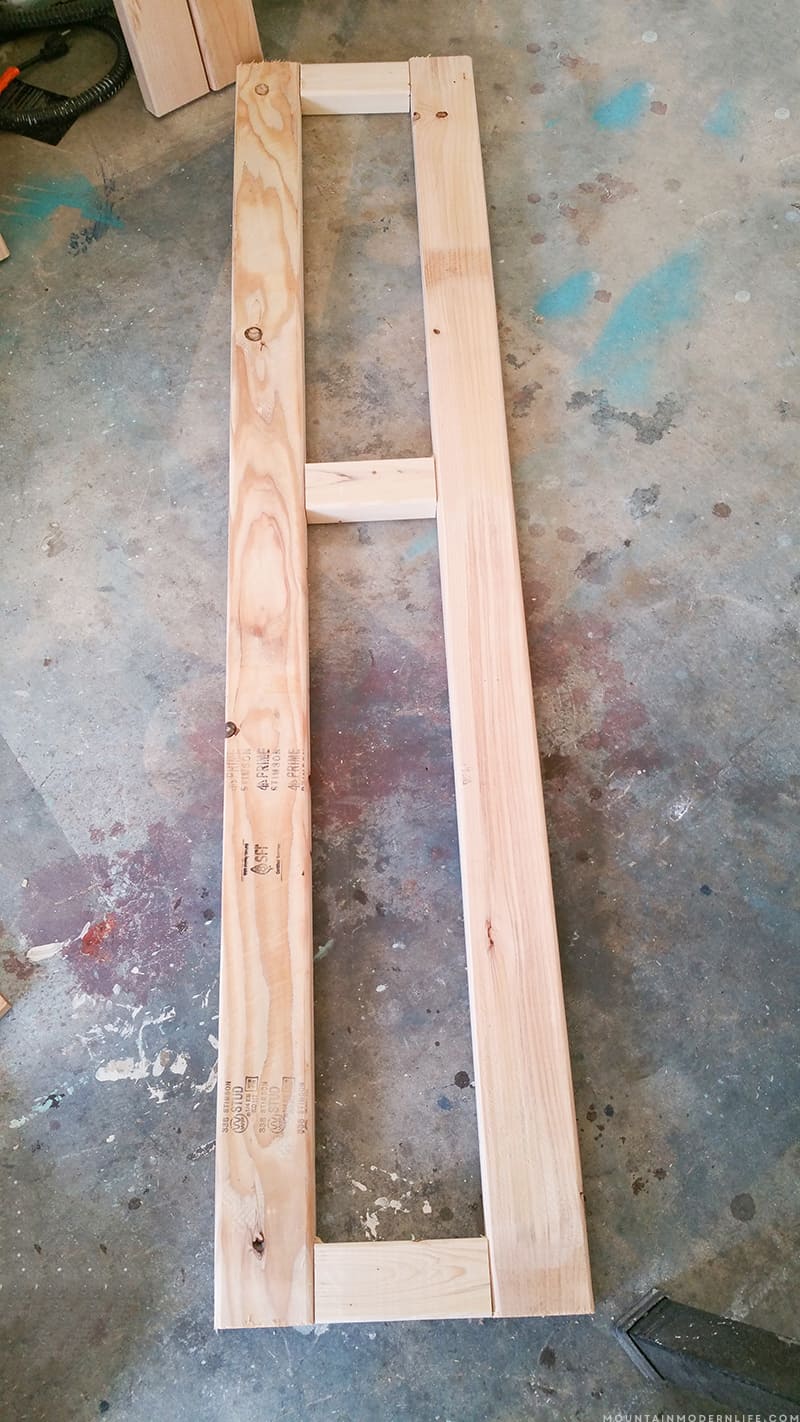
As you can see above, it is a four-part frame with two side walls as well as walls for the front and back. I am not sure if you have ever used a Kreg Jig before or not, but I can honestly say that it has changed my life. It makes constructing frames for anything crazy easy.
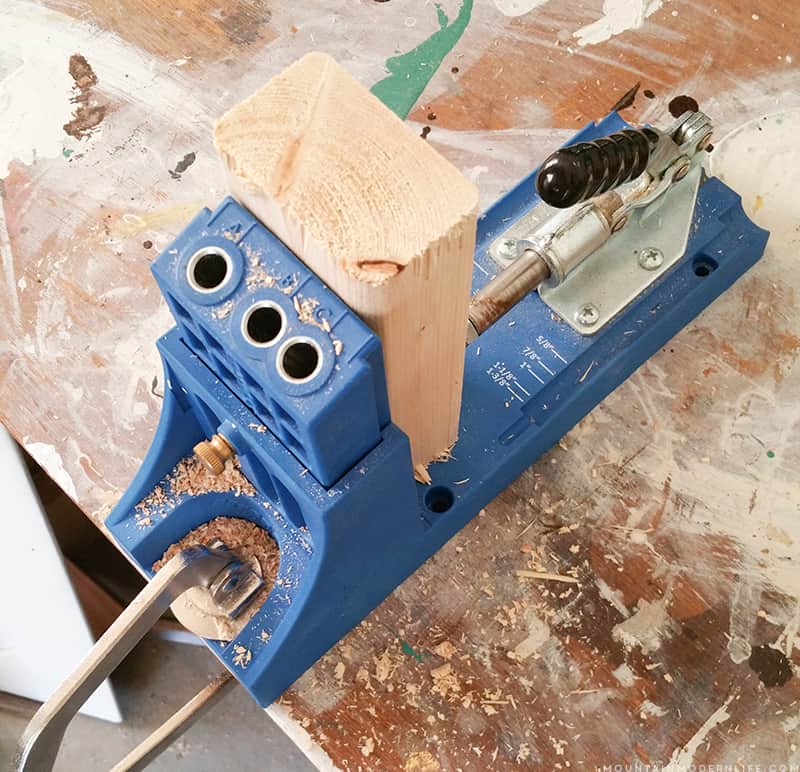
So, I used the Kreg Jig and made the four walls for the frame, then used the Kreg Jig again in order to attach the four walls together.
Two things to note:
I only made the 2×4 frame 62 inches from side to side, I did this because I knew I would be adding on the 1×2 cedar boards for the arms. Each 1×2 is 3/4 of an inch thick meaning I needed to make my 2×4 frame 1 and 1/2 inches shorter than my final width.
Second, I only made my 2×4 frame 27 and 1/2 inches deep because I knew we were going to have a built-in sofa table behind the couch to hold our table leaves, which would be 4 and 1/2 inches deep. This is the deepest we could make the sofa table and have the sofa be a comfortable depth without taking too much space in the center of our RV.
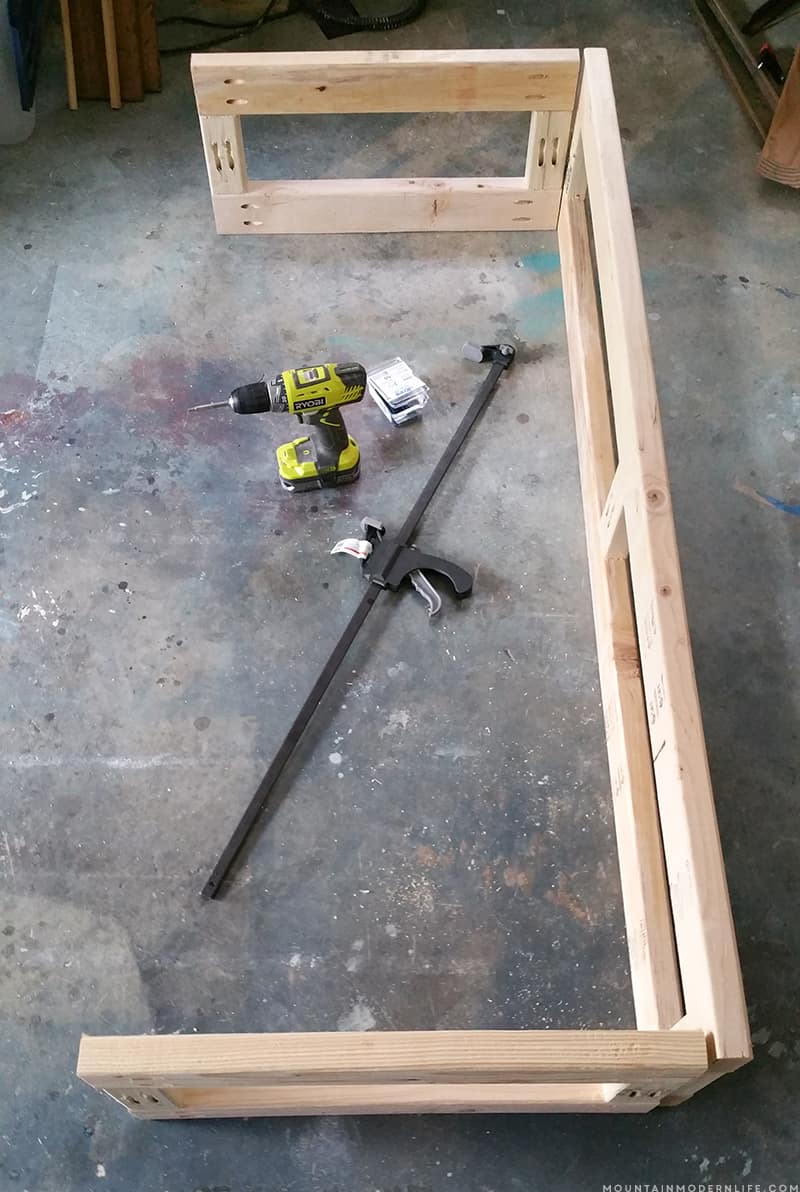
At this point, I am feeling pretty good about the progress, even though it doesn’t look anything like a sofa.
Building the Sofa Arms
As I mentioned above, I knew that I would be building the arms for the sofa out of cedar 1 x 2’s. I have to admit, I’m learning a lot as I go, so I just decided to build two square frames and attach them to the side. I figured with them being attached to the 2 x 4 frame and with the idea of covering the entire sofa with plywood that it would be strong enough. I have to say we’ve been using it for more than a month now and so far so good.
Unfortunately, we had a computer crash a few months ago and lost some files, so I don’t have many pictures of the arm frames. However, you can see them already attached to the 2 x 4 frame in the photo below.
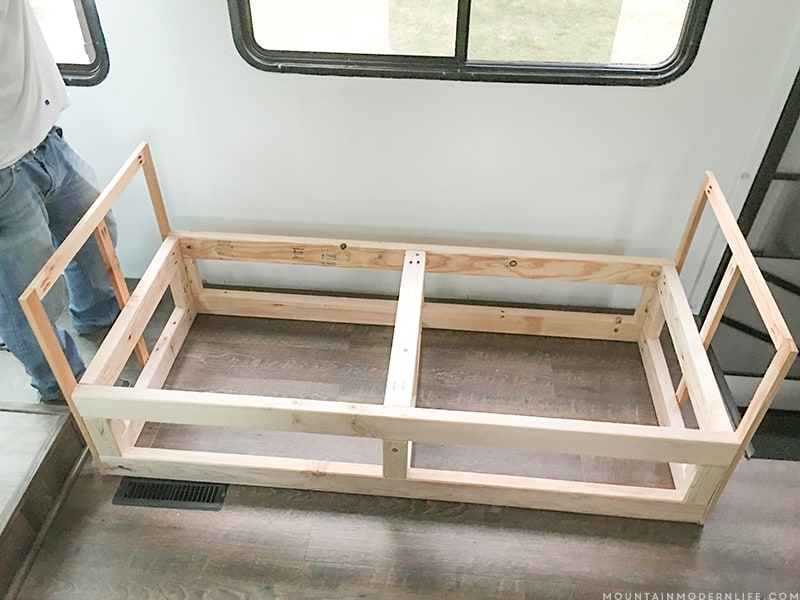
Now, we have the arms attached to the 2 x 4 frame and it’s beginning to look a little bit more like a sofa 🙂
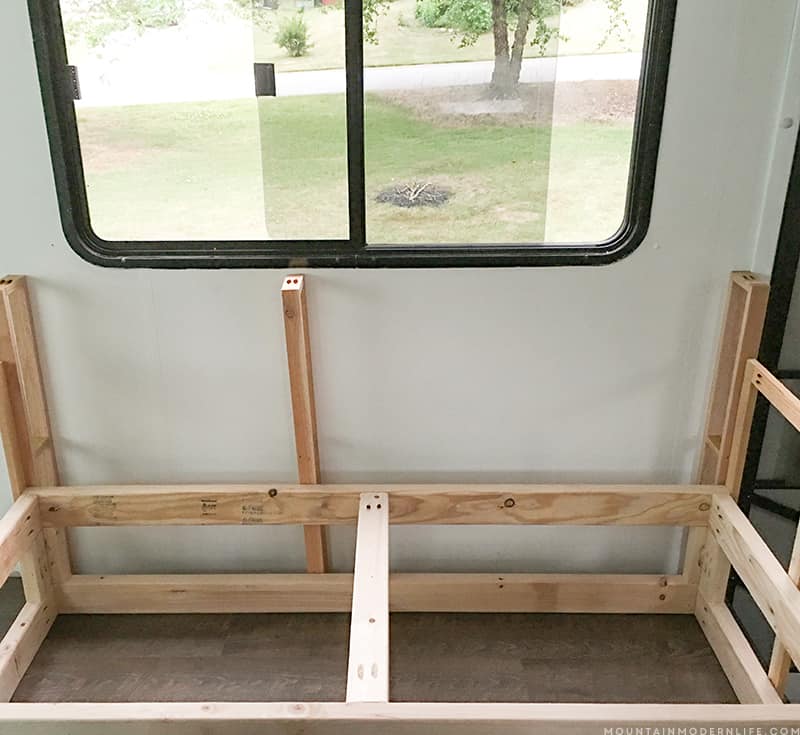
Figuring out the Built-in Sofa Table
Thinking on how I built this sofa it really makes me think of legos, or even a puzzle because I built all of the different frames then stuck them together.
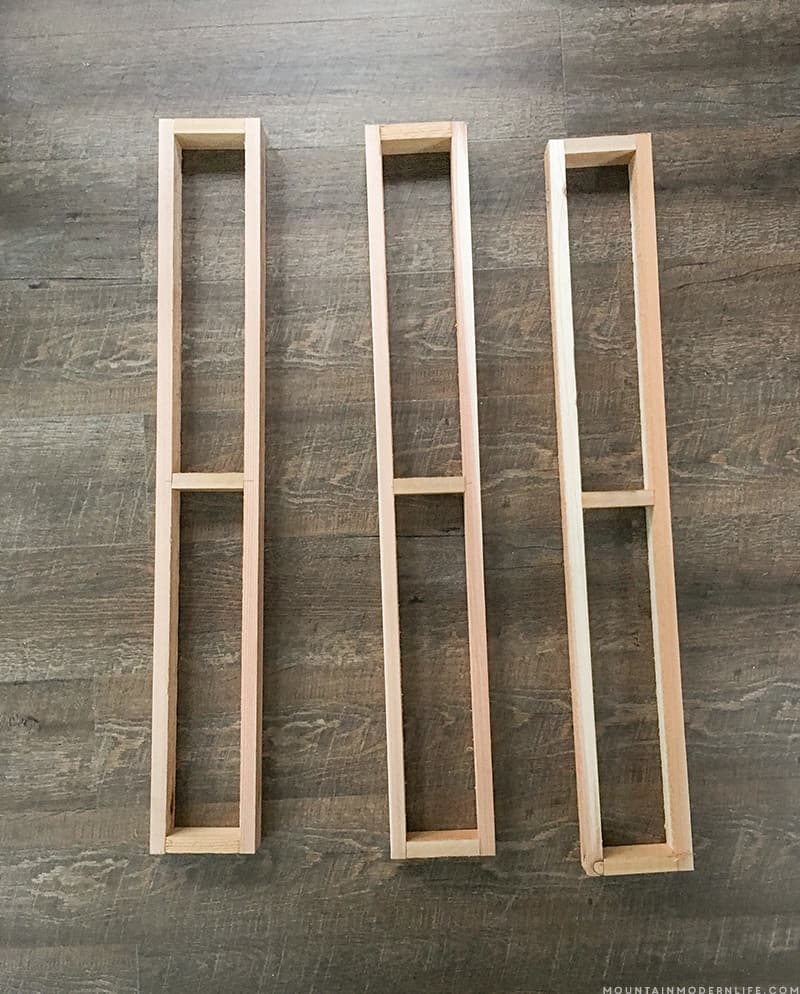
Anyway, for the sofa table, we knew that we wanted three supports in the back, but at the same time, we needed to fit our table leaves in there. In order to create the best support while also leaving enough room for the table leaves, we needed the middle bracket to be off-center.
Here is the sofa frame with two of the supports installed:
The picture below shows all three brackets installed for the sofa table, which were screwed into the wall.
Building the Outside Plywood Frame
Our custom sofa and sofa table are now starting to look somewhat right since we have the basic skeleton put together. So it is onto the framing of the sofa, which we are going to be completing with 1/4 inch stain grade Birch Plywood.
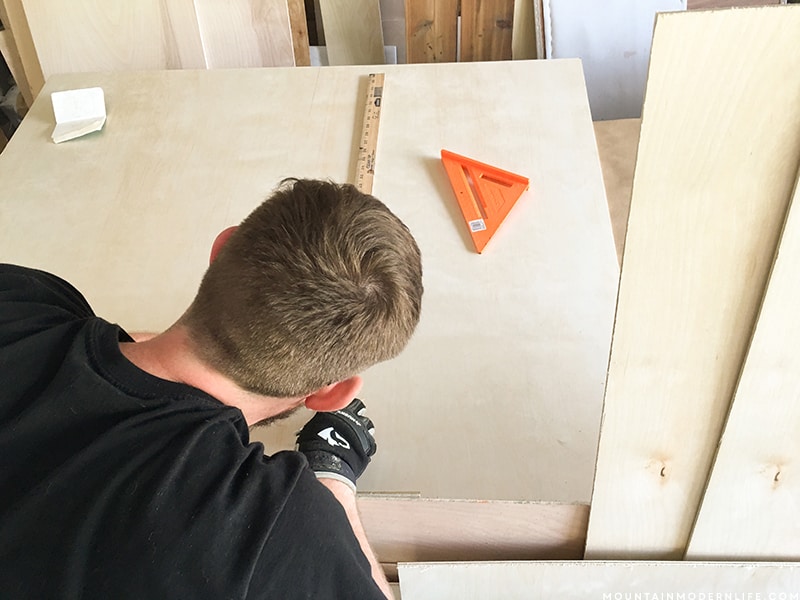
For this step, I measured the different sections that needed to be covered, then made the shapes on the plywood by marking the measurements with a pencil.
Once all measured and drawn it was time to cut the shapes out and attach them to the sofa frame.
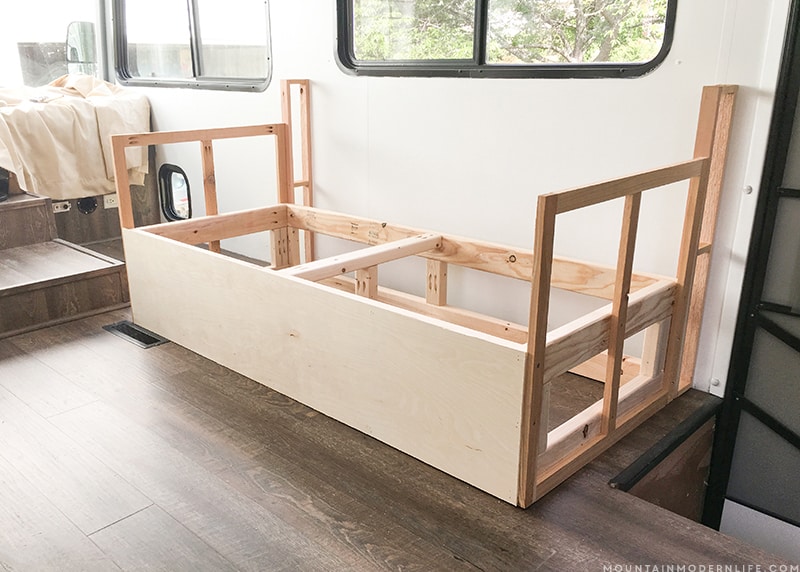
I used our nail gun to attach the rest of the plywood to all of the sides (except for the back wall).

At this point, it finally looked like a sofa. Whew!
As I mentioned before, I am growing and learning with all of the woodwork I’m doing, so there may be a better way for the next part.
Once I had all of the plywood attached I realized each piece was a little too big, I did this on purpose because once it is too small it is much harder to fix. In order to get rid of the plywood hangover I took my sander and sanded the plywood till it was flush with the frame, I had built.
Attaching the Sofa Table Lid and the Seat/Storage Lid
For the lid of the sofa table, we used an old 1 x 6 piece of pine we had lying around, and for the sofa seat, we used a piece of 1/2 inch stain grade Birch Plywood.
When installing the sofa table lid and the seat to the sofa we used the same strategy. We measured the size of wood we needed to cover both of the spaces then cut them to that size.
At that point, we measured an inch from the back of both pieces (1 x 6 pine & 1/2 plywood) we had just cut. Once the inch was measured we cut down the line giving us 2 pieces for the sofa table lid and 2 pieces for the sofa seat.
Now we had 2 pieces (4 really if you think of sofa table lid and sofa seat) one that was 1 inch and another that would cover the rest of the openings. Taking our 1-inch piece and placing it against the cut we had just made we put the hinge in place and screwed it down.
Side Note: Most hinge sets should come with the appropriate screws.
Then it was a matter of taking the pieces with the hinges already installed over to the sofa and securing the 1-inch piece to the frame in place.
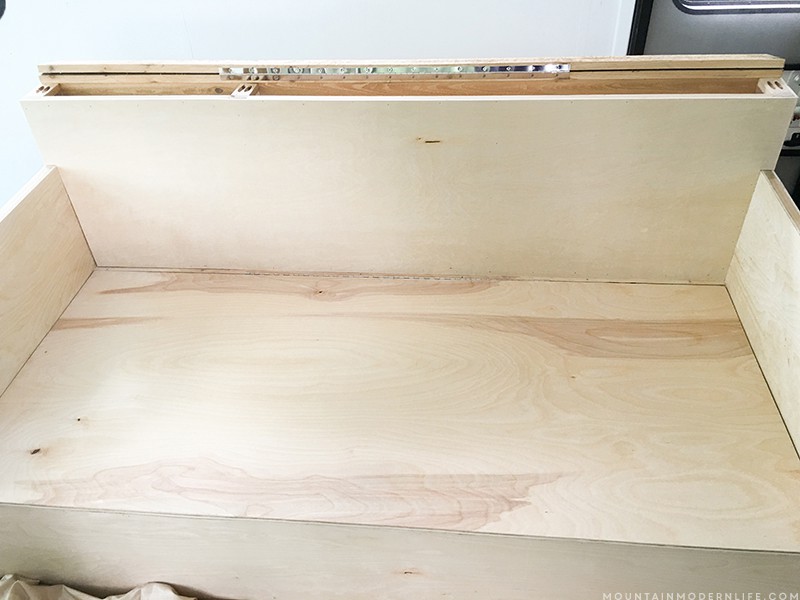
We had originally only installed one 30″ piano hinge on the sofa table top but then noticed it began to bow at the edges a little bit. We picked up two 12″ piano hinges and placing them on either side and our bowing problem was solved Yay!!
If I were to do it again I would probably get two 30″ piano hinges.
It was a bit nerve-wracking to build a sofa that was going to be driving down the road with us, and while it’s not perfect, we’re pretty happy with how it turned out.
We lucked out by having Katie’s mom make the sofa cushions for us.
Update: You can now see the finished custom RV sofa here, and the DIY throw pillows here.

1. Be sure to visit wood building sites like Ana White for some awesome FREE building plans. You can also search Pinterest for some great inspiration and plans to go off of. We couldn’t find plans that were exactly what we wanted but looking through these sites still helped.
2. Use the best stain-grade plywood you can find if you want to stain it. We purchased our plywood at a local lumberyard which we found to have much better quality than that we found at the big box stores. We also later discovered this company that sells beetle kill pine plywood, which is pretty awesome. It wouldn’t even need to be stained.
3. Be sure to check the label of the plywood you purchase to make sure it’s Low-VOC and Formaldehyde-free if that’s important to you.
4. If you plan to have a lid, using heavy-duty soft closing lid hinges will help.
5. The cushions will really help make your custom RV sofa look more professional. If you’re not handy with a sewing machine you may want to ask a friend or family member or consider getting them professionally upholstered.
Have you built your own custom RV sofa or are you thinking about it? If so we would love to hear about it in the comments below!

I am really surprised you did not include under-seat storage while you were at it. Was there any reason for this?
Hey Sabrina. We actually did include the under-seat storage, but I just realized we don’t have a picture with it open. If you click the link below it will take you to our finished sofa post which includes a video that shows the lid open.
https://mountainmodernlife.com/small-diy-sofa/
Anyway, I hope this shows you what you were looking for.
Hello! I was curious on how much it cost you to make the couch? Hope to hear from you soon
Hey Kylie, I’d say it was roughly around $300, it wasn’t cheap. At the same time we couldn’t find what we were looking for. The price will vary greater though depending on the materials you decide to use. For instance fabric can vary greatly price wise from one fabric to another. Katie’s mom did the upholstery which also saved a bit. I hope this helps give you a rough idea.
Hi,
Did you get rid of the seat belt and can you still use them with this new couch. We really want to do the same thing but we need to be able to use the seat belt while driving ( for the kids ).
Hey Patrick, I think I just responded to one of your comments on another post, but I would think there’s a way to reuse the seatbelts that were bolted below the sofa in our RV. I’m not sure how but am including a couple links below that may help, or you may want to consider joining an RV Facebook group like RV Interior Ideas, and asking if anyone in there has any tips for adding seatbelts to a sofa inside the RV:
http://www.irv2.com/forums/f274/adding-couch-seat-belts-59589.html
http://community.fmca.com/topic/5658-installing-seat-belts-in-motorhome/
http://www.rvforum.net/SMF_forum/index.php?topic=41511.0
Katie
My friend and I just finished making the couch, minus the sofa table. It turned out great. We had to build over the heater, so we added vents in the front and side. . I had looked at several other options, but they were too expensive and would require modifications. This worked out perfect. Thanks for sharing.
Wow that’s awesome! We ran into the same issue when looking for one to purchase, but I can only imagine the extra challenge of building over a heater! Smart moving adding the vents in the front and side.
We are remodeling our rv and I never thought about building our own sofa ,,,, love your idea👍