UPDATE: All new featured RV tours will be posted on my other website, Wanderful RV Interiors. Existing tours will slowly be moved to the new website, and anything already moved will automatically redirect.
Disclaimer: This post may contain affiliate links, meaning, if you click through and make a purchase we (or those featured in this post) may earn a commission at no additional cost to you. View our full-disclosure here.
New Years is just around the corner and if you plan to entertain then I have a super easy and festive project for you today.
Although I made these DIY gilded glasses for our Christmas tablescape, I knew they would be perfect to celebrate the New Year as well!

Rather than go out and purchase some new stemware, you can update some glasses you already have on hand. This is a super simple project, doesn’t require any skill, and it only took a few minutes to paint each glass.
DIY Gilded Glasses
Although I was able to find gilded glasses online or in-store for as low as $6 each, I decided to use what I had on hand rather than purchase new. I already had everything I needed to gild up 8 faceted glasses so this project cost me $0. Now that’s what I’m talking about!
However, if you don’t already have glasses you want to spruce up, you could also purchase a set of some stemless wine glasses or even mason jars for fairly cheap and then gild those up instead.

Glass cups/Stemless wine glasses
Paper Plate
Painter’s Tape (optional)
Gloves (optional)
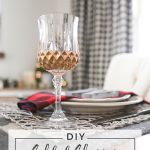
![]() I purchased these glasses a few years ago and think I paid about $15 for all 8. They are pretty and I like them as-is, but figured it was worth taking a risk to see how they would turn out if I added some gold to them.
I purchased these glasses a few years ago and think I paid about $15 for all 8. They are pretty and I like them as-is, but figured it was worth taking a risk to see how they would turn out if I added some gold to them.

Step 1:
The first thing you will want to do is wash and dry your glasses.
Step 2:
Tape off the design you want, or any areas you don’t want gilded and paint the glass using a small detail brush and some liquid leaf. You could even just gild the stem of your glasses. My glasses were faceted so I didn’t use any tape. #imarisktaker
I just used a paper plate to pour some of the liquid leaf on and then dipped my brush in that. You could also just dip the brush into the lid of the liquid leaf if you wanted.
Note: Liquid Leaf is sticky and not the easiest to get off, so you may want to wear some disposable gloves and make sure to clean your paintbrush right after you are finished. I would even recommend using a paintbrush you don’t mind ruining or using only for gilded projects in the future.

I tried a couple of fine brushes before I found one I liked and I also found it easier to paint my glass upside down.

Keep in mind that you will only be “painting” the outside of the glass and want to keep the paint away from any area you would drink from to ensure these are safe to use. You will also want to make sure and only wash these glasses by hand afterward.
I originally wanted to use copper but went with what I had on hand. I’ve used liquid leaf on frames, art, and furniture. A little goes a long way!
True confession: I did a test on a small section of one of my glasses using my gold liquid leaf pen and even some copper/rose craft glass paint, but in the end, the liquid leaf won out. You could also use the sheets of gold leaf but that requires just a tad more work and I didn’t have any leftover from previous projects. I guess my point is to experiment with what you have and see what you like best.

Step 3:
Once the glasses are dry go over them once again. I think you are technically supposed to wait an hour but I waited maybe 5-10 minutes in between. You want to make sure the liquid leaf is opaque so it may take 2-3 coats. Don’t be afraid to add a decent amount of this stuff to your brush either.
And… you’re done!
Make sure to read the directions on whatever “gilding” material you use for curing or washing information. I believe the liquid leaf said it takes 21 days to cure. Here are a few photos of the glasses from our Christmas tablescape:
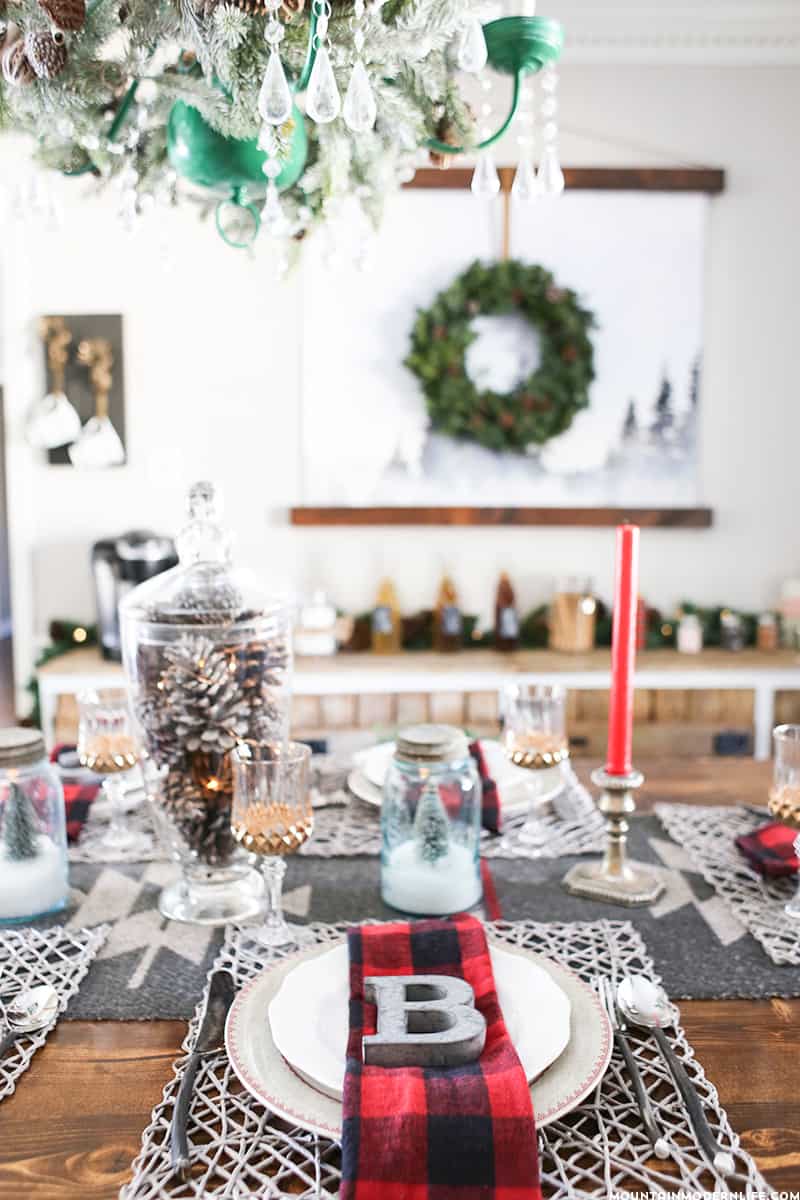

I was really excited about how these glasses turned out and have already hand washed them a few times with no issues. In fact, I think they look even better in person.
If you’re looking to spruce up your holiday table for Christmas or New Year’s, I think these DIY gilded glasses are sure to please.
So what do you think? Have you spruced up any of your glasses before?

Your diy’s are the best! I want to make some of these for me and gifts for others now.