UPDATE: All new featured RV tours will be posted on my other website, Wanderful RV Interiors. Existing tours will slowly be moved to the new website, and anything already moved will automatically redirect.
Disclaimer: This post may contain affiliate links, meaning, if you click through and make a purchase we (or those featured in this post) may earn a commission at no additional cost to you. View our full-disclosure here.
I’ve been working on our bedroom makeover this past week and made some new accessories to go along with our coastal-cottage theme. Every time I visit HomeGoods I find myself picking up wood signs with words on them, like the one below. However, I don’t care to spend $50 on a sign when I can make one at a fraction of the price, and make it my own. So even if it doesn’t look as cool, at least I can say no one else has one exactly like it .
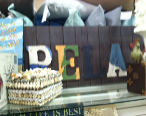
This is a wood sign that is for sale at HomeGoods – please excuse the small, blurry pic which was taken with my phone.
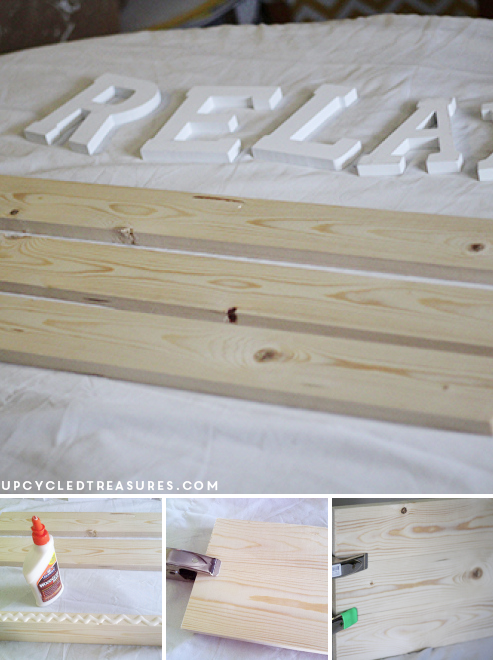
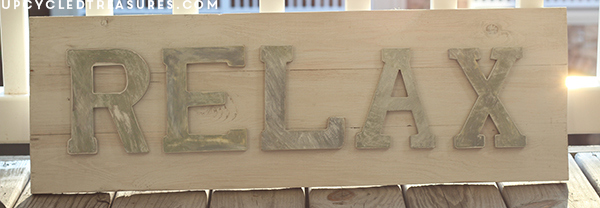
So I wish I could say I used reclaimed wood or old wood crates for my DIY wood sign, but the truth is I didn’t have any (although I keep checking CL and would love some old wood crates to use for craft projects in the future). Instead I went to Home Depot and purchased a 8×3 piece of wood that they then cut into 3 equal parts. I then purchased the letters to spell out “Relax” at Joann Fabrics.
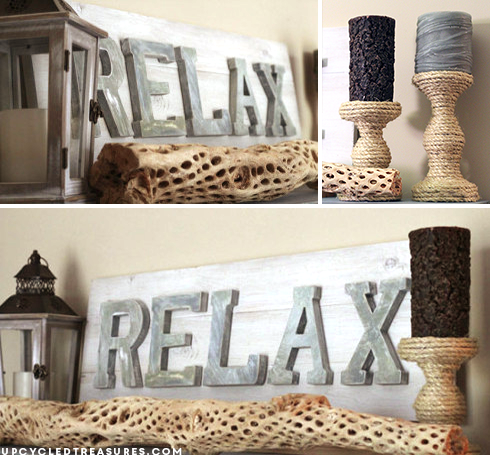
DIY Wood Sign and Rope Candle Holders
The first thing I did was use wood glue to put the boards together and then used clamps to keep them in place.
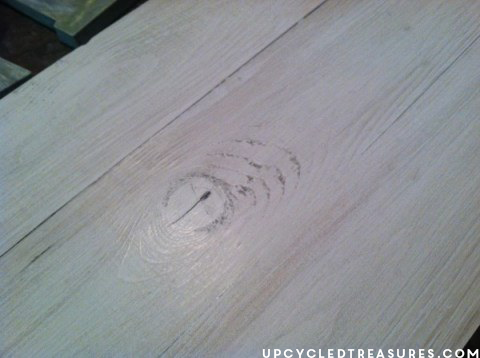
After the boards were dry I lightly sanded them with 220 grit sandpaper and then painted them. I did one coat of white paint mixed in with some water so I could still see the wood grain a bit through it. I then rubbed on some glaze to add another dimension to it and bring out some of the detail in the wood.
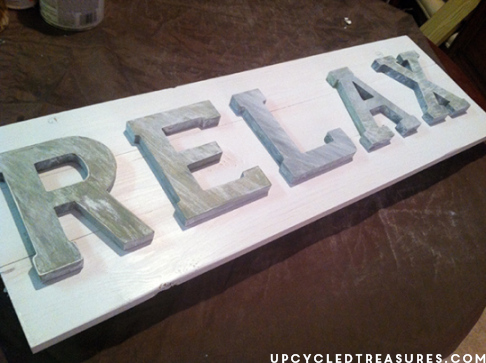
Then I lightly sanded the wood letters before adding a couple layers of blue, green and yellow paint. Afterwards I did a whitewash on them – using 50% water and 50% white paint, let it sit for about 30 seconds and then wiped it off. I then sanded each piece with 220 grit sandpaper to distress them a bit more. When all the letters were done and the board was dry I centered my letters before using Loctite to make it permanent. That’s it – my board was complete and ready for the shelf!
I have some Moroccan style candlesticks that I also wanted to makeover and decided to use one of my new favorite materials, rope, to do the job. Rather than use some of the leftover rope from my mirror project, I opted for sisal rope that I picked up at Home Depot that was a little bit thinner. Then it was just a matter of going around the candlestick while using my glue gun an inch at a time.
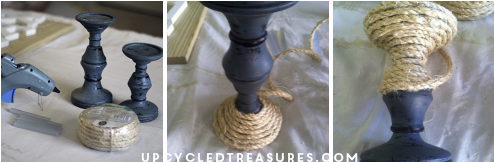
I completed 2 candlesticks this way and here they are all roped up, along with my new wood sign:
Being in an apartment, it’s not always easy to get sunlight on my projects, but I definitely need to work on taking better photos. Here is an updated photo of the sign on our balcony so you can see what the colors really look like. Wow, it makes such a difference in the colors!
Thanks for stopping by and as always, feel free to leave any questions or comments below or share links to your own DIY wood sign.