UPDATE: All new featured RV tours will be posted on my other website, Wanderful RV Interiors. Existing tours will slowly be moved to the new website, and anything already moved will automatically redirect.
Disclaimer: This post may contain affiliate links, meaning, if you click through and make a purchase we (or those featured in this post) may earn a commission at no additional cost to you. View our full-disclosure here.
Don’t you just love gallery walls? They are such a fun way to show off not only photos, but interesting objects, digital prints, and other artwork or projects you’ve created or collected over time. However, we hit the road in less than 3 months (yikes!) and what comes up, must come down.

Over the next couple weeks, Eric and I plan to go through each room and stick a post-it note on everything as we decide what we want to keep, store, donate or trash (thanks Tiny House Nation for that tip!). This reminded me that I better take photos of some of the projects around here before they are gone for good, including our massive gallery wall which has evolved over time.
I’ll admit that this gallery wall never quite felt complete or at least not completely “me”. When I first decided to put it up nearly two years ago I didn’t have everything I wanted or needed but knew if I didn’t start, it would never get done. In fact, some of the older photos make me cringe because it just seemed so claustrophobic. Nonetheless, I’ve enjoyed updating it over time and it’s become a focal point and fun conversation piece when people come over.
The Evolution of Our Gallery Wall
Here is how our gallery wall started roughly 2 years ago…
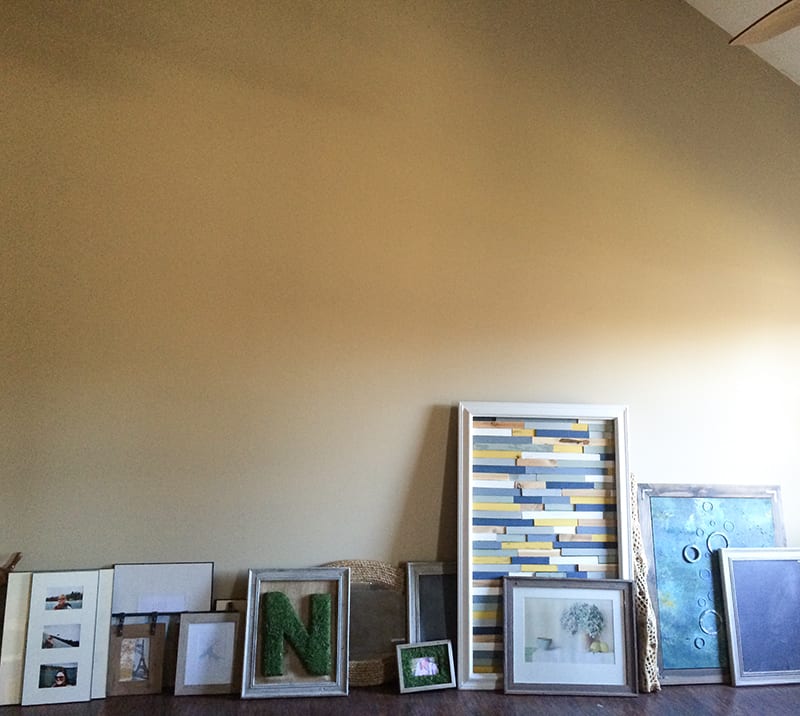
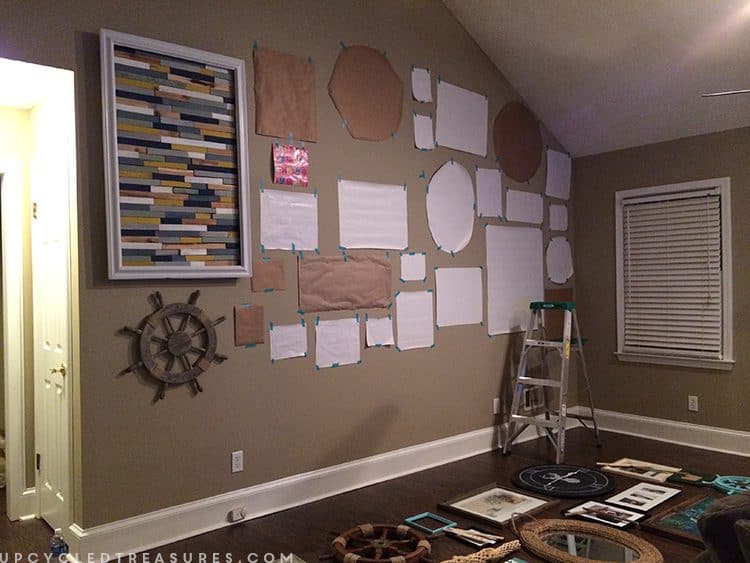
The first thing I did was bring anything I may want on the wall into the room. I then arranged everything where I wanted it and traced that frame/object onto wrapping paper. Once that was done I arranged the wrapping paper silhouettes onto the wall and taped them into place. From there we used nails or hanging strips to hang everything up. Here’s a photo I took on my phone during the process…
Updated Photos:
Again, the wall has evolved over time but here are a few updated photos of it, which is filled with DIY projects. I’ll share the sources to the projects currently on the blog at the bottom of this post.
I hope these photos will help inspire you to create your own gallery wall or spruce up a blank space. If nothing else I hope this will give you the confidence to tackle a project you’ve been waiting to start. If you wait until that perfect moment, who knows if or when it will come.

![]()


It may not be perfect, but I still appreciate this wall and all of the projects that went into it. It was a fun process and I learned a lot along the way, mainly what not to do and that I will let go of my fear of heights when I want something hung up high and Eric is nowhere in sight. Haha.
You can read more about how we created the gallery wall back on this post, but here are a couple of tips I would give for someone just starting out:
4 Tips for Creating a Massive Gallery Wall
1. Start Small
This was my first gallery wall and I sorta went all out with the biggest wall in the house, partly because it was the biggest wall in the house and everything looked tiny in comparison when I hung it up. However, I think had I started on a smaller gallery wall first, like one in the office or bedroom, it would have made the process a little less daunting.
2. Give each piece space to breathe
This is something I wish I would have done more of from the get-go. I sort of crowded all of the frames and objects which made the wall look more cluttered. You want each piece to stand out so give it some space, at least a few inches. I think this will make each piece feel more special while creating a bigger impact on the overall feel of the gallery wall. By the way, this paint stick trick is an awesome way to get your frames hung perfectly!
3. Pick a Color Scheme or Theme and Stick to It
I’m not saying you can’t use a variety of colors or mix and match items if that’s the look you’re going for. However, before you begin I would think about how you want the gallery wall to look and how you want it to make you feel. Are you going for a rustic vibe, beachy, eclectic? Do you want the colors to be more monochromatic, have a certain color sprinkled throughout, or have it be full of vibrant colors? I was sort of all over the place in the beginning but over time I started to see a pattern – natural textures, warm woods, and a variety of blues. I also added a lot of white to brighten up the dark beige wall, which I was too lazy to paint. Had I thought about this first it would have made the planning process a lot easier and made the wall look more cohesive. Instead, it sort of happened by accident.
4. Command Hanging Strips are your BFF!
This is especially true if you are renting (which we are). If you plan to fill a large wall you will likely need A LOT of nails. This is where Command Hanging Strips come in handy. I’m happy that we used quite a few hanging strips, but I definitely have a lot of nail holes to fill in…
Overall, I’m happy with this wall and all of the projects that we made over time that are displayed here.
Have any tips you would like to share?
These are just a few tips, but if you’ve created a gallery wall and have some tips to share we would love to hear about them in the comments below!
And if you’re thinking about creating a gallery wall, I say go for it! You don’t need to wait until you have everything perfectly the way you want it, it can evolve over time and that’s okay too.
Gallery Wall Sources:
- Wood Shim Artwork
- Wall Hangings with Arrows – I recently tweaked our wall hangings by painting a couple of metal arrows (from Hobby Lobby) and attached them to the wood.
- Wood Slice that Says “Going to the Woods is Going Home” – this was created using this print transfer method, but could easily be done using a sharpie or wood-burning tool. I have a printable with this quote in the shop.
- Buffalo Print, Moose and Bear Prints – I made these using a photo I took of the NC mountains as the background, but it’s hard to tell from far away
- Too Legit to Quit – I made this printable and have a similar one available here.
- Driftwood – HomeGood’s Find
- DIY Ampersand Wall Art
- DIY Abstract Art – I love how the liquid gold looks in this painting and will share a post on it soon
- Abstract Tree Painting – one of the first paintings I made
- Agate Slice Print – this is a free printable available from Alexis of Persia Lou
- Chalkboard canvas with abstract mountains
- Nautical Rope Mirror
- Creativity is Contagious Pass it On – I made this printable and have a similar one available in the shop
- Wood with galvanized heart – this is actually a Christmas ornament that I have hanging from a nail on scrap wood
- Framed Vintage Colorado Postcard
- Watercolor Skull Print – this printable is available from the shop of Aniko of Place of My Taste
- Succulent Watercolor Print – You can see how I made this here
- Moss Frame with a photo from our cabin wedding
- Chalk painted canvas with Geometric heart
- Ship Helm I found from an antique shop and added rope to
- Don’t Worry Be Happy
- DIY Abstract Art