UPDATE: All new featured RV tours will be posted on my other website, Wanderful RV Interiors. Existing tours will slowly be moved to the new website, and anything already moved will automatically redirect.
Disclaimer: This post may contain affiliate links, meaning, if you click through and make a purchase we (or those featured in this post) may earn a commission at no additional cost to you. View our full-disclosure here.
If you’re looking to add character and warmth to existing furniture, this project may be just what you need.
Back when we were making changes to the bedroom of our RV, I wanted to figure out a way to easily add some rustic wood to our nightstands. At first, I thought I could paint them white and add wood to the top surface area but ultimately decided to add it to the front of the drawers instead.
Not only did this allow me to keep our existing drawers, but it was the perfect opportunity to use some of the reclaimed wood we picked up from Memory Mountain.
If you have a piece of furniture you want to update but are unsure what to do, I hope this post helps give you some inspiration.
How to Make Reclaimed Rustic Drawers (the easy way!)
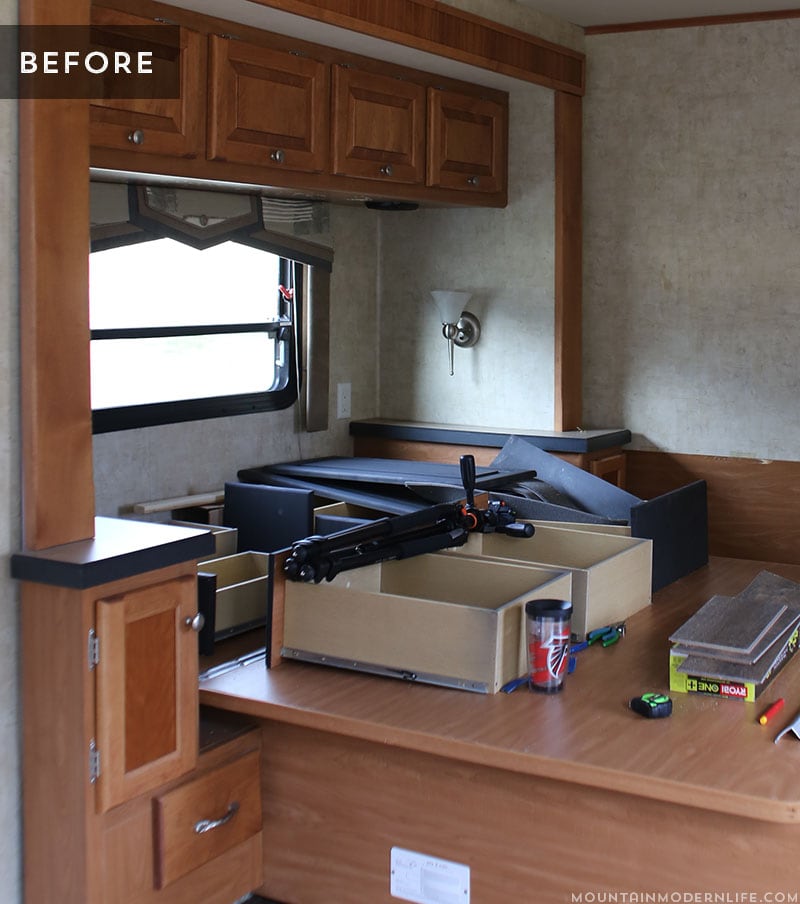
As a refresh, here’s a photo of our RV bedroom before we began the renovation process. If you look in the lower-left side of the photo you’ll notice a drawer in the built-in nightstand area, next to the bed. There is one on each side, and these are the drawers that we updated with reclaimed wood.

Every drawer is built differently, but in our case, the fronts of the drawers came off pretty easily.

Here’s what we used to create our rustic drawers
- Existing drawers
- Reclaimed Wood
- Measuring Tape
- Saw
- Mallet
- Drill
- Flathead Screwdriver
- Pliers
- Stain/Sealer
- Drawer pulls
The first thing we did was unscrew the hardware.
Okay so maybe I forgot to do this the first time around, but you should probably do it first.
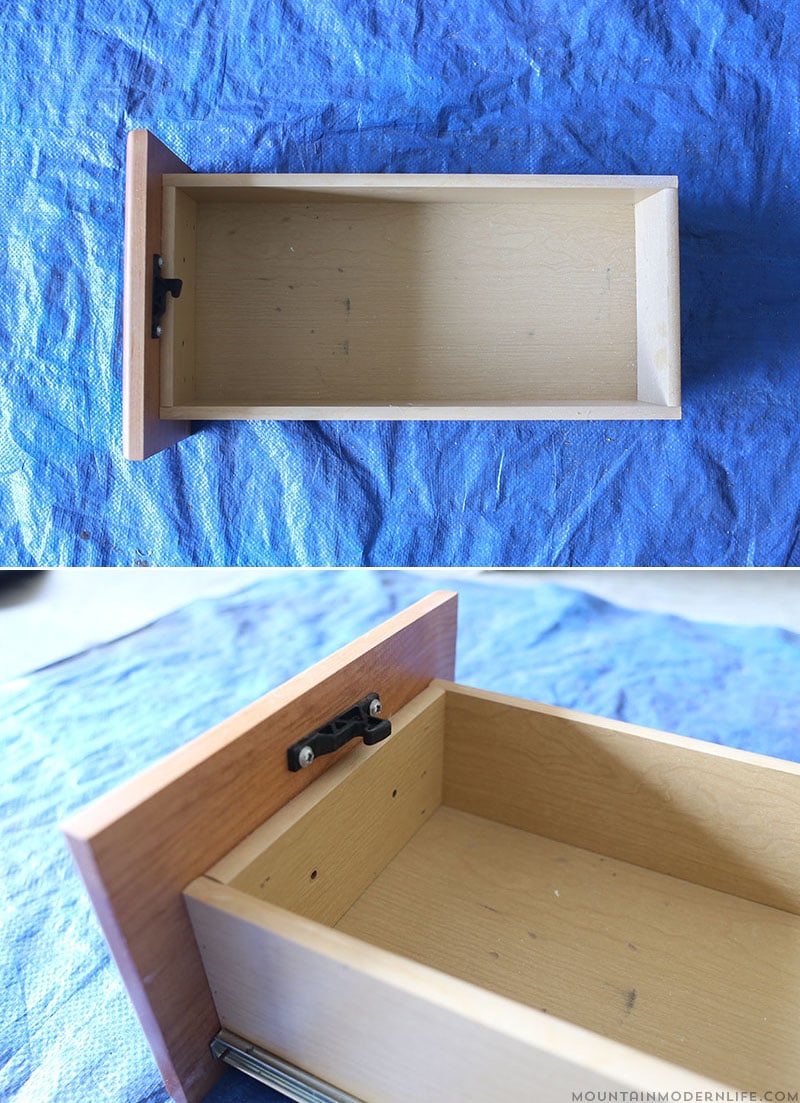
Then we used a mallet to tap the back of the drawer front. It honestly didn’t take much to loosen it up and pop it off.
I may have been too excited the first time around and since I didn’t remove the hardware, part of the actual drawer came off too. Woops.
You can see how part of the actual drawer got damaged when I attempted to smack off the front part. All we had to do was unscrew the hardware and pry off the piece and then re-attach it to the drawer. My bad.

The second time we (errr… Eric) were more patient and gently removed the front of the drawer. A flathead screwdriver came in handy with helping us pry away the staples that were securing the drawer front to the actual drawer.
If you haven’t noticed by now, RV manufactures love them some staples.
Once we removed the staples from the front with some pliers we were pretty much left with a clean slate. Oh the possibilities!
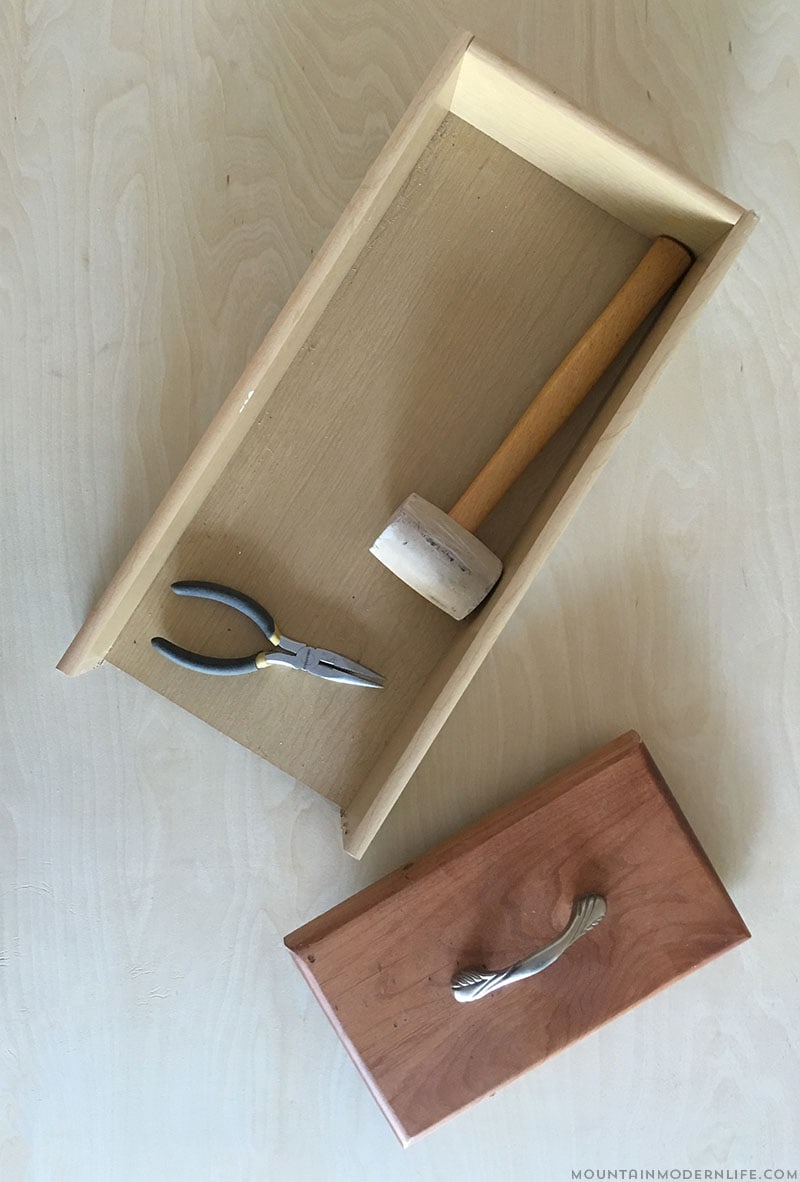
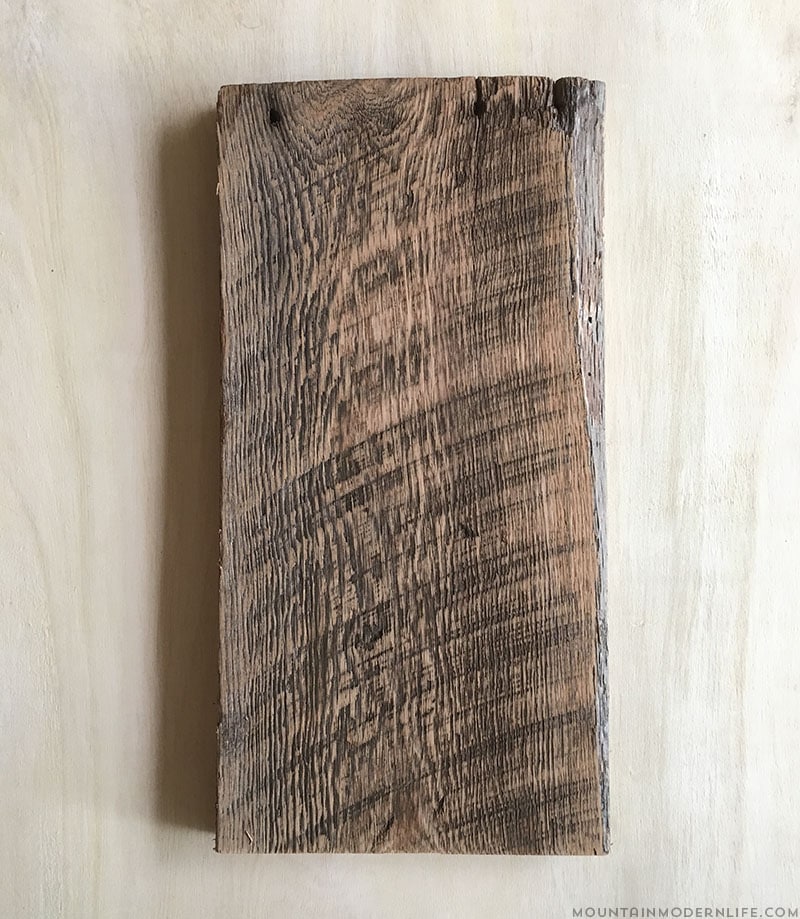
We then went through our stash of reclaimed wood and cut a couple pieces down to the dimensions we wanted.
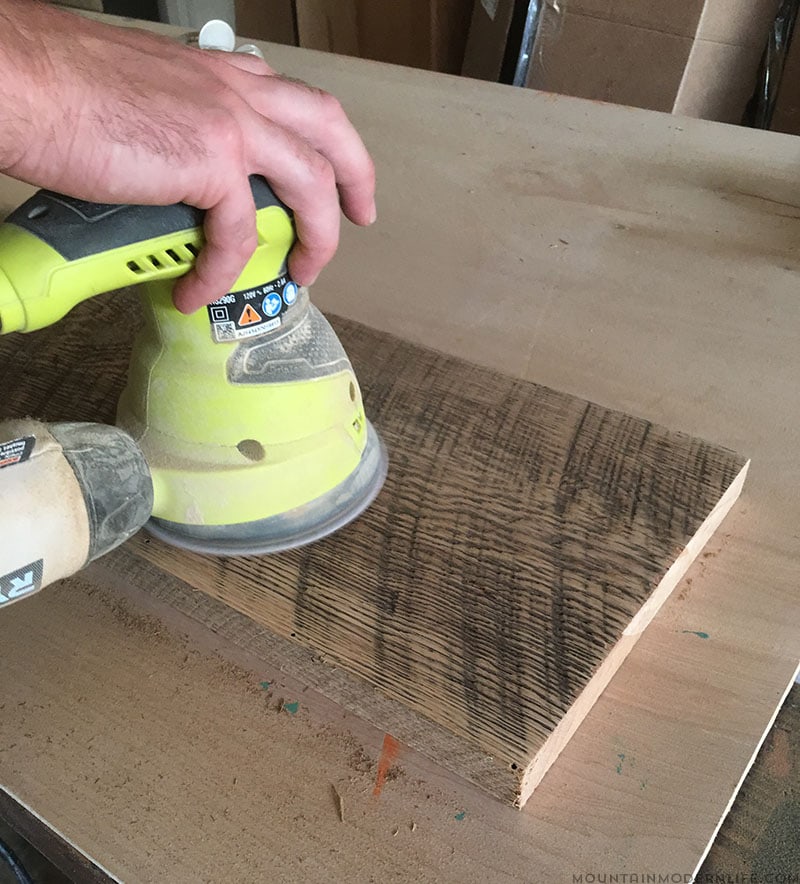
Once clean and sanded we added some stain to the wood – I can’t remember exactly but think it may have been some of the leftover Polyshades stain we had used on our wall-mounted desk. Looking back, I wish I would have just added a clear coat instead.
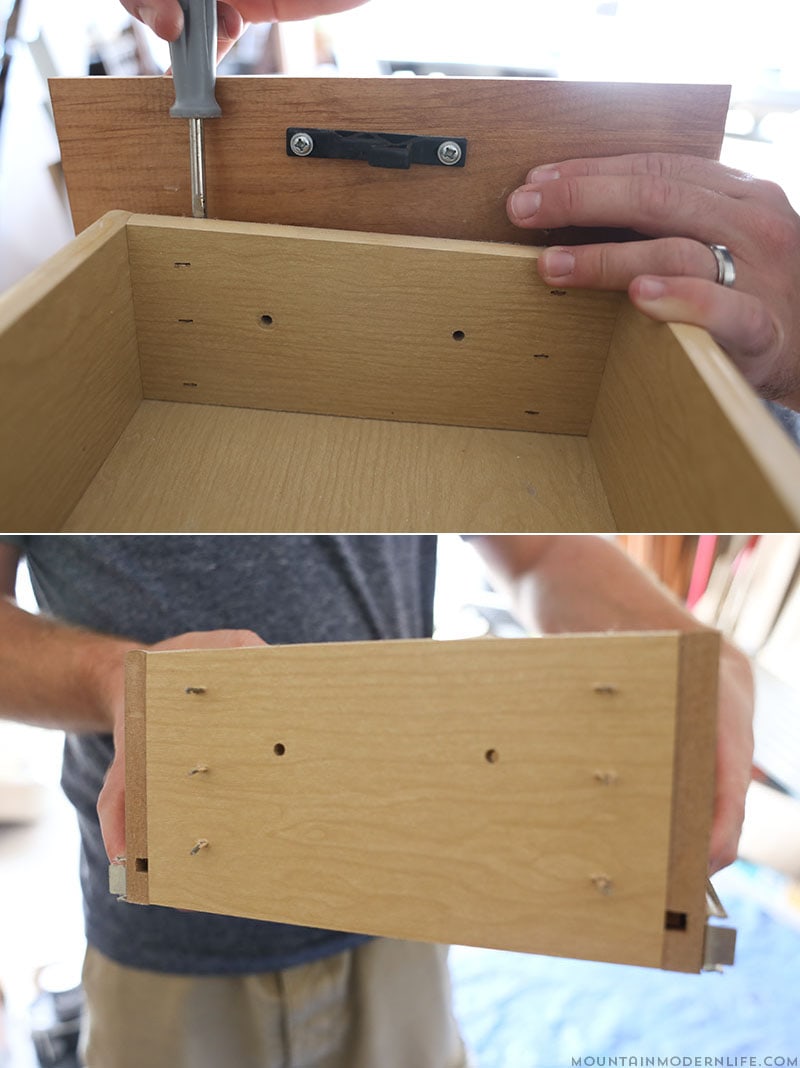
We attached our rustic piece of wood back to the drawers using screws (we drilled from inside the drawer so you wouldn’t see them).
Then all that was left was to add some new hardware. We did some measurements, drilled a couple of holes, and called it a day. We used the same style drawer pulls we have in our RV bathroom, which are what we had previously added to our barnwood sideboard.
Overall, this project was fairly easy, essentially free since we used materials we already had, and it adds warmth, character, and history to our RV bedroom.
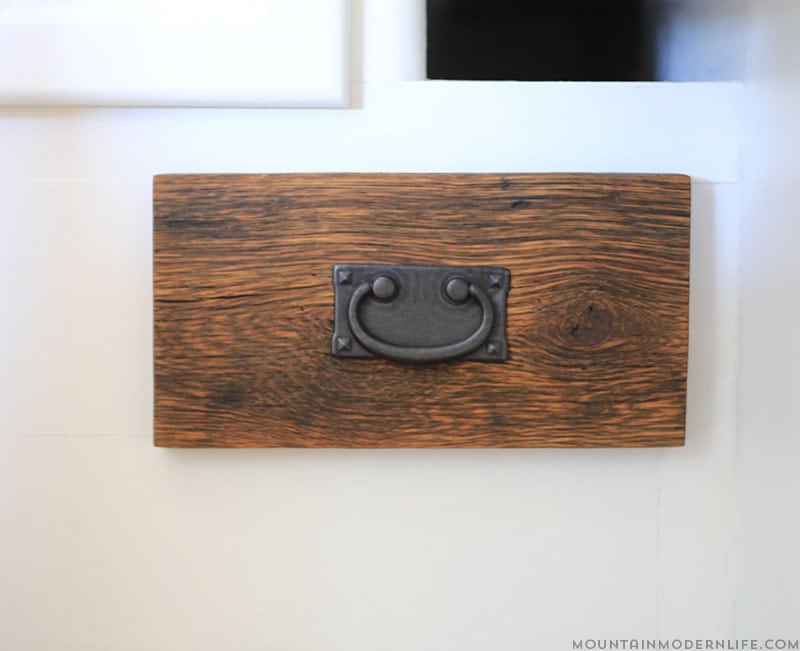
Okay, so it’s possible our drawer pull is slightly crooked, or that the wood is. Ummm, that’s character, right?
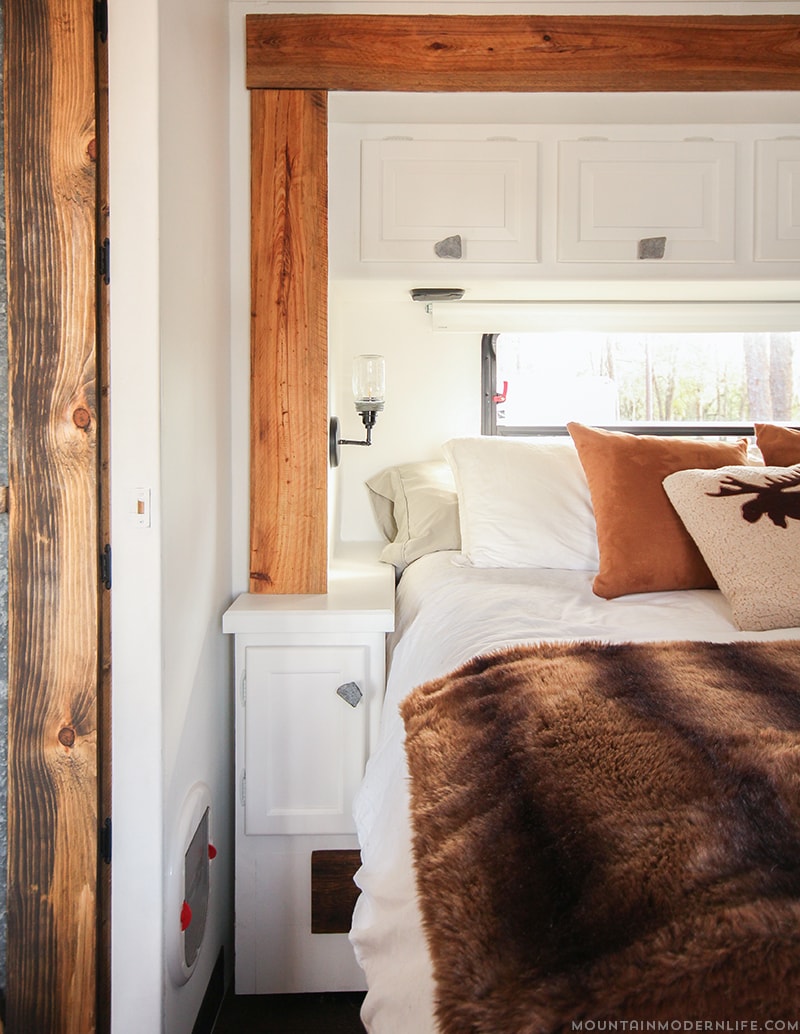
Here’s a photo from our RV tour where you can see little glimpses of the drawer.
There’s no need to always create something from scratch, don’t be afraid to reimagine what you already have to help you create a space you love!
I really enjoy the handle and the slightly crooked look. It is not so horrible it would drive me bonkers. I like the stain, what makes you wish had done the other thing?