UPDATE: All new featured RV tours will be posted on my other website, Wanderful RV Interiors. Existing tours will slowly be moved to the new website, and anything already moved will automatically redirect.
Disclaimer: This post may contain affiliate links, meaning, if you click through and make a purchase we (or those featured in this post) may earn a commission at no additional cost to you. View our full-disclosure here.
Eric and I recently decided to update our RV captain’s chairs and in doing so we went through quite a bit of trial and error. Yesterday I shared some tips on how to paint upholstered chairs with a paint sprayer and today I’m revealing how our RV captain’s chairs turned out. Whether you are looking for an affordable option for updating your own RV chairs, or are just curious if painting upholstery is worth it, I hope this post will help you decide if paint is the right option for you. (You can also read our update on the results towards the bottom of this post).
With the front of our RV being freshly painted white, the beige chairs just felt so bleh. Replacing them was out of our budget, I’m not much of a seamstress so re-upholstering them was out, and I wasn’t feeling any of the seat covers I found online. That’s when we decided to take a major risk and paint them.
Our Painted RV Captain’s Chairs
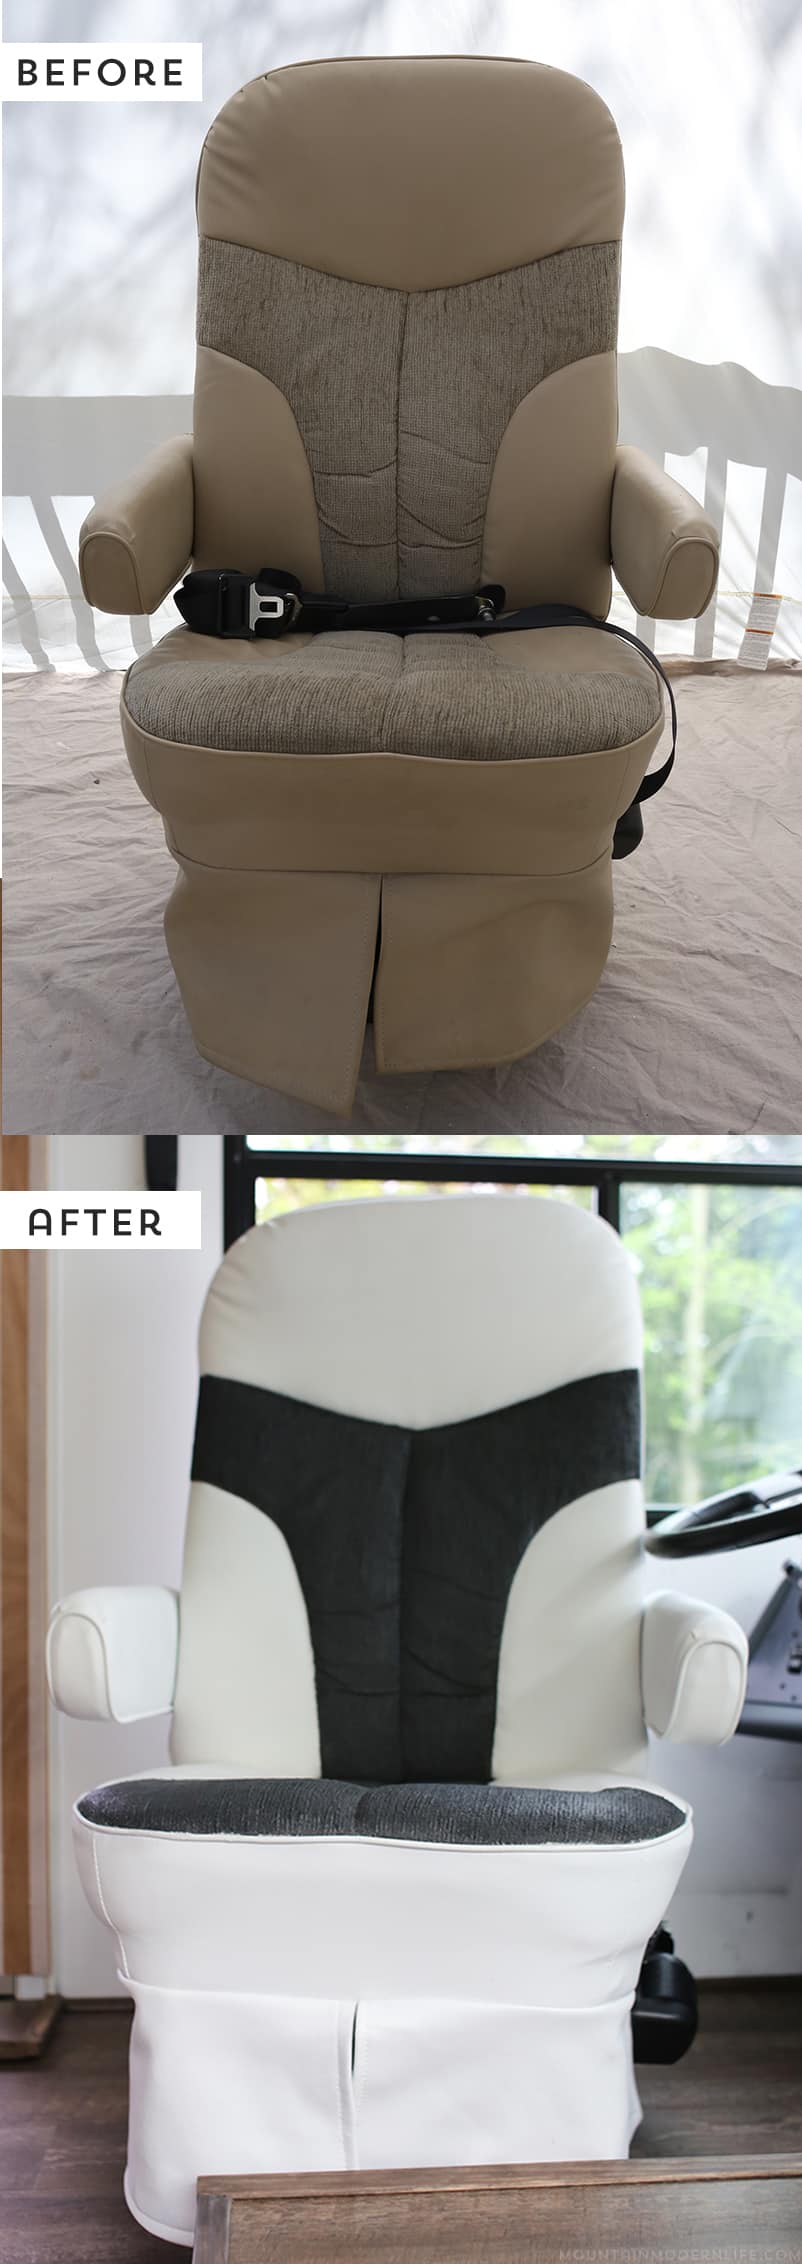
Here’s a before photo:

Painting an Upholstered Chair with a Paint Sprayer
We used the new Home Decor Paint Sprayer Wagner had sent us for the simulated leather areas of the chair, and then hand-painted the cloth areas with a brush. If you want more info on how we painted the chairs with a paint sprayer be sure to check out this post.

Hand Painting Chairs Vs. using a Paint Sprayer
I can tell you that the areas we used the sprayer on look beautiful, in fact, you probably wouldn’t know the chair was previously beige. It’s so smooth and there are no brush strokes and I’m sort of obsessed with it.
I originally planned to hand-paint both chairs but it was exhausting with all of the areas and flaps and whatnot and that’s when we decided to try the sprayer on it instead, which was soooooo much easier! We did make some mistakes the first time around, mainly spraying the paint on too thick, not adding enough water and also using a clay style chalk paint, but after some tweaks, we were able to get better results.
This is why I decided to create a separate post just for tips on painting upholstery with a paint sprayer. Again, I definitely recommend checking that post out before you paint any upholstered furniture.
With the paint sprayer, it took maybe 5 minutes to cover both chairs. We would then wait 30 minutes to an hour for them to dry before adding another coat. We also wiped the chairs down with a damp rag in between coats. I’d say we probably used 4-5 light coats of paint with the sprayer and that’s mainly because we had to adjust the chairs a couple of times like with the arms up or with them leaned back.

If you have chairs that are completely vinyl or some sort of leather then consider yourself lucky as the paint sprayer will work great. You could also paint by hand but if you have large chairs, awkward angles or your hand gets tired easily the paint sprayer will make things sooooo much easier.
Cracks or Tears in the Material
Something to keep in mind about painting vinyl or simulated leather is that the paint doesn’t cover up any existing cracks or tears in the material. Luckily ours were in pretty decent shape, but there were a couple of tears here and there so I tried a trick I found online where you cover those areas with Mod Podge, let it dry and then paint over it. Ummmm yeah that didn’t seem to do anything for me but maybe it was user error. If you know of any other tips be sure to leave them in the comments section so others can test it out.
Fabric Spray Paint Vs. Chalk Paint
After our 1st failed attempt at painting the chairs we were able to remove the majority of the paint with a steamer so that we would have a clean slate to try again. This time around we decided to test a small area with spray paint made for vinyl/leather material so that we could compare it to the chalk paint.
The spray paint went on easily but I was only able to find the white color in a gloss finish and I really wanted a softer, matte finish. The fabric spray paint made the chairs look more like vinyl and it just didn’t compare to the chalk paint, at least in our opinion. However, the verdict is still out on which would be more durable.
You may want to test out a couple of options in an inconspicuous area before deciding which you prefer. We would have needed A LOT of fabric spray paint cans so you would probably be in the same price range either way.
We used one can of Annie Sloan Pure White chalk paint in the sprayer for the simulated leather and then about a quarter of a can (Annie Sloan Graphite) for the cloth areas.
Painting cloth type material
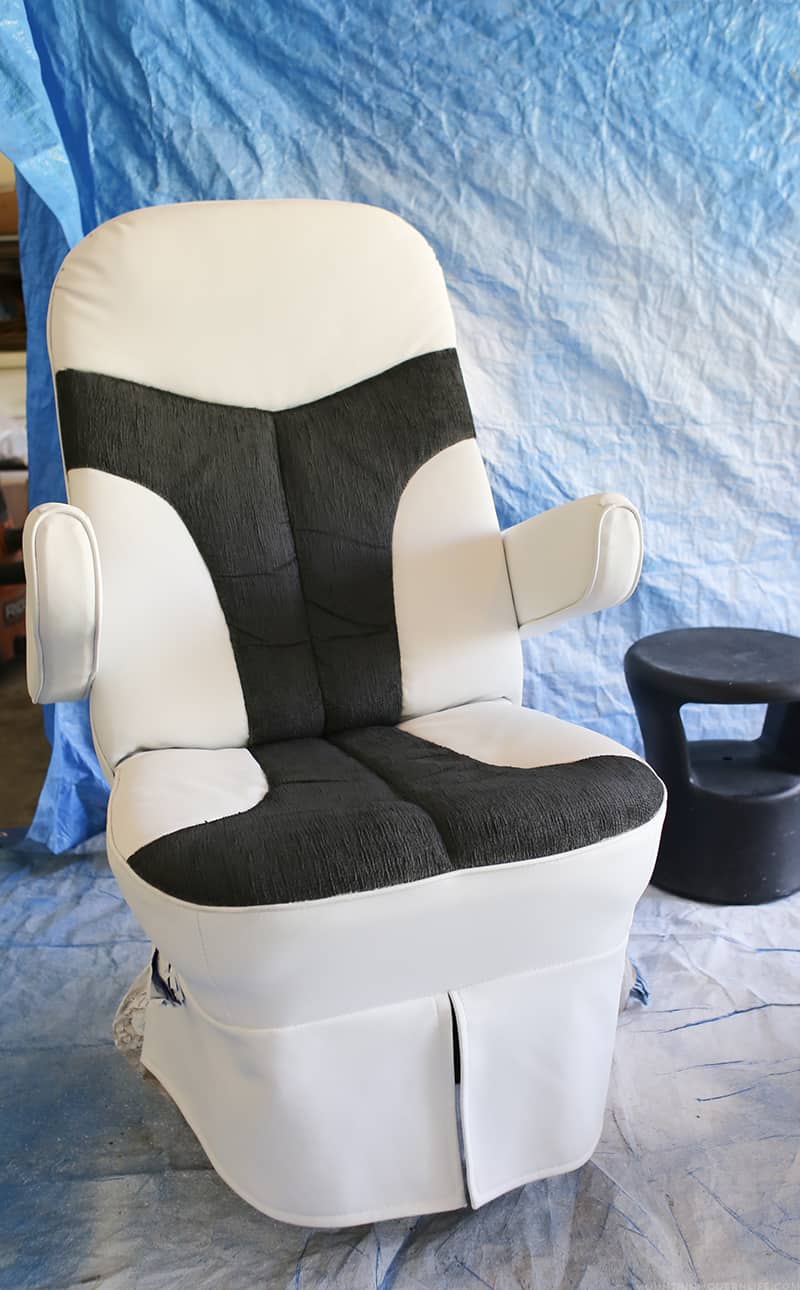
We could have just kept the cloth areas white and sprayed a couple more coats on them, but to be honest we knew we would have needed more paint. I already had a can of graphite Annie Sloan chalk paint so we thought it may actually be cool to have the chairs be two-toned.
To do this we taped an outline to paint inside.
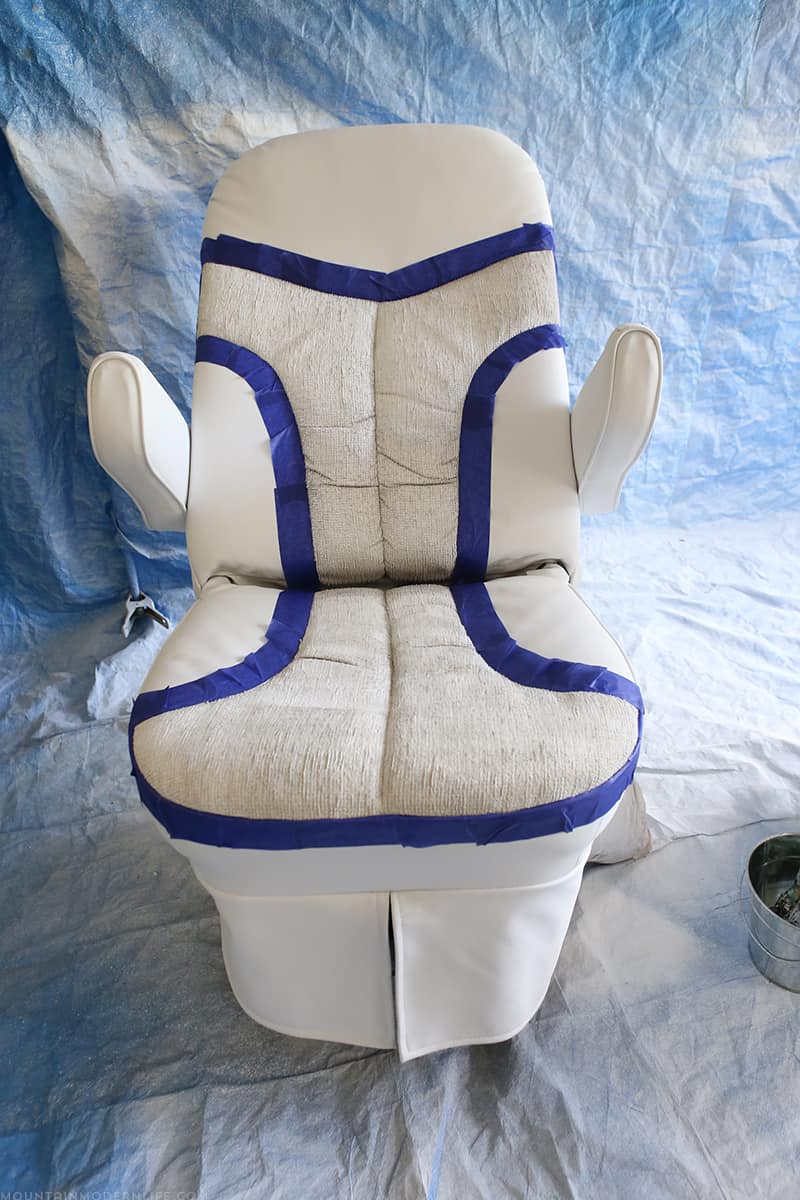
We then “painted” some water on the chair, followed by the graphite chalk paint. You want to use a decent amount of water so that the paint is absorbed into the material. You could use a spray bottle to get the fabric wet but we wanted more control of the water which is why we used a brush. You don’t want to soak the chair, just get it a little damp to make the paint go on easier. It’s best to work in small sections at a time and a stiffer brush also seems to work better.

Eric did a better job of this than me and his chair looked better after the first coat, so I made sure to use a little more water and worked in smaller sections for my second coat and the paint had better coverage this way.
I also found that swirling the paintbrush or using a dabbing motion helped it get into some of the crevices. I also made sure to paint the last stroke in the same direction but don’t know if that made a difference. I would think if you are working with more of a velvet or suede material that you would especially want to make sure the last paint stroke is going the same direction rather in circles.
Sanding in between coats
After the first coat is dry I would give that area a light sanding to help soften it up. You can do this in between coats and it should help keep the chair from being overly stiff. Of course, it will probably be stiff anyway but if you sand the fabric or use a bristle brush it should at least help. You DON’T need to do this to vinyl or simulated leather.
We only did this for the first two coats (I think we did 4 or 5 coats total) and then Eric said he liked how the material looked and felt it was comfortable enough. Looking back we probably should have continued sanding in between coats, especially on the upper sides of the chairs because when the armrests are up they hit this area. After we moved one of the chairs into the RV we noticed one of the arms was lightly scratched from when it was lifted up against one of the stiffer areas of the chair. Booo. Luckily I can touch that area up pretty easily.
Is it scratchy or stiff?
Yes, the cloth area is pretty stiff and it’s hard to know how they would have turned out had we not screwed up and had to repaint the chairs more than once. If I were to paint another cloth type material I may try a different method, probably using a fabric medium.
With that said, the chairs are still surprisingly comfy, as long as you’re wearing a little more than a bathing suit anyway, haha.
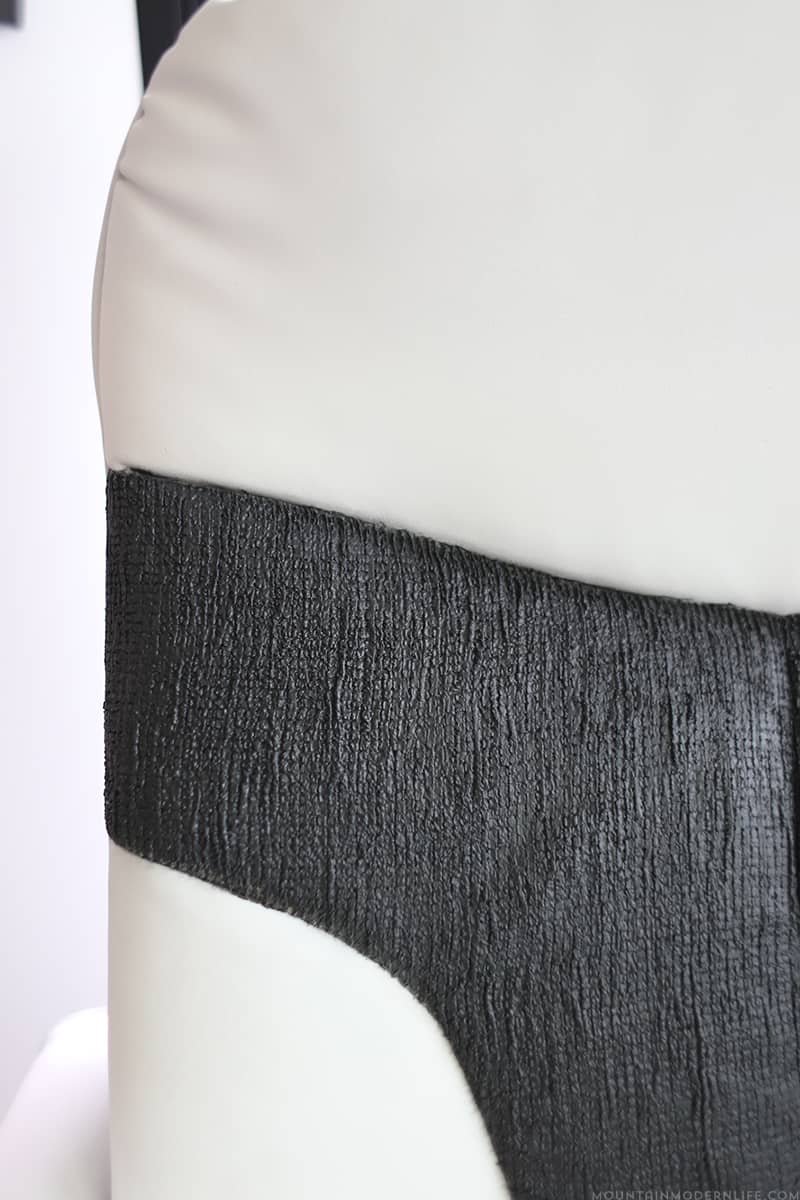
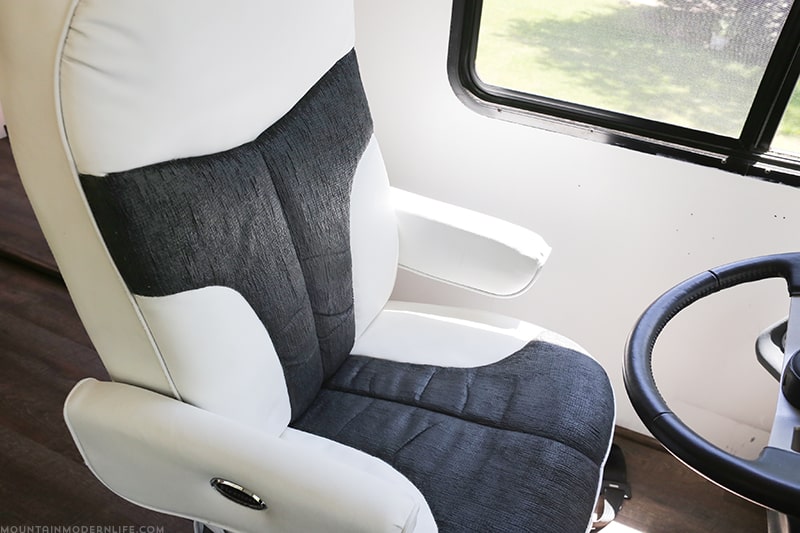
As for the painted simulated leather, it looks awesome and feels nice and smooth just as it did prior to painting it.
Sealing the Chairs
I went back and forth on how to seal the chairs. I always get so scared to seal furniture because you get it looking exactly how you want and sealers can change the look and feel of a finished piece. Then again, if you don’t seal it your furniture can get ruined and that’s no good.
Anyway, I considered waxing the chairs since that’s what I’ve seen done before but my hand was already tired from hand painting the cloth areas and while cruising the aisles of our local hardware store I came across some clear spray sealer for chalk paint.
UPDATE: This made the first chair we installed back in our RV sticky after a couple of days so I don’t recommend using it! I’ll update this post once I figure out a better solution.
We did test a small area first and all looked good so we went ahead and sprayed both chairs with the clear sealer. This was one day after the chairs were painted but you may want to give your chairs a bit more time if possible to ensure the paint has cured. It actually takes approximately 30 days for ASCP to cure but I didn’t want to wait that long to seal them. As a result, when I sprayed the back of the chairs with the clear sealer it seemed to make some slight lines, almost like it may have taken some of the paint off?
You can barely tell but it’s enough to annoy me since the backs looked sooooo perfect before the sealer. I think I did 4 light coats of the sealer hoping that would fix it but it didn’t. Luckily this didn’t happen anywhere else on the chairs, or at least not to the point where it’s noticeable, but I guess because the back is a larger area to cover it seems more obvious. Also, the spray did make the cloth areas a bit glossier than I wanted.
I think waiting a couple more days before sealing may have prevented this or maybe I should have just waxed them instead. Either way, it was worth trying but I wouldn’t recommend using it for painting upholstered furniture.
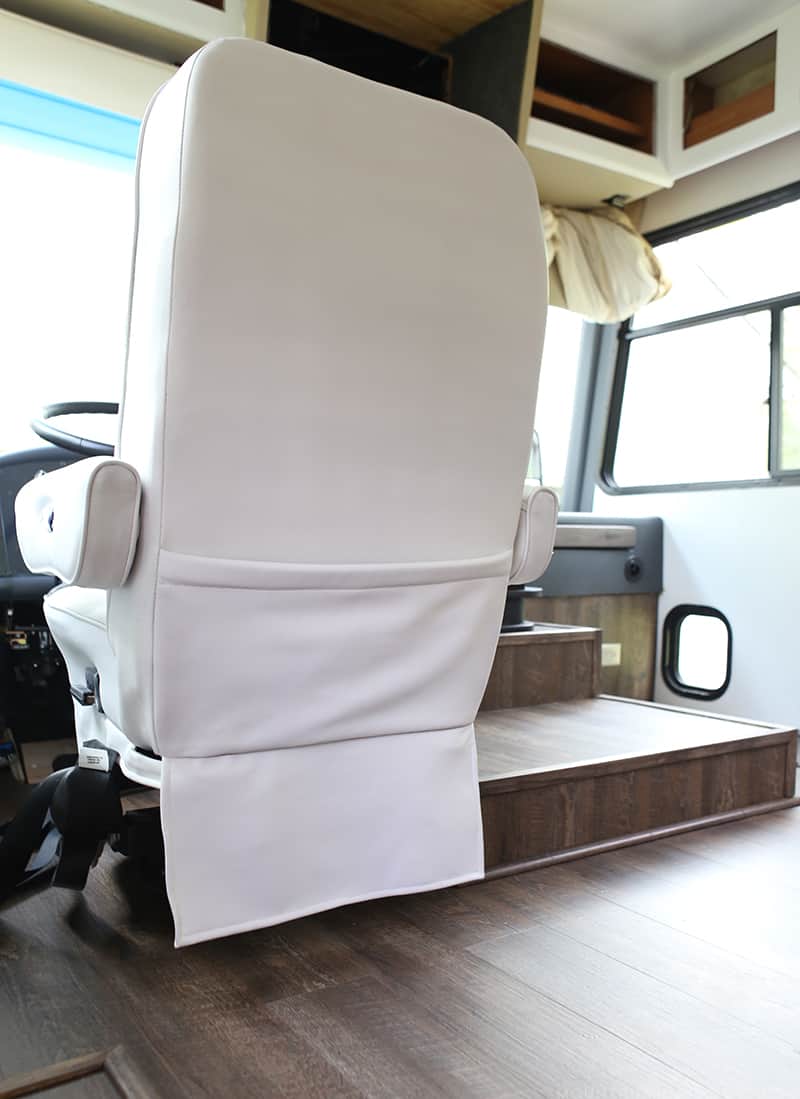
Here are a few more photos of the captain’s chair installed in the RV. We haven’t installed the passenger chair yet because we need to keep that area open while we update the cabinet in the front.
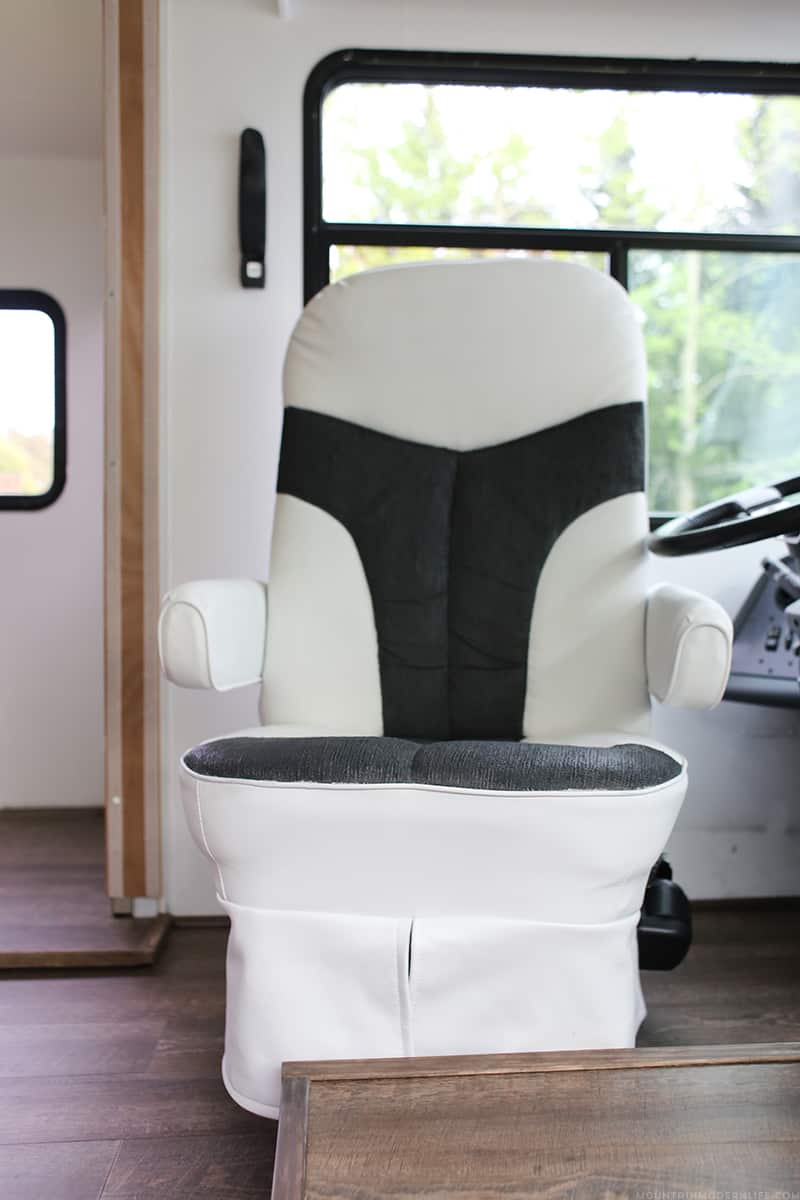
Overall, we are very happy with the results and it was an interesting experiment.
If you have some chairs you are considering getting rid of or replacing, maybe all they need is a little love and some fresh paint. And if you are thinking about updating your RV captain’s chairs I hope you found this post helpful.
I’ll be sure to update this post in a few months to let you know how the chairs are holding up.
Update: Was it Worth It?
If it’s any indication, we now have a Renovation Flops video and post and these chairs are included in that post.
The short answer is I definitely don’t recommend trying this in your RV unless you are going to get rid of the chairs and willing to attempt to save them, knowing it probably won’t work out.
Eric thinks the front is okay, but I think they look like crap, haha. It doesn’t help that our cats use these chairs as a playground when we’re sleeping. Ugh.
The sealer I had previously put on there I had to paint over because it was getting sticky in the humidity of the RV. They haven’t gotten sticky since then but we’ve noticed that lint or flying cat fur (from our fur babies) sticks to certain areas.
We don’t spend much time upfront because we do most of our “living” behind the driver’s area, but even so, the paint is cracking and they definitely look a bit rough.
The area that probably has the most scratches is where the arms go up and down, but a different sealer may have prevented this. We have considered poly or wax but will have to test a small area first to see if that gets sticky as well. If we were in a sticks and bricks home I don’t think it would be an issue, but the humidity in the RV makes it a bit more challenging. I had never painted upholstered furniture prior to this, and don’t know if it was really worth it, especially since the beige chairs probably would have looked fine in our RV – even though the white definitely brightens it up quite a bit.
I also think it would have been smarter to wait until we finished up the majority of our reno to see if it was really necessary…because I don’t think it was in our case.
Prior to painting our captain’s chairs, we couldn’t find any information about anyone else doing this so we were happy to be the guinea pigs and see how they turned out. We hope this helps you decide if it’s the right option for you!
I think this is the most amazing thing ever – that you can paint upholstered furniture. Your chairs turned out beautiful. I’m still a little skeptical, though,, that the fabric doesn’t “crack” eventually with usage. Your instructions were great and I appreciate all the hard work that must’ve gone into it. I am new to your blog, and really happy for you.
Wow. You wouldn’t even be able to tell that they are painted either. How many times have you done this sort of thing and has it ever backfired?
Hi Paul,
Not gonna lie, they look AWESOME from the back and you really can’t tell they are painted. The front is a little more iffy and the sealer I had previously put on there I had to paint over because it was getting sticky in the humidity of the RV. They haven’t gotten sticky since then and it’s been a few months. There are a few areas that got scratched (where the arms go up and down) but a different sealer may have prevented this. We have considered poly or wax but will have to test a small area first to see if that gets sticky as well. If we were in a sticks and bricks home I don’t think it would be an issue, but the humidity in the RV makes it a bit more challenging. I had never painted actual furniture prior to this, but overall, I’m still pretty happy with how they turned out. With that said, I think painting them should be a last resort if you can’t afford new ones. I plan to do an updated post/video here in the future 🙂
Katie
I’m thrilled to have found this solution to tired RV upholstery!!! After spraying on the ASCP, is bushing on wax the best sealing option?
Hi Matt,
I just added a little update note to the bottom of the post, but to be honest we haven’t re-sealed the chairs yet. I originally sealed them with a spray sealer meant for chalk paint but over time it became really sticky due to the humidity in the RV and I painted over it. We’re considering wax or poly but the chairs are holding up pretty good right now and I want to test a small area before moving forward with a different sealer. If you paint your RV upholstery I’d love to hear how it turns out!
Katie
The seats look good, you can’t tell the faux leather has been painted.
One point to stress to everybody else, is there is a certain paint to use on the faux leather, that keeps it from cracking so they need to make sure to get the appropriate kind. If you don’t get the appropriate thing, the plastic will crack.
We used it in ambulances, and it worked like a charm for a long time. They get a lot of use and abuse, but I think what we used, was in a spray can, but was called dye, not paint. If that helps, because ours didn’t scratch, but they did finally after many years, start to peel. Although I can say that we did not seal them, or wax them either. I would think that wax would be better than the sealer.
Also, I have painted cloth upholstered furniture several times, and the most important thing I found out was, if you use fabric medium, and use the appropriate mixture of medium and paint, the fabric stays perfectly soft, as if it hasn’t been painted.
Hope this helps for anyone else who is going to do that sort of thing.
Those are some really great tips, thanks for sharing Sandy!