UPDATE: All new featured RV tours will be posted on my other website, Wanderful RV Interiors. Existing tours will slowly be moved to the new website, and anything already moved will automatically redirect.
Disclaimer: This post may contain affiliate links, meaning, if you click through and make a purchase we (or those featured in this post) may earn a commission at no additional cost to you. View our full-disclosure here.
One question we get asked A LOT, is where we purchased the roller shades for our RV.
When we first brought home our (new to us) RV, we had plans to replace the valences and hideous windshield curtains, but honestly didn’t plan to replace the cellular shades right away.
It wasn’t until we were about to begin our renovation that we noticed the shades not staying up, and falling randomly while we were parked or as we drove down the road. Once they stopped being super functional, we decided it was time for them to go, especially since they were off-white and not quite our style.
If you’re looking for budget-friendly RV roller shades, we hope this post (and video) will help point you in the right direction, even if that means crossing an option off your list.
Check out the video below where Eric talks about what roller shades we purchased and how they’re holding up some 9 months later:
Our Budget-Friendly RV Roller Shades
We originally considered going with MCD Shades, but they were a bit pricey and while I like the clean, modern look, I was still toying with the idea of using white, linen, jute, or some other natural material for our roller shades.
Ultimately we decided to go with white roller shades for a cleaner look, that would allow the shades to “disappear” into the walls when rolled up.
Here’s a before photo of our RV, during one of our first trips. I barely even recognize it!

Once we decided to go with one windshield roller shade, vs. two shorter ones, we realized we would need to get it custom-ordered. As you may know, we went with Blinds.com for the windshield and driver/passenger shades, and have been really happy with how they’re holding up. We went with their most affordable white, light-filtering roller shade option and you can check out our post and videos about the installation process here.
Here’s a photo showing the front of our RV, right after we installed the roller shades from Blinds.com:

You can see our driver’s area roller shades in action via the video below:
We considered purchasing matching shades for the rest of the RV, but at the time we were still contemplating adding wood trim around the windows, which would effect the size of the shades we install. On top of that, custom shades can get expensive, especially when you have 8 windows to cover.
Of course we had a laundry list of projects to work on and the shades kept getting pushed to the bottom of our list.
I found several cordless roller shade options online, but my indecisive side kept taking over.
I think it was the day before we officially headed out in our RV that we swung into Lowe’s with our window dimensions and picked up 8 roller shades. Talk about cutting it close, haha.
They were the cheapest… err most budget-friendly RV roller shades we could find that could be custom cut on the spot.
I should mention that we had also swung into Home Depot, but our local store had limited options and we wouldn’t have been able to pick up all the shades we needed. I think they didn’t have enough light-filtering sizes, and I didn’t want all black-out shades. Also, while we went with the least expensive white, light-filtering roller shades, both Lowe’s and Home Depot offer additional roller shades that can be cut to size, some better quality than others.


Cut-to-Size Roller Shades
Luckily Lowe’s had all of the light filtering shades we needed, so all we had to do was wait for someone to cut them down for us. By the way, there are some peel-to-size options available online.

We went with mostly light-filtering shades but did get a blackout shade for the window behind our media cabinet and our bedroom window. The cost of the shades we purchased ranged from $8-24 each.
Side Note: Be aware that there may only be one person on duty that knows how to cut the shades, and if they’re on lunch you may have to wait. You may even want to call in advance to see if someone is there to cut them for you if you show up.

Don’t forget to pick up some brackets and that you choose the right ones depending on if you’re doing an inside or outside-mount installation.
We made sure all of our shades we 4″ longer than our windows (an extra 2″ on each side) to ensure they would extend past our windows without gaps.
Installation:
Installation was pretty straight forward, especially since we had already installed similar shades up front. The brackets we picked up did come with nails rather than screws, and one of our shades fell down while we were driving so we replaced all of the nails with small screws instead. It’s been 9 months and all of the shades have stayed securely in place.
Here’s a photo of the old valences and shades in the hallway of our RV. By the way, if you need help removing the valences and blinds in your RV, you can find our post on the topic here.

Our Cordless Roller Shades
Here’s an updated photo of our budget-friendly RV roller shades installed in the hallway.

While the quality isn’t the best, they certainly get the job done. They practically disappear when rolled up, allow light to come in when down, yet provide privacy so no one can see in.
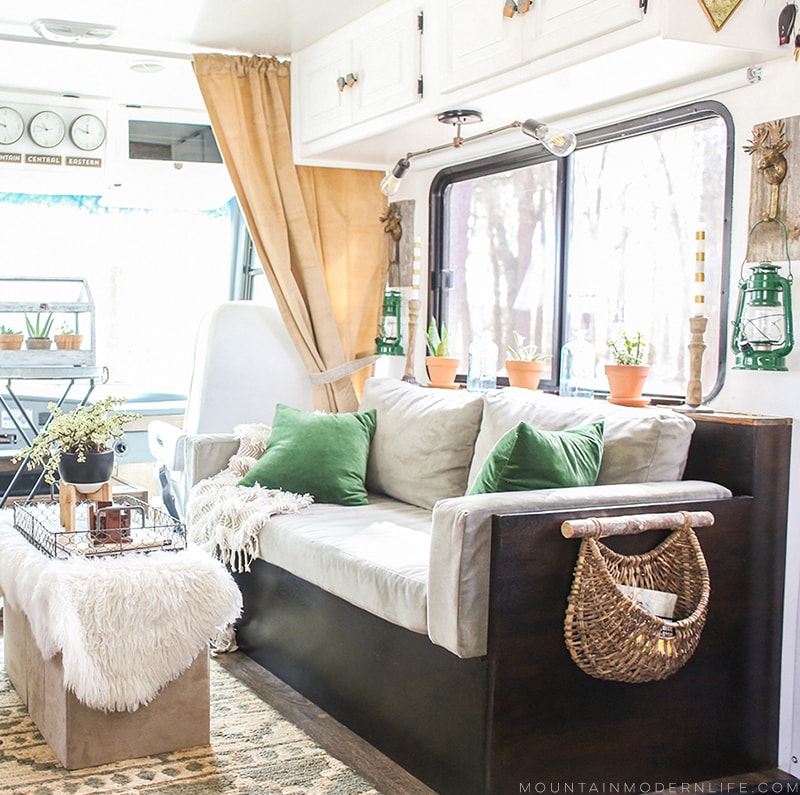
Here’s another photo showing the roller shades installed above our sofa. You can find more photos of the shades sprinkled throughout our recent RV tour:
Here are some pros and cons about the Levolor Roller Shades we purchased.
Pros
- Affordable
- Light Filtering and Blackout Shades do what they’re supposed to
- Disappear into Ceiling when rolled up
- Easy to Clean
- Easy to Install
- Width can be cut to custom size in store
Cons
- Not the best quality – thin and flimsy
- Roller Mechanism can act up sometimes (as seen in video)
- Material looks/feels cheap
- Smelled like beach ball (strong plastic/vinyl smell) when we first installed them – but the smell dissipated after a few days
- Unable to get length cut to custom size (though this isn’t a big deal for us)
- Our cat scratched a couple holes into the shade in the hallway, and I think it’s because the material is fairly thin without a thick weave.

For the price, we certainly can’t complain as you generally get what you pay for. We may upgrade someday, but for now we’re happy with how they’ve held up.
Cost Breakdown:
Custom shade for the windshield, driver, and passenger windows from Blinds.com: roughly $300
Levolor shades from Lowe’s for remaining 8 windows in RV: Less than $150
As you can see, the cost of roller shades can quickly add up, especially when you have several windows to cover.
Our Thoughts
If you can afford better quality shades, or want to spend extra on heat-blocking, day/night, or remote controlled shades, by all means go for it!
But if you’re looking for super budget-friendly RV roller shades or need something you can pick up without waiting on a custom order, we think these are a great option to consider.
What kind of window treatments do you currently have, or plan to use in your RV? We’d love to hear about them in the comments below!
See how we reimagined our budget friendly RV roller shades by making them (no sew) burlap roller shades in the video below, or check out the post here.

Hi! I just discovered your website and want to say thanks! We are in the process of buying a 2006 Itasca Sunrise, which looks fairly similar to your Tiffin “before” pics. Detailing all your renovations is both inspiring and super helpful.
A question: did you complete most of your renovations while in storage? On the road? In your driveway? We are apartment dwellers and hence drivewayless– I would love to hear your thoughts on renovation logistics.
Yay, how exciting! We came really close to purchasing an older Itasca Meridian when we were doing our research. When we first bought our RV we had to keep it in storage for the first 6 months since we had a pretty sloped driveway. We didn’t work on it during this time and then later paid our neighbor to let us keep it in her driveway. We actually did some painting on one of our first outings while we were parked and then did a good chunk of the reno from our neighbor’s driveway. We thought we were going to finish everything before we headed out but um yeah, that didn’t happen, haha. We did get the bigger projects done but have continued to work on smaller projects since we hit the road.
I love the clean fresh look of your roller shades. I own 3 RVs, one of which is a tiny 1976 made-in-New Zealand travel trailer, aka caravan. I live in my Kiwi caravan 4-6 weeks a year while visiting my daughter and her family in New Zealand. The first update I did to my wee 86 sq ft trailer was to replace the original decomposing shades with blackout roller shades. My little caravan has 5 windows, 2 of which are 7′ wide! I got chain operated ones because they were budget-friendly, substantial, and readily available at the local NZ version of Lowe’s. Luckily I was able to replace all 5 of the shades in ready-made widths that fit, for under $300. It was an amazing transformation! We have a 2005 class C motorhome here in Texas and want to do all the same updates you have done to your coach. I love your style and the work you’ve done!
Thank you so much for the kind words Betty!! That’s awesome you get to go to New Zealand for 4-6 weeks a year, and live in you Kiwi Caravan! As you’re updating your Class C let us know if you have any questions we may be able to help with. Best wishes on your renovation.
We’re renovating a 2003 Newmar, and your blog has been a great help and inspiration. I was even inspired to start my own blog, and while I’m documenting a lot of things, I may just link to your site on some things–why reinvent the wheel? Your explanations are very thorough. Happy trails, and thanks!
Curious about the size (Length) of the screws you used and how you made sure that you were screwing into a ‘stud’ around the window. We are super nervous about putting anything INTO the walls because well… who knows how thick the area is and what the heck really is behind the wall panel. 😉 Any tips on that?
Hey Rebecca that was a concern of ours as well! Unfortunately, the studs that are in our walls are metal and are never conveniently located where you need them. The best way I can think to combat this is to use anchors for your screws, you can generally pick up a pack at your local hardware store and they generally come with the anchors and the screws. If you are going to take this route you’ll need to make sure the screws in the anchor set you get will fit within your hanging brackets. But by adding the anchors you shouldn’t have to worry about them falling. Anyway I hope this helps and please let us know if you have any other questions. Best Wishes, Eric
Yay, that’s awesome! And to be honest, I get stuck in that mindset too sometimes, but the truth is, we all have our own experience, journey, and stories to share so don’t get caught up in the fact that someone else shared something, by all means, share your own experience too! Besides, someone may be able to relate to you or learn from you better than from me or someone else. And thanks for the reminder, because I need to take my own advice, ha!
Katie
Thank you so much for all the how to’s. Any advice on a better quality shade? Thank you again and happy travels 🙂
Thanks Deanna! You can purchase better quality shades at a home improvement store that can still be cut to size if you need them last minute, which is why we went that route, otherwise you can order custom shades online from an RV specific retailer, or at a place like Blinds.com. I’ve also heard good things about Steve’s Blinds, but haven’t used them before.
The Ikea Tupplur blackout shade worked out great for us, with the exception that they didn’t come long enough to fit across our kitchen window. No odd smells, and the fabric and rolling mechanism seem pretty durable so far.
That’s awesome Corinne, the beachball smell on ours was a little weird for a bit haha. I’m not sure if you saw but we actually got rid of the fabric that came with our roller shades and replaced them with burlap, we wrote a post on how we did that if you want to check it out – https://mountainmodernlife.com/burlap-roller-shades/ – Anyway thanks for sharing a great option 🙂
Hello I see blinds.com offer a motoized roller. Did you look at using them. Also what was the width of the blind
Used on the front windshield.
To be honest, we decided to keep the shade as affordable as possible, but having it motorized would be pretty awesome! I can’t remember exactly what size it was because we measured it 3 years ago, but it was close to 100″. Here’s our post on the windshield shade:
https://mountainmodernlife.com/rv-windshield-roller-shades/