UPDATE: All new featured RV tours will be posted on my other website, Wanderful RV Interiors. Existing tours will slowly be moved to the new website, and anything already moved will automatically redirect.
Disclaimer: This post may contain affiliate links, meaning, if you click through and make a purchase we (or those featured in this post) may earn a commission at no additional cost to you. View our full-disclosure here.
I am soooo excited to have recently teamed back up with 5 super creative bloggers to bring you another round of inspired DIY projects! We started this series last year and had so much fun that we decided to bring it back.
Last year I created our farmhouse style dining table, rustic plant stand, lace curtains from table runners, and painted vase from this series and they turned out to be some of my favorite projects to date!
On the first Monday of the month, from now until August, we will each share a DIY project inspired by a specific store we love.
DIYs Inspired By…
When you are on a tight budget or in a creative funk, sometimes browsing online or retail shops is just the thing you need to get those wheels turning and inspire you to create something for your home. This month our store inspiration comes from Anthropologie, which is one shop I can browse around for hours. It’s easy to get lost on their website and fill up Pinterest boards with fashion, home and wedding inspiration.
So here it is, round one of the series! First I will share my inspiration project, a DIY Modern Rustic Wall Hanging, but be sure to hop on over to check out the additional inspiration projects at the bottom of this post.
It all started with these Gilded Wall Sculptures
We’ve been making some changes to the master bedroom and I recently decided that I wanted to hang either plants or lanterns on the sides of our new large scale wall art. Then one day while browsing the Anthro website I came across this gilded grain wall sculpture:

I love the mix of modern with rustic and thought this would be a fun way to incorporate some more metallics into our bedroom, which would match our curtain rod and pipe drawer pulls on our dresser and nightstands.
The reclaimed wood used in these sculptures is really cool, but at $400 a pop, that’s definitely out of my budget for a rustic wall hanging. Yikes!
I used these sculptures as a jumping-off point when it came to creating a modern rustic wall hanging for our room that could be both pretty and functional.

How to Create a Modern Rustic Wall Hanging
Since I already had some of the materials on hand this project cost me less than $25, woot-woot!
- Reclaimed Barnwood
- Sandpaper
- Stain
- Copper Leaf Foil
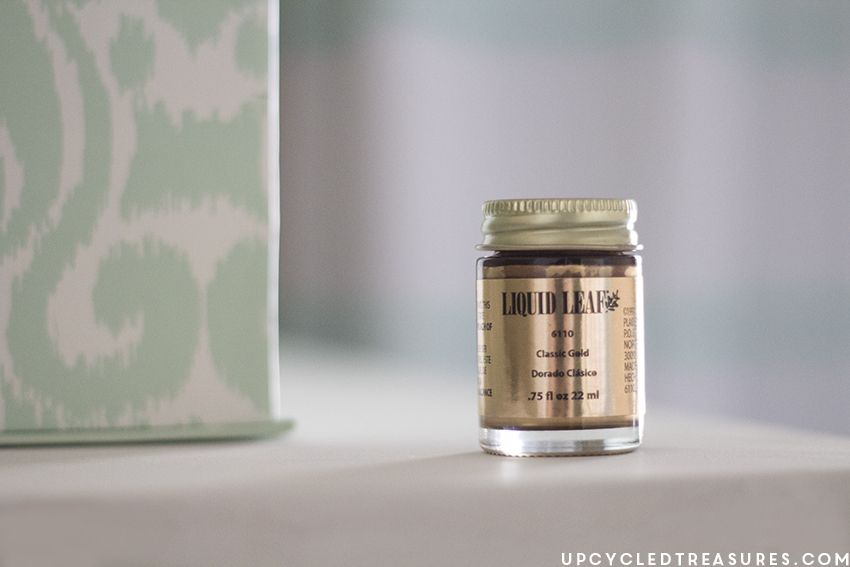
- Liquid Leaf – Gold {You could also use gold leaf}
- Foam Brush
- Spray Adhesive or Mod Podge
- Sealer
- 6″ Plant Brackets
- Hanging Hardware and nails
- Screwdriver/Drill
Measure and Cut the Wood to size
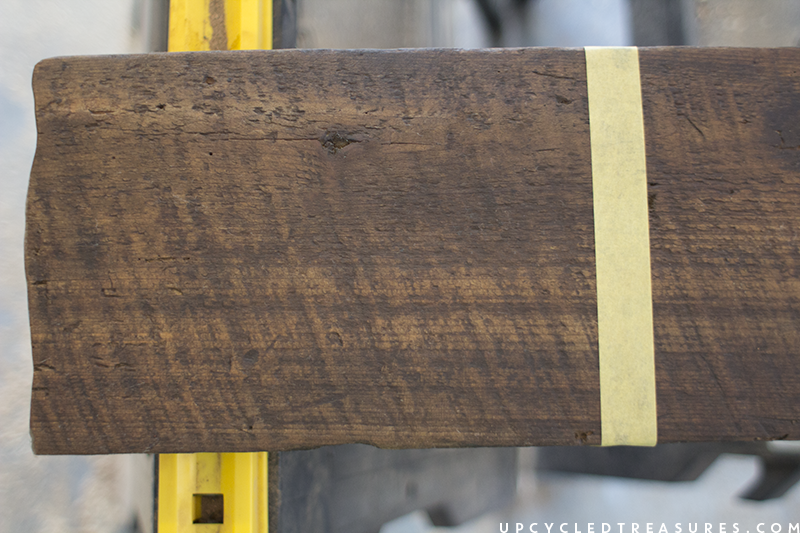
I purchased some old barnwood from a vendor at Queen of Hearts Antiques and used less than a third of it for this project. Although I used salvaged wood, you can certainly use new wood for this project and even get it pre-cut at the hardware store.
The first thing I did was figure out the size I wanted the vertical wood to be and then cut it down to size. For those who are curious, the size of the wood we used was approximately 7″ x 30″.

Sand + Stain
Afterward, the 2 pieces of wood were sanded down and then stained with Golden Oak. I LOVE how rich the color turned out! Originally I was just going to do a light sanding to get rid of any splinters, but I love how refined and rustic the stain turned out.
Oh, and I did sand the ends of the wood with the belt sander to try and create a more natural line vs. keeping the straight end, which you may notice in a few of the photos below.

You can see the difference in the photo below:

Get your Gild on
Although the inspiration piece was gilded on half of the wood, I decided I wanted mine to cover 1/3 of the wood instead. So once the stain was dry I measured out a third of the board and marked it off with some painter’s tape.
I should also mention that although I haven’t yet mastered the art of foiling, I am learning and am not as intimidated by it as I used to be. I am also learning not to be as impatient, and to let the adhesive sit there longer before applying the foil.
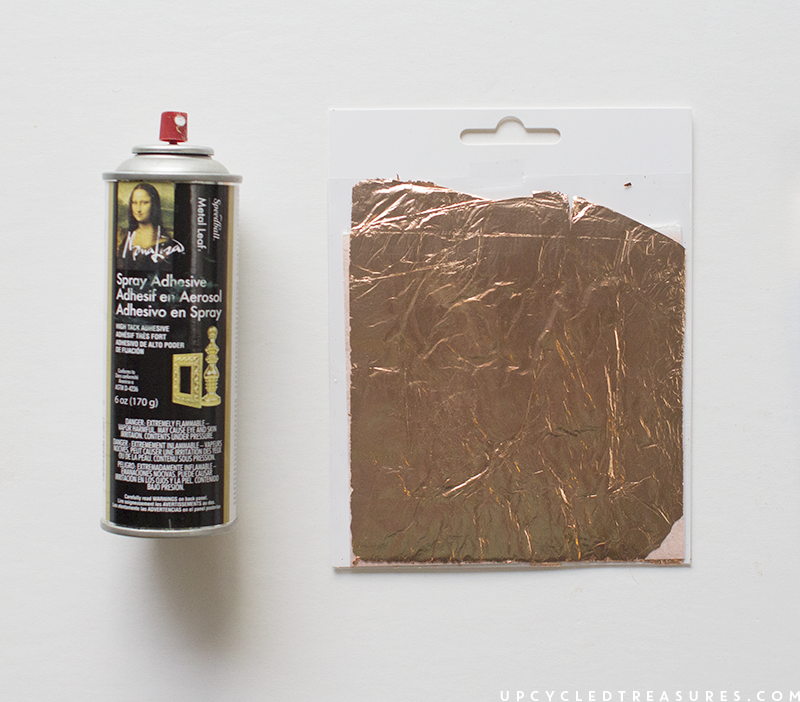
I had picked up some copper leaf from the craft store with a 40% off coupon and followed the directions to add it to the bottom of one of the boards. I had previously used some gold leaf on my wood shim art, as well as on some canvas art, and was looking forward to testing out the copper version.
I actually went to a couple of craft stores looking for some gold foil, but they were all out so I decided just to use some Liquid Gold that I had left from my armoire makeover. I applied it to the second board using a foam brush and used the tape line as a guide. After about 10 minutes I removed the tape and BAM, instant gratification 🙂

Gold Foil vs. Liquid Leaf vs. Spray Paint
Let me just say that the copper leaf looks absolutely beautiful but if I were to do this again I would probably use liquid copper because it is even easier and less messy. Spray paint is another option although it may not have the same reflective qualities as the foil.
Seal it
After everything was dry I sprayed both boards with some clear sealer.
Add the Hooks
Then when that was dry we measured and screwed in a 6″ plant bracket onto each board. {I originally tried using some 9″ brackets we had, but they were too long and looked a bit funny to me}. These 6″ brackets were purchased at Walmart for about $4 each, and they just so happened to have 2 left in stock. Whew! If you want to use these as simple modern-rustic wall art, then you can skip the hooks and go straight to adding the hanging hardware.
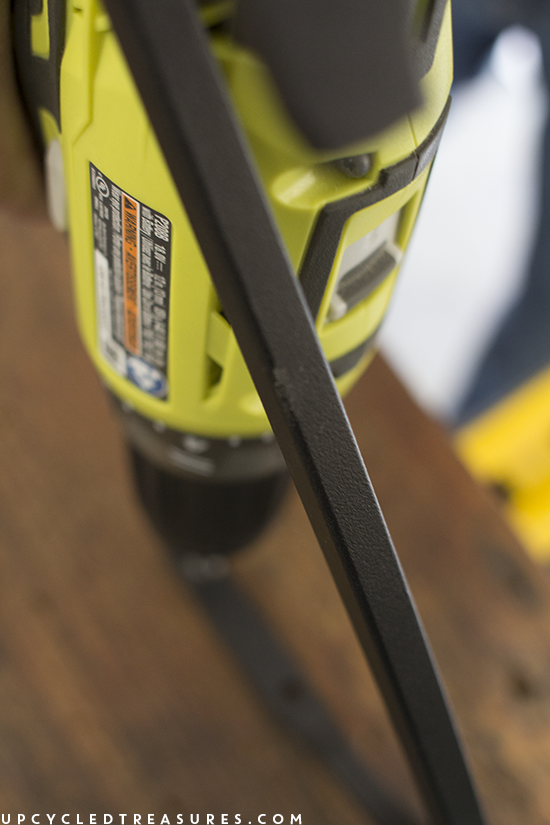
I wanted a hook that would easily allow me to hang a plant, lantern, etc. and didn’t want one that was too short or too long and these seemed to work perfectly.
Hanging Hardware
Hanging hardware was added to the back of each board, ensuring that it could hold up at least 20 pounds.
Add Lanterns
I originally thought I would hang some aqua vintage mason jars from the hooks, but even my quart size jars were too small in proportion to the vertical wood hanging. So instead I hung up a couple of glass lanterns I found on sale at Kirkland’s for $8 each. I love how the colors of the potpourri/vase filler compliment the wall art, and how the rich wood and metallic colors warm the space up a bit. Not to mention we can create romantic lighting with the tealight candles inside {which I will probably switch out to battery-operated ones}.
The Finished Modern Rustic Wall Hanging:

In the future, I may switch them out for some hanging plants to add a bit of greenery or pretty flowers. I can’t wait to show you the rest of the room!
So what do you think of our rustic wall hanging?

If you have wood, paint, and hooks in your home then you can most likely make a version of these rustic wall hanging for free!
Don’t forget to check out the AH-MAZING additional projects inspired by Anthropologie at the links below:

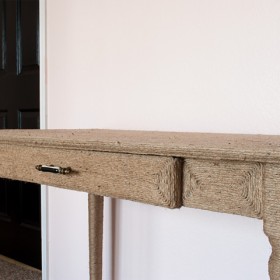
DIY Jute Wrapped Vanity – The Gathered Home
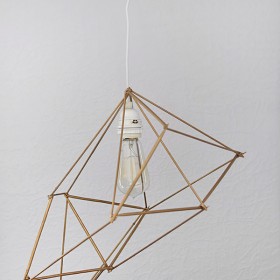
Geometric Pendant Lamp – Delineate Your Dwelling
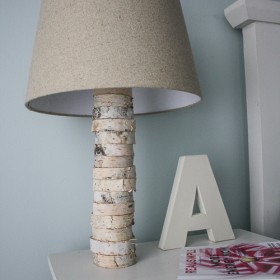
DIY Stacked Wood Lamp – Designer Trapped in a Lawyer’s Body
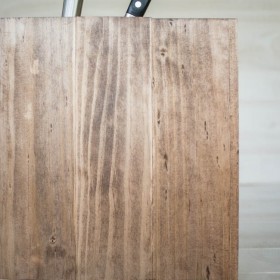
DIY Knife Block – Bigger than the Three of Us
Hand Painted Floral Ring Dish – Brave New Home

Love it Katie! Great tutorial and pictures as well!
Thanks Ashley! I love how they turned out 🙂
Wow, the hangings really are the perfect mix of rustic and modern. I have yet to try foiling, it looks so intimidating but liquid gold/copper may be the way to go. Love the way they turned out!!
Thank you Trisha! Gold foiling is fun and you should definitely give it a try! My biggest mistake is that I never wait as long as I’m supposed to for the adhesive to dry a bit before adding the foil, and then it doesn’t stick as well and I have to do multiple applications. Live and learn, right? 🙂
I do LOVE the liquid leaf though, that stuff is amazing!
Holy smokes!!! This is AHHHHHMAZING Katie!!! LOVE, LOVE, LOVE how it turned out!
Thanks Kristi! I love how versatile they are considering I like to change or move things around a little more than I probably should, ha.
Just came out perfectly! And I love that you added hooks to yours, a great finishing touch.
Thanks Amy! I thought about creating just the art and hanging them up horizontally above the tv in our bedroom, but then decided this would be the perfect backdrop for some wall hangings I was looking to make anyway 🙂
Stunning!!! The reclaimed wood + copper & gold is such an incredible combination! I love that you took the inspiration and reworked it slightly to be the perfect piece for your room! So good!
Thanks Brynne! I love me some salvaged wood, but honestly had no idea the wood would look so rich and beautiful with that stain added on there, which then helps the gold and copper pop off even more. It definitely seems to blend the modern and rustic together in a combo that I love 🙂
I completely copied that same anthro wall sculpture thing for Christmas last year, except I made a sign with mine and used copper. I love what you did way more though! Much cuter!
Whaaaaaaa?? Okay now I’m gonna have to go stalk you site and find it!
I absolutely love this! I like yours better than Anthro’s!
Thanks so much Roxanne!
These are SOOO pretty! Just my type of DIY!…simple! Thanks for this awesome DIY1
These turned out so pretty! And what a nice choice of wood, too.
This is so, so awesome, Katie! LOVE it! And so glad you guys are bringing this series back!
Those are so beautiful! My mind is spinning with all the different twists you could put on this project. You did a GREAT job! Thanks for the inspiration!
I love gilding! Beautiful job. I was eyeing those planks at Anthro recently too.. Thanks for sharing at The Creative Circle!
AMAZING!!! and absolutely my kind of color pallet.. Most of all I love the stone colors? can I ask where you grabbed the stones/rocks from??
I’m obsessed with the potpourri/ vase filler stones.. I must have them for my table decor!!! Do you mind saying where you bought them or the name?
what size did you cut your boards?
Hi Sandy,
They are approximately 7 x 30 🙂
Katie
Hi there! These are gorgeous! Where did you get the rock filler from?! Please and thank you!
Hi Audrey,
I believe I bought it from Michael’s craft store 🙂
Katie
I love love love these! Can you tell me what hardware you used to hang them? they look flush to the wall, so I’m curious!
I have had those wall hangings pinned for a while. I knew someone must have done a DIY on them! Yours came out awesome!
I’m gonna try it. Although I can’t think of where to find wood. That will probably be the hardest thing.
I absolutely love this idea and can’t wait to try it! I want to use it As decor for my screen porch walls. How would you recommend trEating it for outdoor use? EpOxy the whole thing…? Thanks!