UPDATE: All new featured RV tours will be posted on my other website, Wanderful RV Interiors. Existing tours will slowly be moved to the new website, and anything already moved will automatically redirect.
Disclaimer: This post may contain affiliate links, meaning, if you click through and make a purchase we (or those featured in this post) may earn a commission at no additional cost to you. View our full-disclosure here.
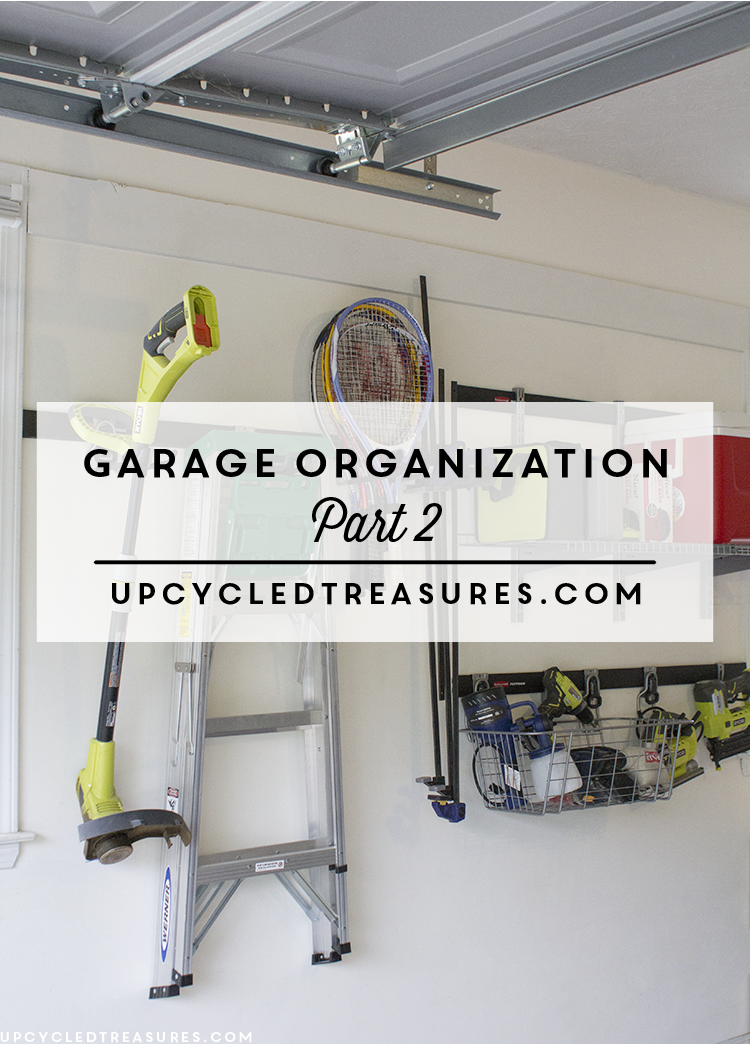
Garage Organization: Part 2
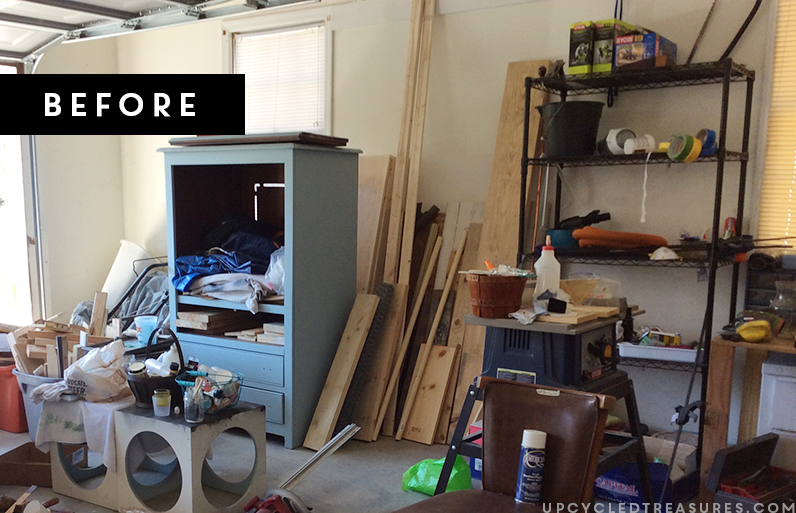
If your garage has gotten out of hand and you’re looking for some solutions for garage organization, then you’re in luck. Today I’m sharing how we transformed our disaster of a garage back into a useable space worthy of DIY projects.
Just to refresh, yesterday in Organize You Garage: Part 1, I shared a scary photo of what our garage looked like a few weeks ago {yikes!}, along with our plan to get it whipped back into shape.
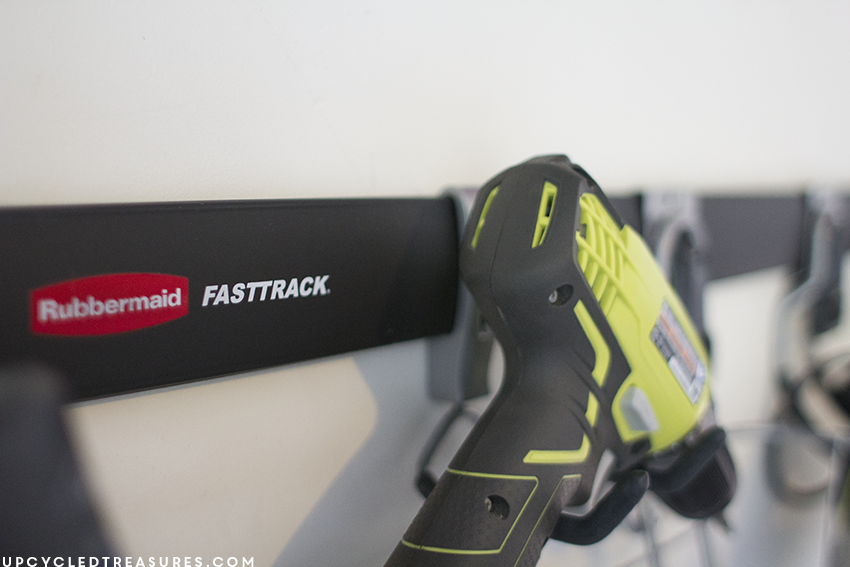
After some purging, we picked up the Newell Rubbermaid FastTrack system so that we could officially designate a wall for storage, and get the clutter off the floor once and for all.
Not only is this system super flexible, but it’s quick and easy to install too, hence the name 🙂
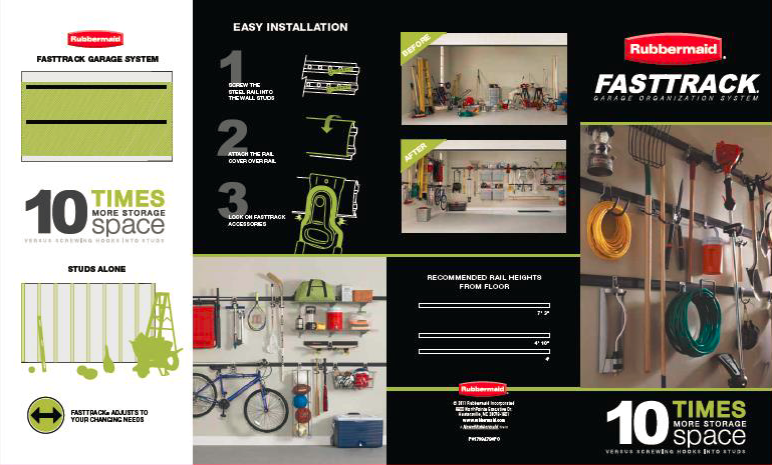
Getting organized with the FastTrack System:
Step 1:
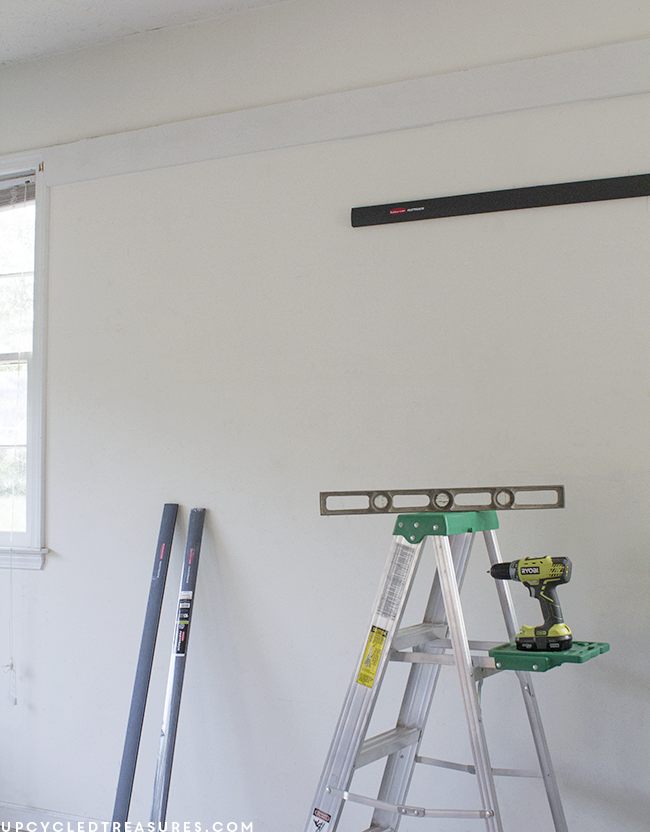
The first thing we did was determine where we wanted to place the rails. The wall we used was about an inch shy of setting two of the 48″ rails side by side, so we decided to place one rail on the left side of the wall, and 2 on the right side. I knew I wanted to hang some taller items {like our ladder} on the left side so we made sure to place the rail higher on the wall.
Step 2:
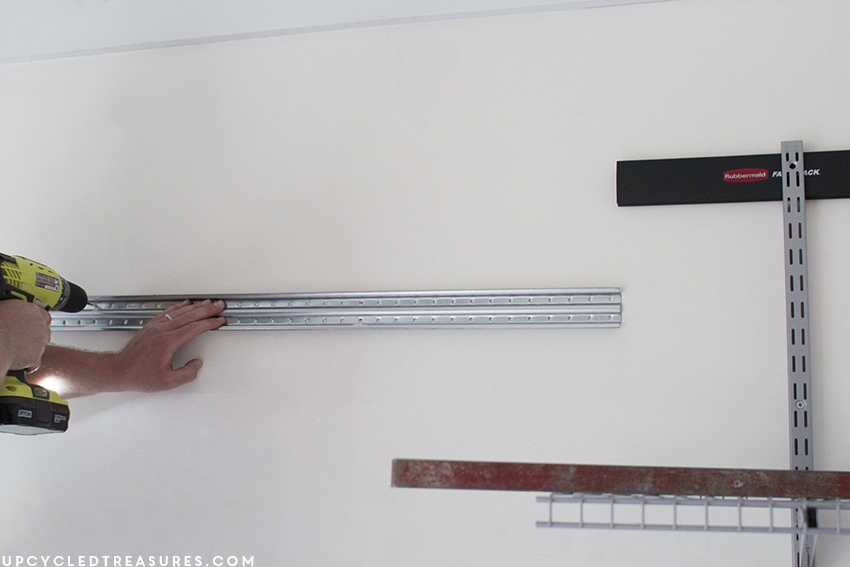
We then used a stud finder to locate the studs in the wall and marked them off with some chalk. I like to use a chalk pencil since it can easily be wiped off.
Step 3:
Afterward, we used a level to ensure the rail was straight before we marked off and pre-drilled where the screws would go.
Step 4:
After pre-drilling the holes, we used the screws included in the hardware kit to attach the rail to the wall.
Step 5:
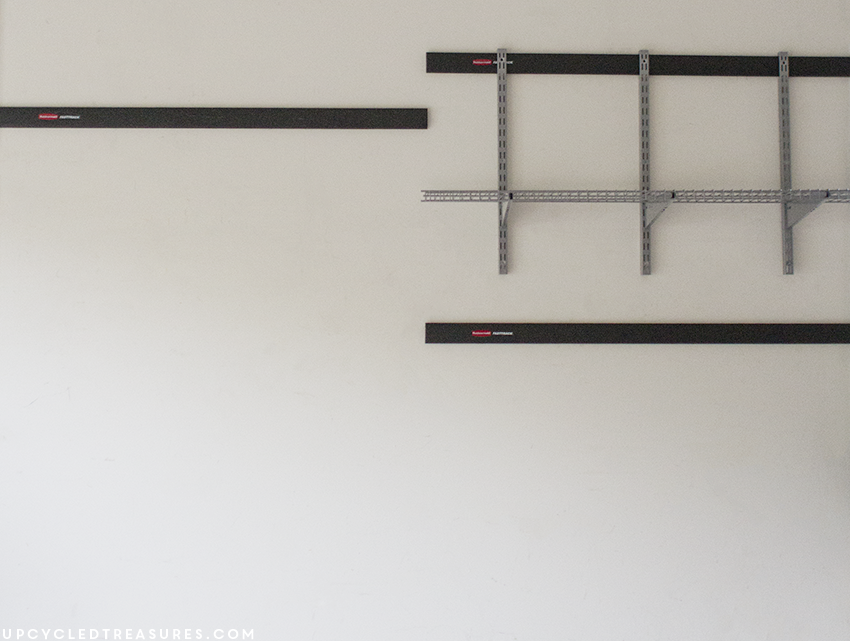
The plastic covers then slide onto the rail for a more finished appearance.
Step 6:
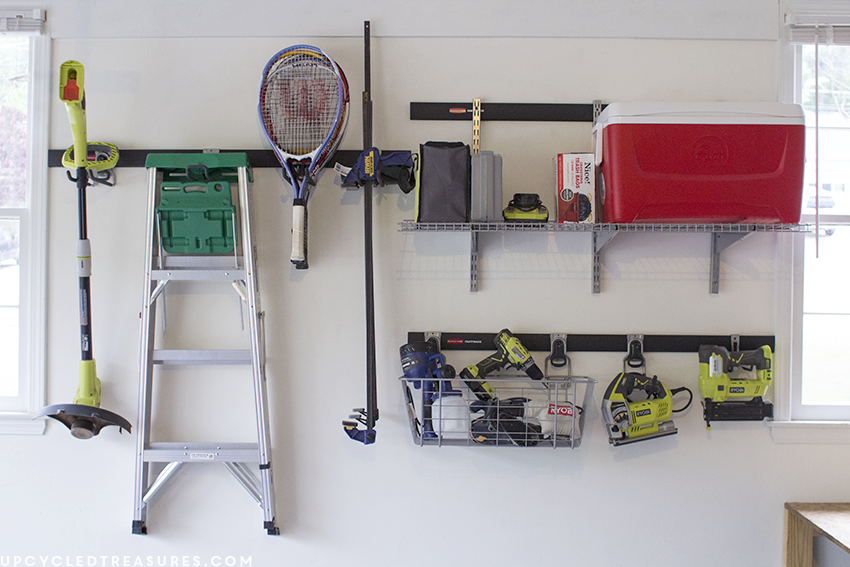
The final step is to attach your hooks to the rails, which snap into place, and can easily be unsnapped and moved around to your heart’s desire. If you are attaching the shelf you will first need to attach the vertical supports.
![]()
Here is what our wall looked like with one of the rails installed and the plastic cover slid on top.
Here we are adding the second rail to the left side of the wall.
And this is what the wall looked like once the FastTrack system was installed:
Easy peasy! Now it was onto the fun part of organizing the chaos that was once scattered about and making it easy to access.
I think I’m in love. Who knew organizing could be this much fun or look this good?
And who knew we had so many tennis rackets? Ha.
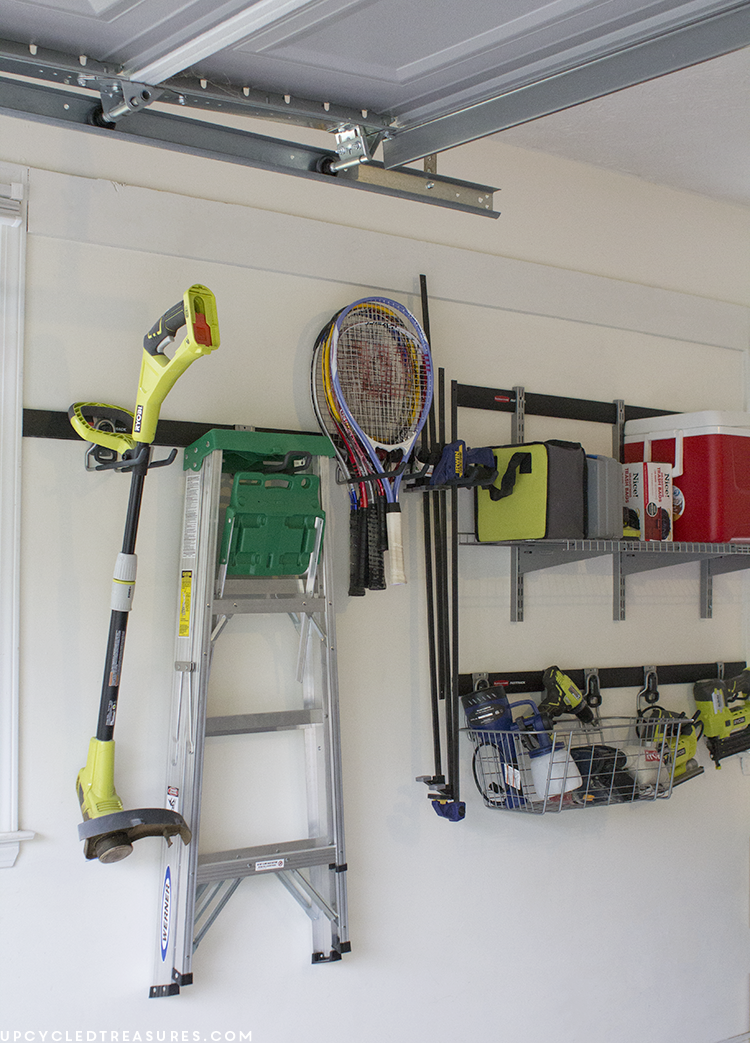
I don’t know about you, but I’m certainly impressed by this garage organizing system. We are already planning to add more rails to another wall in the garage, which will be perfect for the extra hooks I have leftover and the vertical ball rack.
I’m so excited to finally have a useable space to work on our DIY projects and a place to put our tools when we are finished, woo-hoo!
So what do you think?

If you are looking for a garage organizing system that’s easy to install, and flexible to change, then I definitely recommend checking out the FastTrack system!
![]()
Learn more about the products HERE.
Fast, easy, fun. The FastTrack Garage Organization System is easy to install and allows you to store more by making use of your entire wall…not just where the wall studs are located! Visit your local Home Depot today!
This is a sponsored conversation written by me on behalf of Newell Rubbermaid. The opinions and text are all mine.