UPDATE: All new featured RV tours will be posted on my other website, Wanderful RV Interiors. Existing tours will slowly be moved to the new website, and anything already moved will automatically redirect.
Disclaimer: This post may contain affiliate links, meaning, if you click through and make a purchase we (or those featured in this post) may earn a commission at no additional cost to you. View our full-disclosure here.
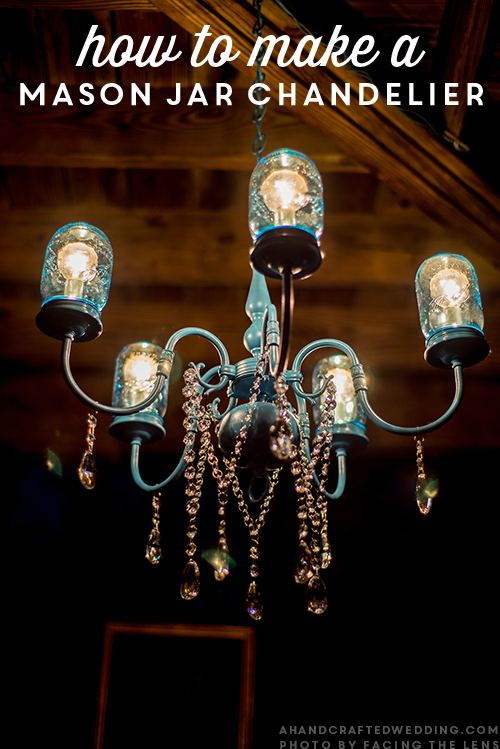
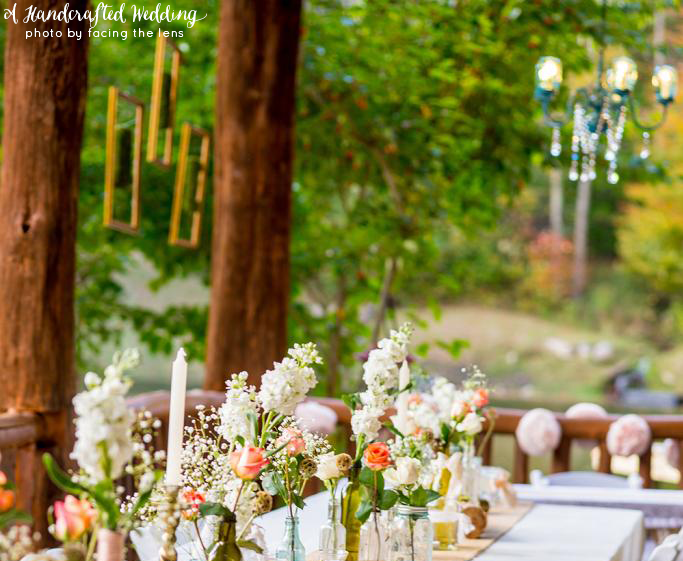
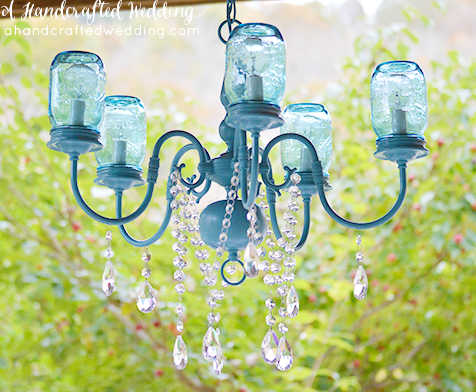
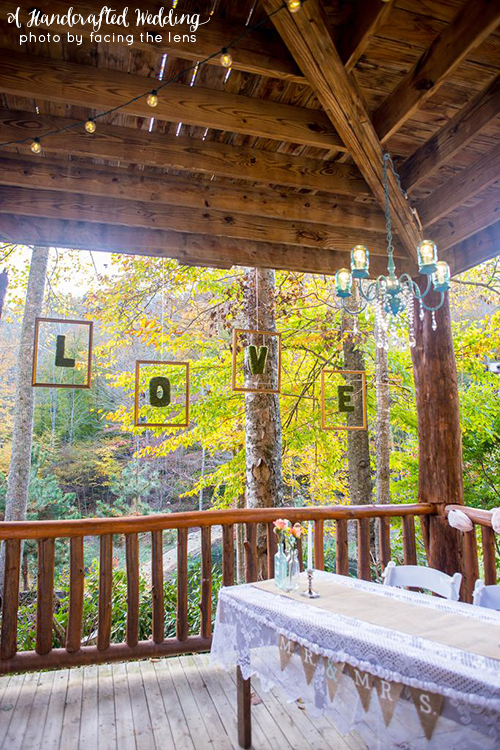
If you are looking to add some romantic or vintage-inspired lighting to your wedding or home why not consider a mason jar chandelier? We made one to use in our wedding reception decor, which we hung right above the sweetheart table and it was one of my favorite decorations!
DIY Mason Jar Chandelier
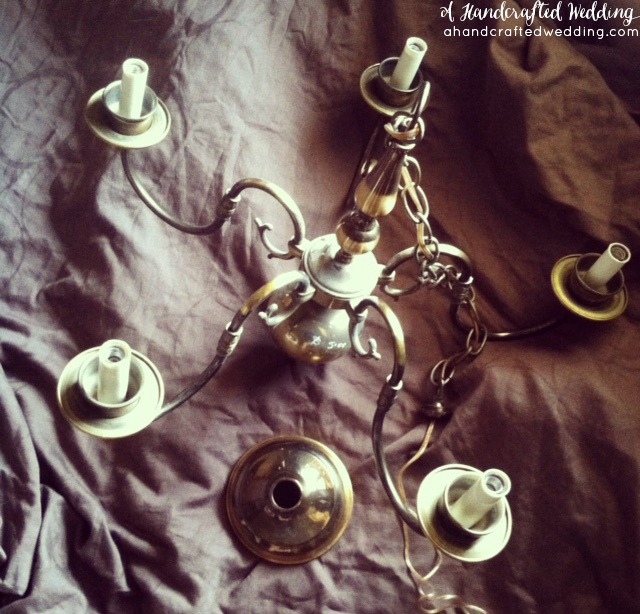
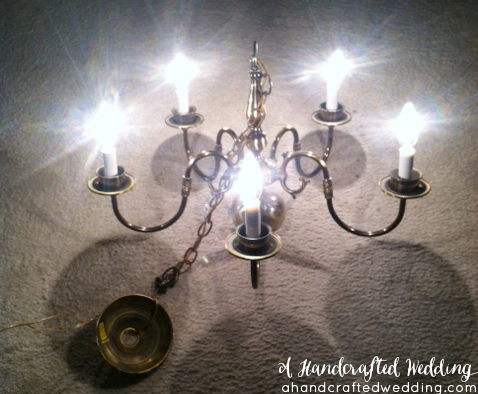
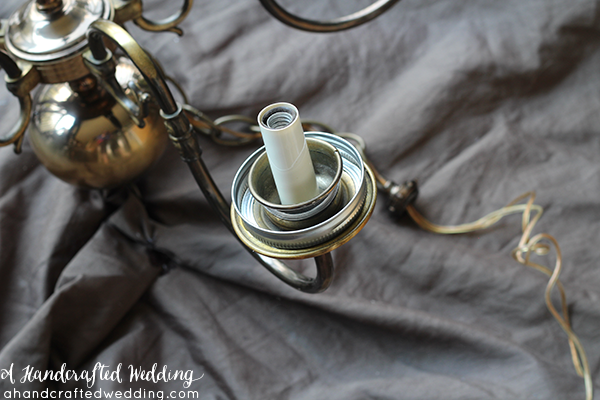
I found the chandelier at a thrift shop a while back for a mere $5! Here is a before photo that was taken with my phone so I apologize for the quality:
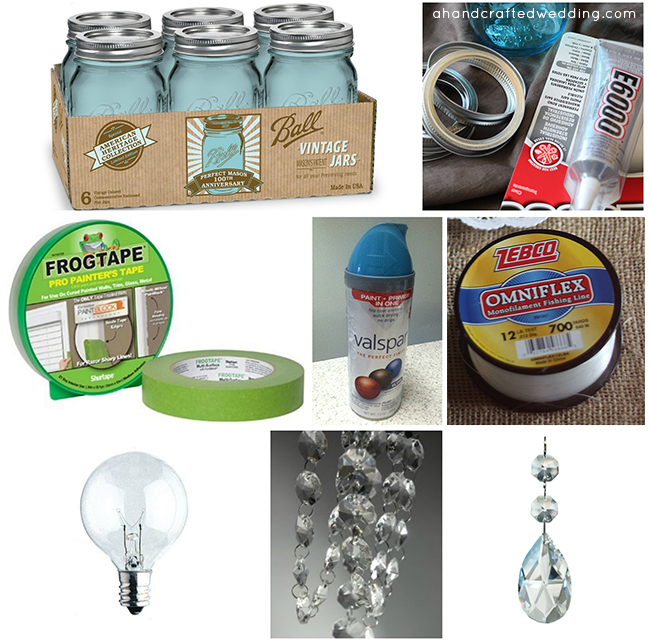
Materials used for DIY Mason Jar Chandelier:
- Globe Bulb Lights – I used some I already had on hand
- 1 can of Valspar Tropical Oasis Spray Paint & Primer in One
- Blue Heritage Mason Jars and Lid Rings
- Painter’s Tape
- Clear Fishing Line or Thin Wire
- E600 Glue
- 6ft Clear Crystal Garland
- 10 Teardrop Crystal Prisms
The first thing I did was put some bulbs in it and connect it to a wall plug in converter (which we already had), just to make sure it worked. It did – yay!
We actually didn’t use the bulbs you see in the photo above though because the mason jars didn’t fit on top of them. We used globe chandelier bulbs instead which we already had on hand.
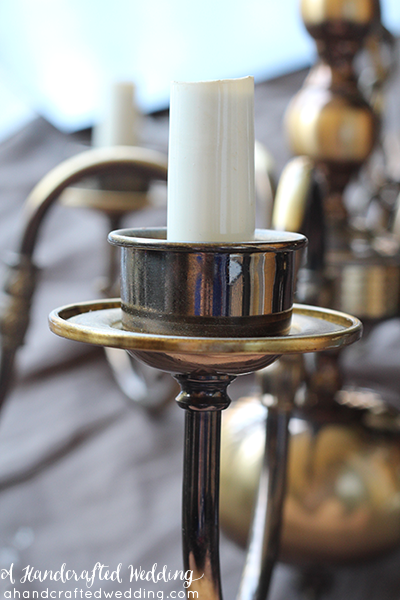
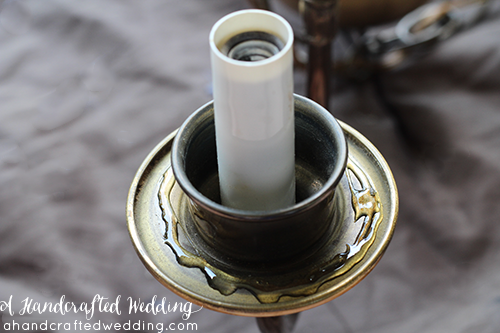
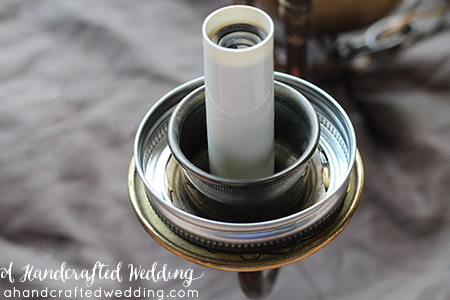
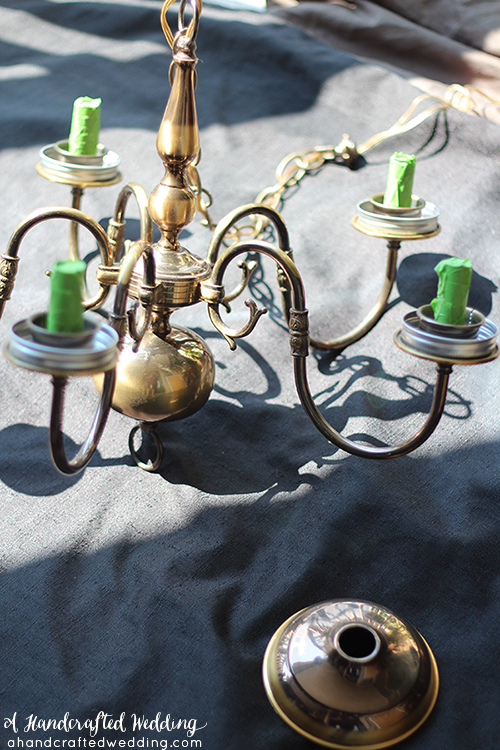
Afterwards I cleaned up the chandelier and even vacuumed out some of the dust before gluing the mason jar lid rings to it with E600 Glue.This way the mason jars can be easily screwed into the lids and are removable if the bulbs need to be changed.
I went around and glued the lid rings to all 5 sections of the chandelier lights, cleaned up the excess glue and then let it dry for a few hours.
Afterwards I used frog tape to cover up any sections I didn’t want paint to get on.
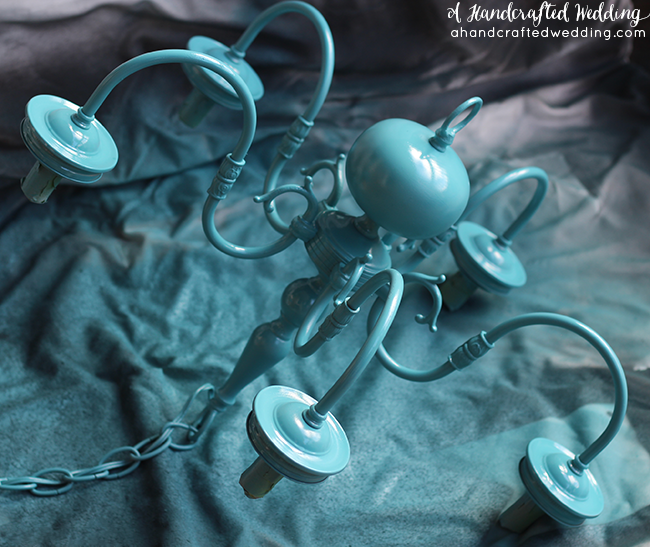
I then used some of Valspar’s Tropical Oasis Spray Paint & Primer in One. I sprayed on a few coats, letting the paint dry in between and also moving the chandelier around to ensure the entire thing was covered.
This is where it may get a bit confusing. You see Eric and I actually added the crystal garland and prisms a couple days before we left for North Carolina for our wedding, and I transferred all the images to my computer before we left so that I would have tons of space for photos. Only now I can’t find the photos we took that day and searched my computer everywhere!
I will try to explain what we did, which I thought worked pretty well, although I know there are certainly other {more professional} ways to get this done.
Once the chandelier had the mason jar ring lids glued on, was painted and dry we screwed in the light bulbs and then screwed the mason jars into the lids.
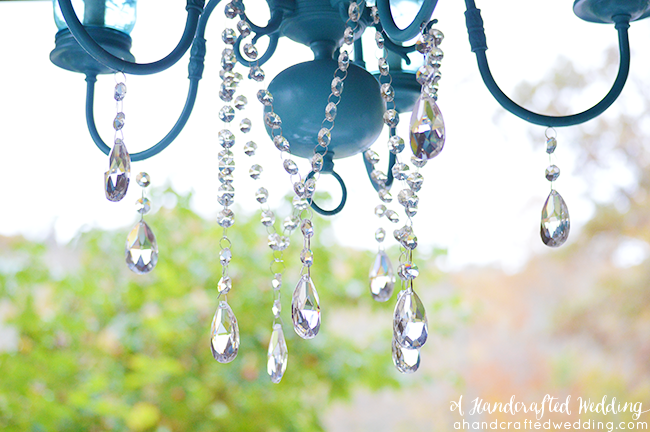
Wanna know what I used to attach the crystals? Fishing Line. Yep. I am sorta obsessed with this stuff as it got me through A LOT of wedding projects! I especially love that it’s clear. You can also use thin jewelry wire.
So we basically attached the crystal prisms where we wanted using clear fishing line and then triple tied it off. It doesn’t need to be 12lb but that’s what we had so that’s what we used.
We hung the crystal garland around some of the chandelier curly hook areas, but wound up removing it for when we transported it in the car and then re-added it while we were in North Carolina. Actually, my sister stood on a ladder and added it while we were setting up the space for the reception. I love her!
My only regret is not buying more of the crystal prisms, which would have looked awesome had I added them to the section where the mason jar lid rings were attached. I would have done that when we got back home, but the chandelier found it’s permanent home at the venue we were married at {Memory Mountain at Wolf Laurel}, where other brides will be able to enjoy it during their wedding as well.
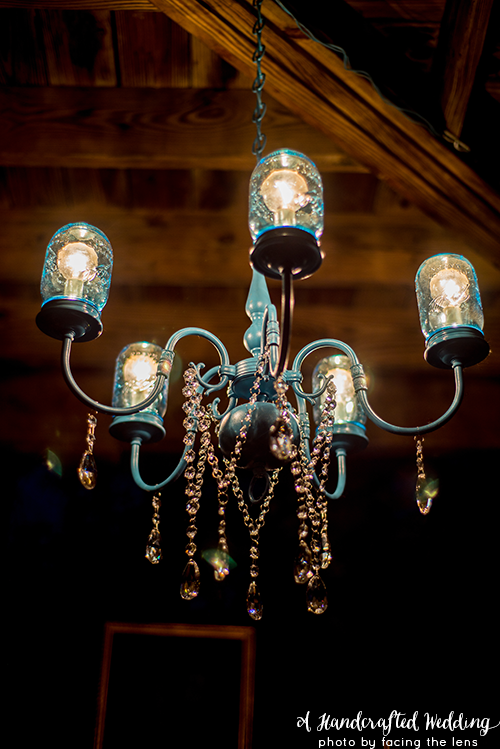
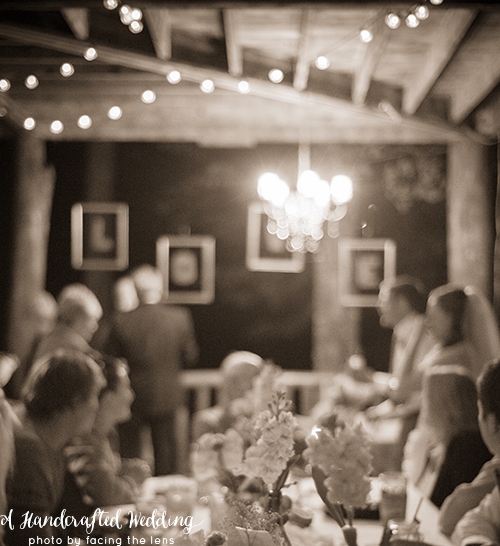
Here is what it looked like during the reception:
So what do you think of the DIY Mason Jar Chandelier? I am so happy that we were able to make it a part of our big day, and since I left it at the venue I plan to make another one in the near future. Do you plan to make your own DIY Mason Jar Chandelier?


This is beautiful! Pinned it!
Thank you so much Erin!
What a great post! The chandelier was amazing!
It was definitely perfect right above our table, although I do wish it had more crystals 🙂
Love these! Great idea!
Thank you Amberly!
Stunning! I love it! I might have to try this! XO, Erica
Thanks Erica, it was super easy and everyone seemed to enjoy it 🙂 Thanks for stopping by!
Looks beautiful! What an inspiration!
Thank you Carmen! It sat in our house for months before I finally worked on it, but it was definitely a great score at $5!
That looks so wonderful. You did a great job!
Thank you so much! 🙂
This is gorgeous! I can’t wait to see more pictures of everything, that little peek looks amazing. I’m having a rustic themed wedding in May so I’ve been getting lots of inspiration from your wedding projects!
Thank you Steph and congrats on your engagement! Oh my goodness people told me things would go wrong, but holy cow did things go wrong! Lol. There are a lot of things that didn’t get done or completed as planned, yet in the end it was still perfect and super magical 🙂
Yowza! I will definitely be featuring this gorgeous creation @ our “Inspiration Monday Party” this Sunday @ 2pm EST. Thanks so much for joining us! ~ Julie redheadcandecorate.com
Yay, thanks Julie! So happy you like it and that you stopped by to check it out 🙂
wow I love that chandy…it looks so pretty…I adore the color you painted it…the tut was so perfect…I can’t wait to find me on to redo…
Thank you Phyllis! I had actually purchased 2 different blue colors because I wasn’t sure which one would match the jars best, and originally thought this one may be too dark. In the end it was actually perfect! Thanks for stopping by 🙂
Came over from the Atlanta group and I’m so glad I did! this is just brilliant and beautiful! I’d love for you to link up to my group linky (in Tuesday’s blog post!) Everyone needs to see this! ox
Thank you so much for checking it out Robin and I would LOVE to link up to your party, thanks!
I love this!!!!!!!I featured you this week at Boogieboard Cottage, Take care, Mary
Yay, thank you so much for the feature!
Beautiful chandelier. Thanks for the how-to. Love your wedding reception setting!
Hi Ann, thank you so much 🙂
Beautiful job. I love the color you chose! I’m hosting a giveaway for two modern printed kitchen towels that you should enter! http://homecomingmn.blogspot.com/2013/10/a-tea-towel-set-giveaway.html
Thank you so much Kayla and I’ll head over now to enter the giveaway 🙂
Sweet up cycle! I passed one of these over at a yard sale, now I wish I hadn’t. visiting thru Leslie’s How on the Way party
Hi JoAnn! I went through a total obsessive light fixture phase and bought this during that time. Since I left this chandelier at the place we were married at, I hope to find another one we can use in our home! Thanks for stopping by 🙂
What a beautiful spin on painted chandeliers! The mason jars are an amazing idea!!! Looks great:)!!!
Thank you so much Melanie 🙂
I love how your chandelier turned out. Beautiful job.
Thank you!
OMG I love it! What a great idea to use the mason jars and the color is gorgeous! Thanks for sharing!
I’m so glad you like it Bonnie! It was definitely one of my favorite things during the reception.
Looks like you had a beautiful wedding, love what you did to the chandelier, Are you going to use this in your home? Great job Andi @thewednesdaybaker
Hi Andi! We actually left it with the owner of the cabin venue we were married at, so that other brides can use it in the future. I hope to make a similar one for our house as soon as I find another thrift store chandelier 🙂
WOW!! This is beautiful.
Thank you Marie!
Love this! I’d love for you to add this to my link up party “Friday Follow Along Party” http://thecraftiestallie.blogspot.com/
Thanks Allie! I am heading over there now 🙂
I absolutely LOVE this project Katie! Perfect color, and mason jars just got even cooler. Thank you so much for joining us at the Inspiration Monday party 🙂 xo
I’m so glad you like it Tanya, and thank you so much for stopping by to check it out 🙂
That turned out FANTASTIC! I love it! how creative!
Thanks so much for linking up to http://arttisbeauty.blogspot.com/2013/10/twirl-and-take-bow-link-party.html
Have a BEAUTIFUL day,
Hugs
Karin
I love the chandelier and the beautiful table décor too! Can’t wait to see more pictures of your special day!
This is the best tutorial I have seen. I cannot wait to make one of my own. Thank you so much for sharing at Redoux! I am featuring tomorrow, party goes live at 2:00 PST. 🙂
This is AMAAAAAAAAAAAAAAAAAAAAAAAAAAZING!!!! Mason Jar MARVELOUS!!!! LOVE IT and the crystals…the perfect touch! Hugs…thanks for sharing and of course it shall be featured : )
Katie, this is fantastic! Thank you for sharing. You are one of the features today at the Anything Blue Friday party at The Dedicated House. Pop on over and grab a feature button for your blog. Here is the link to this week’s party. http://thededicatedhouse.blogspot.com/2013/11/anything-blue-friday-week-33.html Hope to see you again at the little blue soiree. Toodles, Kathryn @TheDedicatedHouse
Have been saving two chandy’s for just such a project. Where did u find the crystals.
Absolutely stunning! You certainly thought of every detail from your wedding! WOW– gorgeous! Pinning this for sure!
~Abby =)
BEAUTIFUL!!! That paint color is so gorgeous and this is so quintessentially rustic glam!! Love it.
My husband and I wanted to do something like this for our dining room! I love mason jars, this turned out great. Perfect blue color choice. Thanks for sharing!
Love the chandelier! I have made a similar one for our backyard above the dinning table. Did you keep your chandelier hardwired or did to switch it to a plug in? I’m trying to figure the cheapest way to keep my chandelier a working electrical one and not use led candles. Thanks
What size of mason jars did you use? Thanks!
Hi Shawna,
For this chandelier I used pint size jars, which I link to in the materials list 🙂
Katie
Love It !