UPDATE: All new featured RV tours will be posted on my other website, Wanderful RV Interiors. Existing tours will slowly be moved to the new website, and anything already moved will automatically redirect.
Disclaimer: This post may contain affiliate links, meaning, if you click through and make a purchase we (or those featured in this post) may earn a commission at no additional cost to you. View our full-disclosure here.
I recently picked up a nightstand at the local Goodwill – solid wood with interesting knobs so I was pretty stoked. I have wanted to try out stenciling on furniture for some time now and finally bought a few Martha Stewart stencils at Michael’s a few weeks ago (gotta love their 50% off coupons!).
DIY Stenciled Nightstand
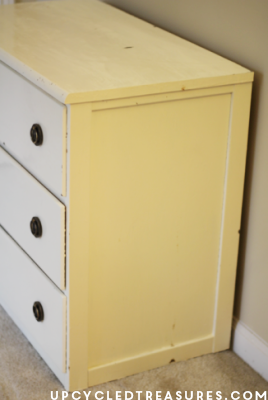
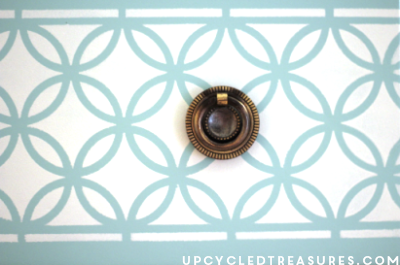
After taking the nightstand home I realized that the knobs are even more interesting than I originally thought – on the back is engraved the following: ” RD. 1964 CAN.3 PAT.NO D206,059″I tried to Google more information on the patent number but the only thing I could find in the Canadian patent library was for an airplane in 1920 which obviously isn’t the same. Regardless, I love finding furniture with history and wondering where it came from or how many other people had it before it found me.
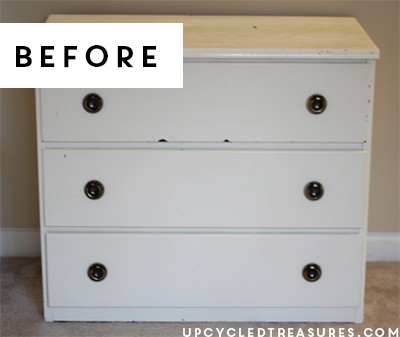
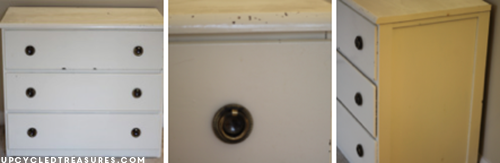
Here are some before photos:
After I sanded the nightstand down lightly to make it smooth, I added 2 coats of homemade chalk paint (3 parts paint + 1 part Plaster of Paris + 1 part HOT water + mixed well = homemade chalk paint!) letting it dry a couple hours between coats. To keep the paint from drying up in between coats I placed the small container of paint into a ziplock bag and made sure it was zipped shut and did the same with the paintbrush. {Update: I now use old spaghetti jars which is soooooooo much better, easier and last longer!} After the 2 coats were dry it was time for the fun part – stenciling!
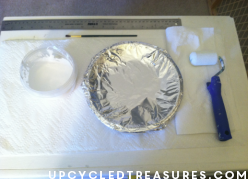
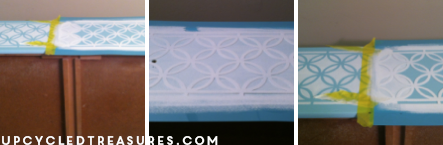
I measured where I wanted the stencil to be and taped it down with frog tape (you can use any painters tape). Then I made a quick batch of white chalk paint and used a Styrofoam roller to apply the paint to the stencil. I put the roller in the paint, then rolled it onto the foiled covered plate and then rolled it onto a paper towel a couple times.
I like to cover a plate with foil when painting because it keeps the paint from drying so quickly and is super easy to clean up, just remove the foil when you are done and toss it in the trash! The trick to painting on a stencil without it bleeding out is making sure the roller is practically dry – you can go over the stencil a few times like this to get the saturation you want. After one side was dry I taped the stencil to the other side and repeated the process. This wasn’t nearly as difficult or messy as I thought it would be – and I LOVE the results.
And here is the stenciled nightstand all completed:
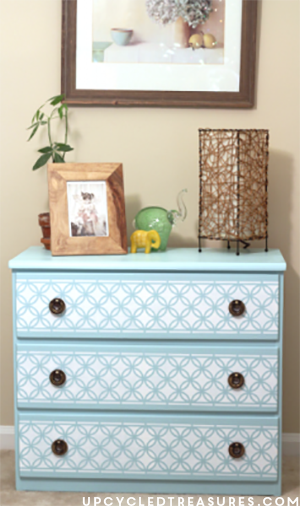
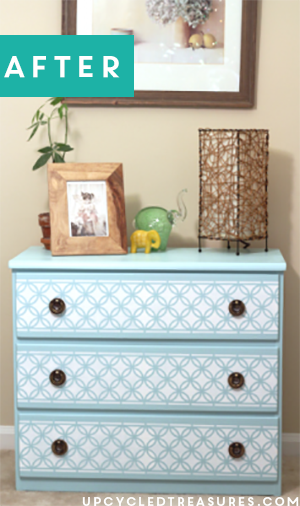
And here is the before and after:
It was a lot of fun and I will definitely be working on more stenciling projects in the future.
Turned out so cute!! Love the colors, too. I might have to try my hand at stenciling, I have been meaning to refinish our nightstands.
Thanks Bethany! This was my first stenciling project and it definitely got me hooked on others. Although I didn’t have issues with the paint bleeding through on this one I did recently come across this post, http://inmyownstyle.com/2011/08/how-to-monogram-a-drawer-with-martha-stewart-decorative-crafts-paints.html, where she recommends using a re-positionable craft glue stick to keep the stencil in place and I’m going to try that out next time. I’d love to see your nightstands when you’re finished!
This is so pretty! You have inspired me to try stenciling. Every time I see a project that has been stenciled I think I won’t be able to do it because it must be difficult or take lots of practice. Your tutorial made me realize I can do it too! Thanks for inspiring me, Michelle
🙂