UPDATE: All new featured RV tours will be posted on my other website, Wanderful RV Interiors. Existing tours will slowly be moved to the new website, and anything already moved will automatically redirect.
Disclaimer: This post may contain affiliate links, meaning, if you click through and make a purchase we (or those featured in this post) may earn a commission at no additional cost to you. View our full-disclosure here.
Whether you’re looking to separate your RV cab area from the rest of your motorhome, or are looking for a simple way to help incorporate it into the rest of the living space, we hope you’ll find this quick tip helpful.
You can also check out the video below:
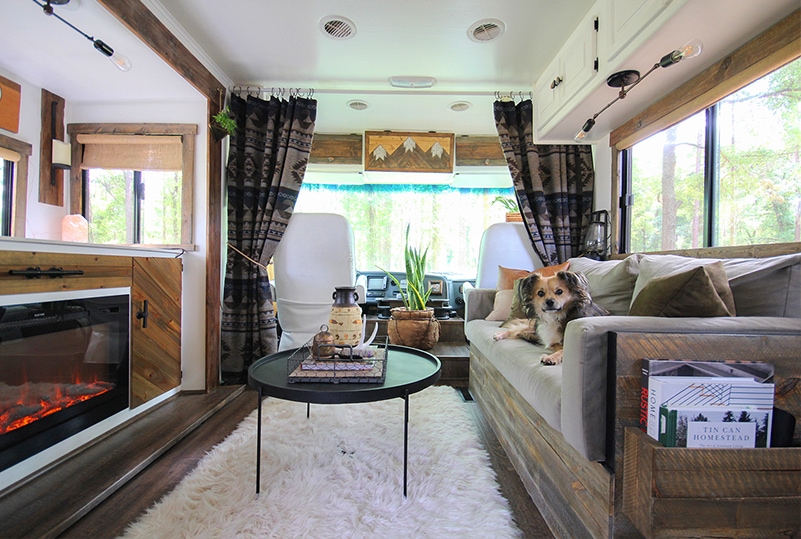
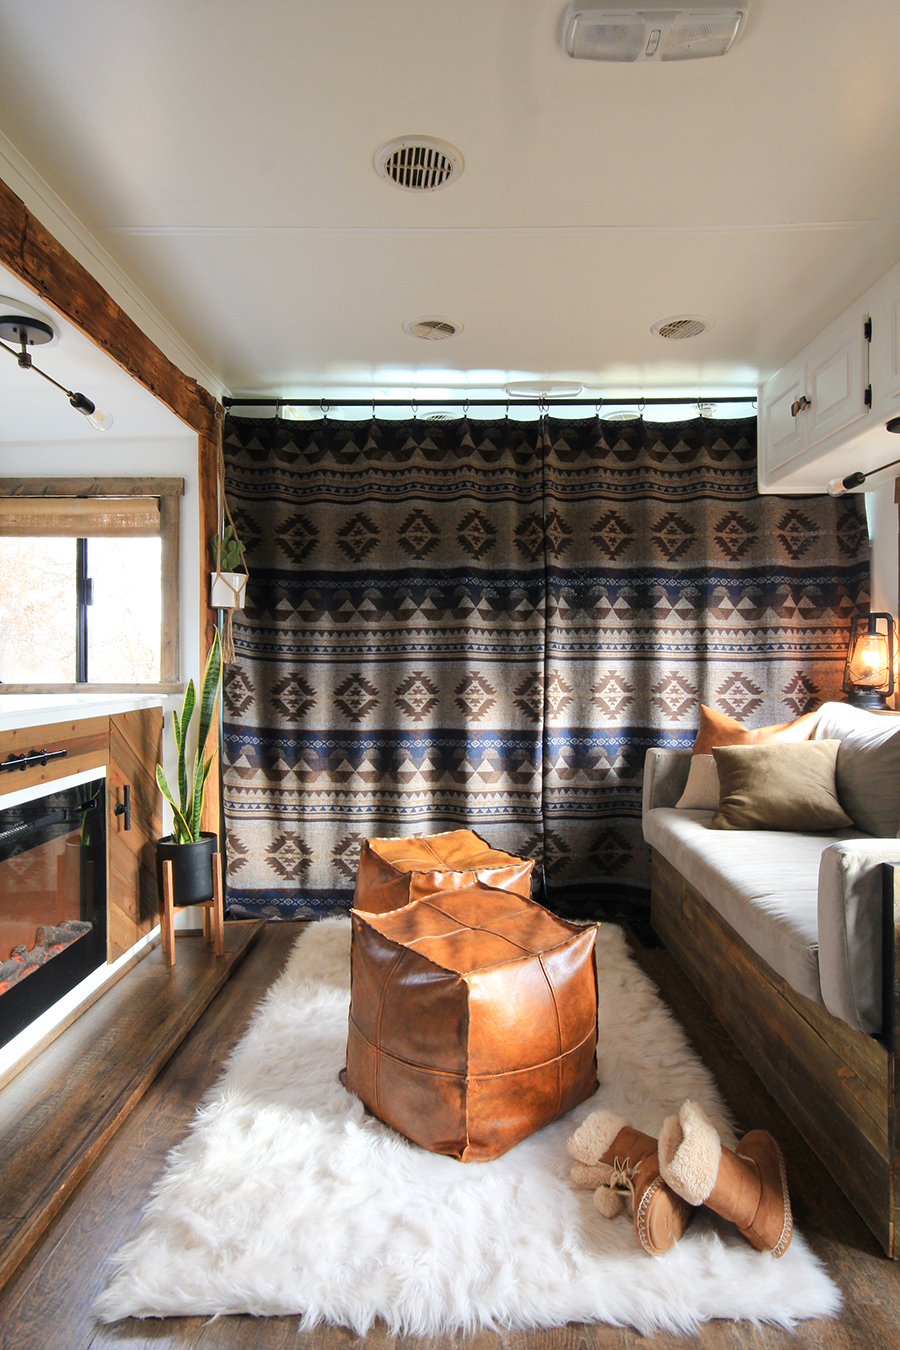
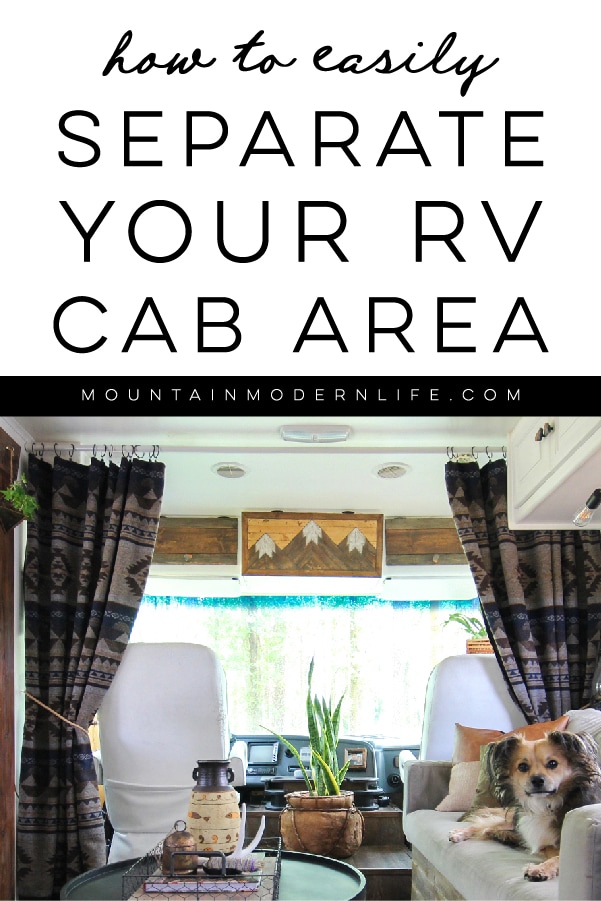
How to separate the RV cab area with curtains
Here are some reasons you may want to separate your RV cab area with curtains:
1. Create a cozier vibe
2. Create privacy or separation
3. Temperature regulation
To be honest, we originally added curtains behind our captain’s chairs because we wanted to create a cozier, home vibe, and also wanted to have the option to close that area off to hide the dashboard.
While our simple curtain solution has helped achieve those goals, there’s one other major benefit we’ve been able to enjoy since adding curtains to separate the cab area…. temperature regulation.
Yup, it turns out that massive windshield does a great job at attracting both hot and cold air, which can make regulating the temperature inside the RV a little more difficult.
And yes, this happens even when our roller shades up front are closed. Our windshield shade has worked awesome but looking back I wish we would have upgraded to a higher quality shade that was thicker or had insulating qualities. We’re thinking about adding some sort of liner in the future but if you’re just now in the beginning process of purchasing new shades for your RV, I definitely recommend getting something more insulated, at least for the windshield.
Thankfully, with the curtains closed off, those temps only linger around the cab area and make it much easier to control the temperature in the rest of our RV.

Here are the supplies you’ll need if you want to follow the same process we used:
- Measuring Tape
- Tension Rod
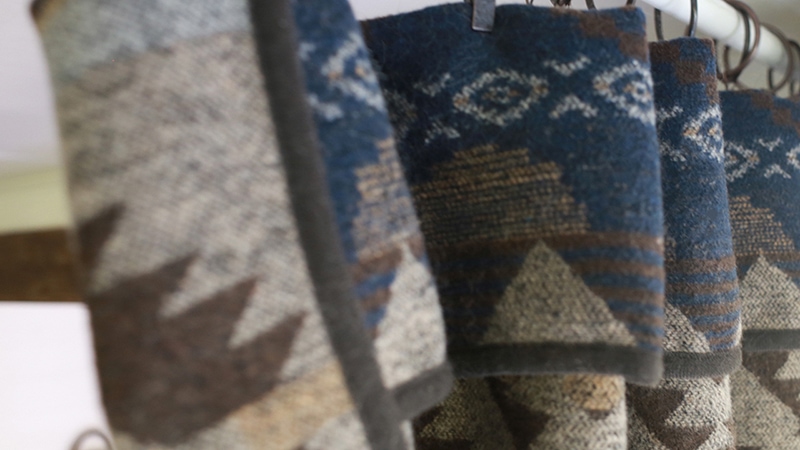
- Curtains (we used these blankets)
- Ring Hooks (optional)
- Tie Backs and Cup Hooks (optional)
Step 1: Measure
Step 2: Add curtains to the tension rod
Step 3: Install
It’s important to measure the width and height for both the tension rod you’ll need and the curtains. Chances are, you’re trying to cover a 6-foot gap, so you want to make sure the tension rod is long enough, and that your curtain panels are wide enough so they close all the way.
We purchased our tension rod off Amazon because I was having trouble finding one large enough nearby at the time, but you may want to look at shower tension rods at your local hardware store. I opted for a white tension rod because I wanted something that would disappear into the ceiling vs. bring attention to how short it is, but you can choose a different finish. (Update: I later spray painted it black and think it feels more intentional, which I think I prefer.)
Tip: Add soft furniture feet pads or velcro to the end caps of the tension rod to better protect the walls of your RV.
Using a tension rod is honestly what made this process sooooooo easy! Not gonna lie, becoming an RV’er has given me a new appreciation for tension rods, and we use them all throughout our tiny home on wheels.
What’s funny is when Eric and I first hit the road nearly 3 years ago, we were so nervous about things falling while we drove that we actually took down the tension rod and curtains every time we drove. I think it was a couple of months before we finally just left it up and have left it up ever since.
Just make sure your tension rod is tight in place and you should be good to go!
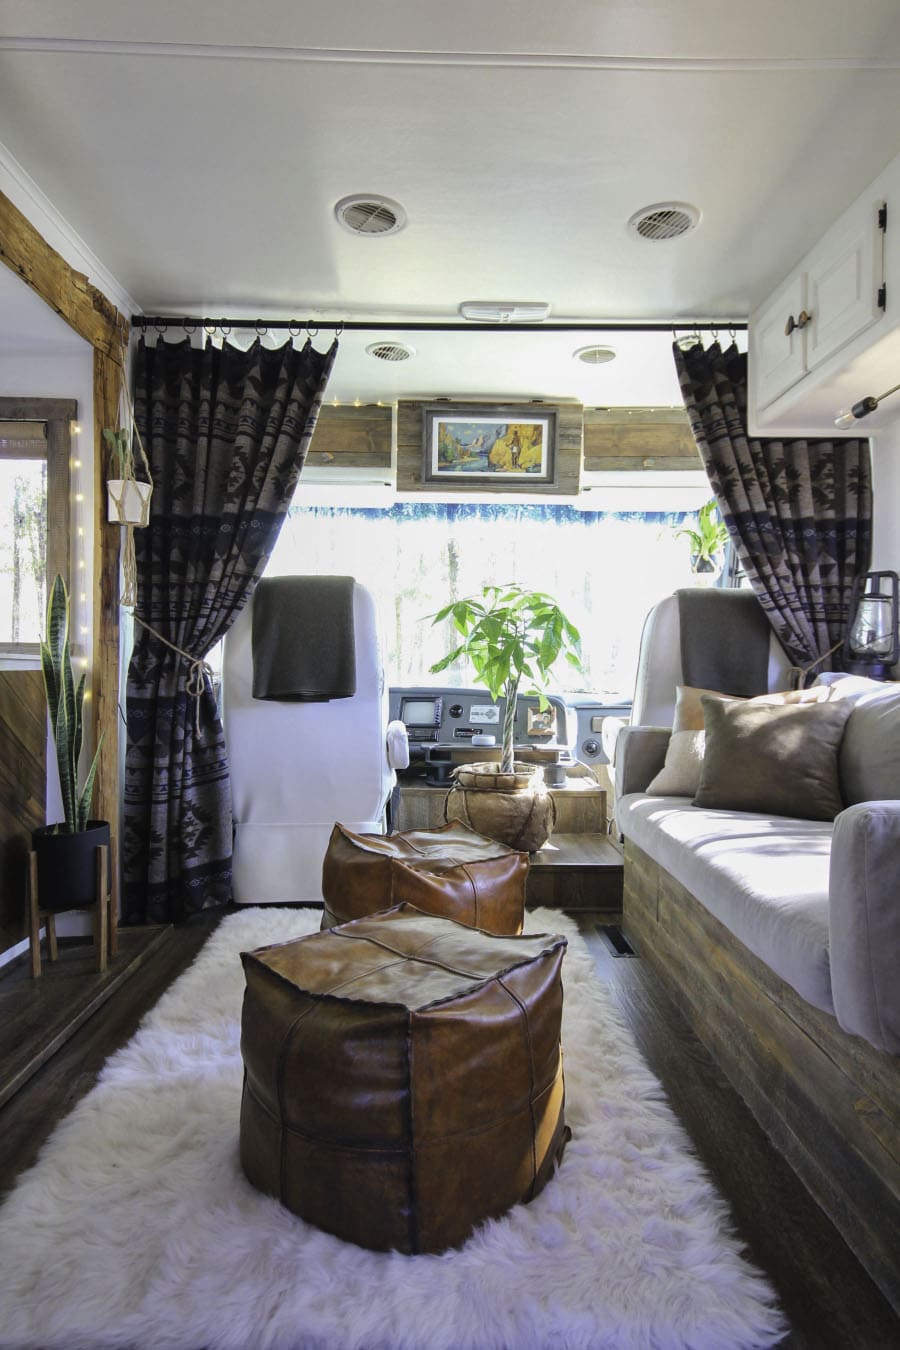
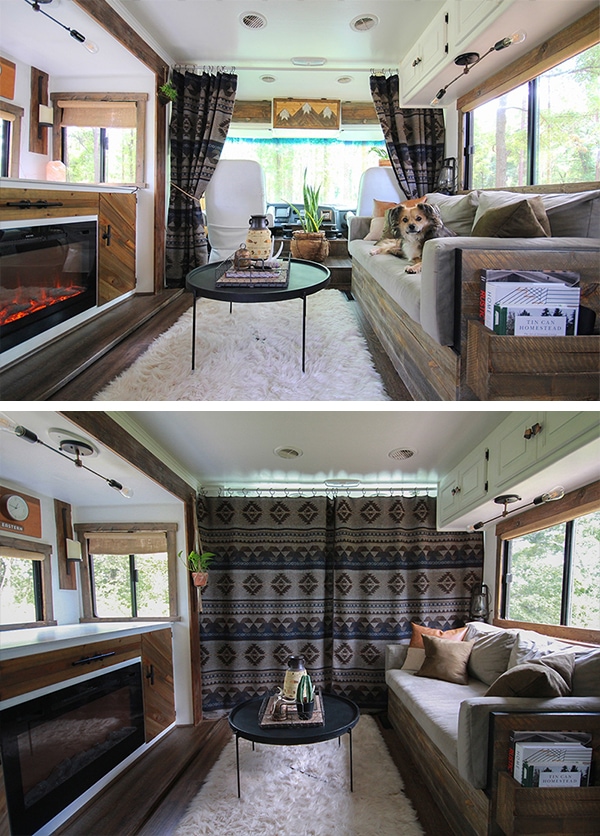
Our (Blanket) Curtains
I get asked about our RV curtains all the time, which are actually just camp blankets. You may notice in our first and second RV Christmas tour, that we used buffalo check curtains my mom made for our previous sticks and bricks home. I love those curtains, especially during the winter, but wanted something else I could use year-round and was really struggling with finding the design I wanted that was also within budget. That’s when I decided to use blankets for our curtains.
These blankets are tall enough, wide enough, and just thick enough to provide extra insulation. Plus I love the design, and if we ever need extra blankets we know where to find them, ha!
If you plan to use anything other than actual curtains, and like me, you don’t want to alter to sew them, then ring hooks can really come in handy.
Our blankets were a tad tall so I just folded the top section over a few inches (I think it’s about 5-6″) which helped keep them from puddling too much on the floor. This also helped them fall a little better since they are kinda heavy.
However, depending on the curtains you purchase, you may not need to use ring hooks.
Tip: If the curtains you find are just a few inches short, adding ring hooks can help give you some added height.
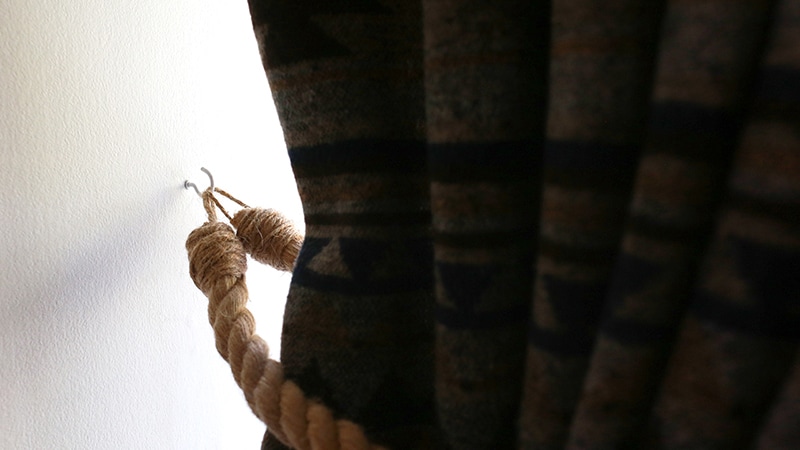
Just like tension rods, I also have a new appreciation for cup hooks. We use them everywhere! They also make it super easy to hold the tiebacks for your curtains if you plan to use some. I grabbed some rope from the craft store and added loops with twine on the ends, but you can buy whatever you prefer.
Tiny Hack, Big Impact
This quick modification may be simple, but it’s made a huge impact on how our space feels. I absolutely love the texture and warmth the curtains add, while at the same time helping us maintain a comfortable temperature in our tiny home on wheels.
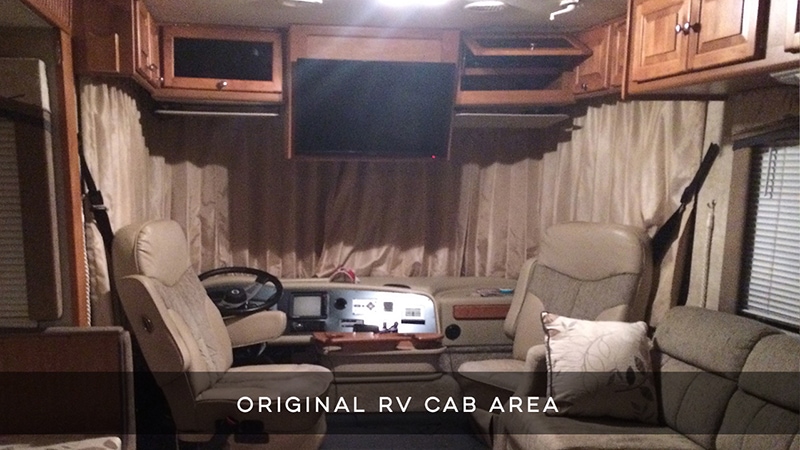
Just for fun, here’s a photo showing the front area of our RV before we renovated it:
Here’s a photo without curtains upfront:

Here’s a photo with the curtains tied back:
And here’s a photo showing what they look like closed off:
Whether you add curtains to your RV for aesthetics, function, or both, we hope you found this simple tip helpful!
And if you’ve used a different method to separate the RV cab area we’d love to hear about it in the comments below!

What a terrific idea! You can’t even tell it’s a motorhome with the curtains closed.
Just ordered my “curtains” for my motorhome-very excited to get them installed.
Thanks for the great idea and instructions!
Awesome! What did you end up going with?
Thanks, Love yalls ideas.
Thank you much! We’re glad they’ve been helpful 🙂