UPDATE: All new featured RV tours will be posted on my other website, Wanderful RV Interiors. Existing tours will slowly be moved to the new website, and anything already moved will automatically redirect.
Disclaimer: This post may contain affiliate links, meaning, if you click through and make a purchase we (or those featured in this post) may earn a commission at no additional cost to you. View our full-disclosure here.
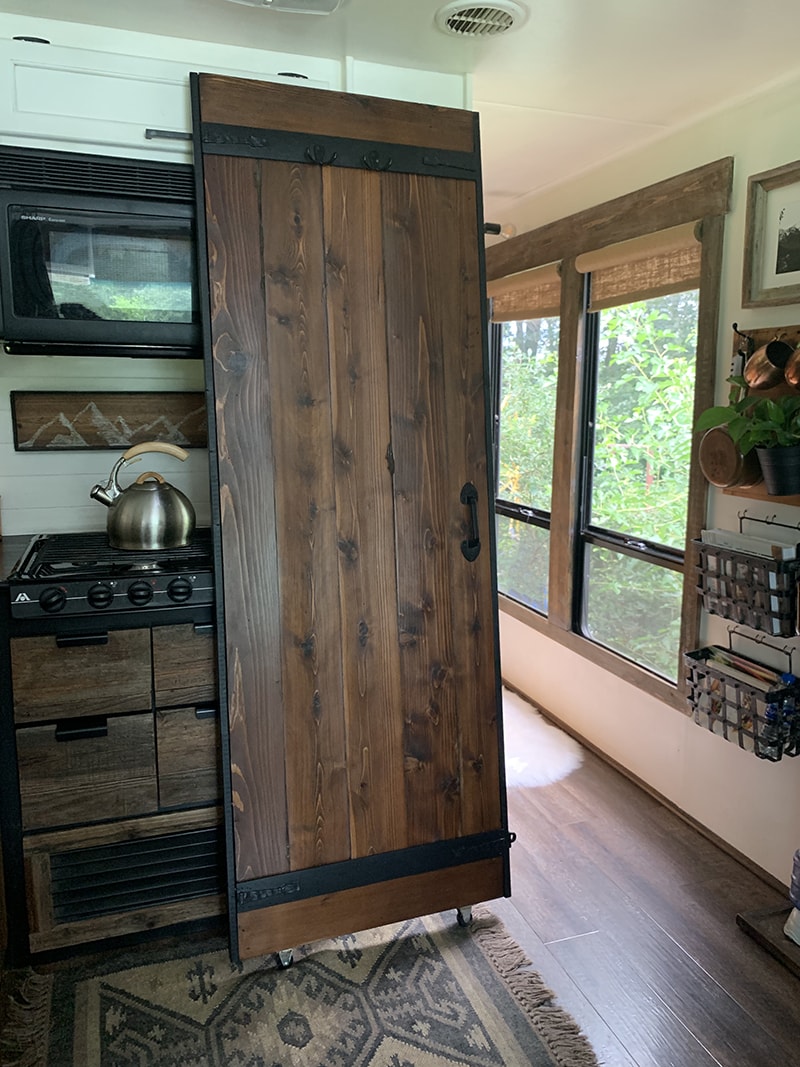
We knew from the beginning of our RV renovation that we wanted to install a lightweight sliding barn door in the bathroom. Our only concern was figuring out the best approach to actually hang it.

While weight generally isn’t a concern in a sticks and bricks home, it’s extremely important during an RV renovation.
This is because an overweight motorhome can create safety issues.
For that reason, we’re always looking for lighter alternatives when it comes to renovation projects in our tiny home on wheels.
Here are the supplies we purchased:
Mini Sliding Barn Door Hardware Kit
How to install a Lightweight Sliding Barn Door in an RV
We originally created our own sliding barn door hardware using copper pipe and flanges. This was mainly because we had most of the supplies on hand and it seemed like a simple, lightweight option. Not to mention, this was several years ago and the average barn door hardware kit was on the heavy side.
Thankfully, barn door kits have become more popular, and therefore more affordable and easier to find. Countless options now exist, in a variety of styles.
We recently replaced our DIY hardware with a professional hardware kit and are thrilled with the results.
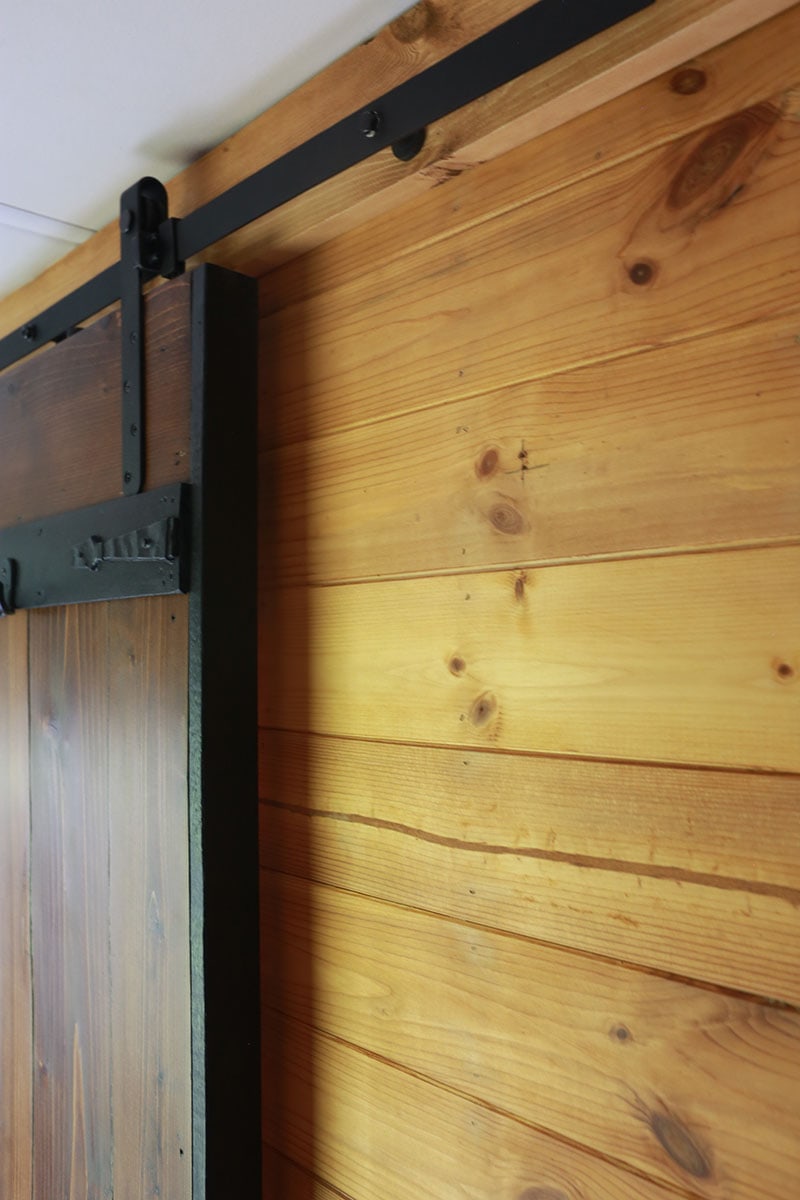
If you’re looking for ways to hang a barn door in your RV, or simply need a lightweight hardware option, we hope the video below will help point you in the right direction. We chose to use a mini sliding barn door kit to save on weight, and show how we installed it, the modifications we had to make, and whether or not we prefer this setup vs. the DIY hardware we previously used.
Do we recommend this hardware kit?
Overall, we love this new hardware kit. It looks great, works great, and cost about the same as our previous DIY setup. If we had to do it all over again, I’d choose the professional kit over the DIY version because it’s much quieter and slides much smoother.
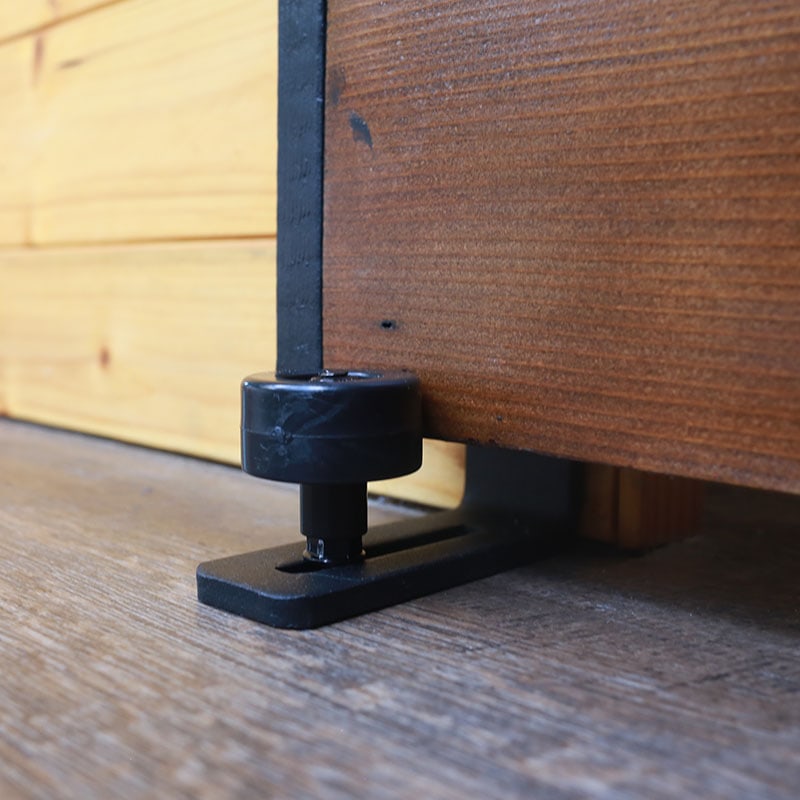
As mentioned in the video, we did end up purchasing a separate floor guide that screws into the wall vs. the floor and definitely recommend going this route. It was super simple to install and, well, we didn’t have to drill a hole into the floor of our RV, which is a bonus.
The specific kit we purchased is meant for lightweight doors or cabinets and had a weight limit of 75 pounds. It’s perfect for an RV because it requires less clearance above the top of the door than standard barn door kits, and weighs less than 5 pounds.
Just be sure to read the specifications for whatever hardware kit you purchase to make sure it will work for your specific situation.
DIY lightweight sliding barn door hardware
Have you installed a sliding barn door in your RV and have any favorite products or methods to share?


Where do I find the directions for the original one with the copper and eye bolts
Woops, I just realized the link at the bottom of the post was incorrect, but have it updated now – here ya go:
https://mountainmodernlife.com/diy-sliding-barn-door-hardware/
Hope that helps 🙂
Katie
Where did you get the actual door? Did you make it or purchase it? And the latch to keep the door open when you travel is really awesome! Where did you find that?
Hi. Do you recommend another hardware kit? The one that’s linked is no longer available? Thanks!
Hey DeVona, I’m sorry the kit we used is no longer available. The one we used was a mini-cabinet door kit, which supported the weight we needed. I’d suggest searching a lightweight sliding barn door kit on Amazon when I did that search it brought up a variety of different options. When looking for the right one for you I’d focus on the length of the pole and the weight it will support to make sure it will fit your needs. Anyway, I hope this helps 🙂
Even in a minor vehicular wreck, wouldn’t that door fly through the RC and kill someone? It looks great and I appreciate the info, but I wonder if it is a huge safety issue?
Great point! That’s why we installed a lock on the bottom, which we use before hitting the road. Definitely don’t want to take any chances and so far we’ve never had an issue, though we considered adding a lock to the top as well.
Love, love, love this RV remodel! My husband and I have a 2002 Phaeton, that we are going to remodel this next spring. I have a taken a lot of ideas from your RV, and I’m planning on incorporating some of them with my ideas. I love the barn door, but we have a pocket door between the kitchen and bathroom, and between the bathroom and bedroom, we have double pocket doors. What type of material would you suggest using for the door itself. I thought about painting to look wood, I’ve also seen wall paper that look like ship-lap. Any ideas would be very appreciated. Thanks, Doris
How exciting and thanks for your kind words 🙂 Do you plan to build your own door or customize the existing hollow pocket doors? If updating the existing doors, wallpaper is a great option and would take less work than building a new door. You may want to test just one side first with removable wallpaper so that it’s easy to change if you don’t like the results. Sometimes trial and error is the best approach for learning what you do and don’t like, but at least removable wallpaper is a budget-friendly solution that can be changed out later. Or you may be able to spruce up the existing hollow door with molding (if there’s space for it) and then paint it. This seems to be one of the easiest and most popular options when it comes to updating the doors inside an RV, and afterward it will look like a brand new door! I’ll link to an example below.
Otherwise, if building a new door you can google how to build a hollow door or I’ll link to a video I recently came across that shows how a couple built a door inside their RV by building a wood frame and then sandwiching hardwood on both sides, along with a custom design.
Here’s a simple example of adding molding to the existing door:
https://blog.jennasuedesign.com/2014/07/master-makeover-diy-plain-to-paneled/
Video from Camp Lovesick on building a door:
https://www.youtube.com/watch?v=f9Nb6uueKzc
Hope that helps 🙂
Katie