UPDATE: All new featured RV tours will be posted on my other website, Wanderful RV Interiors. Existing tours will slowly be moved to the new website, and anything already moved will automatically redirect.
Disclaimer: This post may contain affiliate links, meaning, if you click through and make a purchase we (or those featured in this post) may earn a commission at no additional cost to you. View our full-disclosure here.
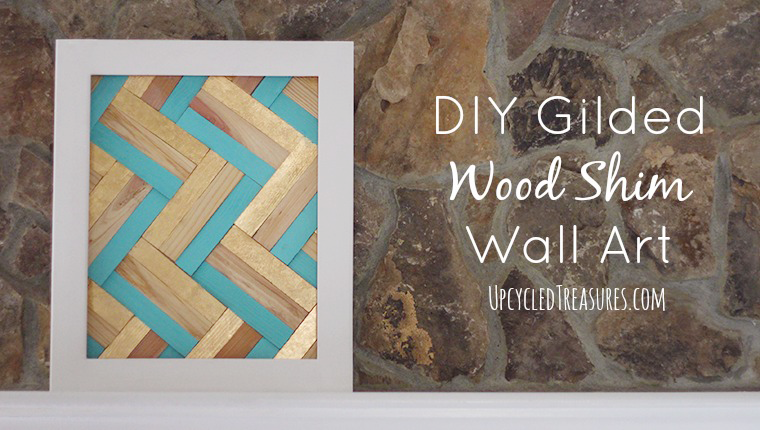
I am a fan of using wood shims in projects and today I am sharing how to create DIY gilded wood shim wall art.
DIY Gilded Wood Shim Wall Art
I made some wood shim art about a year ago and have been itching to make another for quite some time. As you may already know I plan on creating a gallery wall in my office/studio but need more art to add to the mix.
My budget is quite limited so I decided to DIY some wall art using materials I already had on hand. Not only is this project super easy but it can also be customized to match your decor style and colors.
Materials Needed for DIY Gilded Wood Shim Wall Art:
- 2 packs of Wood shims or lath wood – depends on how large or small you want your art
- Gold Leaf Materials {I would actually skip this and go with gold spray paint, see explanation below}
- Plywood
- Scrap Wood for the Frame
- Glue Gun/Glue Sticks
- Paint & Paintbrush/or spray paint
- Jig Saw
- Nail gun/ you could hammer some nails in or use screws
Let me start off by saying that I used gold leaf on 1/3 of my wood shims, but if I was to do this project all over again I would simply spray paint them with gold paint instead or used rub n buff. Sure the gold leaf may add a little extra sparkle but it was much more time consuming and I think the spray paint would have looked great, been easier and less expensive.
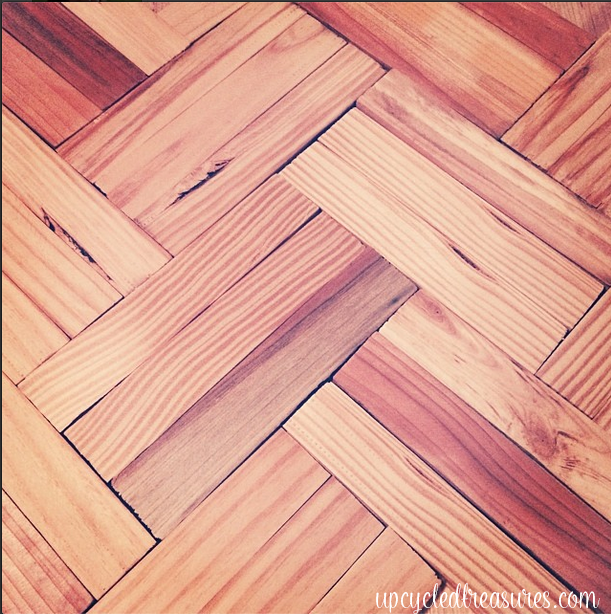
The first thing I did was grab a bunch of wood shims and decide what pattern I wanted and how big I wanted it to be. I actually laid the shims out on some leftover plywood from my giant chalkboard project. You may have seen this photo on Instagram last week:
I didn’t have enough wood shims to double them up, which creates a flat even look as seen in the photo above, but I like the texture and effect of the different widths so that was okay with me.
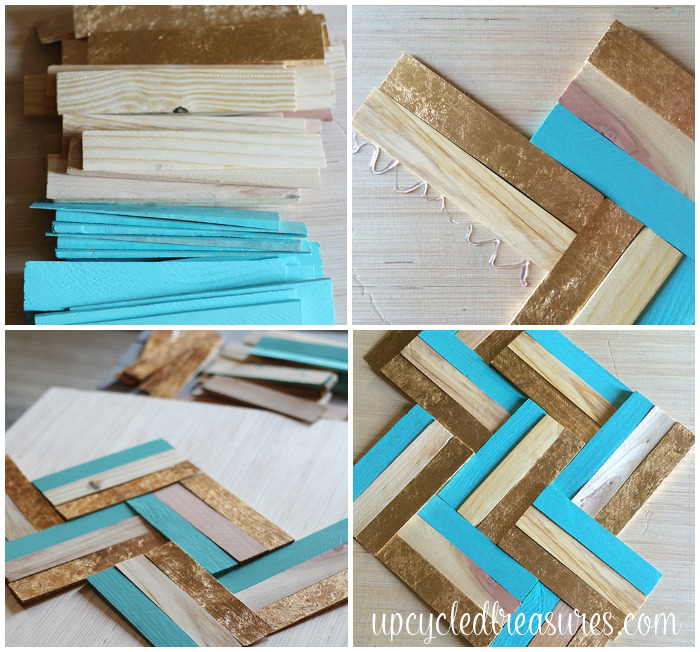
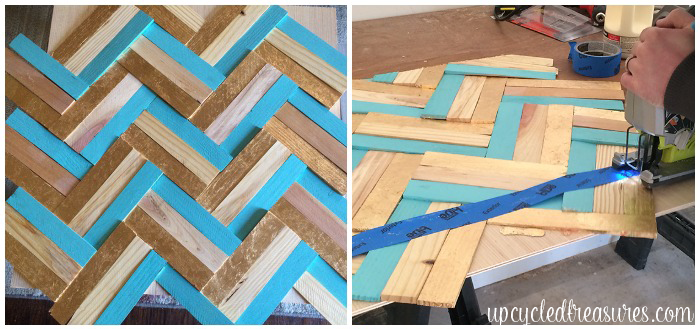
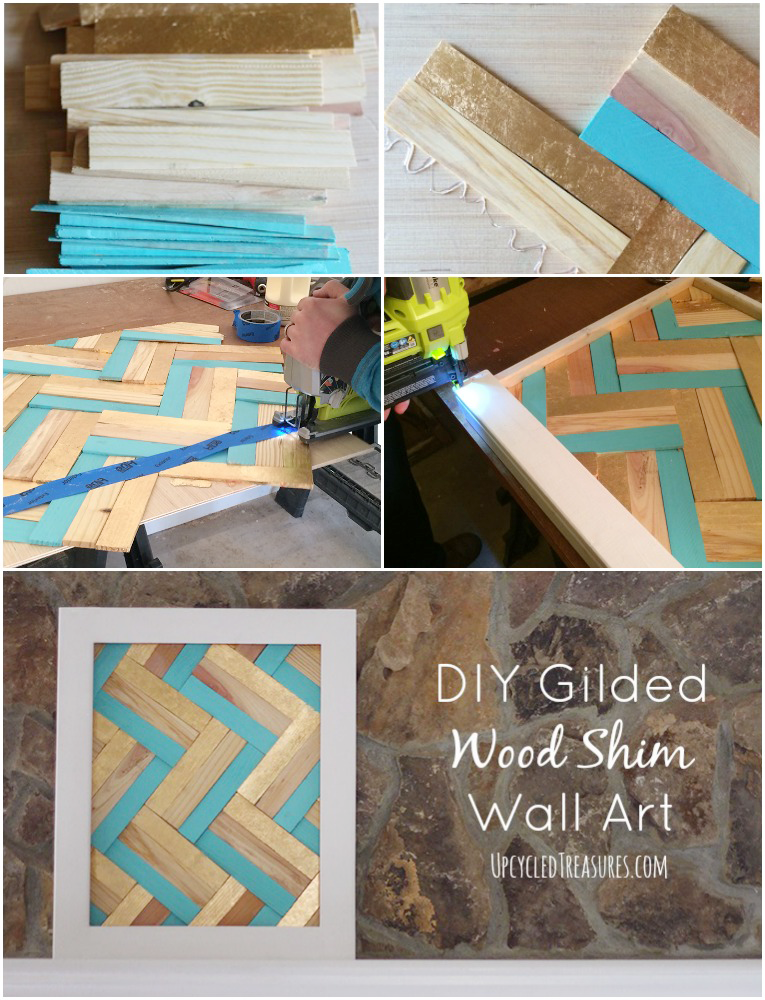
I separated my wood shims into 3 piles knowing I wanted 1/3 to stay natural, 1/3 to be gilded and the other 1/3 to be painted with a custom blue color I mixed. After I lightly sanded and then painted/gilded the wood shims I used my glue gun to attach them to the piece of plywood.
I covered most of the board, knowing that we would go back with the jigsaw to cut the overhanging wood shims and make the edges straight. I made a line with some painters tape and Eric then cut along the edge of the tape to ensure a straight line.
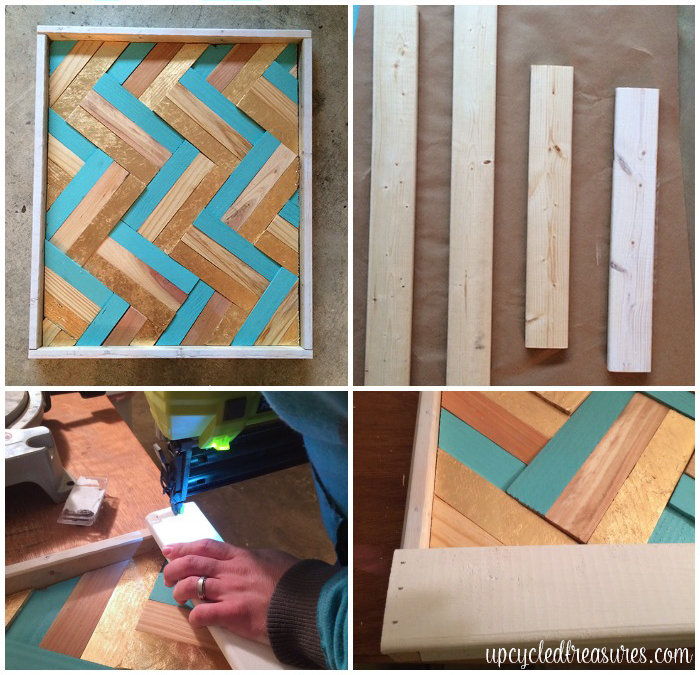
Afterward Eric created a frame using some thin scrap wood that I painted white {which he cut to size}. He then used our Ryobi Airstrike to nail them into place. Once the first frame was nailed into place he nailed some more scrap wood (which I also painted white) on top of the first frame, which basically created a shadowbox effect.
After filling in some of the frame cracks and a bit of touchup painting my DIY gilded wood shim art was all finished, woo-hoo!
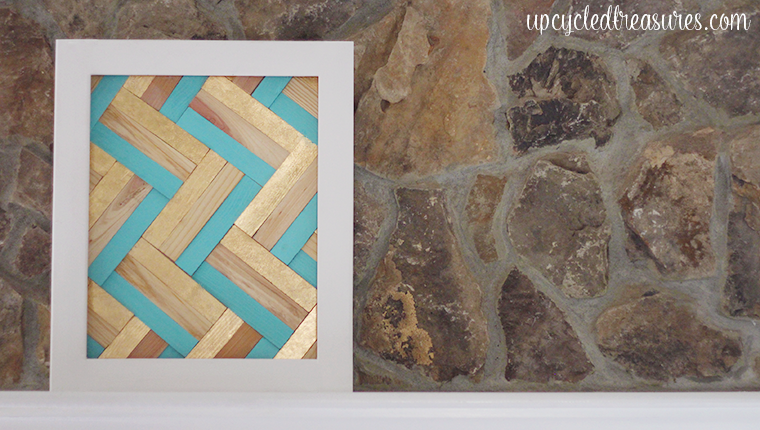
I still have some gallery wall planning to do so I haven’t actually put it up yet, but I will definitely share those photos with you as soon as it is.
I love how it turned out and that I was able to make it using what we had on hand. So what do you think?


Katie, that is gorgeous! I’m sure the gold leafing took forever, but it definitely looks worth the effort! I’m pinning this for later:)
Thanks so much Katie!
O so lovely! These colours look so great together, what a beautiful piece of art you have created.
Thank you Julie 🙂
I love it and need something big for my living room. This would be perfect!
Thanks Carole! I made one for our living room last year and love how easy it was to make. I didn’t have to build a frame for that one either since I used one I bought.
Beautiful! I’ve been shy of trying anything gilded because it looks so delicate and finicky. But, this is just such a pretty piece you may have just convinced me to give it a try.
I bought a bunch of gold leafing materials a couple months ago but this was actually my first attempt using it and it was so much easier than I anticipated. I bought a gold leaf pen and rub n buff at the same time and think either of those would have been easier and less messy for this project though 🙂 I definitely recommend giving it a try and would love to see what you come up with!
Awesome use of wood shims. I like the effect with the different colors.
Thanks Audra!
Great job on this Katie! I’m thinking of doing something similar for my office. Thanks for the inspiration!
Oooh I can’t wait to see what you end up making!
This is absolutely beautiful. You have just inspired me. I have a whole bunch of shims in my car (why, I don’t know).
This is such a great project! A suggestion: they make this stuff called liquid gilding. It goes on like paint, has the gorgeous metallic shine of gold leaf, and is pretty inexpensive. I’ve seen it in bronze, gold, rose gold, copper, and silver. It would save you time and still give the same look. 🙂
Hi Brittany! Is that the same as rub n buff or the liquid gold leaf pen? I had both of those on hand but decided to use gold leafing as my first attempt. Looking back I definitely would have gone with something else to achieve a similar look with less time 🙂 Thanks for the tip!
It’s similar to the liquid gold leaf pen, but easier because you paint it on just like any regular paint! I personally like Martha Stewart’s liquid gilding products, but I know other companies make it as well (and probably for cheaper). The only issue is that it has a really strong smell, so it’s best to work with it outside.
This is so cool! I love the touch of blue color that goes through it! Thanks for sharing today at our Twirl and Take a Bow party! Hope to see you again next week!
Thanks Trina, that’s one of the colors I have popping all over my office and it makes me happy every time I look at it 🙂 Thanks for stopping by!
Love this project. Can you believe that I’ve never used wood shims? I need to get on that!
Oh my gosh I can only imagine the things you would come up with using wood shims!
This is so beautiful! I want to try it and can’t wait! I definitely need to get some shims. Thanks for sharing at the HIT ME WITH YOUR BEST SHOT linky! I’m glad I clicked on your link!
Thanks Teri! I love how easy wood shims are to work with and you could even cut them at angles to create something more interesting. Can’t wait to see what you make!
This is so cool! I love art like this and if its gilded, then its icing on the cake!
Thanks Jenna, I couldn’t agree with you more 🙂
Love this project! Now I have some inspiration for what to do with the zillions of wood shims I have in my basement. 🙂 Pinning!
Thanks Erin I can’t wait to see what projects you come up with!
Very creative. I love making my own wall art.
This is BEAUTIFUL, Katie. Love the simple color palette <3
Thanks Amy! The gold actually stands out more in person than it does in the photo and it makes me feel like my office will actually be completed….someday 🙂
This is totally so cool.You are really coming up with some great projects, so creative lady!! I could almost see putting glass over the top and becoming a serving tray, too!
Funny you mention that because when Eric and I were trying to decide what scrap wood to use as a frame we had considered some poplar wood but then the frame stuck out too far and looked like a tray to me, lol. Of course it wouldn’t be functional at that point because it would be uneven, but using glass to make it even would be a genius idea! I like where your head’s at 🙂
Wow! That looks like a lot of work, but look at how fabulous it turned out/11 You go girl!
🙂
“hugs” Crystelle
Crystelle Boutique
Have a very terrific weekend!!
Thanks Crystelle!
Very nice! I love the pattern and the touch of gold 🙂
This is great! I’d love to make something like this! I really love those colors together!
Wow…alot of work but well worth it..its gorgeous!
lovin the colors!
Absolutely gorgeous! I love the gold, wood, and turquoise together. You are so good!
Thanks Alexis! I don’t think I’ll ever get tired of turquoise, it’s such a happy color!
This is so awesome–love it!