UPDATE: All new featured RV tours will be posted on my other website, Wanderful RV Interiors. Existing tours will slowly be moved to the new website, and anything already moved will automatically redirect.
Disclaimer: This post may contain affiliate links, meaning, if you click through and make a purchase we (or those featured in this post) may earn a commission at no additional cost to you. View our full-disclosure here.
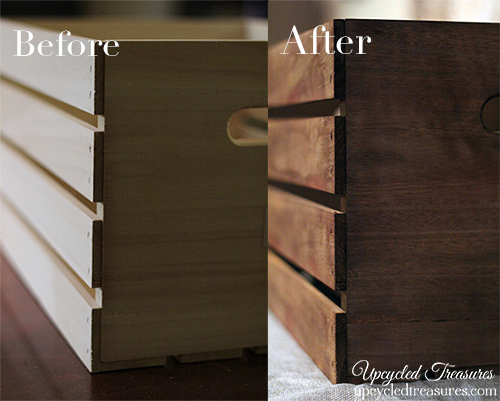
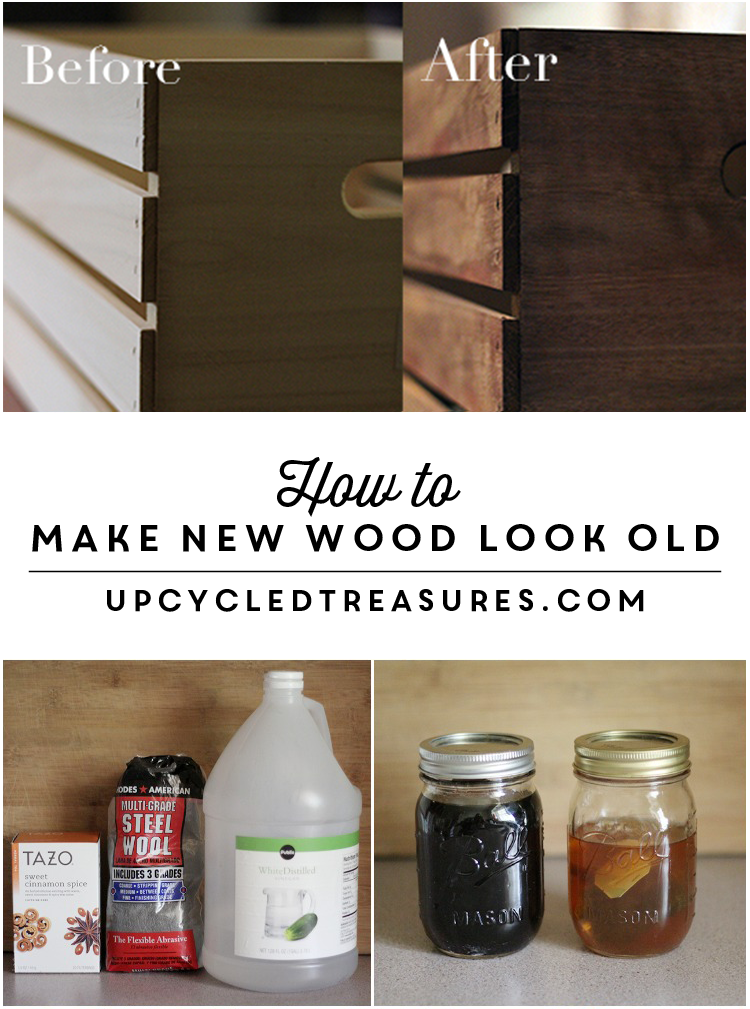
How to Make New Wood Look Old
Today I am sharing how to make new wood look old. This homemade vinegar/tea stain is one of my absolute favorite ways to “stain” wood and it’s great for making newer wood appear aged and weathered. It’s also a non-toxic homemade stain that’s super easy to use and doesn’t cost much to make. In fact, you may already have everything you need on hand!
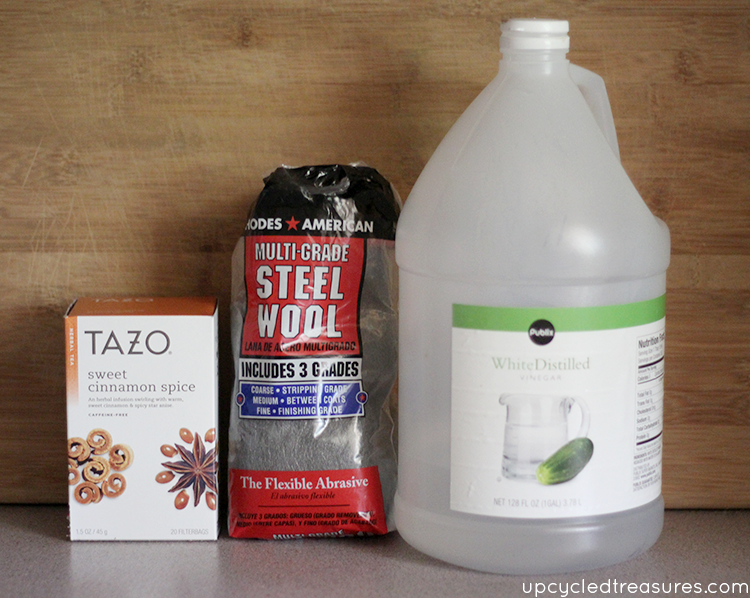

Materials Needed to Make New Wood Look Old:
- Vinegar – Apple Cider or White Distilled will work
- Steel Wool FYI: I’ve heard SOS pads don’t work so well
- Tea Bags + hot water to make tea
- 2 Jars/containers with lids – buckets will work too
- Paint brush or rag – or an old T-Shirt
- Gloves
- Coffee Grounds – optional
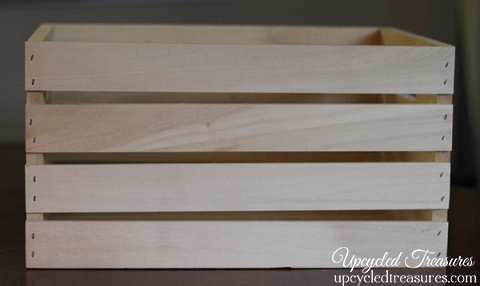
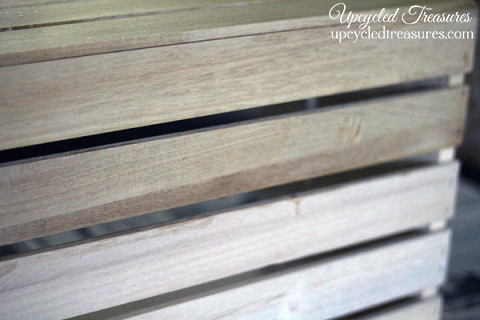
Here is a before photo of an unfinished wood crate before I decided to make new wood look old.
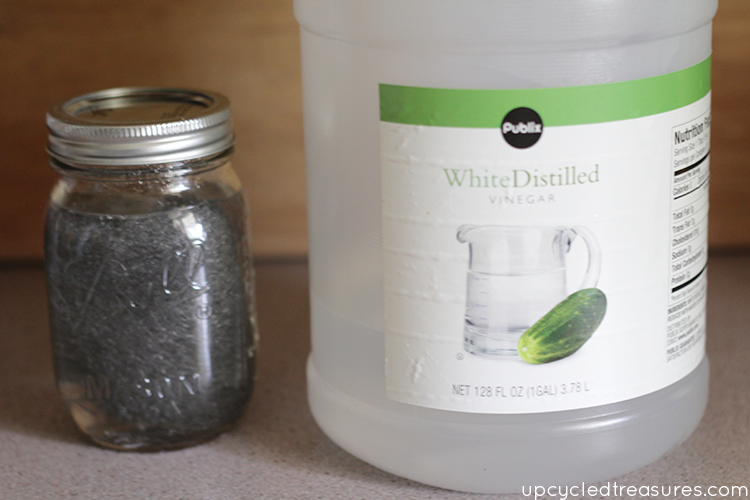
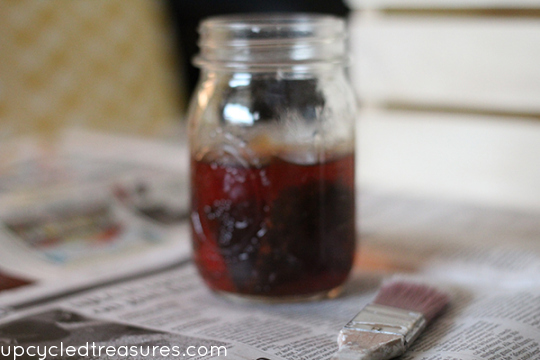
Step 1:Mix the Steel wool with vinegar and let sit for a minimum of 24 hours
You don’t need a whole piece, 1/3 to 1/2 of a whole piece will work but I just throw a whole piece in a jar and then fill it up with vinegar. I have seen posts where people only waited a couple of hours and others where they waited days, but most people have suggested to let the mixture sit for at least 24 hours. I was too busy looking up venues and cakes and dresses to pay attention and mine sat for about 4 days for this specific project. I did notice the color was rusty brown after 24 hours and even muddier by the time I used it. I have let the mixture sit for a day and other times a few weeks before using it to make new wood look old.
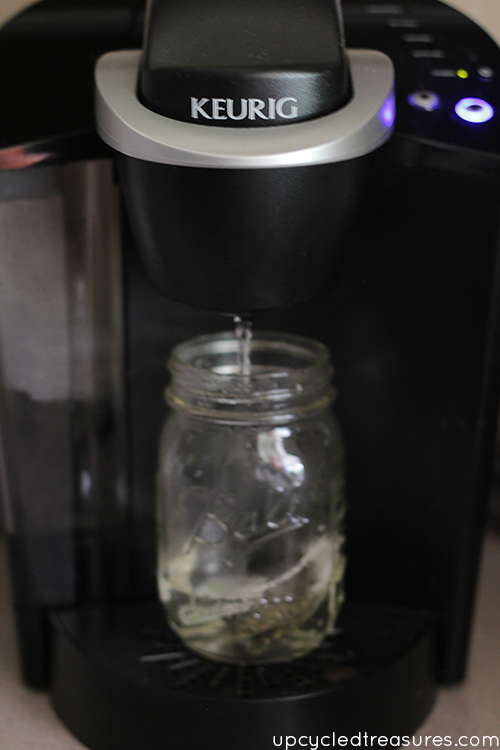
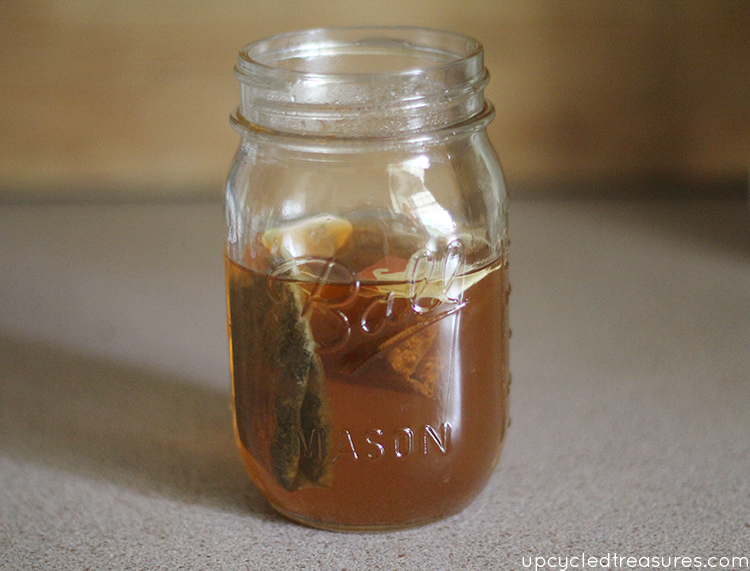
Step 2: Brew some tea
After the steel wool has set for 24 hours and you are ready to “stain” your project, you can brew some tea in a separate jar – any kind will do. I kept mine in a mason jar and I used 2 bags of black chai tea for these specific crates, which was more than enough. You can brew more if you plan on “staining” a lot more wood. I have used tea that sat out for longer than a day and some that only sat for about 10 minutes, it worked fine regardless. I like to use my Keurig to brew the tea, and if you want to add coffee grounds to the mix {which will make it darker and also help with the vinegar smell} you can just put a couple of tablespoons in the jar, or keep one of the Keurig coffee filters in the machine and let it brew that on top of the tea. This way it strains the grounds and you don’t have to wipe them off the wood later, but either way works.
Keep in mind that the type of tea you use can can vary the color of the wood, so have fun and experiment. Here is the chai black tea I used on these crates:
This is some green tea and cinnamon tea mixed together:
And this is what some tea and coffee mixed together looks like

Step 3: “Paint” your wood with the tea mixture
Now that you have 2 separate jars, one with steel wool/vinegar and the other with tea, you can paint your wood with the tea mixture using a brush (or rag). You will want to let the tea completely dry to make the new wood look old before continuing to the next step – this generally takes about 30 minutes to an hour. The photo below shows the top after I painted on the tea mixture. It did get lighter after it dried though. This stuff really does stain the wood so try to avoid any drip marks.
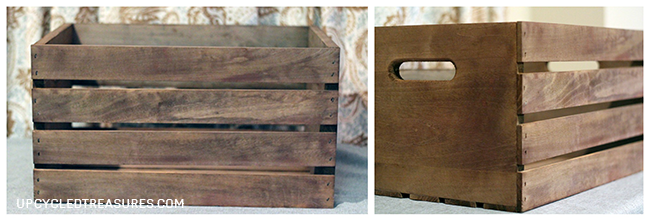
Step 4: “Paint” on your steel wool/vinegar mixture and let it dry
Apparently the acid in the tea mixed with the steel wool/vinegar mixture works some magic. It may smell like vinegar but mine actually wasn’t too bad and the smell went away after it dried, although you could always rinse it off. The good news is you will immediately see a difference which is awesome and very satisfying. {FYI: I have also used the vinegar/steel wool mixture first, followed by the tea and it worked just as well}
Step 5: Seal your wood.
At this point, you can protect the stain using wax or some sort of sealer like polyurethane or polyacrylic. I didn’t stain these crates because I didn’t mind if they got banged up, since I wanted them to look old and weathered, but have sealed all furniture pieces and frames I’ve used this on. It adds a bit of sheen and makes it look oh-so-pretty.
That’s it! Enjoy your new, “old” piece of wood!
One thing I would suggest is making sure you put down a newspaper or a drop cloth or do this in an area you don’t mind getting dirty. The steel wool/vinegar stain is actually pretty dark and I didn’t realize it may splatter and stain something. You may also want to wear gloves so it doesn’t get all over your hands, although washing your hands about 10 times will get rid of it. Ha.
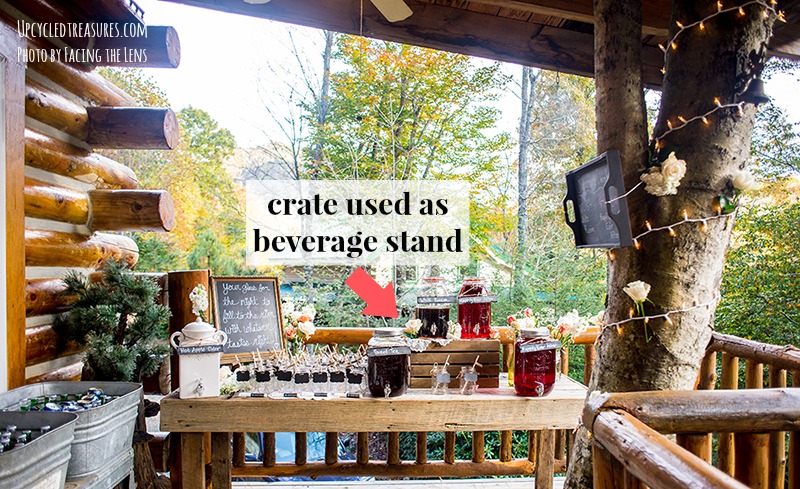
I actually ended up whitewashing these crates right before our wedding just to make them look a bit more weathered. I basically painted on a mixture of 50% white paint and 50% water, let it sit for about a minute and then wiped it off with a rag. Here is a photo of one set up during the reception:
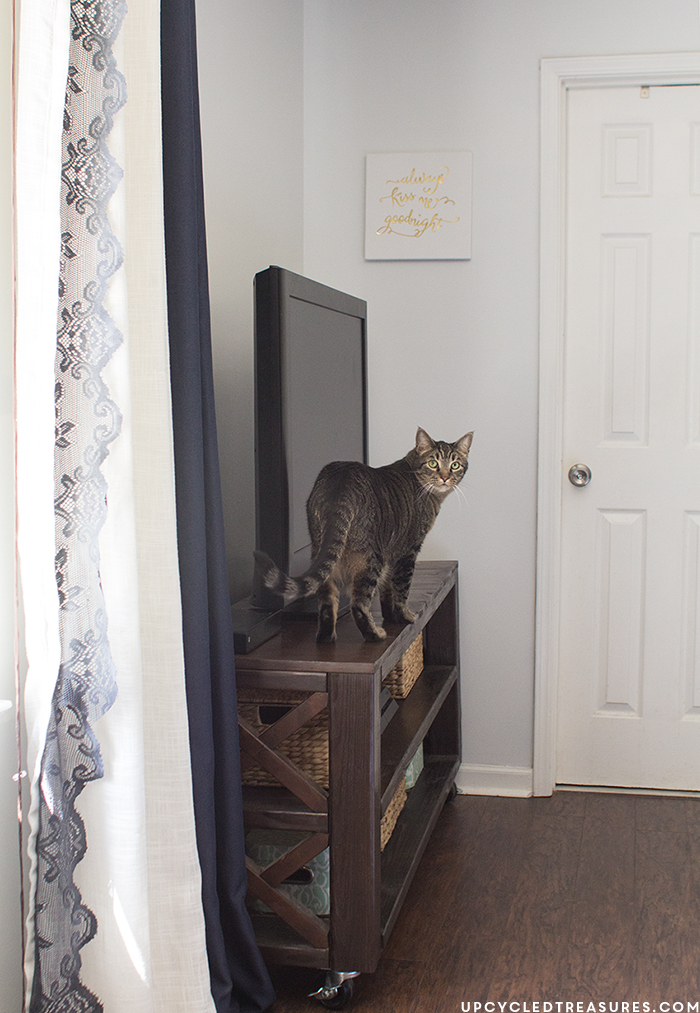
We have used this DIY stain to make new wood look old on too many projects to count, including our rustic media stand, dining table, and wood frames on our gallery wall.

Updated Notes based on previous reader questions: I used 2 tea bags for this specific project {one probably would have been fine} and the type of tea doesn’t matter either, although different teas and woods can have a variation in color. I used black chai tea on this project and it smelled sooooo good but have also used green teas, lavender tea, basic lipton tea, etc. Again, the type of tea and type of wood can make the “stain” color vary.
Distilled Vinegar vs. Apple Cider Vinegar and why isn’t the color changing?
Although I used apple cider vinegar on this specific project, I have also tried it many times using distilled vinegar. The first time I used distilled vinegar I left the steel wool in the jar for 8 days since the color in the jar still hadn’t changed, and was as clear as day {which is why I just kept letting it sit}. However, as soon as I took off the lid the steel wool started to disintegrate. Then when I stirred it the jar became dark and the mixture still worked perfectly. So letting the mixture get some air had a reaction which then made the color show.
So yes, both apple cider vinegar and distilled white vinegar have worked for me. I have also heard that balsamic vinegar will work but may have a greenish tint.
As for the amount of steel wool, on this project I used about a third of one piece, but I honestly prefer to make this stuff in large batches now since I use it so often. So I will generally throw one steel wool in a jar, old {clean} takeout containers {Chinese soup containers are the best!}, or large yogurt container and then fill the rest up with vinegar. Anything with a lid will do to store it for later use. I don’t store the tea/coffee since I just make that right before, but you can.
Adding Coffee Grounds to Make New Wood Look Old
I pretty much always add coffee grounds to the tea mixture to darken it up even more, plus it helps cover up the vinegar smell a bit. You may be left with some coffee grounds on the wood but can just wipe it off. Make sure to wipe off the grounds right away though, otherwise, you will be left with spots afterward. Of course, the coffee grounds are not necessary and I didn’t use any on the wood crates in this post.
I have even thrown both the vinegar/steel wool and tea/coffee grounds mixture into a plastic bin when I stained some wooden easels that we used at our wedding, and some picnic baskets. I also put the mixture in the sink when I stained our wedding wands, and I cleaned the sink afterwards with no “stain” left behind. Although the mixture worked just as good when combined {which makes it easy to stain oddly shaped projects}, I find that on furniture it’s more consistent if you “paint” on one mixture followed by the other vs. using them as a combined mixture.
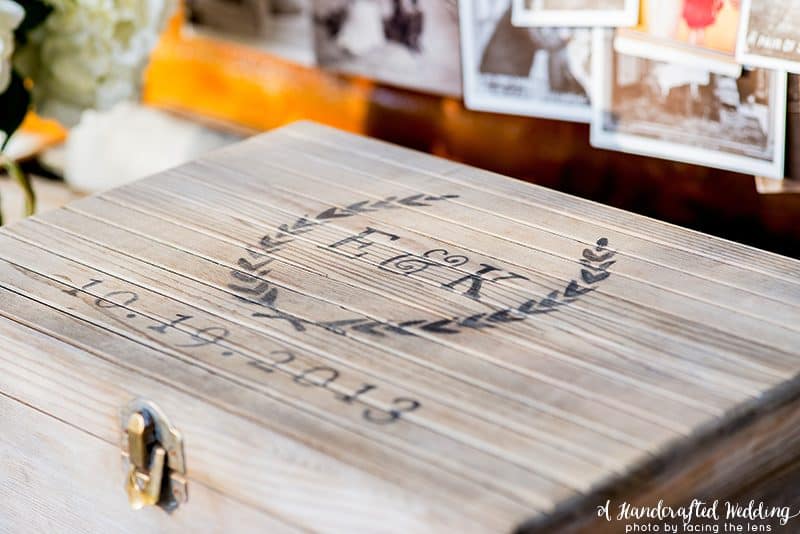
I have used this stain on so many projects I can’t even keep count, like my rustic industrial desk, wedding chair signs, wedding wands, easels, picnic baskets, frames, keepsake boxes etc. It has worked every time and I love the results! My favorite thing to do is to add a whitewash on top of the stain to create an even more aged effect.
Have you used this DIY stain to make new wood look old before and how did you like it? Be sure to read even more helpful tips in the comments!

Looking to make metal rust? Check out our video below:
You can also check out this post on how to make metal rust in less than 10 minutes.
hi katie, i love non-toxic wood finish recipes! and LOVE your desk with that rug! =)
I love this idea! I can’t wait to give it a try. =]
I tried this recently after making a wooden crate (had to buy new ones) coffee table and sealed it with a beeswax/olive oil paste wax and I’m SO pleased with the results! I did this in the middle of a cold midwestern winter so no fumes was a definite plus.
Thanks so much for sharing this!
I’m using this technique on some new yardsticks I purchased to vintage them up a bit!
Hello!
I tryed to do this at home but the steel wool and vinegar mixture did not change any color. I don’t know why. Please help me!?
– Finnish girl
Hi Madeleine,
Do you mean it’s not changing color in the jar? If that’s the case I would remove the lid and stir it around a bit and you should see the color start to change. I noticed this was the case when I used white distilled vinegar vs. the apple cider vinegar. Hope this helps 🙂
~Katie
I can’t wait to try this! But I realized I bought steel wool with the soap already on it. Are these still going to work?
Hi Laura,
To be honest, I’ve never used the kind that has soap in it. You could always test it on a small piece of wood first, but I don’t know if having soap in the “stain” is a good idea. If you do test it out, let me know how it goes 🙂
Thanks!
Katie
I have used this method. I even used an old crock pot to get a deeper brown with the steel wool and vinegar. I also mixed vinegar and food coloring to get different effects.
What kind of coffee grounds can I use? Could it be instant coffee? Or does it need to be used coffee grounds? I’ve seen on a different website to use used coffee grounds. But, that’s a little tricky for me.. As I do not use a coffee machine.
Hi Sheree,
I’ve used coffee brewed in the Keurig and also just some straight out of a tin can. I think instant coffee would have the same effect 🙂
~Katie
Would u get the same results using apple cider vinegar??
I make handmade pens and am going to try to use this to antique up some of my woods. Thanks for sharing.
I know that this is quite an old post, but I figured I could reach out via comments and see if I could get an answer 🙂
In the how to and in the pics you mention regular distilled vinegar, but then in the “updated notes” you discuss acv vs regular distilled vinegar, and you say that you used acv in this particular project.
But then, reading through, I’m getting the idea that it doesn’t really matter which I’d use?
I have a good amount of crates and wood to stain, I Guess I will probably just stain one and see how that one goes.
Thanks so much for the post and the suggestions!
Hi Margaret,
Yes, I’ve used both on several projects. The first time I made the stain I used apple cider vinegar and you could see the color changing inside the jar, and getting darker over time. The second time I used distilled white vinegar and the color didn’t change inside the jar for days. It wasn’t until I removed the lid and stirred it around that the color began to change. I wanted to mention using both since I was receiving lots of questions and some people were confused when they didn’t see the color changing in the jar, even after a week had passed.
So either one will get the job done. Hope that helps 🙂
~Katie
I am doing a bunch of shipping crates as well! I just started my steel wool jars today and didn’t have a lot of acv so I used what I had then topped the jars off with distilled vinegar. Then (because I was feeling a little spicy) I added a few drops of balsamic vinegar to each…who knows what effect that will have haha! I’m curious to see how ours all turn out! I will most likely wait a few days before starting, unless I get antsy tomorrow afternoon and get going!
So I couldn’t wait any longer and I tried this today. First and foremost…WEAR GLOVES. Secondly, I definitely think you need to keep the steel wool vinegar mixture sitting much much much longer. It never got cloudy in these 4 days even after stirring. I followed the directions and I painted all 8 of my crates with the tea. This hardly changed the color at all. Then I realized it would be a reaction with the vinegar solution after applying that. I let the crates dry, then luckily only tested 1 crate. Painted the steel wool mixture on and I now have a gross, grey, moldy looking crate. I pulled up some other sites that have used this method and decided to pull apart the steel wool to help with the degradation and left the vinegar/steel wool solution to sit longer. I guess I will try again in 4-5 days. On another site it showed the steel wool solution after 4 days using pulled apart wool and white vinegar and it was brown and muddy. She also added water to her solution before painting it on the wood. I may try that if this doesn’t work out. A little disappointed. PS–I repeat…WEAR GLOVES
What type of steel wool did you use? I have a jar with steel wool from home depot and Heinz vinegar that’s sat for over 60 days no color change. HELP?
I recently set out to clean the rust off from some chrome bicycle parts and bought steel wool and vinegar and soaked the parts on the vinegar and took some #0000 steel wool to the parts and worked it just like I was sanding a piece of wood except there is no grain to follow, just rub willy nilly to remove the rust. Btw, it works really well on removing rust from all of the parts, not just the chrome. And when you are done, the chrome parts look new with no scratch marks of any kind. The point is that there were several times when I would take a break to go cool off (I live in Texas where it is hot ALL of the time) and after an hour or so, come back and the steel wool would already be covered with rust. If you leave on sit out overnight, it will just be a clump composed almost entirely of rust. My guess is that exposing the steel wool to the combination of water, vinegar, and air made it rust very quickly. It’s an idea that is worth a try. Good Luck
A hundred years ago there used to be a show on :PBS called The Furniture Guys and every week they would take on a new project i.e. upholstery, building something, whatever. One week they showed how to make the vinegar stain but they, instead of using steel wool, used rusty nails and bolts and nuts, whatever you had around the house that was rusty. Just put the nuts and bolts in a jar, say a quart jar, and pour just enough vinegar over them to cover them about a half inch up. Let it sit for a few hours, dump out all of the hardware and then, take a little bit of your concentrate and cut it with water about 4 to 1. You can keep the rest somewhere to use whenever you need it. It will make a BUNCH of stain. One drawback though, this stain only works on certain woods, usually hardwoods, oak, ash and I don’t know what others. Your way, I guess, works on all kinds of wood, which makes it more versatile but it’s always nice to have one more trick in the bag, right? I will remember the tea bag trick. That will come in very handy.
https://www.youtube.com/watch?v=eyF_ulsznlU
https://www.youtube.com/watch?v=zyisHz4XgZw
https://www.google.com/search?q=pictures+of+walnuts+with+husk+still+on&biw=1093&bih=506&tbm=isch&imgil=ogV-lrRFBJBtRM%253A%253BG7KbAGk7GNfwXM%253Bhttp%25253A%25252F%25252Fwww.wildmanstevebrill.com%25252FPlants.Folder%25252FBlackWalnut.html&source=iu&pf=m&fir=ogV-lrRFBJBtRM%253A%252CG7KbAGk7GNfwXM%252C_&usg=__RXyRswrqj8MTrAsHoTabBml4NSs%3D&ved=0CDMQyjdqFQoTCOmEzYCUhMcCFYPTgAodb50Jqw&ei=Ese6VemzA4OngwTvuqbYCg#imgrc=ogV-lrRFBJBtRM%3A&usg=__RXyRswrqj8MTrAsHoTabBml4NSs%3D
I don’t know if any of this will help or not but I have put the links to a couple of videos I found on youtube here. The first one shows several different types of wood and several different types of aging attempts and you can see what each one did to each type of wood. The second one shows a guy with some old wood making it look even older but mentions how it could be used to make new wood look old.
I don’t know what your experience has been in your live but when I was a kid we used to around to different farms in Iowa, where I grew up, and, with the farmers’ permission, pick up walnuts off the ground and take them home and husk them and then crack them open for the walnut meat. The walnut husks would be in varying stages of decomposition, some were already brown and mushy and some were still green. When you handled the brown ones it would stain your hands terribly and it would take a week or more to get that all off of your skin. I have never tried this but always thought that it would work. I wanted to take some walnut husks and if they weren’t already brown and mushy, let them stand in some kind of container until they reached that stage and then make some sort of paste out of them and rub it or brush it on some wood, let it dry for a while and then rub it off with a cloth or perhaps some paint or laquer thinner and see what the effect was. Like I said, I haven’t tried it but I am guessing that you could make your own stain. It might be a weaker version of what you buy in a store but that could be a good thing, depending on what project you were working on and, in its original form like that, it may even be water soluble. If it does what I think it would do, that would accomplish what you were talking about in your comment. I guess the big question is; where do you find walnuts in your area that haven’t already been husked? Another thing a person could try is putting some tempura paint powder in the mix along with your black tea and coffee grounds, just a thought. I hope one or more of these will be of some help to you.
I’ve had my vinegar/steel wool mix going for a few days and haven’t noticed a single change. I’ve opened and stirred it a few times but it looks the same as when I poured it in. Is there any way to speed this up and/or tell if it’s even working? Should I have a lid on the mason jar im using (I currently do)?
Just tried your mix and love love love it! I let my wool and vinegar sit about four days in the kitchen window, then used Lipton’ tea and left over coffe grounds brewed it in my coffee pot got a wonderful dark color, gave her try and……LOVED it!
Thanks for sharing!
That’s awesome! It’s funny but it still amazes me every time I use this staining method 🙂
I’ve noticed several people on here are having the same problem that I am with their steel wool mixture not changing. I’m wondering if the fact that I bought stainless steel wool instead of regular steel wool is the issue? I’m assuming it’s more difficult to break down. Has anyone else used the stainless steel wool?
Hi Lori,
Did you read the section of the post about the color not changing inside the jar? This tends to happen with distilled vinegar, but basically once you remove the lid and stir it up, you should see it start to change. Hope that helps 🙂
Katie
Lori Barker- you’re right- Stainless steel wool does NOT work the same as regular steel wool does in this project :). I know some of the comments are a month old and older, but to those of you who had problems with the vinegar mixture: make sure your steel wool is NOT in fact, stainless! Hope that saves somebody the time of waiting for something to happen when it’s not going to!
And, Thanks for all the great ideas!
I am wondering how this will work on a new piece of furniture that has a polyurethane stain on it. Do I have to sand the furniture first? It seems that the pieces you are staining are raw wood with no preexisting shiny poly coat on it. Thanx!
Hi Ursula,
I’ve never tried this on pre-finished wood, but would think that the sealer would repel the stain mixture, as most sealers do. You may need to sand the piece down first. Probably not what you want to hear, but hope that helps. Let me know how it goes.
Thanks!
Katie
How does this work on Maple and Walnut
Good morning please could you help. I did my vinegar/steel wool mig ture last year 4ltr vinegar and 1 packet of steel wool (l saw it on another post) it changed my wood to the old grey effect.
I have just made the mixture last week and it’s been sitting for 4/5 days now and it’s making my wood yellow not grey.
What have l done wrong please ?
Thank you
Claire
Hi Claire,
I’m not sure what’s causing this but it could be the wood you’re using, or the tea. Did you add the tea or coffee to the wood as well?
Katie
So I realize this post is older, however I just stumbled onto it looking for keepsake box plans. So I’m the WORST when it comes to remembering to put on gloves before I stain. Every time I tell myself, “Oh its a simple project, I’ll just keep it on the rag/brush!” 5 mins in I get sloppy and end up with dark stained hands. You’d think I’d learn, but nope. I did learn how to get it off pretty quickly when you don’t have special soaps/mineral spirits around. Magic Eraser + Dawn. Yup. That’s it. But it works like magic to get even nasty oil stains off my hands. Just thought I’d share incase you find yourself with a hole in a glove or something. 🙂
We’re remodeling our house and my husband is making some of our tables out of wood from our 100 year old barn. We’ve stained some of them..thry look awesone. I want to try your stain recipe on,the rest. Just curious…what is the steel wool for? Can’t wait to see how they turn out. Thanks for all your great ideas
I’ve used this method many times and always gotten amazing results. I place a whole piece of #0000 Steel Wool in a large spaghetti jar and fill 3/4 way full of regular white vinegar. Then in an old pickle jar I place 3 “Earl Grey” Black tea – bags in the bottom of the jar and then fill 3/4 way full of boiling water.
After 4 to 6 hours my jar of steel wool looks like nothing has happened. but believe me it has. (it does not matter if it looks like a different color to be effective- I have done this for years and have never had a color change) I spread out an old tarp on the floor of our work shed and place the piece I am staining on top. I then sand each piece to the desired smoothness I am looking for. If I want a really worn look I rough up the wood in random places using nails, hammer or chain before beginning my stain.
I put on a pair of rubber gloves and depending on the size of the piece I am staining I will use either a brush or a clean white rag (old cut up t shirts) – NOTE: Make sure you have a separate brush and rag for each jar, if you mix while in the jar it will change the reaction and not turn out as well, and it keeps you from being able to use the solutions again on a later project. Pour in a different jar or bucket if need be.
I paint on the tea solution first, I soak it completely top to bottom as even as possible but since it goes on clear just make sure all the pieces are wet completely, then let dry 20 minutes. I then apply a second coat and wait another 20 minutes. Then I apply the vinegar solution the same way, soaking each piece completely, because the tannin in the tea immediately begins to react by turning black you will need to be a little more thorough with your application making sure all pieces are covered. Don’t worry the black is only temporary and will fade as it dries. I typically wait 20 minutes and depending on what effect I am going for I will apply a second coat for a darker look or just stick with one coat for a lighter look.
Don’t worry if its not perfect, you can always sand the piece to even out darker areas if need be. I hope this helps 🙂
I’m having so much trouble with this. We are making a large frame out of a pallet. I made up the mixture using apple cider vinegar and steel wool. The color really did not change after three days. I then put some on a piece of wood and it turned a grey color. My goal was to try and turn the wood a dark rust color. I tried adding cinnamon and cloves to the mixture and also some rusty nails….everything but the kitchen sink, right…lol However that also did give me the color I’m am looking for. I did do the tea on the wood first…just made no difference. I am going for the color that you are showing on your crates…what the heck…need help!!
I believe I used black and chai tea on these crates, but a lot of it depends on the type of wood and the type of tea/coffee stain you’re using, and sometimes experimenting is the only way to get the look you want. This video may help since it shows the stain color effect on different woods:
https://www.youtube.com/watch?feature=player_embedded&v=eyF_ulsznlU
Would this work on a deck outdoors? Or would this be strictly for indoors?
Absolutely, I would just recommend using a clear protective sealer on top to protect it from eventually rotting.
After using this staining process, instead of whitewash, could you do a color. We are painting a barn door and want it to look old but have some color to it as well, (yellow or red) Could I paint and sand the color down in spots? Or would your recommend doing the whitewash (50% color 50% water)? Thanks!!
You can definitely use a whitewash, or dilute your paint color. I like to dry brush paint on and then sand areas off after. Sometimes I’ll do multiple layers to get the look I want, it’s really just a process and there’s no right or wrong way. Experiment with it and have fun!