UPDATE: All new featured RV tours will be posted on my other website, Wanderful RV Interiors. Existing tours will slowly be moved to the new website, and anything already moved will automatically redirect.
Disclaimer: This post may contain affiliate links, meaning, if you click through and make a purchase we (or those featured in this post) may earn a commission at no additional cost to you. View our full-disclosure here.
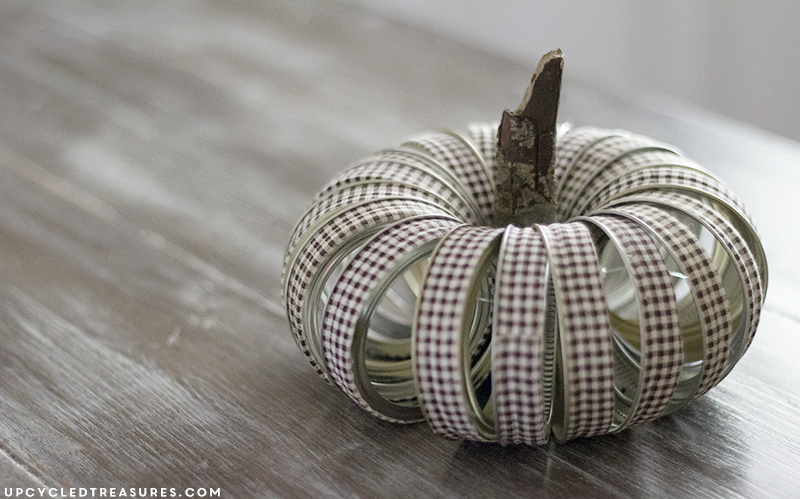
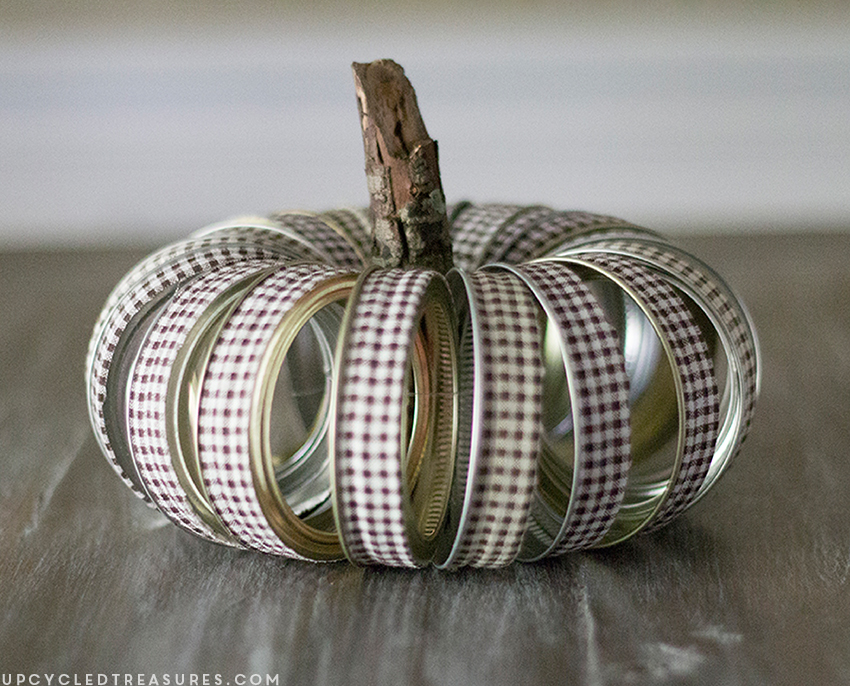
Last year one of my favorite fall projects, just so happened to be the easiest. You may recall seeing my little fabric pumpkins I shared here. I originally had 2 types of fabric tape pumpkins shared in that post, but decided to break that post up into two, so here is the tutorial on how to create a rustic mason jar lid pumpkin using fabric tape.
I had a large ziplock bag full of mason jar lids leftover from our wedding that I had been hoarding holding onto for just the right project. I love all of the mason jar lid pumpkins out there and wanted to make my own, but thought it would be fun to add some of the fabric tape to the outside of the lids first. Nothing like a rustic, plaid style mason jar lid pumpkin to welcome fall, right?

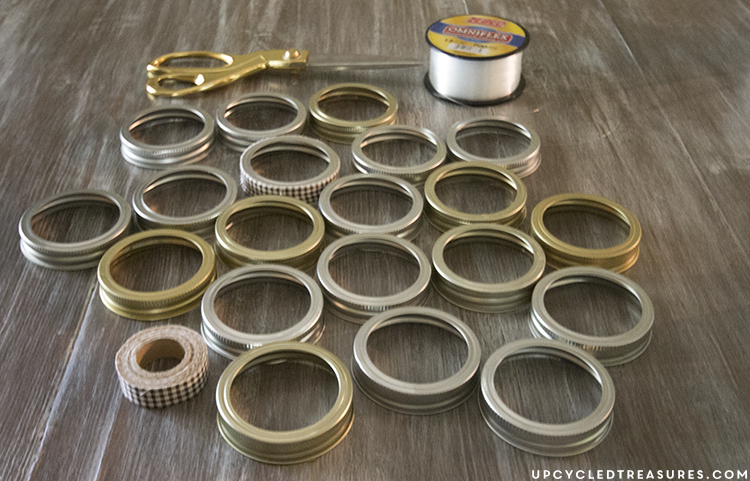
- Fabric Tape
- Mason Jar Lids – I used 19
- Fishing Line/wine/String/Yarn– even floss would work!
- Scissors
- Stick (for the stem)
How to Make a Rustic Mason Jar Lid Pumpkin
Where to find Fabric Tape?
The brown gingham fabric tape I used in this post came in a 3 pack I purchased from Michael’s with a coupon, but I found the same gingham pattern, only in black available on Amazon. Of course, you can always make your own using fabric scraps and double-sided tape.
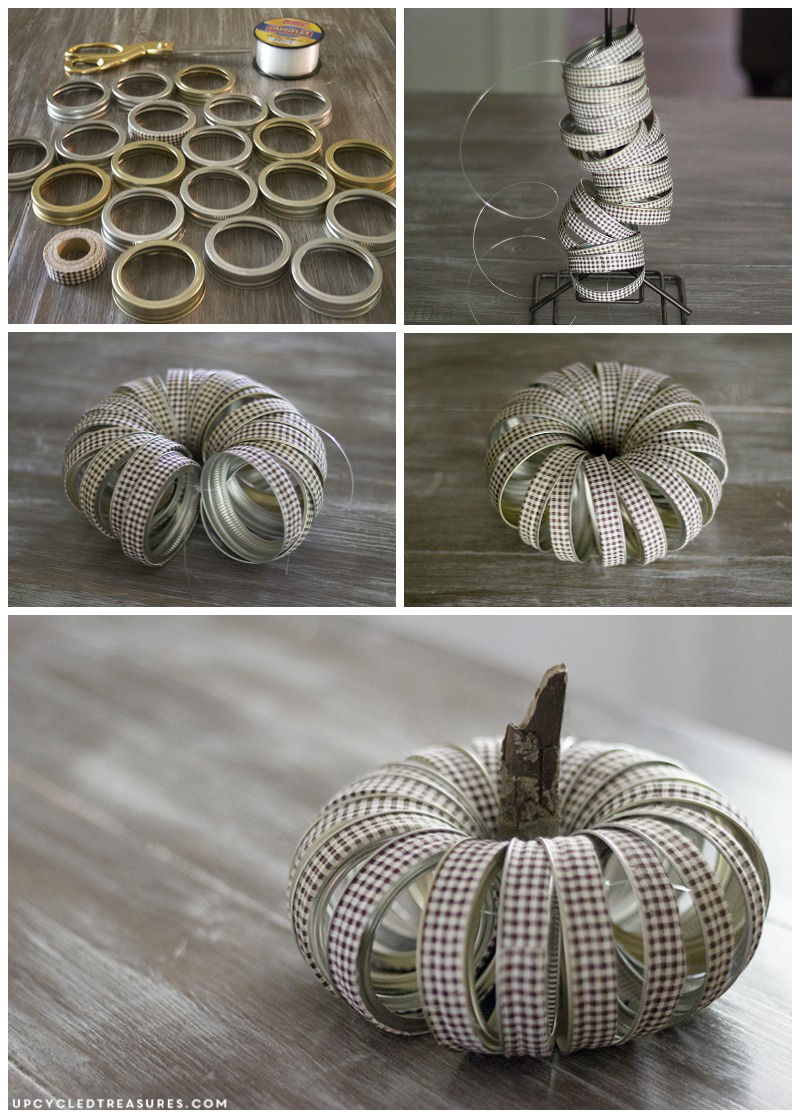
Step 1: Gather up Your Supplies
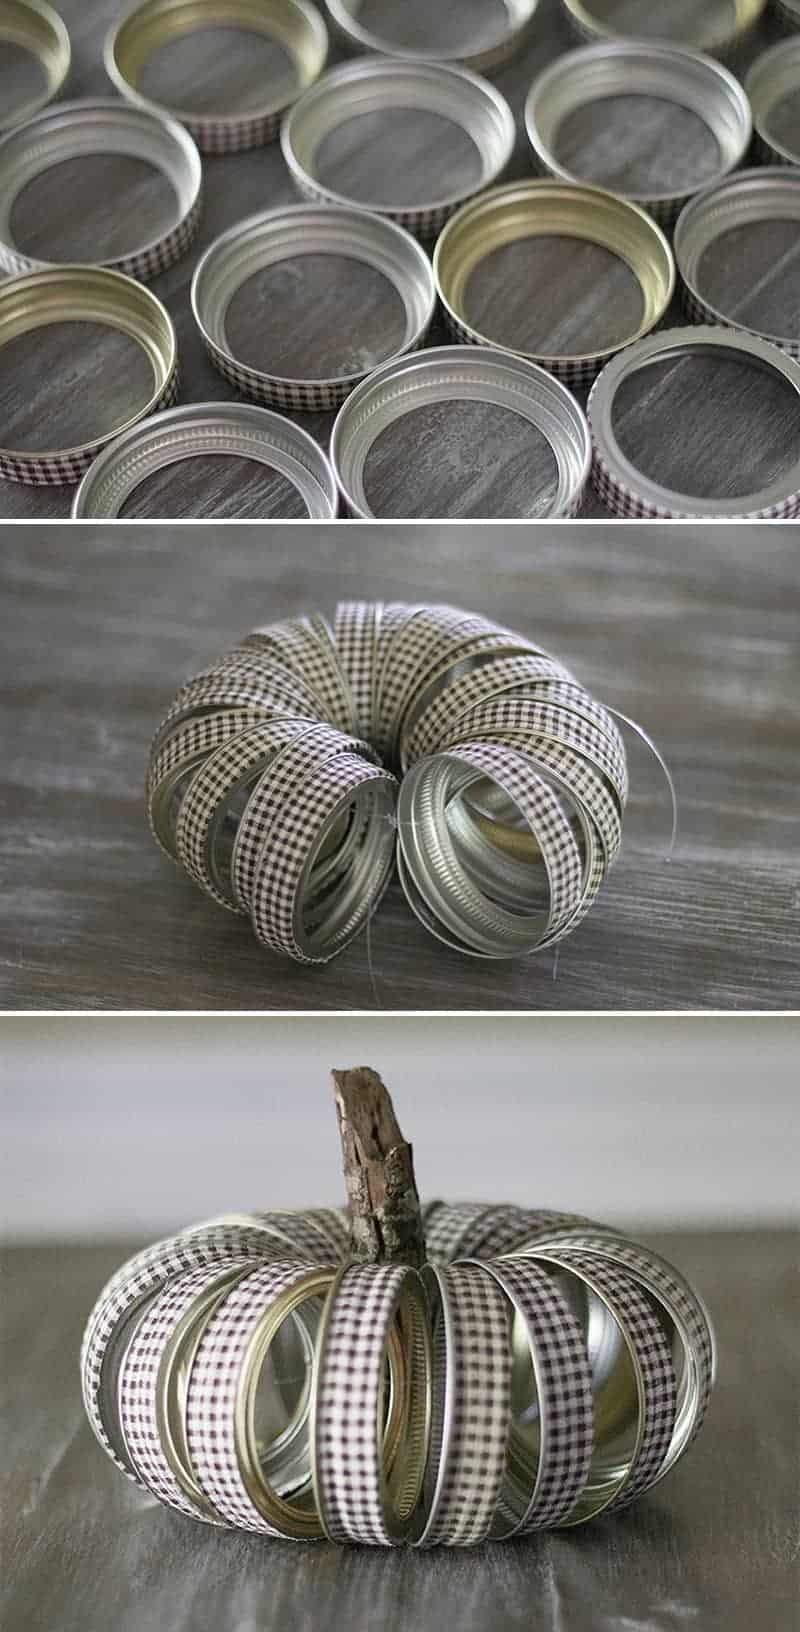
The first thing I did was gather up my lids, scissors, and some fishing line. You could use twine, yarn, string, etc. but I like that fishing line is clear and I still have A TON leftover from our DIY wedding. I didn’t mind that my lids were a combination of gold and silver, but you could always use the same color, or paint them the same if you are using a combination like me.
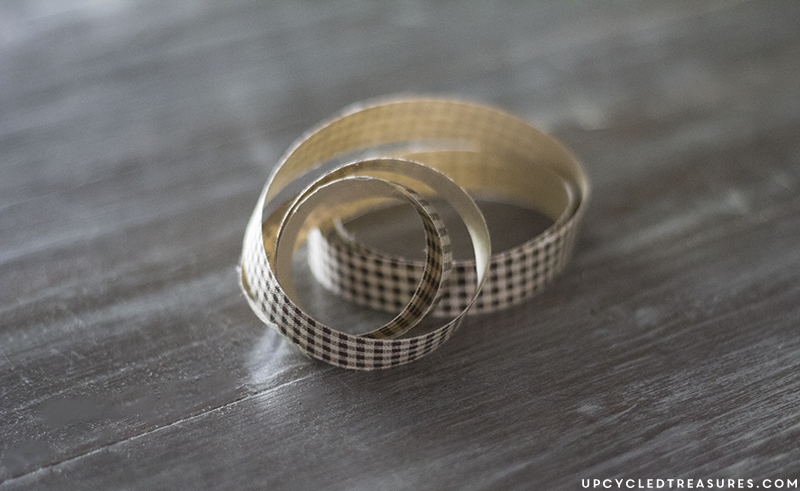
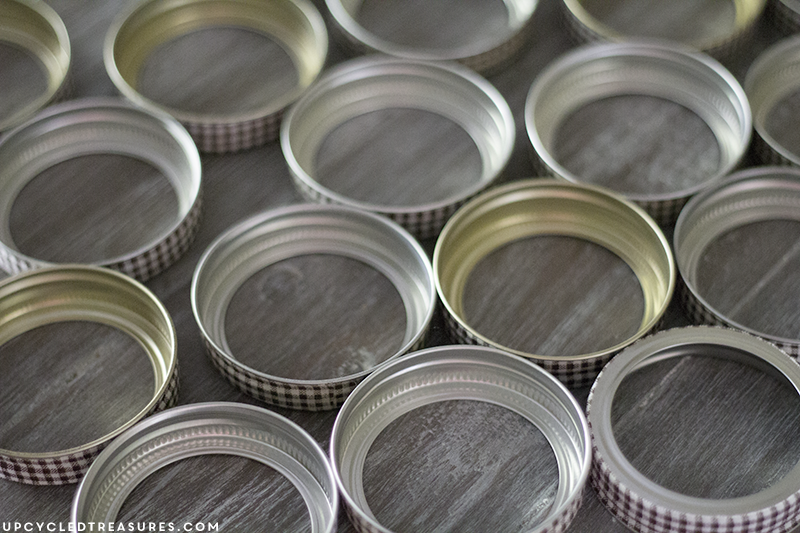
Step 2: Cut Fabric Tape into Strips and then place onto the outer edge of each canning lid.
I cut strips of fabric tape the length of the lids, and then removed the backing and placed them onto the lids, lining them up to the lip. I found it easier to cut all of the fabric strips the same size and then tape them onto the lids.
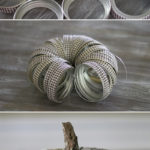
Step 3: Place all your lids in a row or on top of one another all facing the same direction, then thread the fishing line through the center.
The first time I made this pumpkin I just stuck the lids on my hand/arm and then threaded a piece of fishing line through the center. You could also have someone help you or find some other way to easily stack them.
Just out of curiosity I decided to try this using an old paper towel holder. I just dropped the lids on it {making sure they were all facing the same direction}.
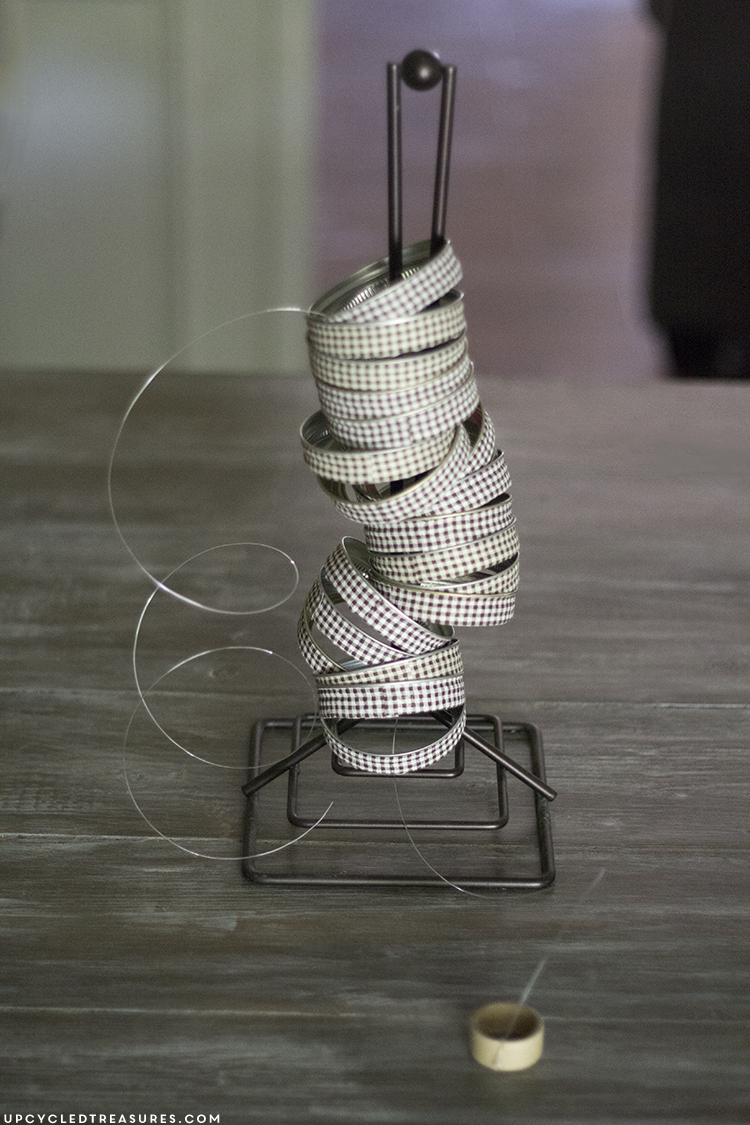
I then tried to drop my fishing line through the center of the lids, but it was all kinked up so I tied the empty roll of the fabric tape to the end of the fishing line {which added a little weight}, and then dropped it down. Again, this may not be necessary at all, but doing something similar may make it easier on you if you are having to hold them all at once, or don’t have someone around to help.
Step 4: Grab both ends of the fishing line and make a couple of tight knots.
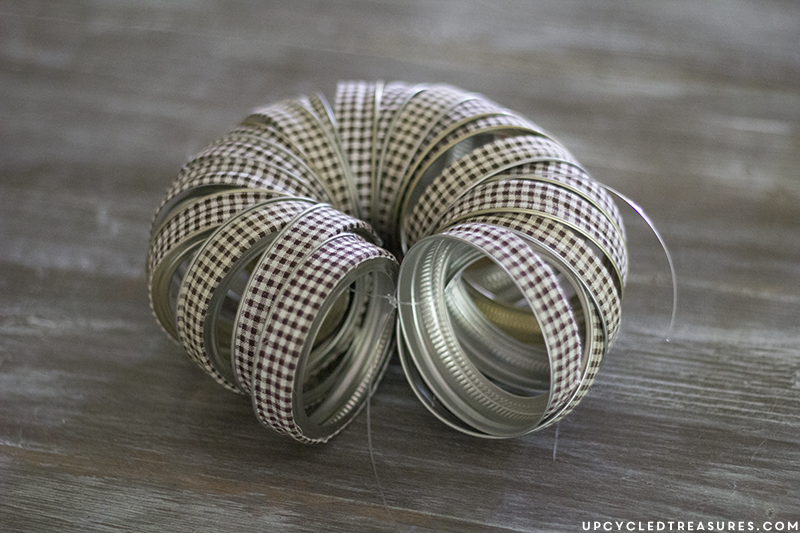
Step 5: Fan the lids out and place a stick in the center
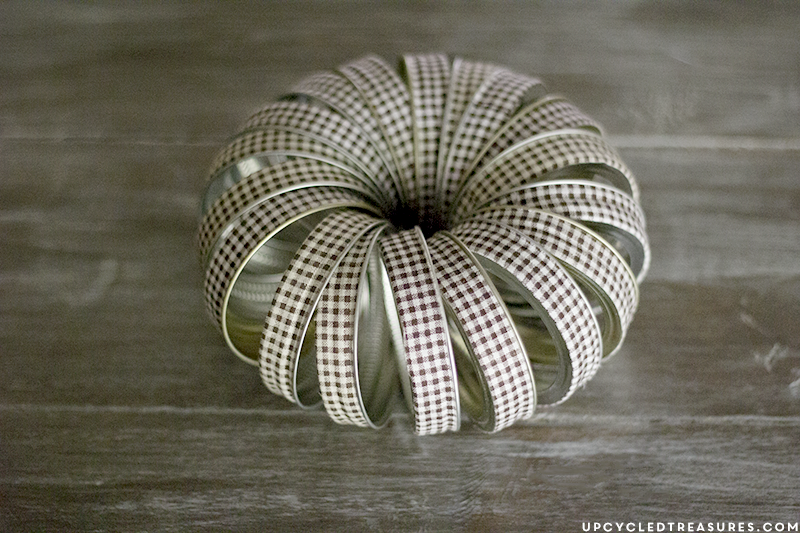
I used a stick from a fallen branch. You may need a couple of sticks depending on how large or small the hole in the center is. You could also use driftwood or make a faux stem wrapped in twine.
I tried making the pumpkin with more and fewer lids just for fun but wound up using 19 for this pumpkin, so don’t be afraid to play around with it until you get the look you like. I think I will make a couple more of these guys using the larger lids, and may even make some faux leaves.
And there ya have it, a super simple rustic fall pumpkin that only took a few minutes to make. What do you think?
Not only is this project super easy, but it’s a quick way to add a rustic touch to your home during fall. The different patterns and colors make it such an easy and fun item to decorate with, don’t you think?
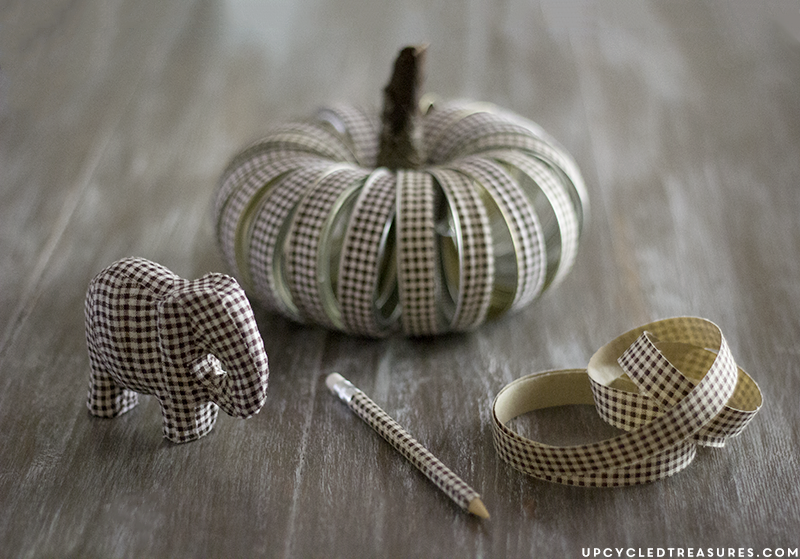
I have even used it on pens and mechanical pencils, as you can see here.
Have you used fabric tape before? If so I’d love to hear about it or check out the links to your projects in the comments below.
OMG, those are so adorable! I can’t wait for Halloween to get closer so I can make them!
This is seriously one of the cutest little pumpkin crafts ever! Love it!!
I just love what you did with the fabric tape! So cute and pinning!
That is a cute simple craft. Would you mind telling me how you made the stick stay in place.?
Pamela
Love this, shopping for supplies tomorrow. I want to try several gingams. Best place to buy lids?
Just out of curiosity, what dif you use them for at your wedding?
Again, cute, simple & doable by even a non-crafter. I think burlap strips might be charming as well!!
[…] Mason Jar Lid Pumpkin from mountainmodernlife.com […]
I have looked at different utube but they never mention lid size. You finally said something about using large size (wide mouth) Thank you for that.