UPDATE: All new featured RV tours will be posted on my other website, Wanderful RV Interiors. Existing tours will slowly be moved to the new website, and anything already moved will automatically redirect.
Disclaimer: This post may contain affiliate links, meaning, if you click through and make a purchase we (or those featured in this post) may earn a commission at no additional cost to you. View our full-disclosure here.
The other day while browsing Pinterest I came across this gorgeous side table makeover photo and knew I had to try and “copy” it.
I have 2 pedestal plant stands that I picked up from a thrift store a while ago that I have wanted to redo, and this post both inspired and motivated me to finally work on them. I was originally going to paint these a funky color like yellow but what can I say, I LOVE grey! Plus I had some paint left over from the coffee table makeover that I knew would be perfect.
Stenciled Plant Stands with a Nailhead Trim
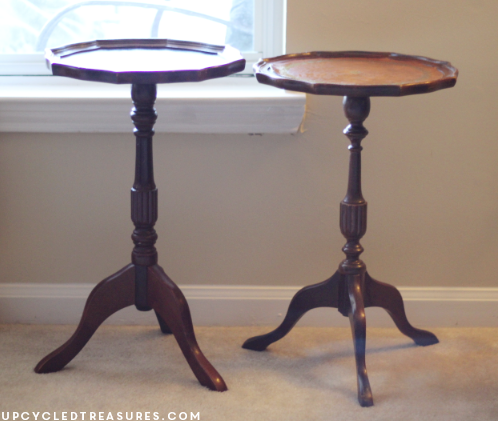
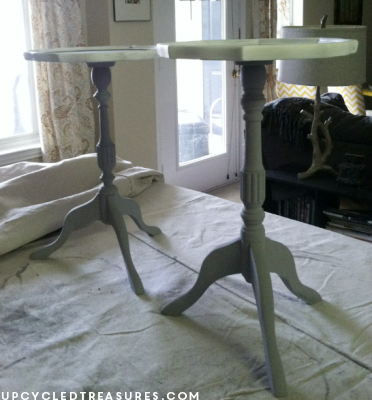
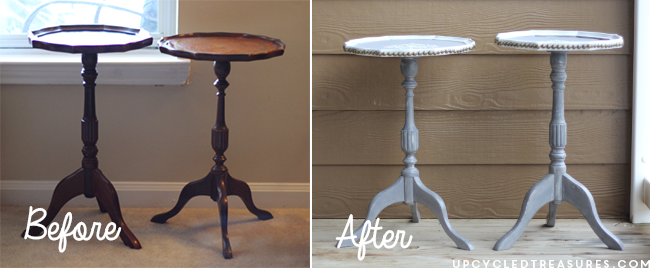
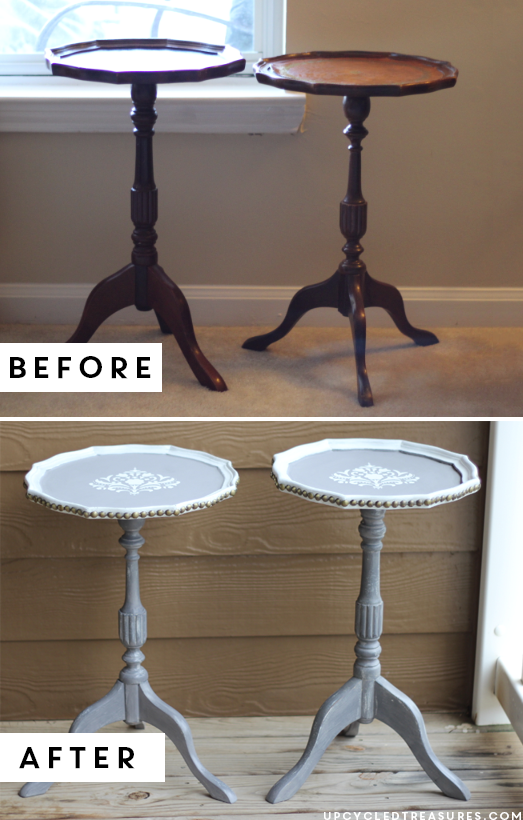
Here are the two plant stands/side tables/accent tables, whatever you want to call them that were in need of a makeover. I actually purchased them on two separate trips so it’s crazy to me just how similar they are, although one is a tad shorter than the other.
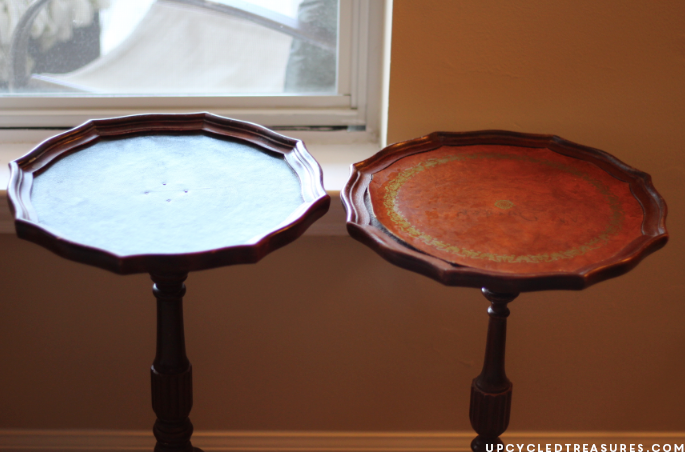
The first thing I did was remove the leather tops from each table as they were not in the best condition.

Then I lightly sanded each table before adding one coat of white chalk paint and then applying 2 coats of my leftover grey chalk paint.
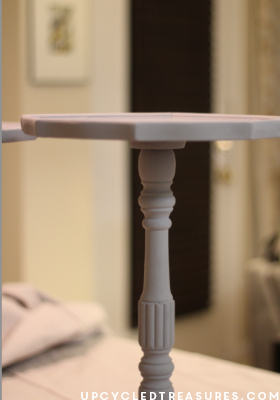
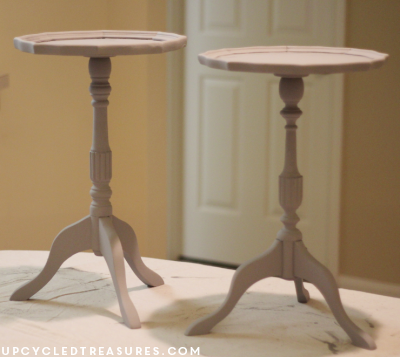
I did a coat of white paint first so that when I distressed it some of the white would show through. Next, I painted the top edges white and after letting it dry I lightly distressed both tables so that some of the white paint would peak through.
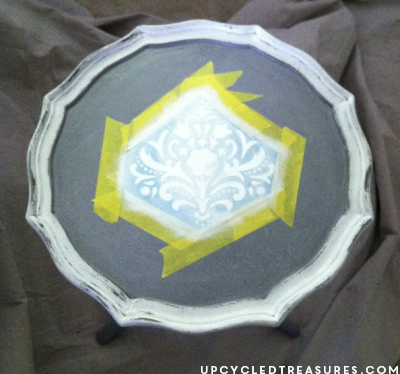
And now the fun part: adding the stencil! I measured out where I wanted the stencil to be, taped it down with frog tape (any painter’s tape will do) and then painted over the stencil with white chalk paint.
I find that the best way to paint on the stencil is to use a small styrofoam roller, dip it into the paint, then roll it onto a plate covered in foil (for easy clean up), then roll it onto a couple of sheets of paper towels so that it is practically dry and FINALLY roll it onto your surface!
This seems to prevent the paint from bleeding and you will have more control of it – just repeat the process until you get the color density that you want. I had to go over mine a couple of times because there was a spot in the center that didn’t fill in as much as I wanted it to the first time around, as you can see in the photo below. After I painted on the stencil I quickly removed it to check out my work and then let it dry.
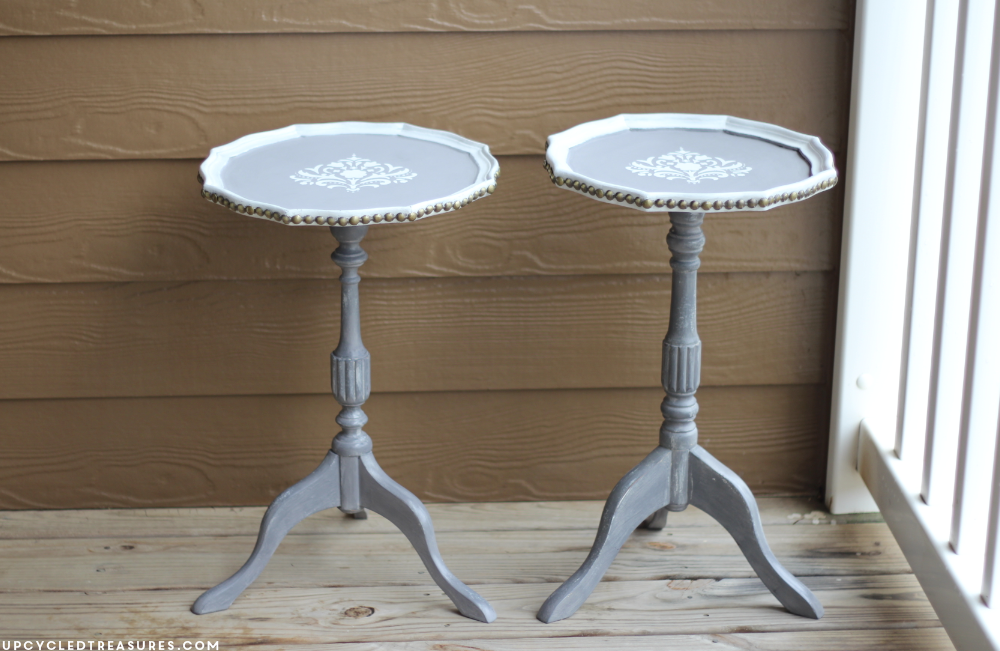
I love the clean look of my inspiration photo but decided I wanted mine to be a bit more chippy and aged. I also wanted to add some nail head trim to the edge that I had leftover from my upholstered headboard. I decided to wax both tables before adding the nail head trim to make sure they were protected.
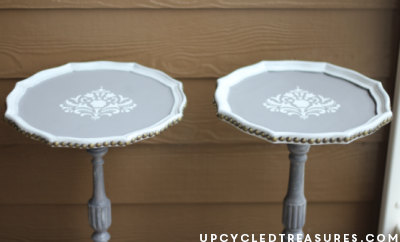
And here they are all finished!
I love the turn out and had a lot of fun working on these. A couple things I learned along the way:
- Don’t apply wax with a paper towel! Yes, I’m sure this is probably pretty obvious but out of excitement for finishing these and laziness for grabbing what was near me rather than getting up and getting a rag, I tried to use a paper towel which left little pieces of white fluff which then had to be sanded off to start over.
- Don’t paint in a circle to get the edges and then paint up and down for the middle – this left a paint ring around the whole edge of the top no matter how many coats I put on, it’s best to tape off the edge and then paint the whole top in one direction – up and down.
- Make sure you pay close attention to where you add the nailhead trim. I wanted mine in the middle but this made it difficult due to the lip of the edge so the other end of the nail would sometimes poke through – I ended up adding it just slightly below the center to avoid this.
So what do you think?
Oh I love the new look of the tables. So pretty.
Thank you so much Tina! I love the way the nail head trim turned out 🙂 Have a great holiday weekend!
~Katie
New fan coming over Mop it Up Monday. I would love for you to come share this post at our From the Farm Blog Hop. Hope to see you there!
Lisa
Fresh Eggs Daily
http://www.fresh-eggs-daily.com/2013/05/from-farm-blog-hop-34.html
Thank you so much Lisa, and I would love to share this at the blog hop. Thanks for stopping by!
~Katie