UPDATE: All new featured RV tours will be posted on my other website, Wanderful RV Interiors. Existing tours will slowly be moved to the new website, and anything already moved will automatically redirect.
Disclaimer: This post may contain affiliate links, meaning, if you click through and make a purchase we (or those featured in this post) may earn a commission at no additional cost to you. View our full-disclosure here.
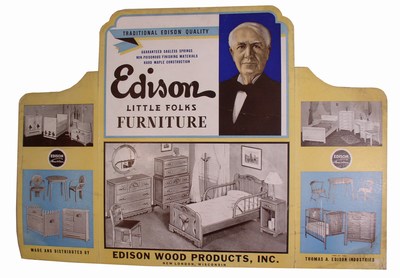
Today I am sharing a vintage kid’s dresser makeover with a hidden chalkboard inside the cabinet. This dresser was actually given to us by a friend who was originally going to drop it off at Goodwill. I’m so happy I was able to work on it though because it was a lot of fun, and just so happened to be made by the Edison Little Folks Furniture Company. Ya know, as in Thomas Edison, the famous American inventor who apparently owned his own furniture company too!
When I saw the old sticker in one of the drawers I decided it was time to do some research. Turns out that Mr. Edison purchased a cabinet company in 1917 and renamed it Edison Wood Products, which was originally created for his phonographs. During the depression, however, the phonograph cabinets were not selling too well and rather than lay off the workers, he transformed the company into making furniture for children, hence the name “Edison Little Folks Furniture”. The company was later sold to the Simmons Company.
Dresser Makeover with a Hidden Chalkboard
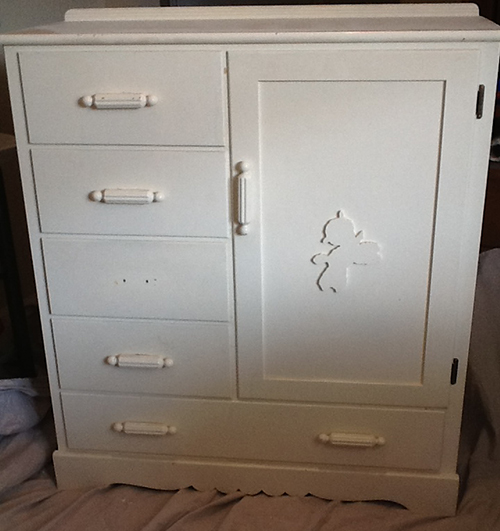
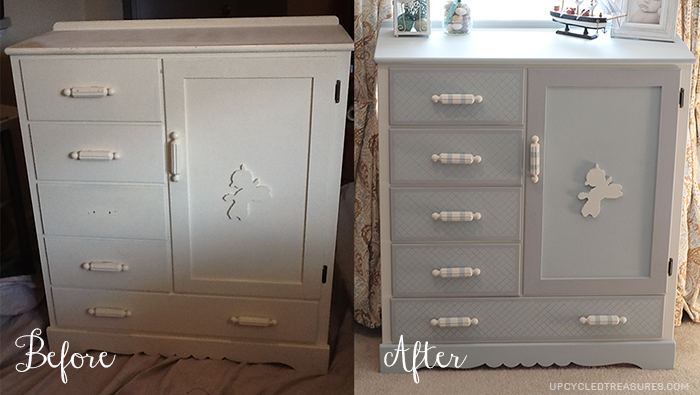
Here is what the dresser looked like before, I’m guessing it’s circa 1930s:
- I had already taken off one of the knobs before taking the picture.
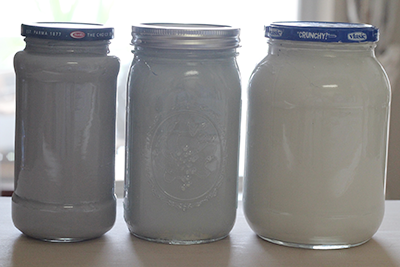
Here are the custom homemade chalk paint colors I mixed:
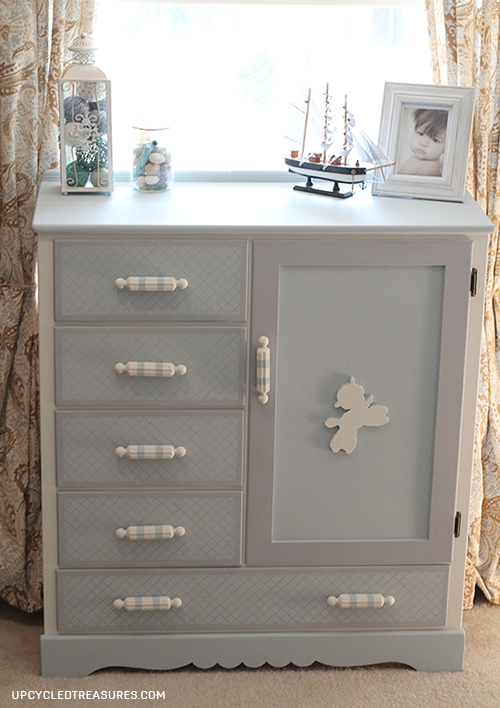
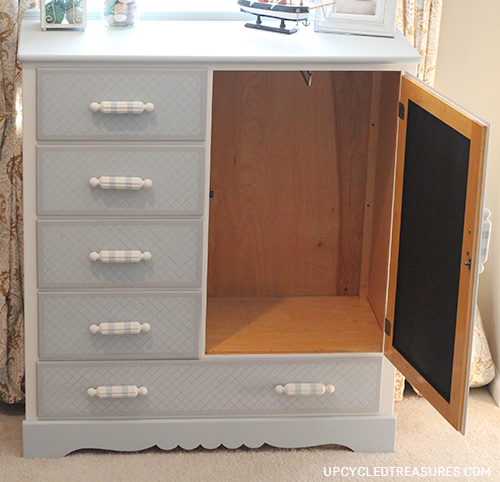
And here is the painted kid’s dresser all finished up:
I decided create a hidden chalkboard by painting the inside of the cabinet door. Now the dresser is functional and fun! I plan on attaching an upside down drawer pull to hold the chalk as seen on this post about chalkboard project ideas.
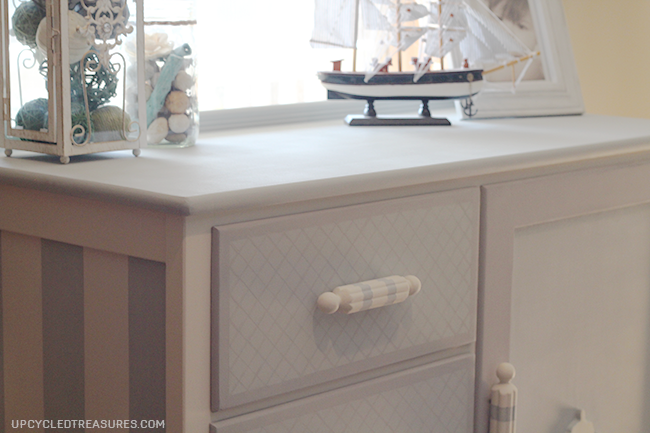
I painted stripes on the sides, a lattice pattern on the drawers and then stripes on the drawer pulls. I also painted an edge along the drawers. I just love how soft the colors look against one another. The soft gray almost looks lavender.
And after several hours, tons of paint, lots of measuring, and a whole bunch of frog’s tape, here are the before and after photos.
So what do you think of the dresser makeover with a hidden chalkboard? I don’t have kids (yet) so I had to improvise on the accessories, but I think it’s adorable. I hated the drawer pulls before but now they remind me of little candy wrappers.

My favorite piece you have done. I love the latticework and stripes!
Thank you Ashley! I have been so indecisive with furniture lately and after hearing a friend’s advice I decided to make this dresser something I would enjoy working on, vs. something I thought others would like, or what I thought may sell 🙂
What a cute make over, so much work. I hada dresser like this as a child. It was a very pale green. Also had a youth bed with side rails as shown in the pix of the ad. Thanks for the memory!
Hi Alma, that is so neat that you had one of those sets growing up! So glad I could help bring back that memory 🙂
~Katie
Katie, this is absolutely adorable! You are so talented. I’m jealous.
Thank you so much Wendy! Well it took A LOT of time but I’m so happy with how it turned out. I still need to add the chalk holder to the inside of the cabinet, but that will have to wait until later. I also still need to seal it 🙂
This is fabulous! AND – such cool history behind the piece… I LOVE a piece that has history, but I’m not sure I’ve ever had one that is that cool.. LOVE IT! Would love for you to link it up at my linky party…. I know my readers will love it as much as I do… too cool!
Thank you Heather! I love learning about the history of pieces too, I find it so fascinating! I would love to link up to your party, thanks for the invite!
~Katie
Love it!
Thanks Diana!
You did an amazing job. All that striping is so much work!
Thank you Susan! At first I thought I may have bitten off more than I could chew, but the result was well worth it 🙂
Great idea. Stopping by from Blog Hop Social Linky and following.
Thank you Debra!
Oh what a fabulous piece and I love hearing the history too. The new finish is stunning, so much detail and character. Love it. Thanks tons for linking to Inspire Me. Hugs, Marety
Thanks Marty! I think the history makes the furniture that much more interesting and enjoy learning about each piece I work on, so it’s nice to know others enjoy that too 🙂 Thank you so much for stopping by and for hosting the party!
~Katie
This is FANTASTIC!! Like the color choices! Im a sucker for furniture redos. You should come share that on a party I co-host DIY Sunday Showcase! It’s open now!
Shelly
minettesmaze.blogspot.com
Thank you Shelly! I am off to link up now 🙂
Wow! This is simply gorgeous! I love all of the details! How did you do the lattice pattern? With tape? That must have taken you ages!
Thanks Dawn! I actually measured out the lines and then marked them with a watercolor pencil. I then hand painted over the lines. Yes it was verrry time consuming and the lines aren’t perfect, but it was well worth it 🙂
This is beautiful! I found you on Made In A Day and I’m your newest bloglovin’ follower!
Thank you so much Krissy! So happy you popped over to check out my project 🙂
What a fabulous transformation! I love the detail you added to the piece – it looks amazing:)
Thanks so much for linking up at the Inspiration Monday Party this week! I was so excited to guest host and to get to see so many fabulous new projects and blogs! Have a great week:)
Krista @ the happy housie
Hi Krista! Thank you so much for guest hosting and for stopping by to check out my project 🙂 Have a great week!
~Katie
Hey from your newest follower coming over from Elizabeth and Co linky party! Hope you can stop by our blog at http://www.wonderfulathome.blogspot.com we are doing a giveaway through Saturday so its perfect timing! Also, do you have your chalkpaint recipe somewhere on your blog?
Hi Kristen! Funny you should ask about the chalk paint recipe because I have the recipe scattered throughout project posts, and have been meaning to put it up on a separate page. The recipe I use is one that I’m sure you have seen everywhere: 1 part plaster of paris + 1 part hot water + 3 parts paint. I actually just added a page for reference – thanks for reminding me to get ‘er done!
~Katie 🙂
http://upcycledtreasures.com/diy-chalk-paint-recipe/
Beautiful transformation! I love all the little details!
Thank you so much Allison! I’m so excited you popped over to check it out 🙂
That is just incredibly gorgeous – how did you do the lattice – with a stencil or with tape – it’ s my favorite part!!!
I’m putting chalkboard paint on an interior drawer too – ( but for me – an adult lol )
This is really a stunning makeover 🙂
XOXO
Thanks Suzan! I actually measured the lines all out with a ruler and drew them on with a watercolor pencil before hand painting over them. Thanks for stopping by and I can’t wait to see how your piece turns out!
Oh wow, that is just beautiful! I love your choice of colors and how you put the chalkboard on the inside. The pulls are perfect for the new look!
Thanks Toodie! I think it’s funny how much I didn’t care for the drawer pulls {I even thought about buying new ones!},and how much I looooove them now 🙂
How absolutely beautiful, what a lovely piece! You did a great job with it!!!!
OMGosh this turned out so adorable and what a treasure!! XO
Just wanted to let you know I featured you today! Hope to see you back tonight 😉
Fotini
Yay, thank you Fotini!!!
wow! I just found your site and I love it! Adding it to my bloglovin daily feed so I can stay in touch and come back when I have more time! I would really love a more in depth how to on redoing the dresser AND mixing your own chalk paint! I have done one piece of furniture, a chair with the plaster of paris and some paint, but it turned out way too yellow and I am afraid to take on any bigger projects for fear it might happen again lol.
Curious as to how much you are selling for. I have a 4 drawer one with side cabinet for hanging clothes that I’ve refinished and I cannot find a true value on line for this particular piece. Don’t want to over/under price. Any advice would be great. Thank you.
Hi Michelle,
We sold this dresser last year and to be honest I can’t remember what we sold it for. I had put it up on craigslist and sometimes price is simply determined by how quickly you want to sell it, and finding the right buyer at the right time. Best of luck!
~Katie