UPDATE: All new featured RV tours will be posted on my other website, Wanderful RV Interiors. Existing tours will slowly be moved to the new website, and anything already moved will automatically redirect.
Disclaimer: This post may contain affiliate links, meaning, if you click through and make a purchase we (or those featured in this post) may earn a commission at no additional cost to you. View our full-disclosure here.
I’m so excited to share with you my DIY mason jar wall storage tutorial, but before I get to that I hope you had a wonderful weekend! We had some pretty crazy storms here in Georgia which I still haven’t gotten used to – I rarely even saw lightning while we lived in California! I love thunderstorms but these seem to turn me into a scaredy-cat and I’m pretty sure a tree fell nearby while I was sleeping.
The thunder and cracking were so loud that I woke up and nearly jumped on Eric and freaked him out <– I’m lame I know. Well maybe someday I’ll get used to the storms but at least the rain was just another excuse to stay in and work on fun projects. I am doing another switch-a-roo this Makeover Monday, not that anyone would know unless they saw this sneak peek photo on my Facebook page this weekend:
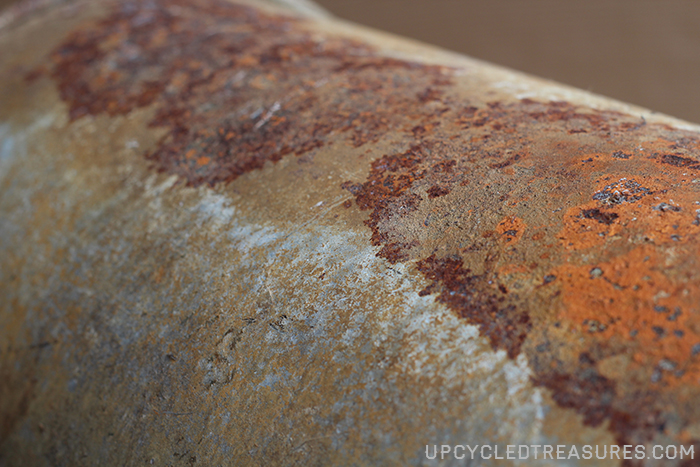
DIY Mason Jar Wall Storage
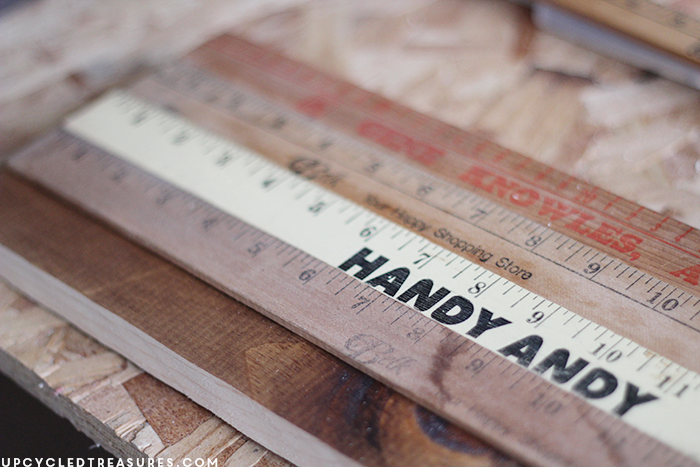
This project is being stored in my back pocket for a future Makeover Monday reveal because I was just too excited to share my mason jar storage tutorial using vintage yardsticks! I have recently been inspired by the projects below and was able to pick up some amazing vintage yardsticks last weekend at my new favorite store, which you can read about here. I have also been wanting to make a mason jar organizer for some time and decided that this would be the perfect blend. Because let’s face it, mason jars are awesome and yardsticks are awesome so why not put the two together.
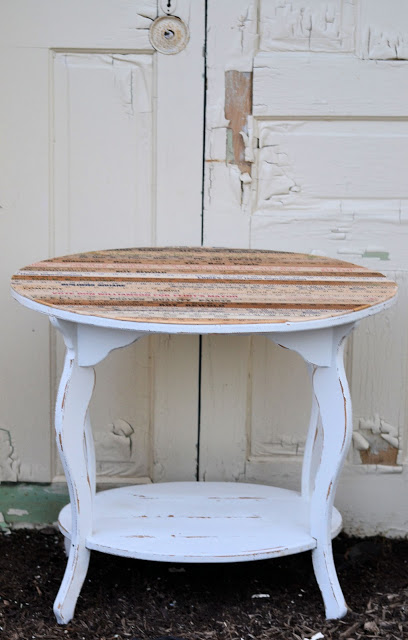
I love this yardstick table via Shabby Love, which was previously featured in my Friday Favorites
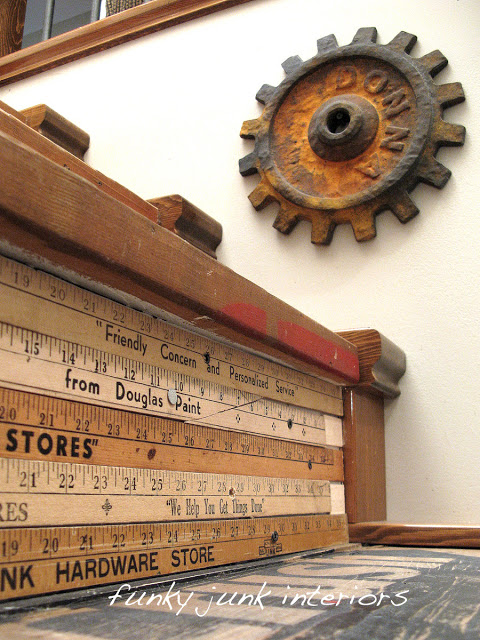
These Yardstick Stair Risers on old crate stairs via Funky Junk Interiors have to be the coolest stair risers EVER!
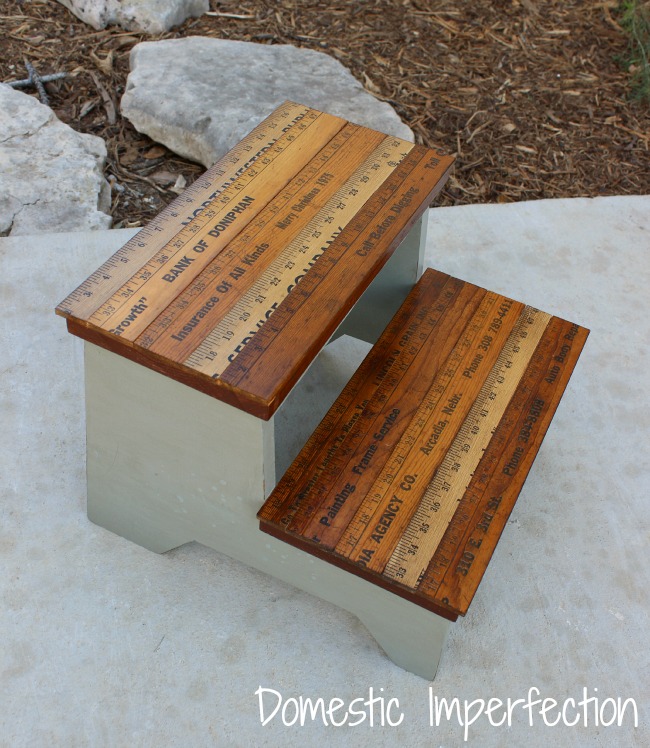
How adorable is this yardstick step stool via Domestic Imperfection?
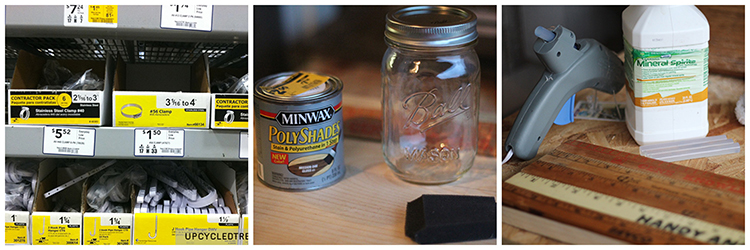
Alrighty, so here are the materials you will need for your Mason Jar Organizer:
- Wood
- {5} Vintage Yardsticks (or new ones)
- 4 Pint Size Mason Jars
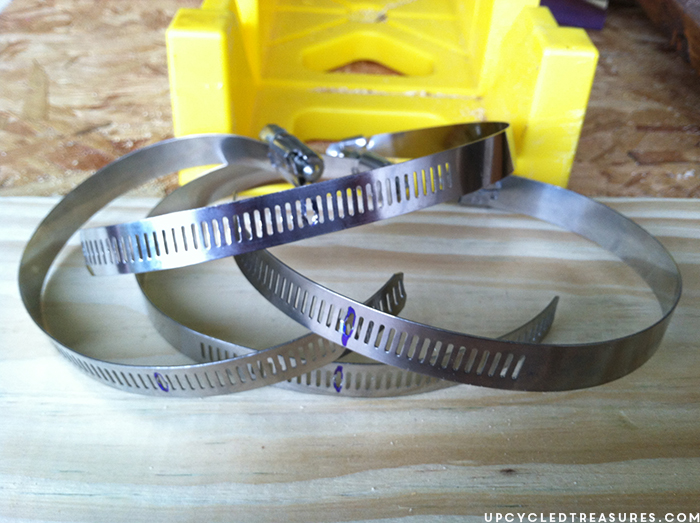
- {4} #40 Stainless Steel Clamps
- Stain {I used Mission Oak}
- Polycrylic Protective Finish
- Foam or Paint brush
- Glue Gun & Gluesticks {Or whatever glue you prefer}
- Pencil/Marker
- Hammer
- Nail
- Screwdriver
- (4) Screws – for the clamps
- Drill
- {2} Sawtooth Hangers with 4 screws
Step 1:
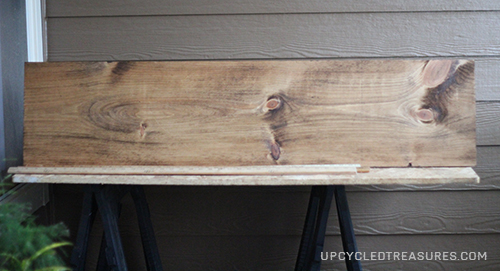
Cut Your Wood to Size: We used Eastern White Pine and cut ours down to 36″ across {the size of one yardstick} by 5.75″ tall. You could always purchase wood from Home Depot or Lowes and have them cut it for you.
Step 2:
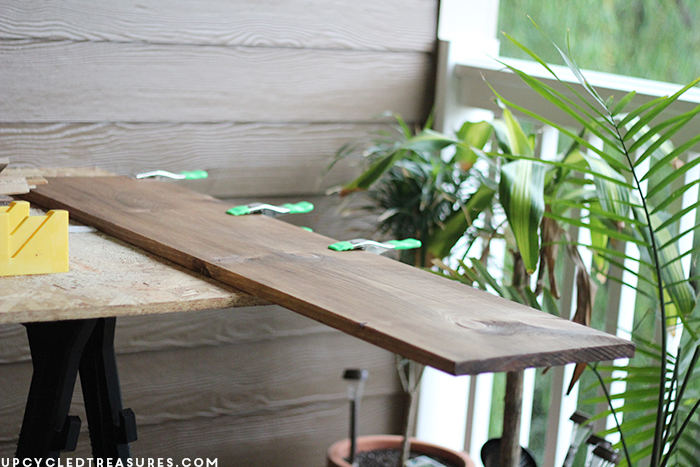
Stain your wood – After reading about Domestic Imperfection’s stool project, I learned that if you don’t stain the edges of the wood, it will look unfinished. For this reason, I decided to stain the wood with some Mission Oaks stain that I had on hand. This stain actually already had polyurethane in it which was nice because I didn’t have to go back over it with a protective finish. I am impatient and since I started this project late at night, Eric wasn’t able to cut the wood before I stained it {the joys of apartment living}. So I stained the wood that night and then just had to go over the edges after he cut it the next day. However, you should probably just wait until your wood is cut to size and then stain it.
Step 3:
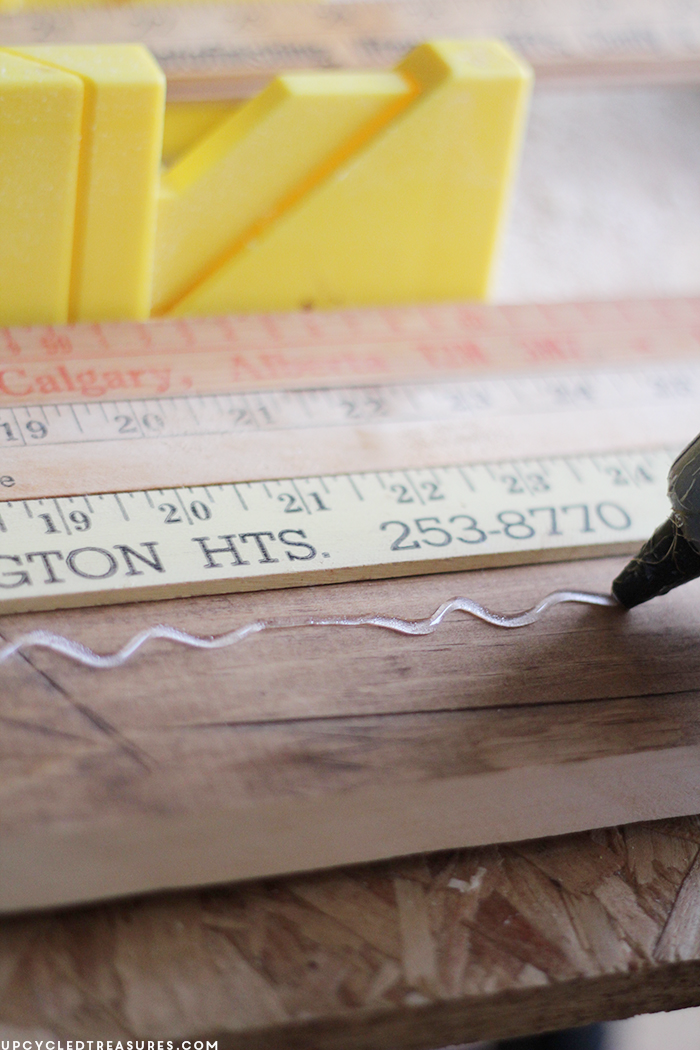
Glue on your Vintage Yardsticks: I picked up our yardsticks from an antique/reclaimed wood store and cleaned them with mineral spirits. After the stain is dry, which usually takes a few hours {I let mine dry overnight}, you can place your yardsticks in the order you want them and glue those babies down! I used my favorite glue method, the glue gun, but you could use whatever you prefer.
Step 4:
Stain the edges of the yardsticks and wood – My dad called while I was doing this, but I’m apparently a bad multi-tasker since I forgot to get photos of this step. Basically you just want to go over the unfinished wood as well as the edges of the yardsticks with a light coat of stain to create a more cohesive look. I now realize it may have been cool to even go over the yardsticks with the stain, but maybe I’ll try that on the next one…
Step 5:
Apply a Protective Finish – I used Minwax Polycrylic {available here}, which I already had, because it doesn’t leave that yellowish tint that you sometimes get from Polyurethane. Since my stain had the protective finish already in it, I only applied a very thin layer of the Polycrylic to the yardsticks with a foam brush.
Step 6:
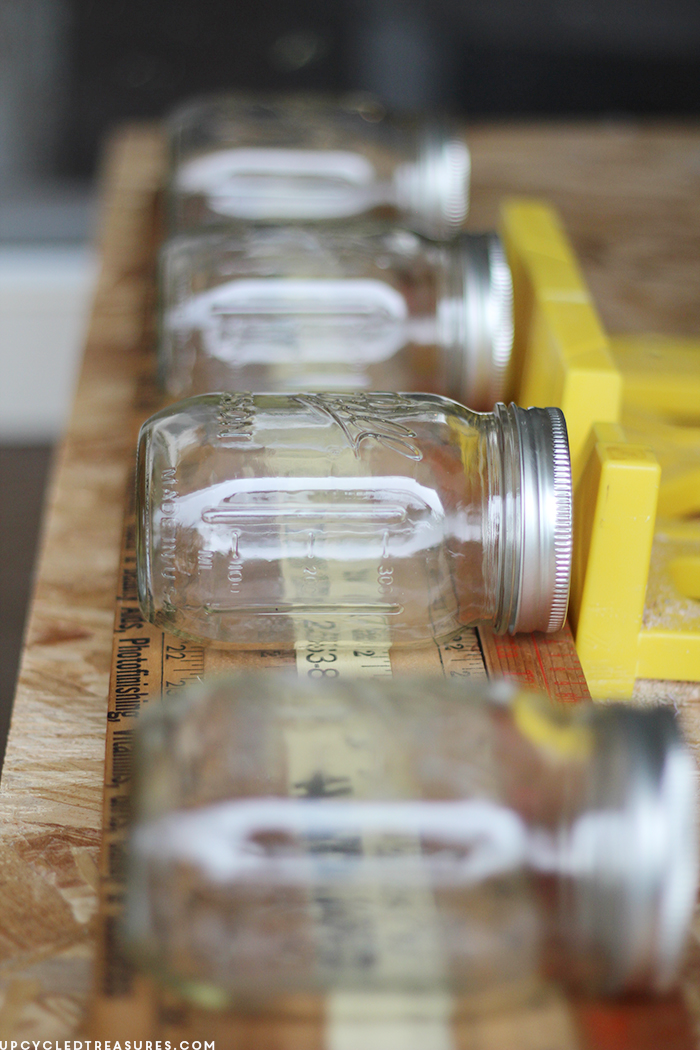
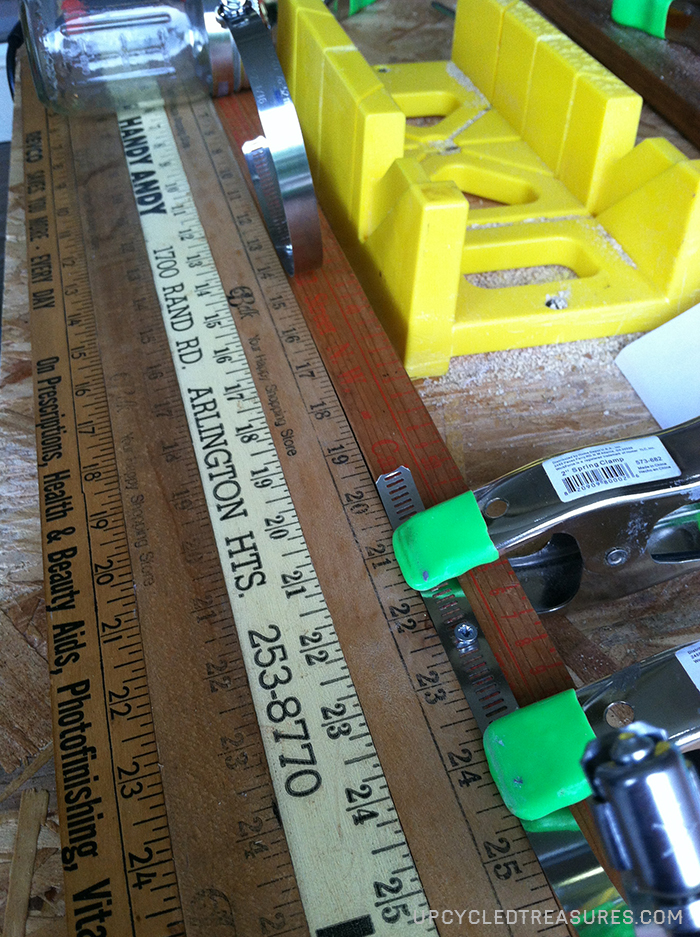
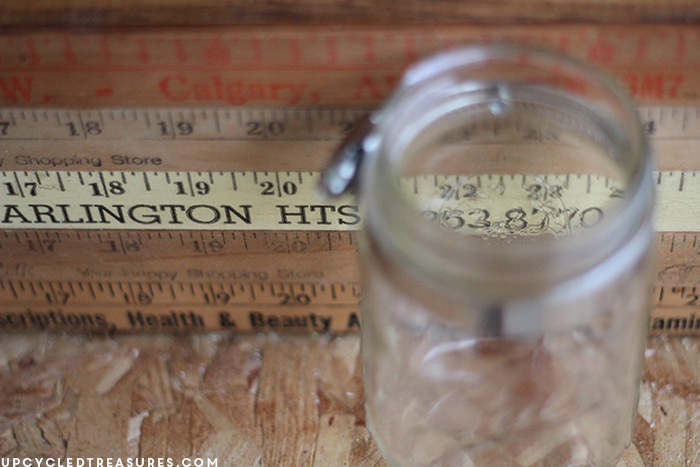
Decide on the layout of your jars as well as where you want the clamps to go – The Stainless Steel Clamps {#40} are available in the plumbing section of your local hardware store or here. You will want to measure and mark out the space you want between each jar as well as where you want the clamp to go. Do you want the clamps to hold the mason jars from the top or in the middle? I decided to put the clamp towards the top, just under the lip of the jar. {Side note: This size worked perfectly for the pint size mason jars, but if you want to use the quart size and have the clamp go around the middle you will need a larger size, like the Stainless Steel Clamp #56, available here}.
Step 7:
Mark your clamps where you would like to drill the hole – I wrapped the clamp around the mason jar to decide where I wanted it and then marked it where I would need to drill the hole. {Side note: It’s easier if you decide to drill the hole within one of the metal slots, rather than go through a full, metal section – see the photo in Step 9}
Step 8:
Pre-drill your hole into the metal clamp using a hammer and nail – Before drilling into the clamp, you will want to create a hole with a hammer and nail. This is to help create the hole in the metal clamp before you use the drill, which will make it A LOT easier.
Step 9:
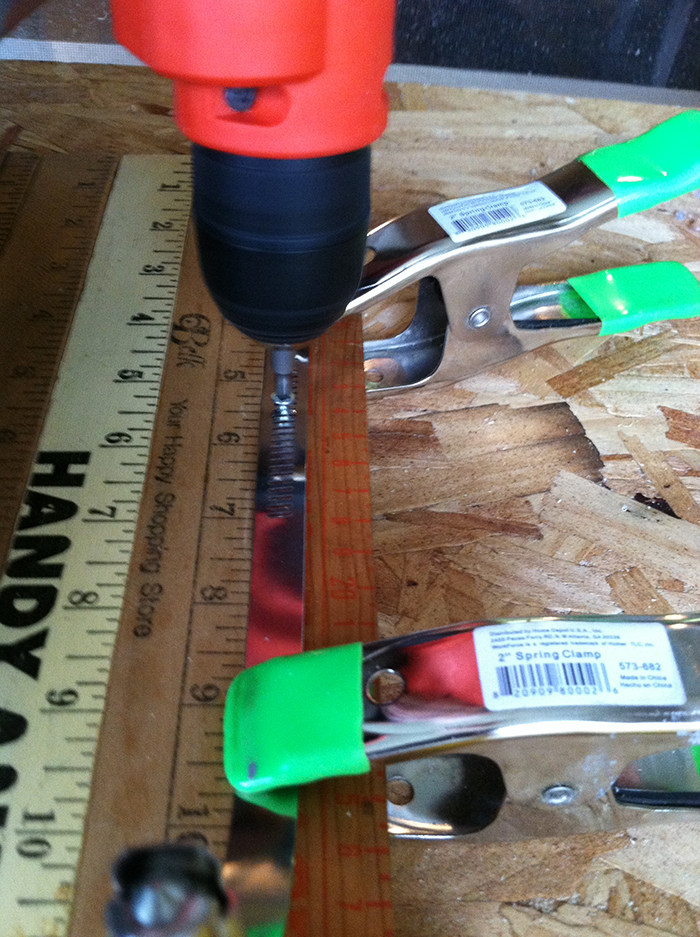
Drill your screws through the Metal Clamp – Now that you just made it easier on yourself by pre-drilling the hole, you can now drill a hole into the metal clamp. You will need one screw for each mason jar you attach to the wood. I can’t remember what size we used, but we went with some small, flat head screws that were less than an inch long.
Step 10:
Screw your clamps into your Yardsticks/Wood – Now you get to screw the metal clamps into place on your wood using your drill, yay! In Step 6 you could have marked where you want them to go with a pencil, but since we are working with yardsticks I just wrote the measurements down on a piece of paper where I wanted the clamps to be screwed in. This is one of the benefits of working with yardsticks – it makes measurements so much easier! However, I am not going to lie, I am TERRIBLE at math so planning out the space between the jars was probably the longest task for me. Haha. I can only imagine how much longer it would have taken if I wasn’t working with yardsticks. We clamped the metal pipe clamps into place and then screwed them in.
Step 11:
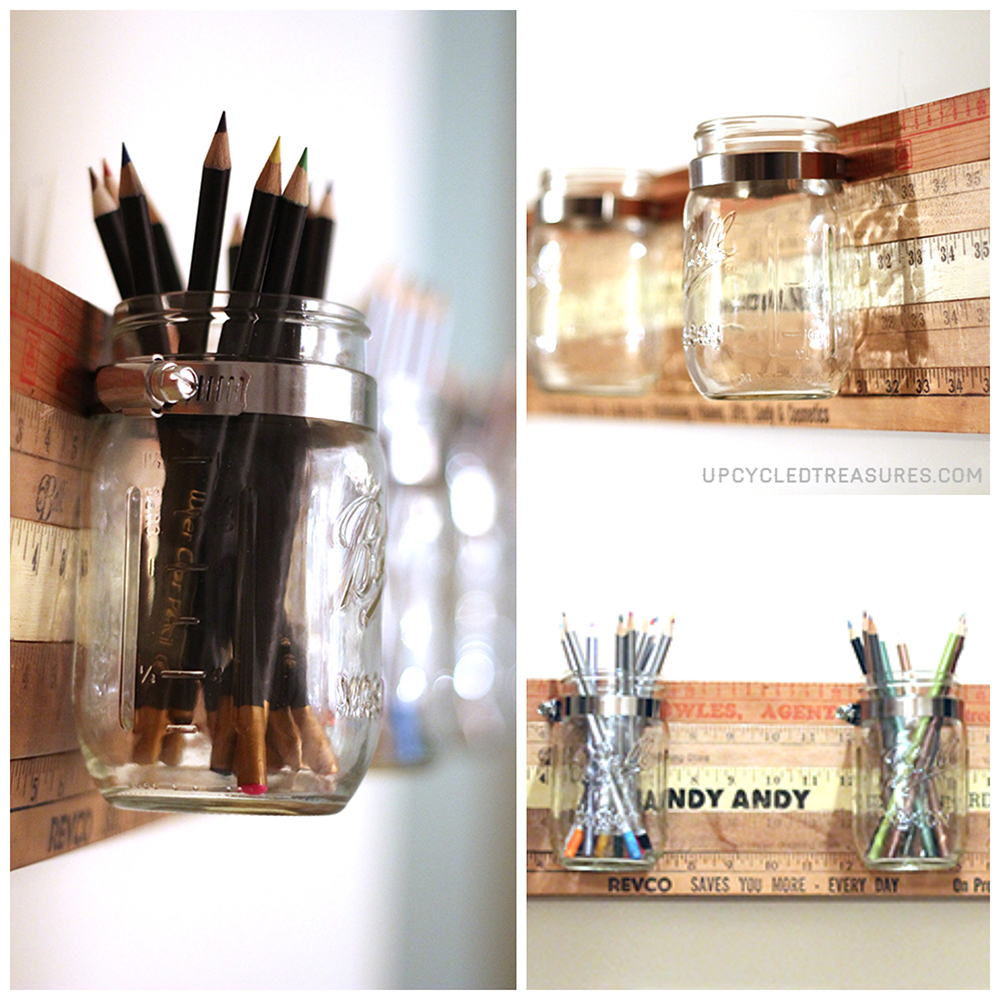
Wrap the metal clamps around the mason jars – Finally the exciting part! You can now wrap the clamps around your mason jars and tighten them.
Step 12:
Prepare to hang your mason jar wall storage – Attach {2} sawtooth hangers to the back of the wood so that you can hang your new, fantastical Mason Jar Organizer!
Step 13:
You’re done, yay!! Enjoy your one of a kind organizer and fill it with goodies like utensils, flowers, toiletries, paintbrushes, crafting supplies, whatever your heart desires.
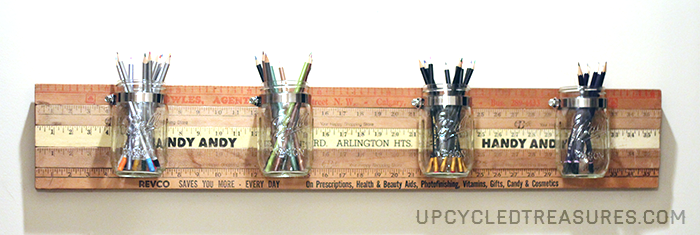
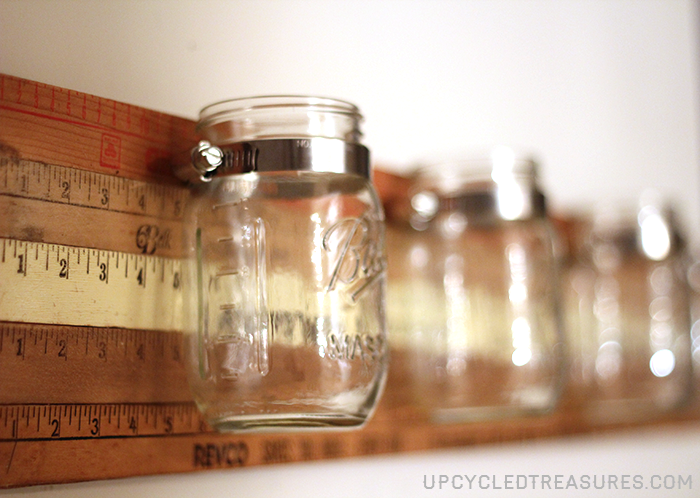
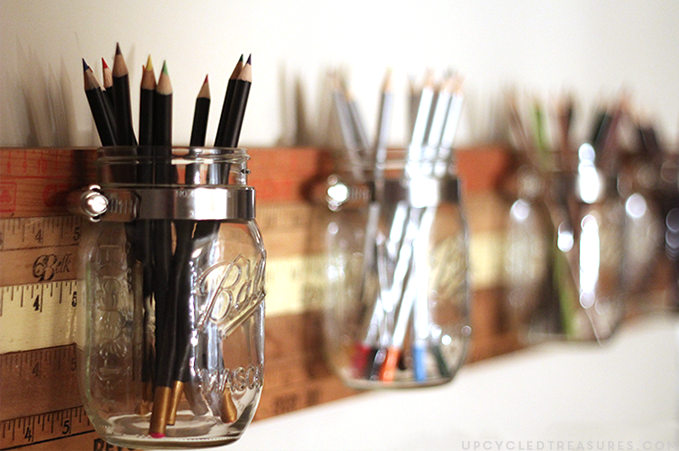
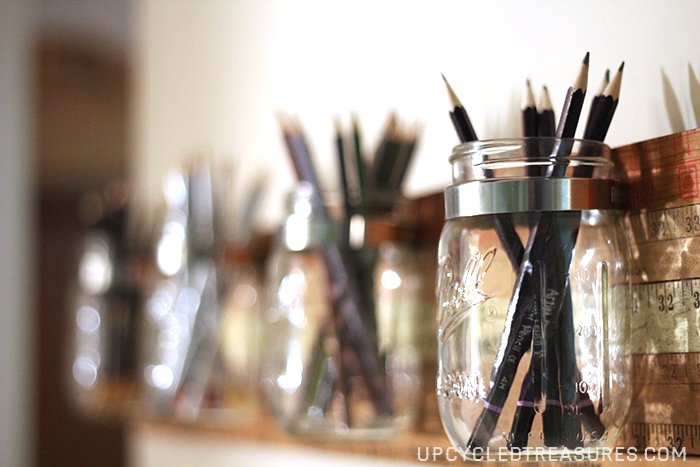
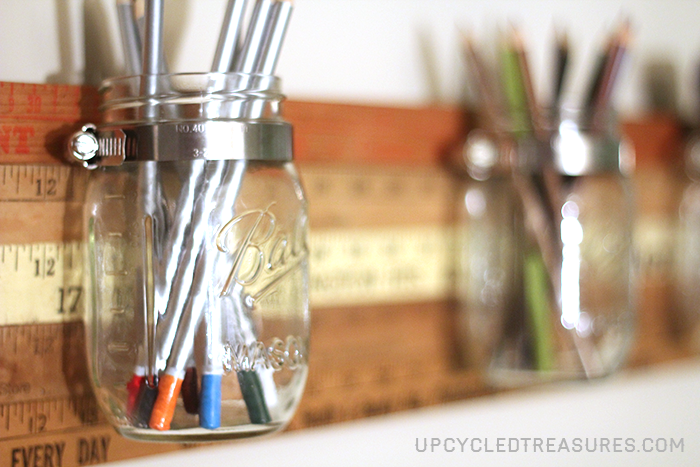
Here is my mason jar organizer all finished, woo-hoo!
Have you worked on any yardstick projects lately? Feel free to leave any questions or comments below, and thanks for stopping by!


Cute and useful!
Thanks Pam!
I love, love, love this idea. How fabulous. Great storage that look amazing. Super tutorial also. I would love for you to link up to my Inspire Me party this evening. http://www.astrollthrulife.net
Hugs, Marty
Hi Marty! Thank you so much and I would love to link up at your party tonight 🙂
~Katie
I so love this project. Thanks for such a thorough tutorial too. Pinned it!
Wow, thanks Karen!
I love the yard sticks!
Thanks Ashley – can’t wait to see you guys this weekend!
Love this! Thanks for linking up again this week at On Display Monday! Pinning!
Thanks Brianna! I love all the crafty projects you create, and the artwork your son did is awesome!
~Katie
Love this idea. I will have to try it. Thanks for sharing.
Rebecca
Thank you Rebecca – I’d love to see it when you’re done!
~Katie
I absolutely love this entire post! These are so my style ;o) I am definitely pinning! Thanks so much for sharing and I hope you have a great night!
Thank you Elena and I look forward to checking out your site 🙂
~Katie
How clever you are! This project turned out perfectly, and so useful, too! 🙂
Thanks Kim!
What a great up cycle! I’d love for you to share it at my Twirl & Take a Bow Party at http://www.houseontheway.com. Have a great week.
Love this idea!!! This is such a neat way to use yardsticks!!!!
You rock!! Could I share this on my Facebook page?
Have a great rest of the week!!
Heck yeah you can share it on your Facebook page and I”m so excited that you like it! Thank you for stopping by, I love all of your projects 🙂
~Katie
How cute and so useful.
Thanks Tina! I love how versatile this is and that there are so many ways to use it, or places to put it.
~Katie
Can I just say how much I love your blog!! I’m obsessed with upcycling. I’m so glad you linked up @ The Owl’s Skull, because I have a new upcycler to follow:). Hope you will come back next week:)!!
Hi Alice! Thank you for hosting the link up party and I will definitely be back next week. Thanks for stopping by!
~Katie
This is fabulous!! Gosh, I wished I’d kept all my dad’s yardsticks…he was in specialty advertising way way back.
Thanks for sharing at Monday Funday!!
I’m on my way to “pin” and “share” on Facebook!!
Best wishes for an Extraordinary week!
Haha! I guess I can’t share it on FB with a full photo…just as a link. Oh well.
Hi Diane! Isn’t it funny the things we get rid of that we later wish we had kept? Thank you so much for stopping by! I recently added the “Pin it to images” plugin on my site but that seemed to screw up my share buttons that were at the top of the post, so I’m actually trying to find a new plugin that will work with it. Thank you for sharing!
~Katie
Awesome post ~ what great projects!
I’m visiting you today from This Silly Girls Life. I co-host a Linky Party Tuesday (open thru Sat) and I’d love for you to link up! I hope you get a chance to stop by, link up and leave a comment, too!
~ Megin of VMG206
Join me each Tuesday for Brag About It Link Up Party
Very nice idea. Love that. TFS. ana
Thanks Ana!
Very cool Katie! Im pinning this!
Susan
Thanks Susan!
great idea, I really love your mason jar storage it’s pretty and functional; this is a project I would love to do! glad to have found your lovely blog today over at keep calm & link up party! Ingrid
Hi Ingrid! Thank you so much for checking out my project via the link up party. I can’t wait to check out what you did 🙂
~Katie
Those jars are so gosh darn cute! And what blows me away is the detail you put into making this post. You are great at tutorials leaving the reader no questions to ask when we reach the end! I’ve tried a few tutorials myself and I know how much work goes into doing one.. job well done! And another idea I can’t wait to try!
Hi Kadee! Thank you so much, that means a lot to me and you are right, it does take longer than one would think 🙂 In fact, I visited a couple tutorials on similar projects when I was trying to figure things out, but none of them gave me the answer I needed so it was about trial and error. I guess that’s why I wanted to add a little more detail. Thanks for stopping by!
~Katie
Katie !!!! this is such a beautiful take on the mason storage idea….I love it….will be sharing it on my fb page and have pinned it ! Thank you so much for sharing at The Inspiration Gallery…hugs and happy long weekend…xo
Thank you Lucy and I really enjoy your link up parties, as well as all of the beautiful photos you post 🙂 Have a great weekend!
~Katie
Oh I am loving all the yardstick projects lately….and I love mason jars anyway! 😉 Great tutorial! Thanks so much for sharing it at Project Inspire{d} 🙂 Pinning!
Nancy
Thank you Nancy. The yardstick craze is definitely taking over and I’m loving it!
~Katie
Absolutely love this! I love mason jars. That is all I will drink out of! 🙂 I pinned this.
Gina
Thank you Gina! We are going to have mason jars for guests to drink out of at our wedding. They are just so perfect and cute! Thanks for stopping by!
~Katie
I love the ruler idea! Especially the tutorail with the mason jars organization. I am going to make one when I make my over the desk organizing board! Great idea! But where do you find so many yard sticks?
Hi Angela! I actually found them at my new favorite store, the Old Wood Warehouse. located in Carlton, GA. I talked about it here:
http://upcycledtreasures.com/2013/05/diy-wood-sign-using-your-printer/
This would look perfect over your desk and I look forward to see it when your done 🙂
Have a great weekend!
~Katie
Wow, such a great idea and you did a fabulous job!! Thanks for sharing at Give Me The Goods Monday! Hope to see you again next week 😉
Jamie @ somuchbetterwithage.com
Thank you Jamie and thanks for hosting the party – I will definitely be there next week 🙂
~Katie
What a fantastic idea! I just recently started saving all my jars so I’d like to do something like this and maybe drill a hole in the bottom to use them as herb planters
Yes, that’s another great way to use these, love it!
Featuring this post at the Owl’s Skull today! Stop by and grab a featured at button:)! Have a great week:). http://theowlskull.blogspot.com/2013/05/the-wonderland-hop-11.html
Yay, thank you so much!!
Totally clever and very useful. Knew if I kept those wooden rulers long enough, they would come in handy. Going to try this project using very old 12 inch rulers by putting 3 in each row. Thanks for sharing.
Thanks Sande! That’s so funny because my dad gave me a foldable 2 foot ruler that belonged to my grandpa over the weekend, and I was thinking it would be cool to either make single mason jar holders using 5 rulers or make a 2 foot long one using 10 with 2 rulers next to one another, or even with the foldable 2′ rulers <-- plus that way I won't have to cut the yardsticks to make a smaller version. I actually sold this one over the weekend and was looking up where to find vintage rulers last night, so I definitely like where your head is at and would love to see if when your done 🙂 ~Katie
Very cool…vising from your feature on Snapcreativity…#newfollower
Katie@mydiyhabits
Thank you! And thanks for telling me about the feature, that’s so awesome! 🙂
OMG!! This is fantastic!!!! I love it! And thank you so much for the mention!
Thank you Melissa and I appreciate the inspiration 🙂
~Katie
Hi Katie,
We are featuring your project at
Pursuit of Functional Home. If you get the chance, please stop by to check it out 🙂
Judy
Pursuit of Functional Home.
Thanks so much for sharing your lovely jar storage at Project Inspired! I featured them today here! http://www.settingforfour.com/2013/05/12-fabulous-vintage-and-repurposed-diy.html and pinned to my features board!
Woo-hoo! Thank you so much Heather!
Stopping by from the Bloglovin’ Collective Blog Hop.
@JLenniDorner
It looks like fun ideas.
Might want to check the value of the yard stick first. My friend was recently at an auction where old yard sticks were going for about $75 each.
Thanks for stopping by – sorry for the late response but this ended up in my spam comments for some reason. $75/ per yardstick!? Yikes, that would be one expensive project! I’m pretty sure those yardsticks were much cooler than mine but don’t think I could ever pay that much.
~Katie
Thanks for the inspiration. I just finished one and i am really happy with it. No ‘yard sticks’ here though. We dont have yards in Australia. I used some lovely bicycle paper as a background. It looks great. Thanks again
Hi Cindy! Your welcome and I’m so excited that you created your own version! I would love to see it if you have a blog or want to email me a photo 🙂 Have a great night!
~Katie
So love this!
I would love for you to link up at the Mommy Archive – we’re focused on mason jar crafts and ideas this week, Alice @ Mums Make Lists
Will do, thank you so much for stopping by!
LOVE LOVE LOVE this. featuring you tomorrow on the blog and sharing on FB today. 🙂 Thanks for linking up for Habitat!
Thank you so much Jocie! I’m so excited you will be featuring it tomorrow, yay!
HI Katie!
I absolutely LOVE this Mason Jar Storage Wall! I have been collecting Mason Jars since I was 11. This is the perfect way to show off some of my jars. Unfortunately, as another poster commented, vintage yard sticks are EXPENSIVE that is if you can even find them! It’s a shame because they have so much character.
I have two questions:
1. When you place the metal clamps up high, are you still able to out the tops back on?
2. This is probably the more important question. I am quite new to DIY projects. The most I have done it refinished a frame (spray painted the frame and turned it into a chalkboard piece) and refinished and CD holder that is a set of 5 drawers. Is this is a “difficult” project, something I should wait to try until I have had more experience?
Thanks so much for sharing your work and inspiration with us! You are pinned several times in my account! 🙂
Barbara
Hi Barbara! Wow, that is so neat that you have been collecting mason jars since you were 11, you must have a really awesome collection! To answer your questions: 1. Well, to be completely honest, I can’t remember! This ended up being my first Etsy sale and so unfortunately I can’t go test it out. However, I can tell you that I included the lids when I sent out the package and that after looking at the photos I feel like the lids still went on. Sorry I don’t have a super straight answer for you on that one 🙁
2. If you are comfortable with a drill and a hammer then you can absolutely do this project! There was a lot of measuring which is not my strong suite, and I still managed to pull it off 🙂 If I can do it, so can you!
Thank you so much for stopping by and for pinning my projects, I really appreciate it! Let me know if you have any other questions and I’d love to see your project when you finish 🙂
~Katie