UPDATE: All new featured RV tours will be posted on my other website, Wanderful RV Interiors. Existing tours will slowly be moved to the new website, and anything already moved will automatically redirect.
Disclaimer: This post may contain affiliate links, meaning, if you click through and make a purchase we (or those featured in this post) may earn a commission at no additional cost to you. View our full-disclosure here.
Have you ever thought of a problem as a blessing in disguise? We have, but it normally doesn’t seem like a blessing until much later down the line.
The interior walls in our RV ended up being a blessing that came from a problem. The problem was a water leak that came in through our bathroom skylight and soaked one of our ceiling panels. The blessing, we were forced to remove some of our interior walls, and in turn, we learned a lot about how they’re constructed while at the same time realizing we could make some changes.
By looking at the before and after pictures of the interior walls we now know the water leak was a blessing dressed up as a problem in the beginning.
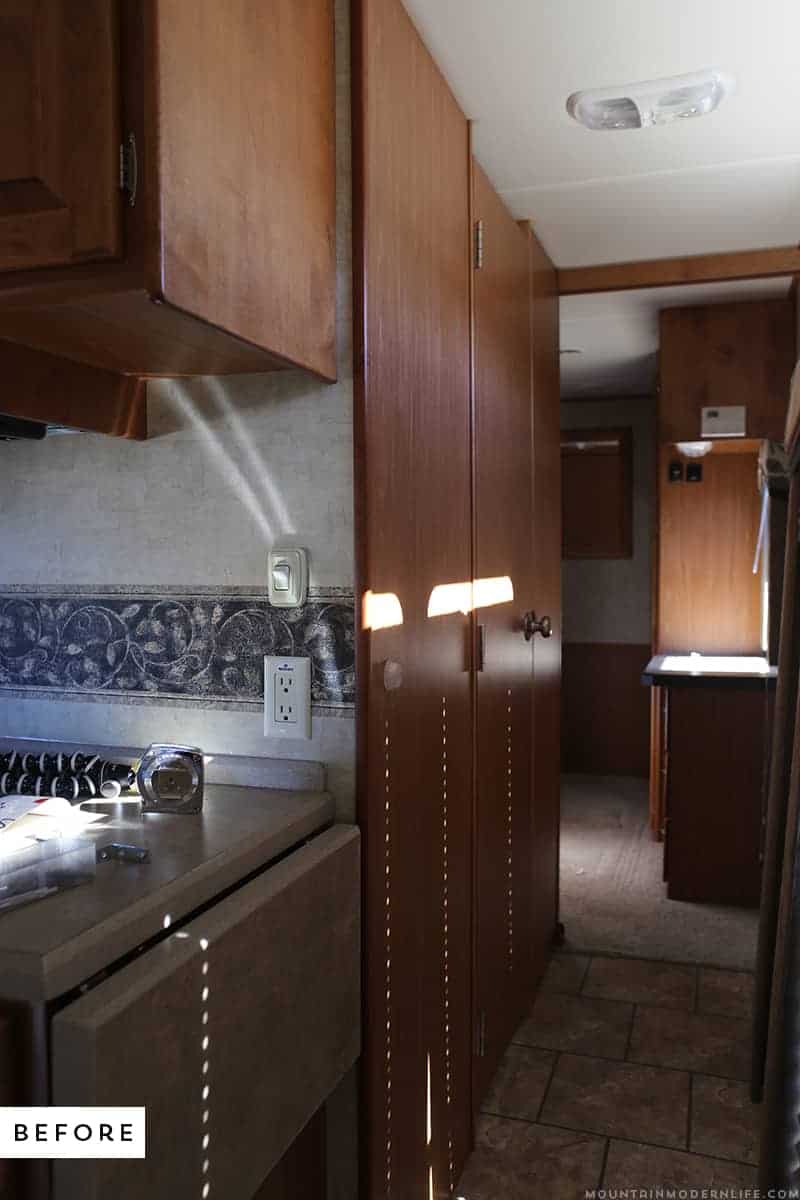
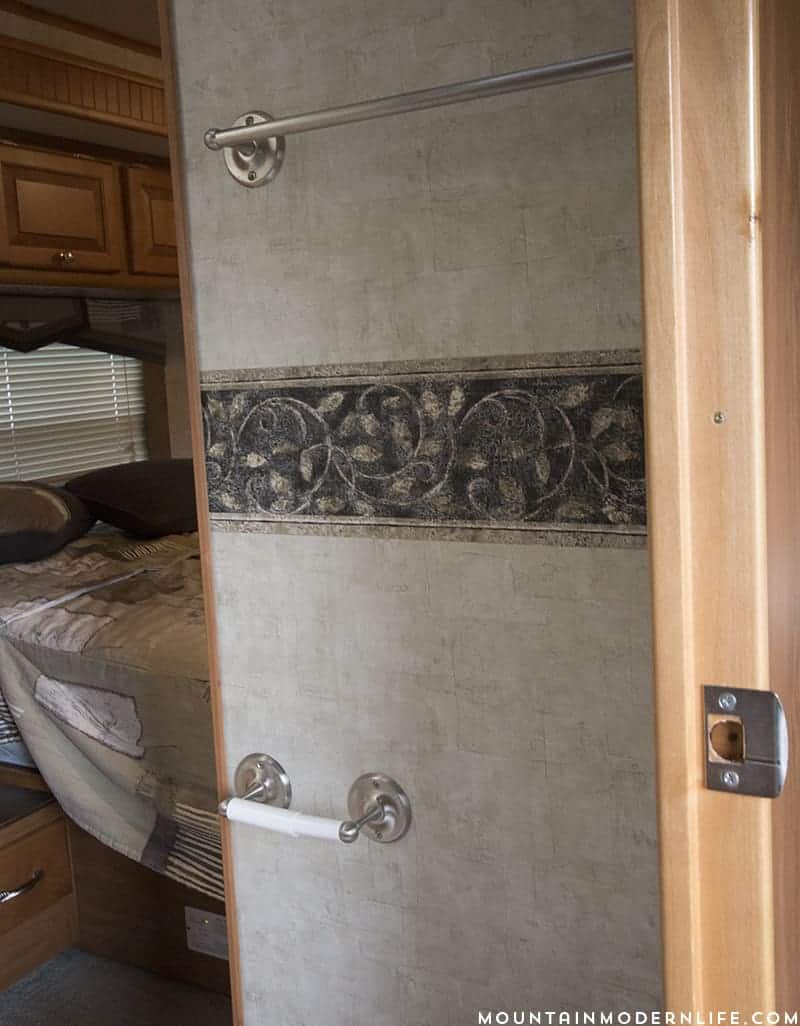
As a refresher here’s a before photo, which shows our old swing open door.
Creating Planked Walls In Our RV
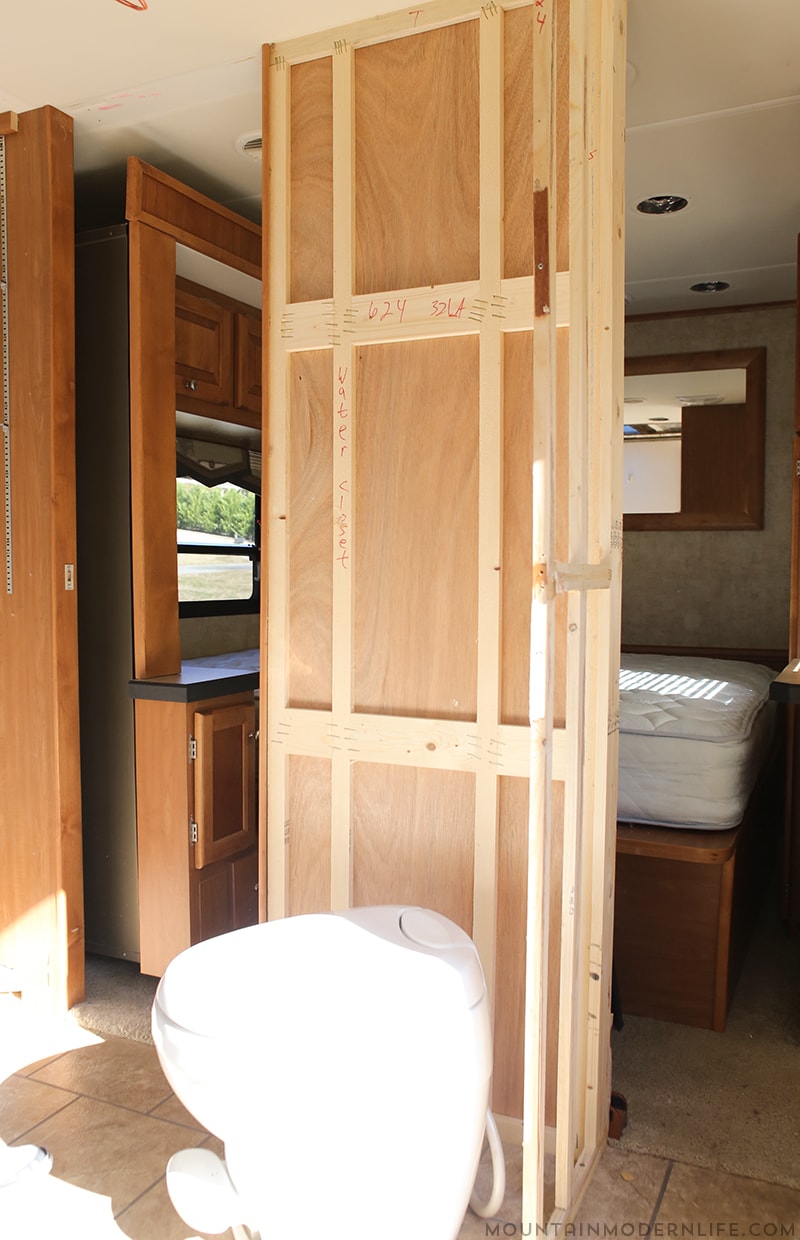
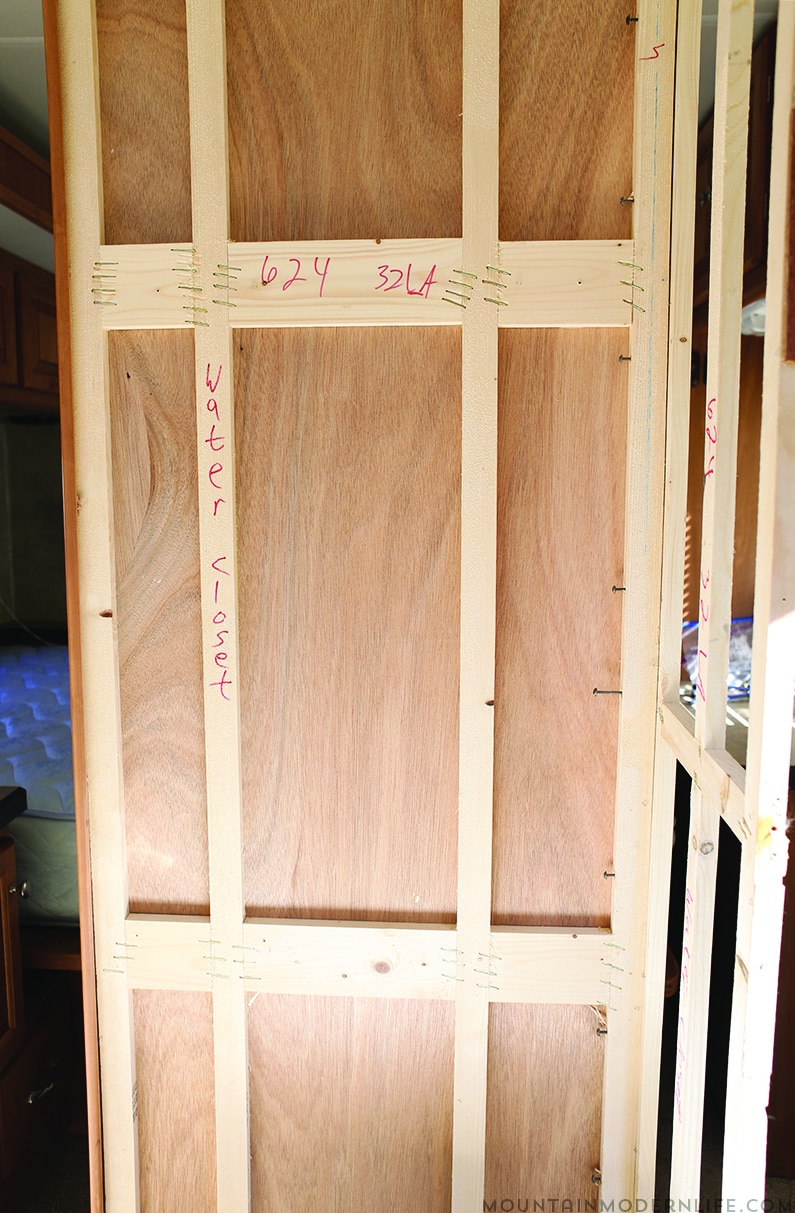
When we removed the interior walls of our RV we were forced to take off the paneling first. By doing this I was able to get a glimpse of how the walls were constructed which boosted my confidence level for the rest of the renovation.
When you’ve never removed a wall before or seen what they look like without the paneling it can seem a bit overwhelming. Don’t get discouraged though, because once the paneling is off it’s pretty basic.
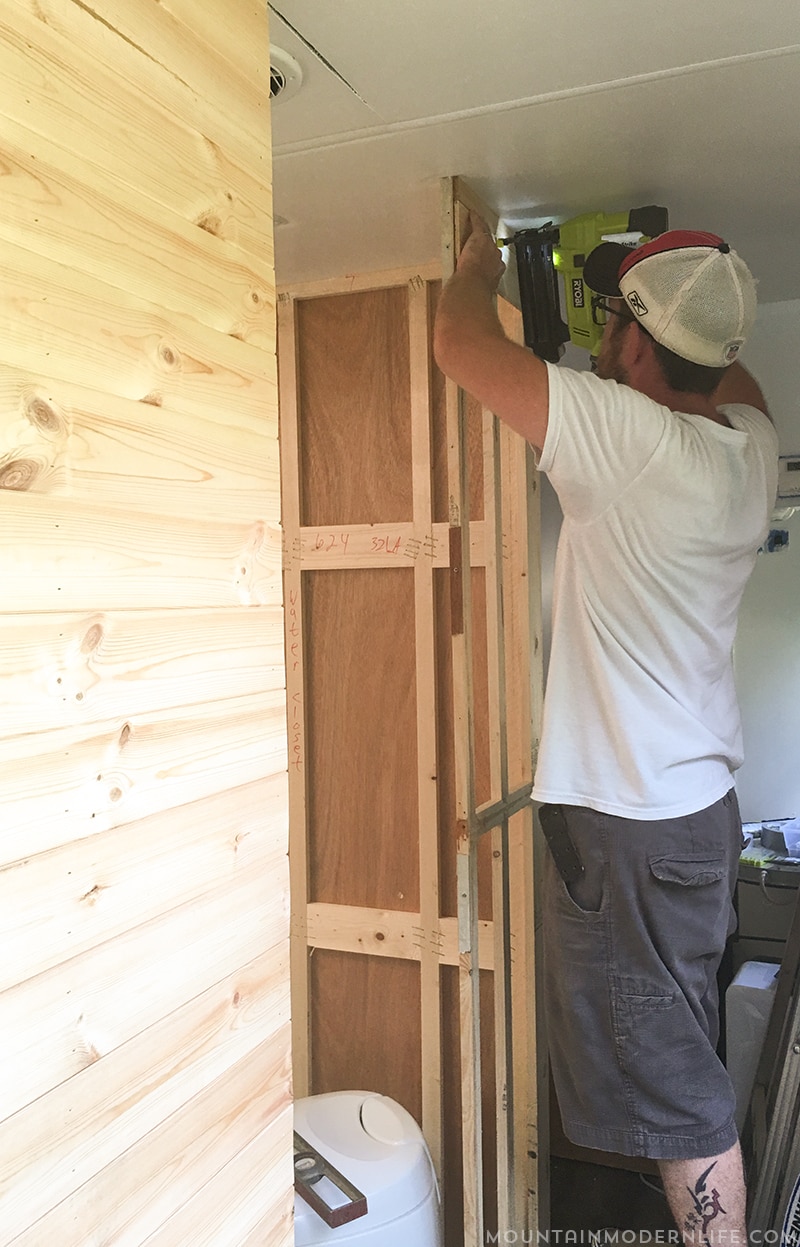
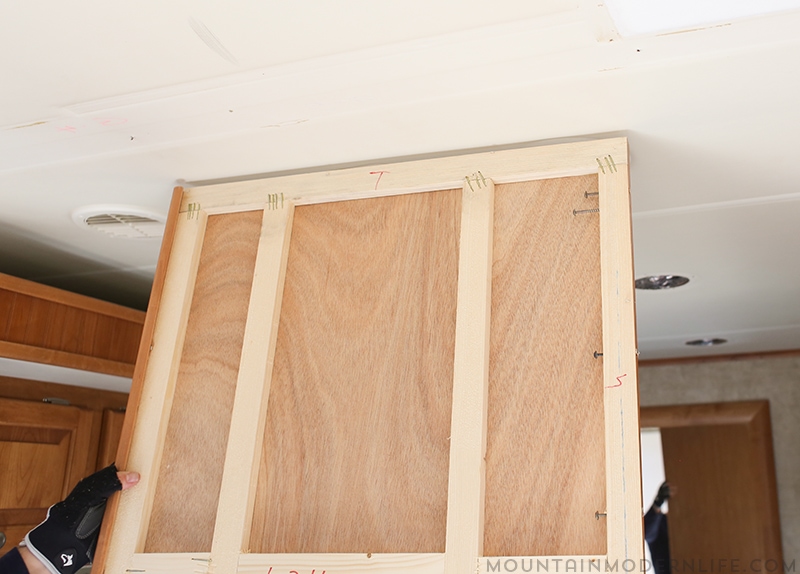
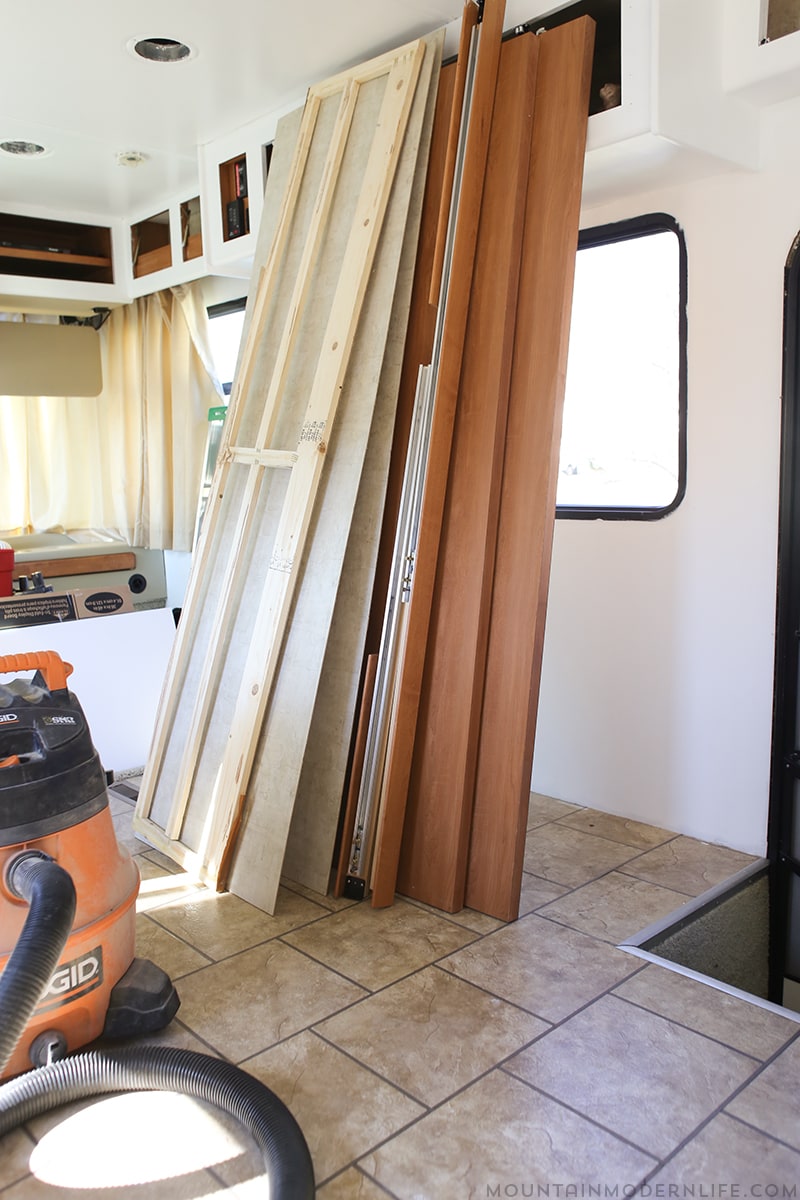
As you can see from the pictures above the skeleton of the wall is constructed of 1×2 and 1×4 boards.
- Rubber Mallet
- Level
- Ryobi Airstrike
- Drill
- Miter Saw
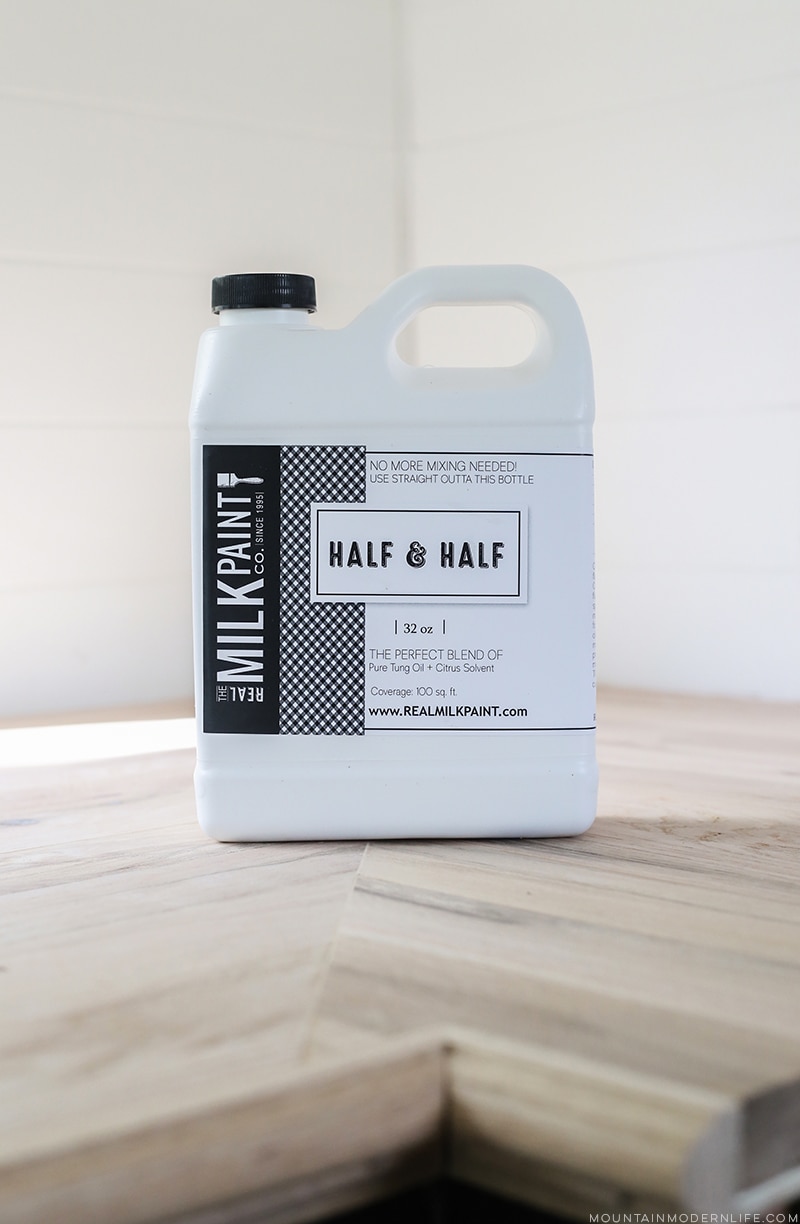
- Tung Oil with Citrus Solvent (The Real Milk Paint Company)
- 1 1/2″ Corner Molding
- 1 1/4″ Flat Molding
- 3/4″ Inside Corner Molding
- Pine Tongue and Groove
Hopefully, if you’re creating planked walls in your RV you don’t have to completely remove the walls. We had to remove ours because of the leak. If you need your walls completely removed I touch on those steps at the bottom of this post.
As we move forward I’m going to explain how we created planked walls in our RV which for us involved removing the old panels. If you’d rather not remove your panels at all you could attach the tongue and groove boards directly over the panels that are installed.
Considering we needed to remove the panels to remove the walls for the water leak we decided we’d not reattach the panels. By leaving them off it saved us a little bit of weight and was just as easy to install.
You can do it either way, we actually left the panels on in our kitchen where we installed our planked walls backsplash and on the planked wall to the left of our media cabinet.
If you’re going to leave your panels in place you can skip Step 1.
Every RV is different, below I’ll explain how we went about creating planked walls in our 2008 Tiffin Allegro OpenRoad 32LA. If some of the steps I mention below don’t seem to work within your own RV I’d suggest reaching out to your manufacturer to see if they have any recommendations.
Anyway, on to step one.
Step 1 – Removing the Panels
One of the hardest parts about removing the panels is finding out exactly how they’re attached. Luckily you’re here and I can help point you in the right direction.
I hate to admit it, but as I was trying to remove our panels I got frustrated. Mainly because I was having a heck of a time finding a place to get underneath the panels (our paneled walls were made out of luan plywood with a veneer surface). That’s when I decided to go piece by piece.
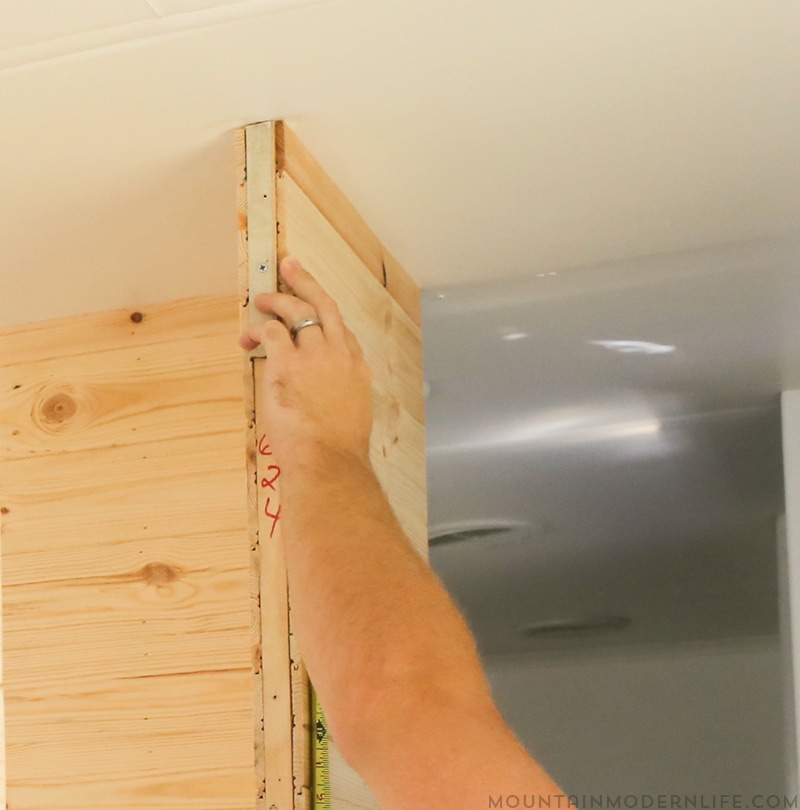
Your first targets are going to be the door jamb pieces. As you look at the edges of your walls you’ll see the door jamb pieces lining the opening where your door closes.
Above you can see where one of our door jambs was located.
They were attached using small nails and staples. However there were also a couple of screws for the doorknob latch. Make sure to check for any screws that may be hidden. Once you know there aren’t any screws holding them in place it’s a matter of gently prying it loose.
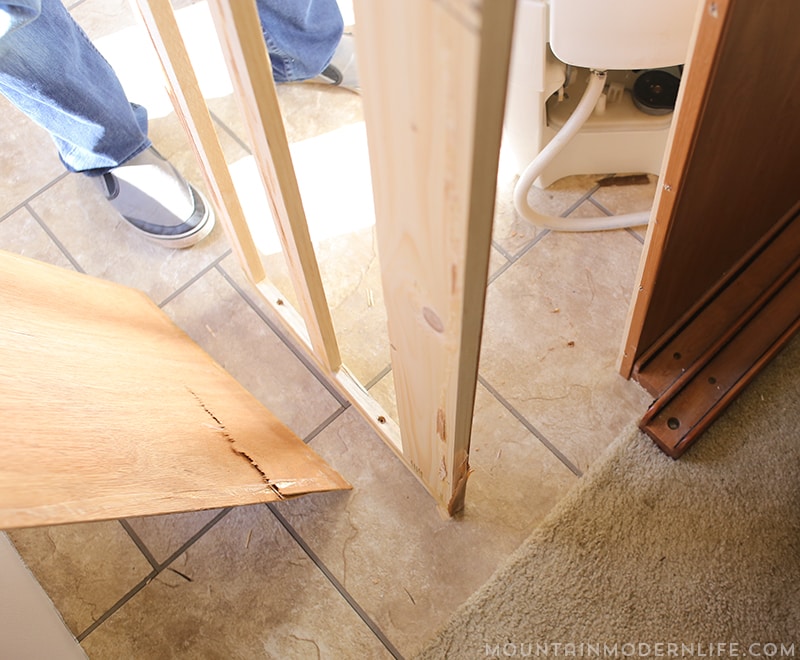
Now that the door jamb piece is removed you should be able to see the edge of the panel. Our panels were attached with a combination of glue and staples. At first we thought we may reattach the panels so we were very careful about how we pried them off.
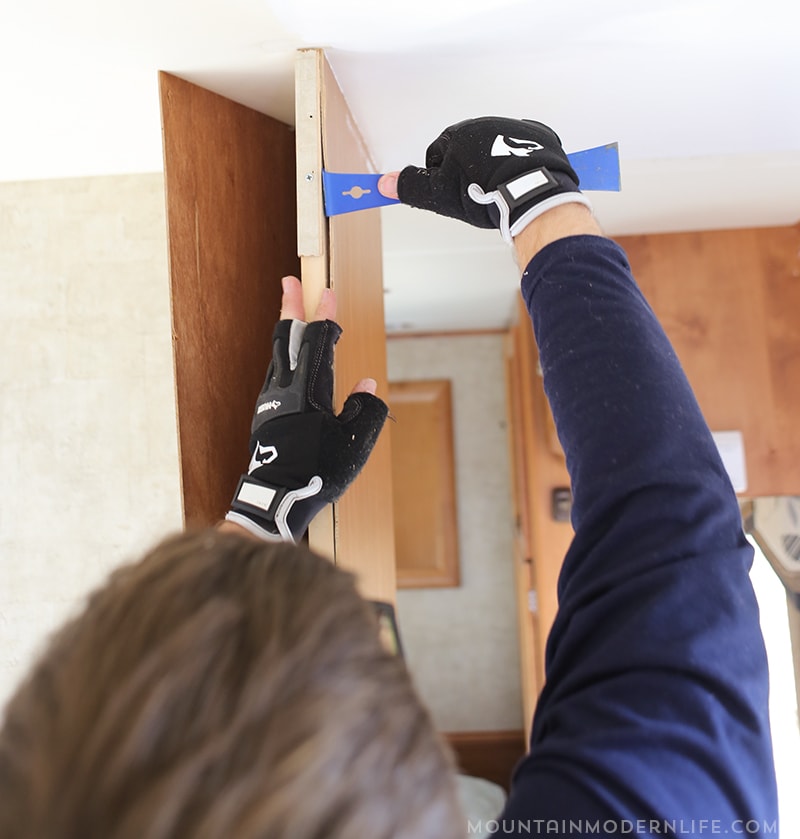
Anyway pry all the way around the panel and you should be able to slide it off and out of the RV. You’ll want to follow this same process for all the walls you’re planning to plank, that is unless you are planking right over the panels.
Step 2 – Measuring and Pre-Cutting
Now your paneling is removed and just the skeletons of the walls remain. Time to make it look the way you want.
Katie and I elected to use pine tongue and groove paneling. We wanted something that was light weight and easy to install, these panels were perfect.
Considering I’d be using the same walls we’d removed to fix the ceiling panel I wanted to make sure it was the same measurements across for the entire height of my wall.
I started with the wall closest to the kitchen and measured the distance across from the top to the bottom. Tiffin did a great job creating the wall, meaning all of my measurement were the same (23 3/4″). Next I measured the height of the wall itself (79″), in doing this I was able to figure out how many pieces of paneling I’d need.
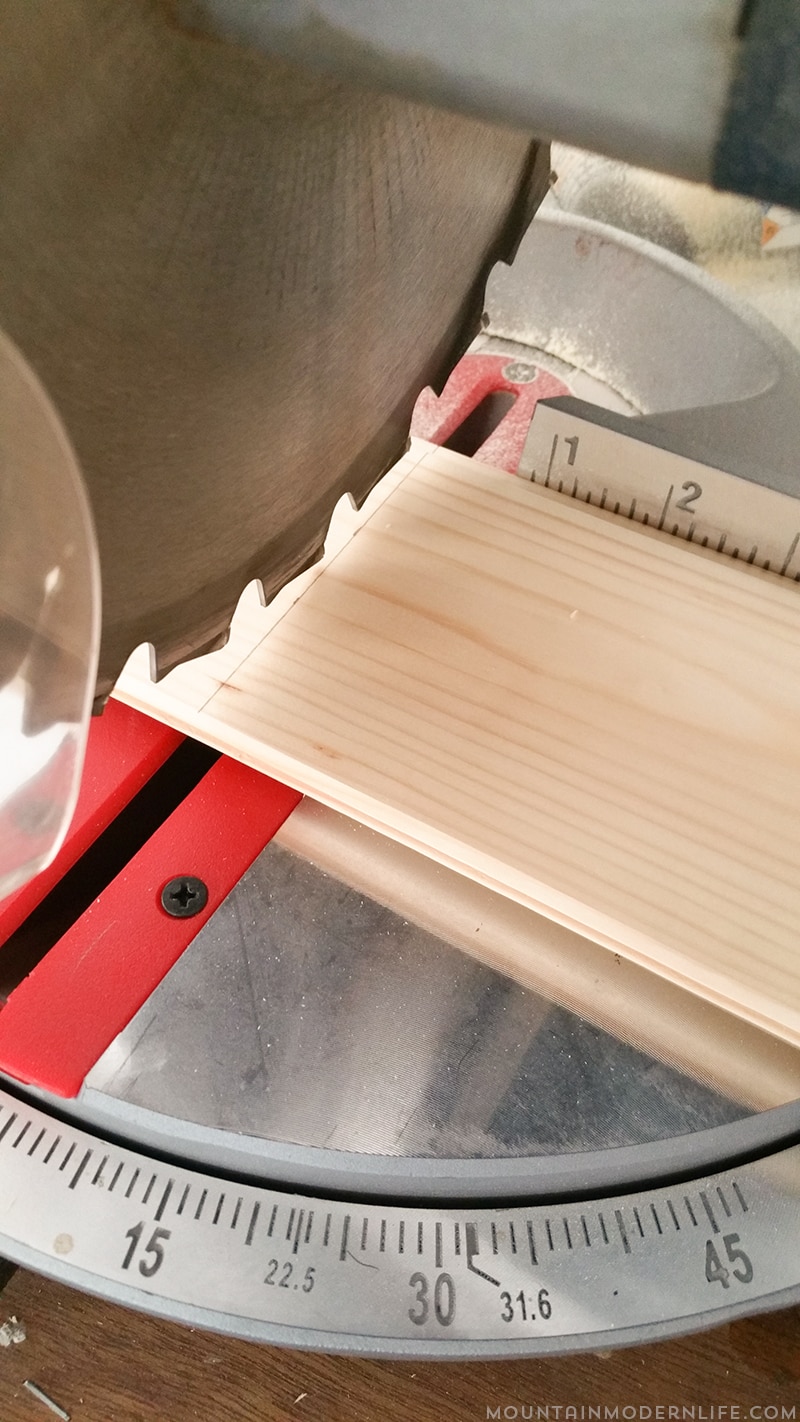
Since I knew all the pieces needed to be the same size I used my measuring tape and marked lines on all the pieces I’d need. Then took them over to my miter saw and cut them all at once.
Step 3 – Attaching the Tongue and Groove
At this point I have all of my tongue and groove boards cut and stacked in different piles for each wall. Now it’s time to install them.
To do this I needed a rubber mallet, level, and our Ryobi Airstrike (battery powered nail gun). With those tools on hand I grabbed my first piece.
As I held the first piece up against the wall I considered which way would be best to start. Should I start at the top or bottom, should I put the groove or the tongue against the floor or ceiling?
I ended up cutting a piece of the tongue and groove in half, this left me with a completely flat edge on one side and the tongue on the other. I then placed my new flat edge flush against the ceiling, leaving my tongue facing down from the top.
This way worked extremely well, but you should do what is best in your situation.
Now that I know how I’m going to install it, it’s time to get to it.
I took my first piece and line it up against the ceiling, while at the same time making my edges flush with either side.
When I did this I noticed it didn’t look completely level, so I grabbed my level and placed it against the bottom of my piece of paneling. By using the level I was able to make sure it was straight.
Now taking my Ryobi Airstrike, I placed nails through the paneling making sure they find the studs in the wall. Our walls had three studs, one on either edge of the wall and one in the middle.
With the first piece nailed in place it was a matter of going piece by piece down the wall.
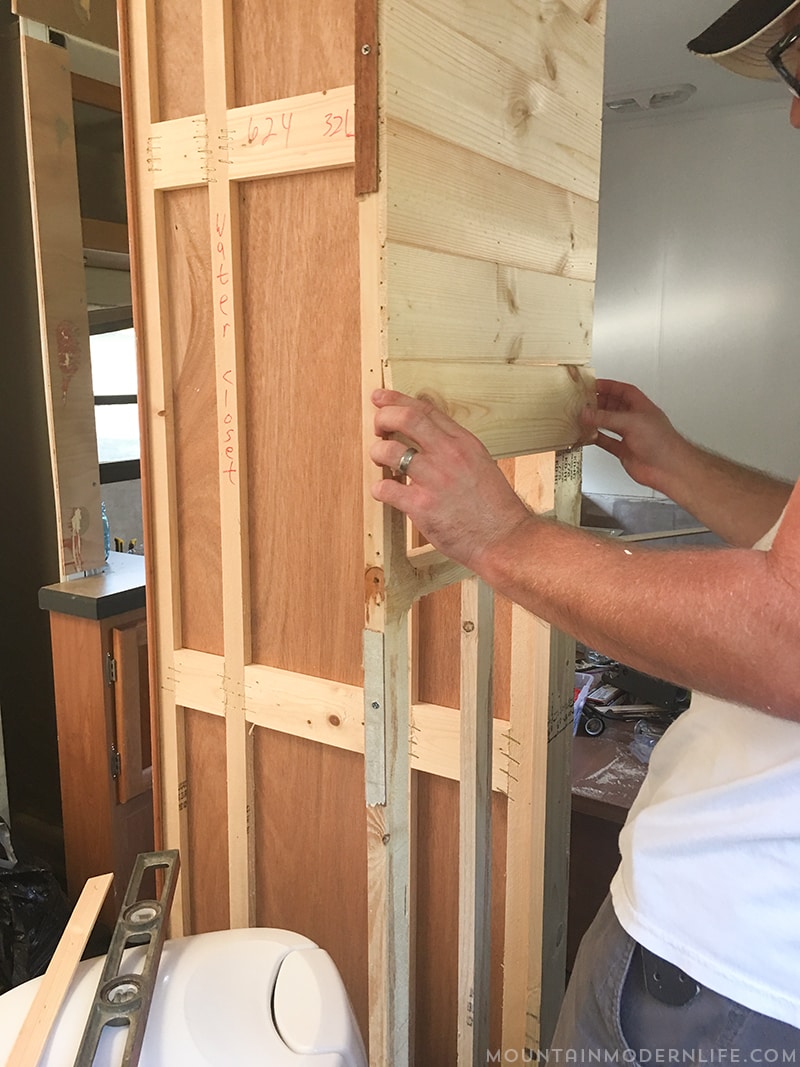
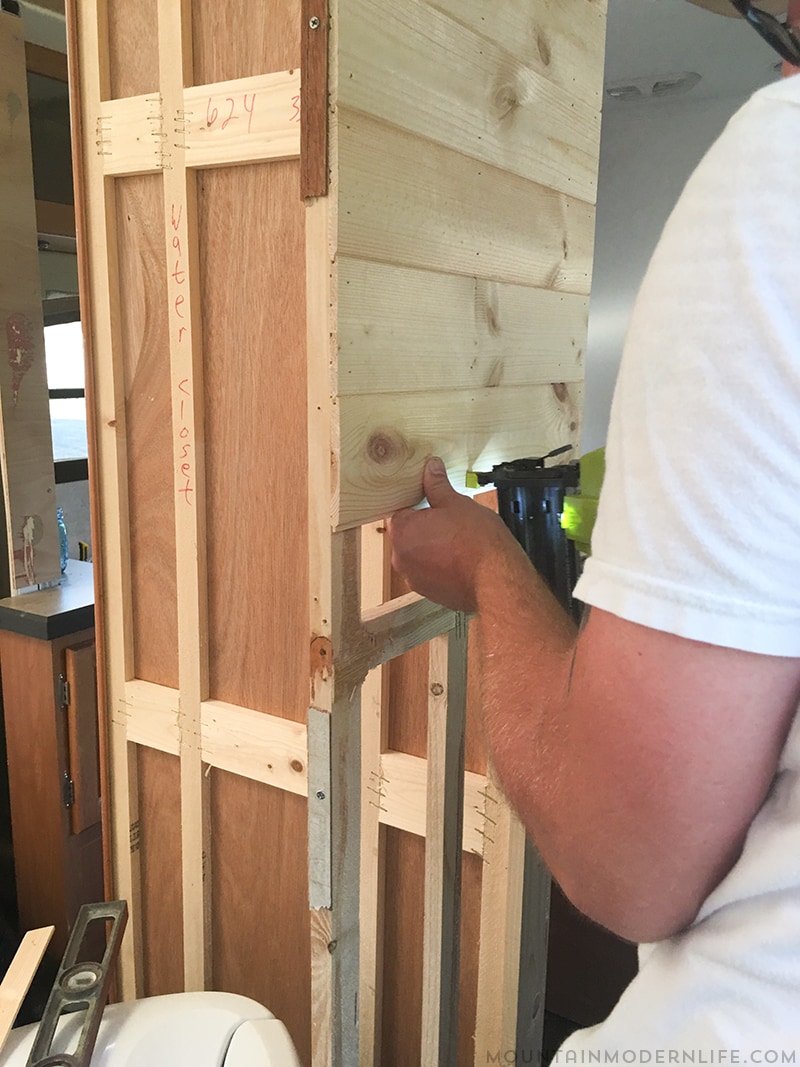
For the next 3 walls I followed the same process until I could no longer see the interior skeleton of the wall.
Step 4 – Can’t Forget the Trim
So now you’ve got to put finishing touches on the doorways so as they don’t look unfinished.
Considering we no longer had a swinging door I’ll be referring to these finishing touches as trim.
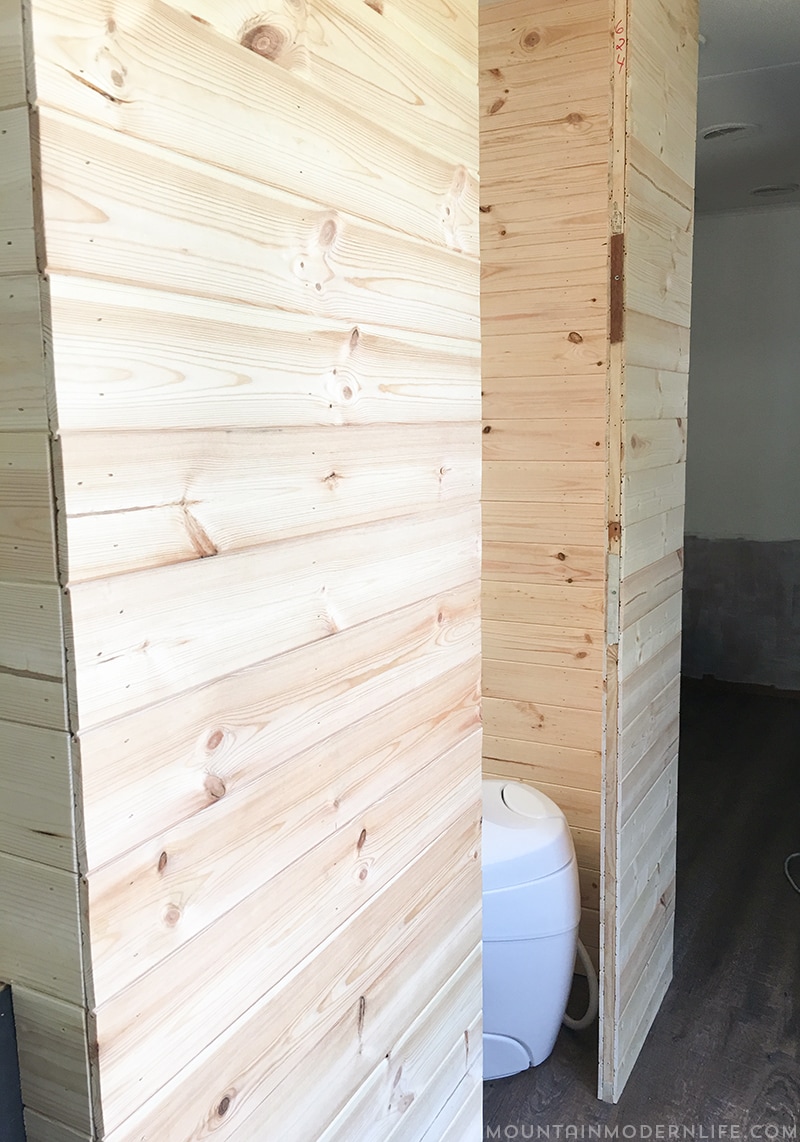
For the hallway doorway that leads into our bathroom and the edge of the wall that leads to our bedroom we used a 1/4″ thick by 1 1/4″ wide piece of pine which we picked up at our local Home Depot.
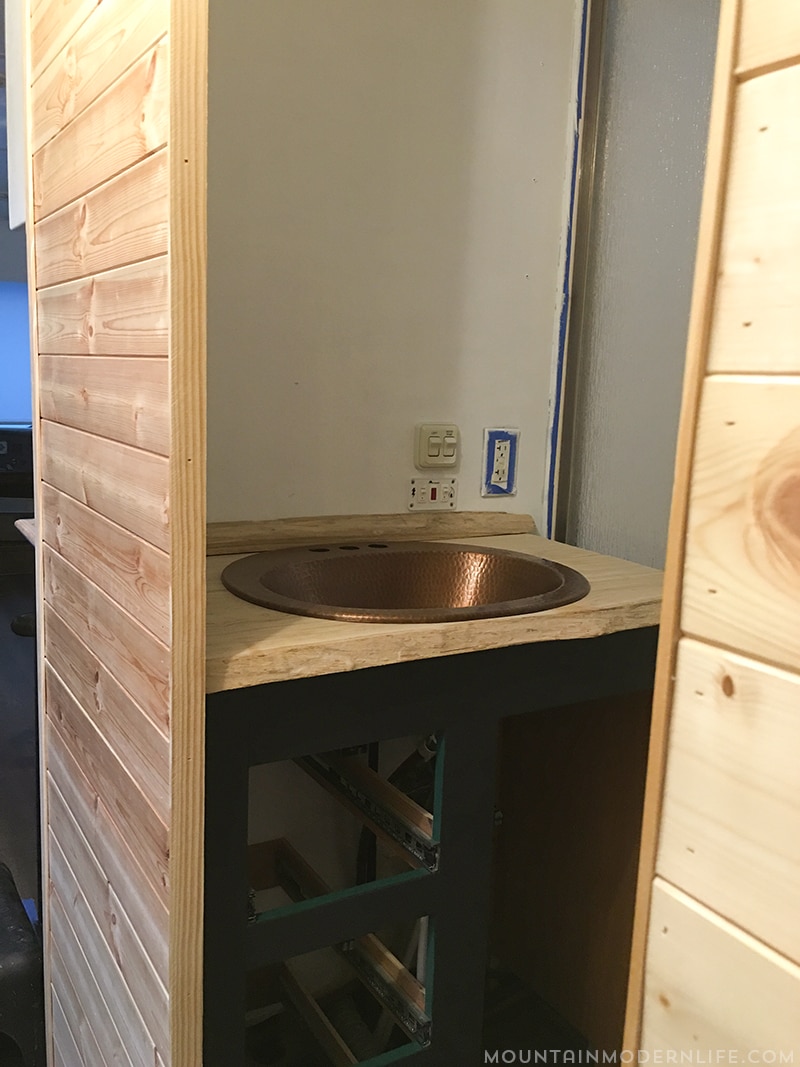
We used a piece of 1 1/4″ 90 degree corner molding for where the hallway meets the kitchen.
You can see our kitchen backsplash to the left, which we used pine tongue and groove for as well.
We used a piece of 3/4″x 3/4″ inside corner molding for the 90 degree angle created where our hallway and bedroom walls come together.
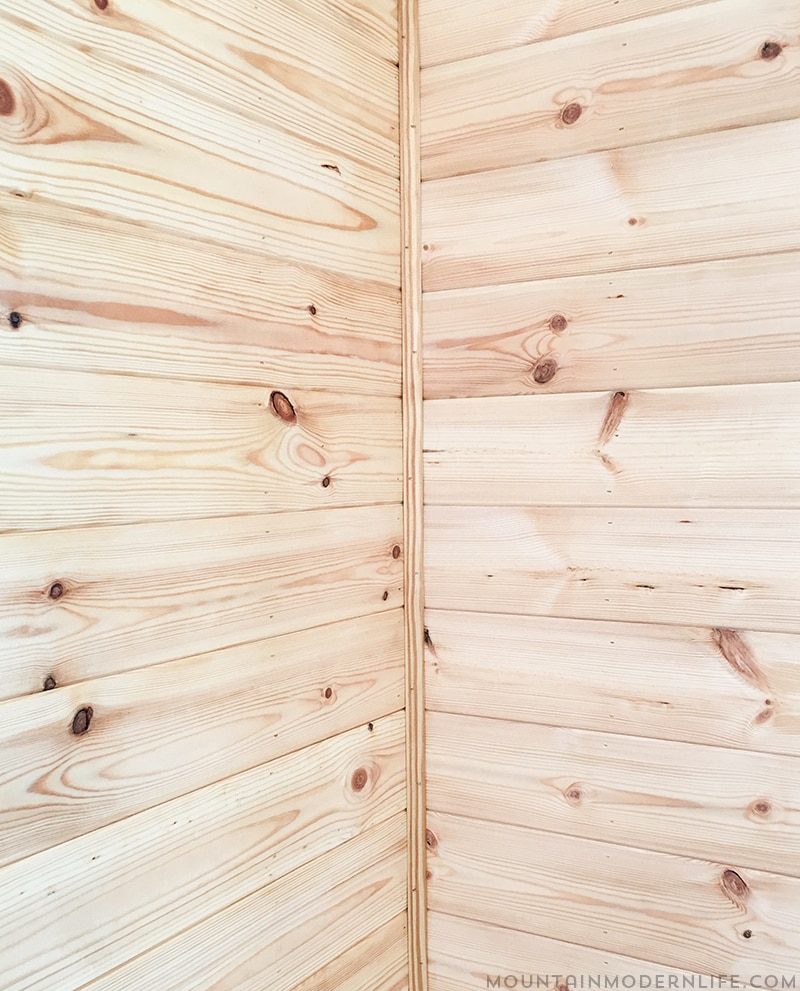
At this point the walls are looking like walls :).
Step 5 – Sealing It
In a previous post we talk about The Real Milk Paint Company and their Tung Oil with Citrus Solvent. We love the way it looks on a few of our projects including our kitchen countertops, and bathroom countertop. We had some left over so we went with it on our walls.
You can watch the video where we walk through the process of how we used it on our bathroom live edge counter top.
The video of us using Tung Oil with Citrus Solvent on our bathroom countertop may make it seem a bit more difficult than it is for these pine tongue and groove pieces. The main reason being that these pieces are much thinner than the countertop therefore requiring less coats. We put a total of 2 coats on our walls.
If you’d like more information on how to use Tung Oil.
The beauty of tung oil is that it’s all natural, works as a water repellant, and is non-toxic. It works by seeping down into the wood in turn fully ingraining itself in the wood. We’ve noticed the tung oil darkens the wood a bit while also helping to highlight the natural wood grain.
Side Note: Tung Oil dries with a matte finish not glossy.
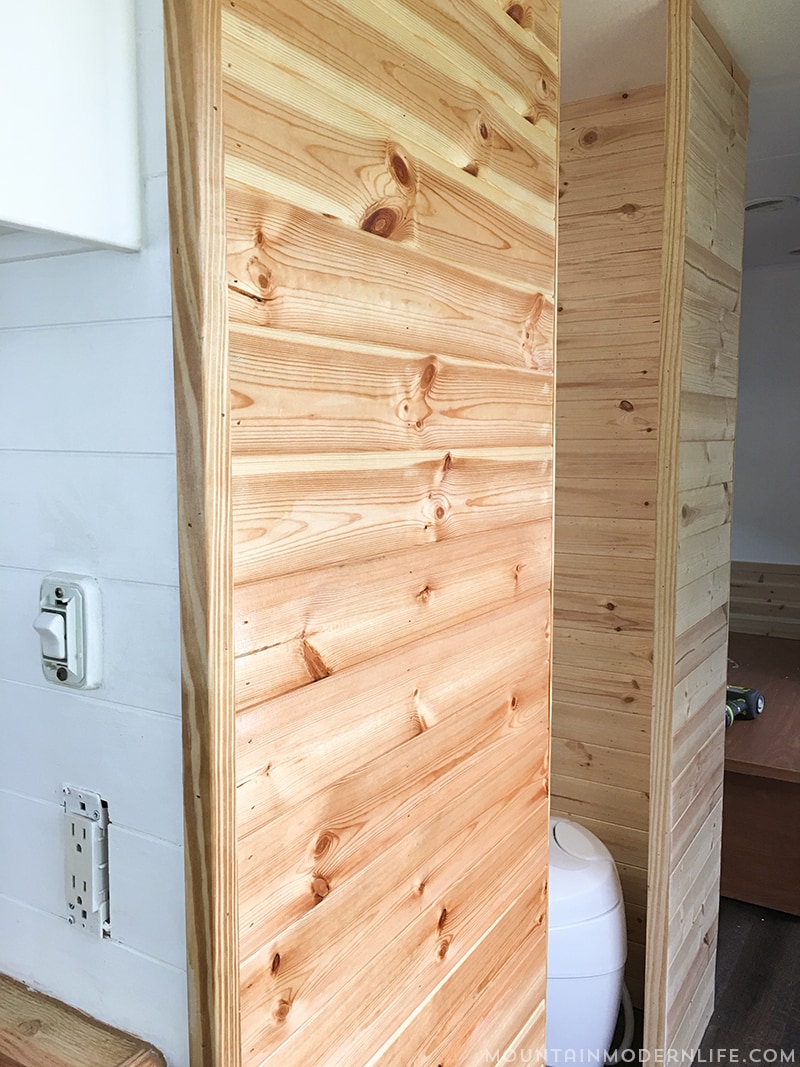
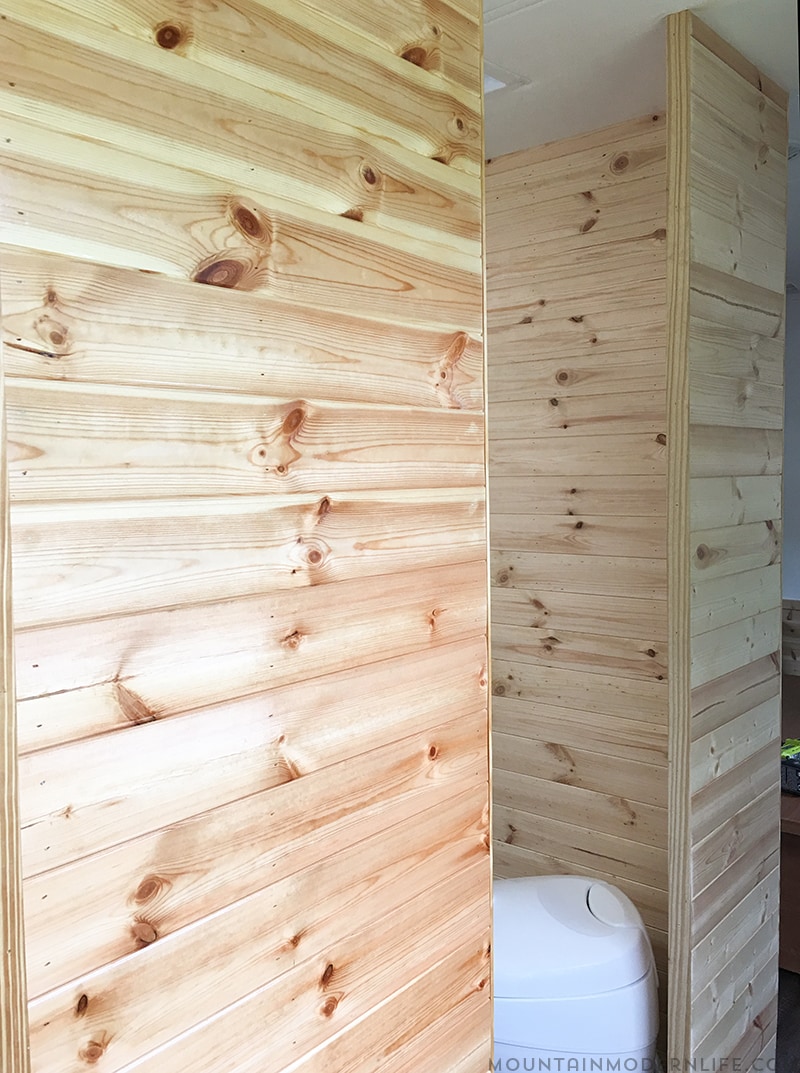
In the picture above the wall on the left has been tung oiled, the one on the right has not.
We have become huge fans of tung oil, but know that not all tung oil is created equal. Some of them out there add extra ingredients to the oil which can take away from the all natural aspect. If you’re trying to reduce chemicals you should do a bit of research, or just go with The Real Milk Paint Company’s version because we’ve already done the research on them.
Before and After:
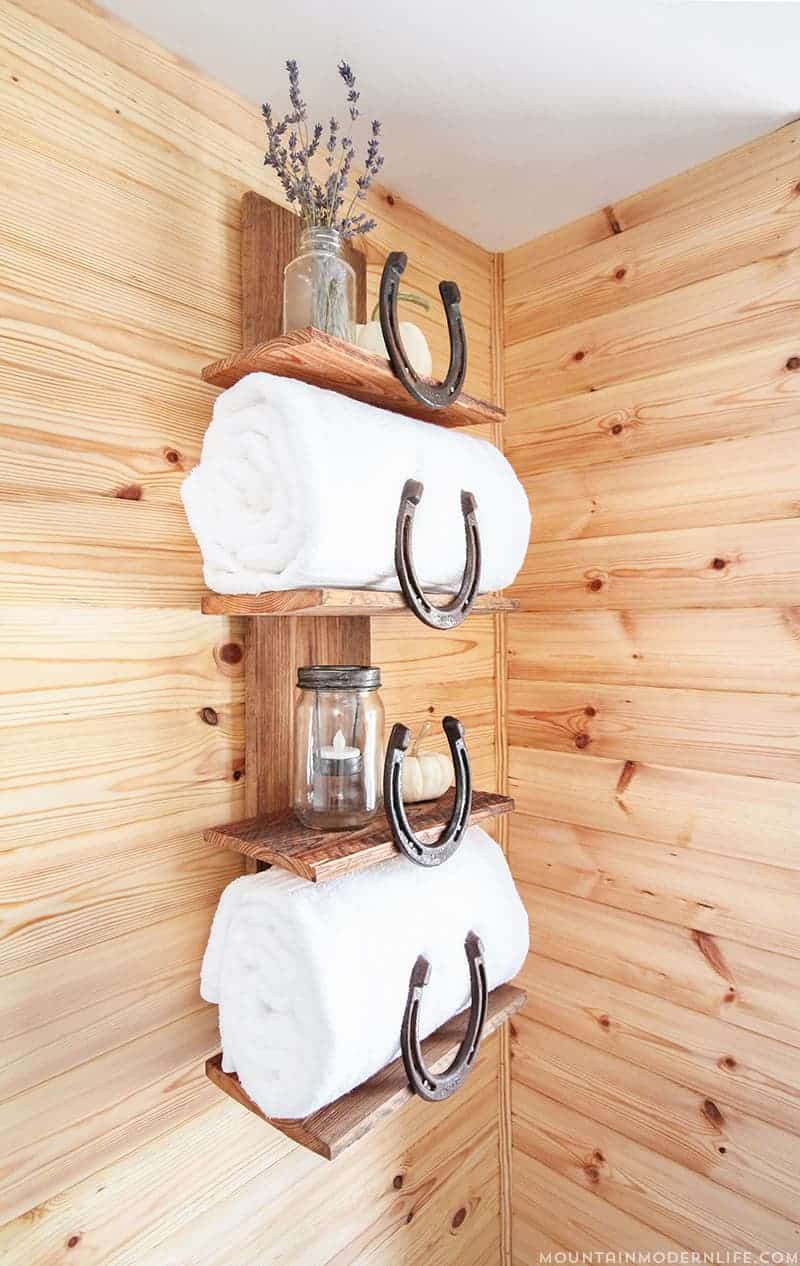
Here’s a photo showing the planked walls in our bathroom:
Extra Step – Removing the Walls
Do you need to remove the walls completely? Don’t worry it isn’t very hard. Every RV is different, our walls didn’t have electricity or plumbing running through them. That in turn made this process a bit easier for us.
If you have plumbing or electric running through your walls I’d suggest reaching out to your manufacturer to see if they have any tips to help you along the way.
If you don’t have those thing running through your walls I hope the information below will help.
Searching for Screws
You’ve removed the paneling from the walls (this will show you if you have any plumbing or electric running through them). Now it is time to hunt.
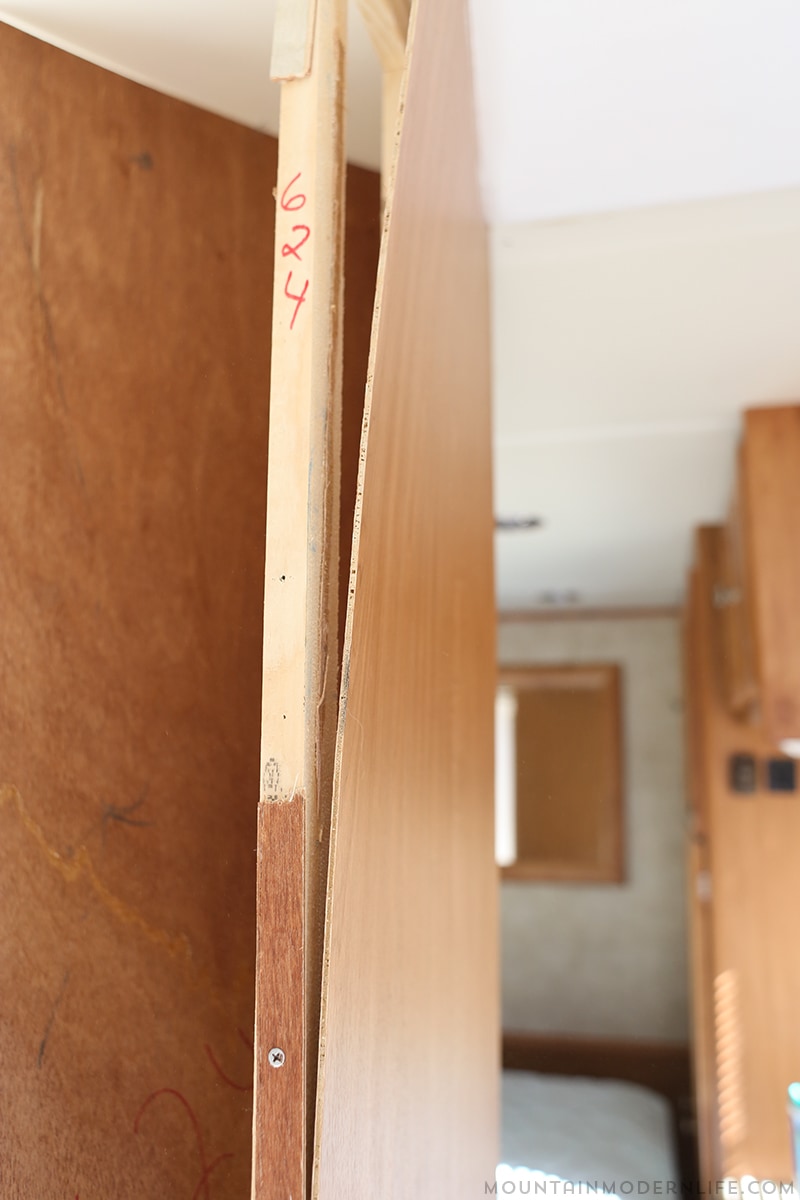
I say that because we found a few of our screws were hidden behind little pieces of plywood. I know it makes no sense, check out the photo below.
The good news is there was only six screws. There was a screw in each corner, with two screws in the middle of the wall, one going into the ceiling and one into the floor.
Now that you’ve found all of your screws grab your drill and remove them. The walls should stay in place after you’ve removed the screws due to the pressure from the ceiling and floor.
Remove the Wall
Before you start this step look closely at the wall to make sure you didn’t miss any screws. Leaving one screw behind can lead to a very bad time.
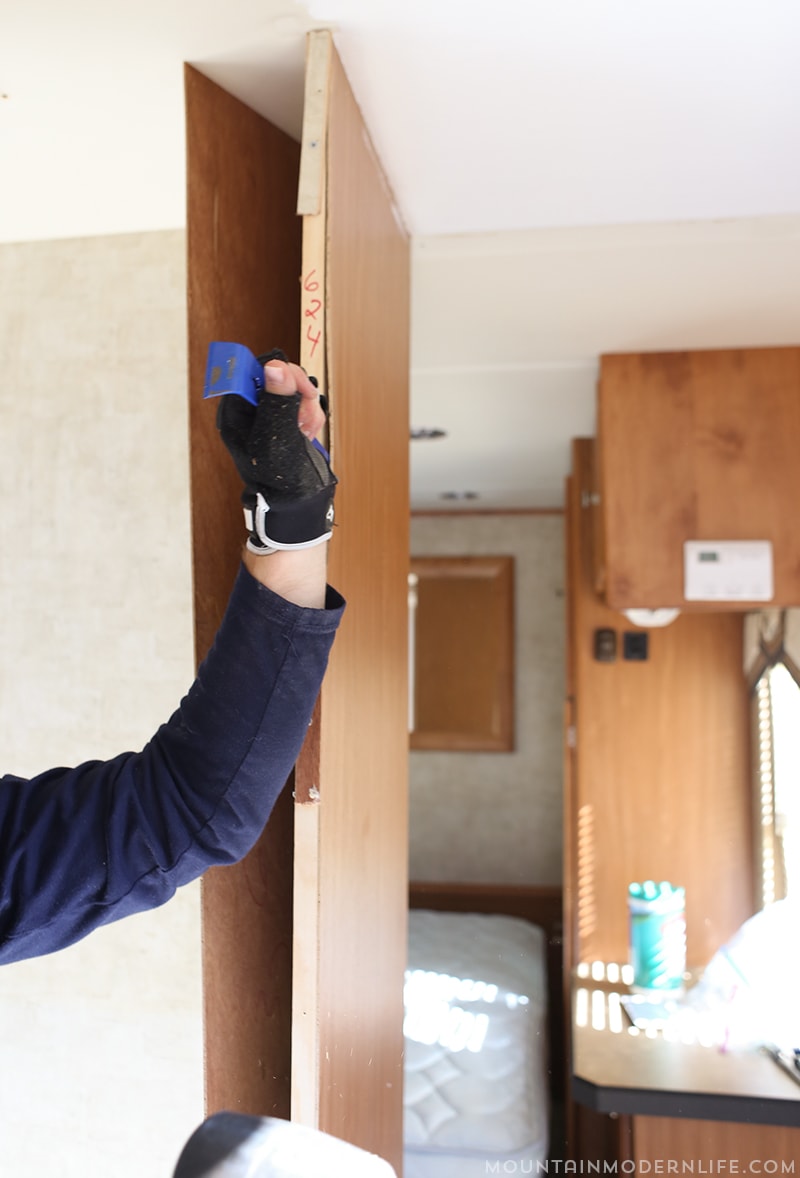
You’ll want to grab your rubber mallet and tap at either the top or the bottom (I chose the top). It’s important when you tap on the wall to remove it that you do it gently. These walls are generally made of 1×2 boards which have had screws and nails placed in them. If you strike the wall too hard you could split the wood or break it a part.
Now all you need to do is follow those steps for the remaining walls and you’ll have them removed.
That about wraps it up for how we went about creating planked walls in an RV. I really hoped this has provided guidance for your own project or given you the inspiration to try something new.



We are planking our ceiling and every tutorial helps. This turned out great.
Thank you much! I’m glad it was able to provide some help even though it wasn’t exactly the same 🙂
It looks very nice and I love the style but doesn’t it add weight to your RV? And if so, how much? Great job on your remodel!
Hey Rhonda, thank you for the kind words, and great question on the weight. Katie and I have been extremely cautious about the weight we are putting in the RV, whenever we add we try to take away. For the walls it wasn’t too bad though because we removed the luan plywood and replaced it with the pine tongue and groove. Luckily the pine tongue and groove was extremely light, I’d say for all three walls it only added about 2 lbs total. At the same time we did replace a door that blocked the hallway from the bedroom with a curtain which also saved some weight in that section.
Fabulous job!
Thank you much!!
Great post. I love all the detailed how-to’s. I updating our RV with some wood accents…not nearly as big of a project as you had here! Your work turned out beautiful.
Thanks so much Jenn! Adding wood accents seem to completely change the look and feel of your RV. For us it makes it feel so much more like home, best of luck on your wood accents, let us know how they turn out.
When you can make planked walls by yourself it’s a great luck! So great job. Looks terrific.
Thank you much Nicolas! We are pretty happy with the way it turned out, on top of that we learned a lot about the RV.
Beautiful job! My wife and I really like your sliding barn wood style door. We are curious how the sliding mechanism works and how stable the sway of the door has been for you. I don’t notice any tracks that it sits in. Do you mind sharing how it works and how you built/installed it? Thank you!
Hey Brice, thank you so much for the kind words. We’re going to be sharing a full post on how we created the sliding door in the future, to be honest though there are still some touches we need to add to it.
We actually used copper piping, flanges, and larger eye hooks for the sliding mechanism, to keep it from squeaking we rubbed the copper pipe down with coconut oil (that stuff can be used for almost anything haha). We don’t have a track for the door to sit in, instead we have it on two wheels. While we’re parked it stays in position on it’s own, but when we drive down the road we have a hook and latch system in place that holds the door secure.
When we come out with the post we’ll give a ton more information, but I hope this helps at least give you an idea for the time being. Let me know if you have any other questions about it and I’ll do my best to answer. Best Wishes, Eric
Hey! Love your post! It has inspired me to do a plank wall as well lol
Did you fill all the nail holes with a specific type of filler that accepts the tung oil or did you leave the nail holes unfilled?
Great job and looking forward to following your future posts!
Thanks Kami! I think we went a little crazy with the nails, but with that said I went over them with Minwax wood putty. It doesn’t match perfectly but unless you look closely they don’t stand out too much. You could always purchase a couple and blend them together to try to color match it better.
I am setting up a Mercedes Sprinter for my Daughter who will be traveling mostly up and down the west coast. She is an Outward Bound and Naturalist At Large instructor. How did you accommodate for shrink and swell of the pine boards?
Thank you.
Hey Jerry Chapmon, that’s awesome you’re setting up the Mercedes Sprinter. When we did our backsplash and the small section above our media cabinet we cut the boards a little short of the space we needed and filled in the edges with caulk. I feel like this give the boards a soft edge to swell into and shrink out of. So far it has worked and we haven’t noticed any negative effects. I hope this helps but please feel free to reach out if you need more info 🙂 Best Wishes, Eric
I love it, I think it’s great when RV Owners put their own stylish twist into their RV’S. This is what I call “making it yours”. Like you I also like creativity in my own work. I like your style of decor. I might borrow this idea when I install our combo bath / Jacuzzi / shower. One item I already planned on using is the Faux dry stacked stone (earth color) which I have been using through our RV already. now you may have just helped me with the other element I was looking for. in my place I am leaving a lot of the dark wood cabinetry alone and just adding touches of faux dry stacked stone, blue pine,, cedar planks, and a few homemade living edge cedar tabletops and bamboo hardwood flooring. currently I am working on my kitchen area and it just so happens you had mentioned your countertops that you made. did you make them from planks or cutting block? how durable are they? seeing on how small our countertops are I was thinking butcher block….. seeing how it will be a lot of work and we are full timers I am still in the planning stages for this area. I am also considering getting more natural 3″ thick cedar living edge to match our new dining room table I made.. just doing a lot of brain storming right now. my overall goal to our RV is when you close the door behind you after entering, you forget you are in an RV and think you are in a custom built log cabin. (I am hooked on that type of decor.) sure hope to here back from you soon ( E-mail ). again, great job.
ide note; did you make any easy access doors or panels in case you have to get back in the wall? or was there no need?
Hey Gregg, We actually used Utility Grade Red Oak Hardwood Flooring for our kitchen countertops. They’ve been extremely durable though if we were to do it again we’d probably go up a grade in the quality of the flooring. I think you’ve accomplished your goal of making it look like a log cabin once you closed the door 🙂 That is the same kind of thought process we’ve had haha. Most of the access we needed for under the cabinets was already there (in the since that if I really needed to I could do work back there). I could’ve made it a bit better but we were on a major time crunch. Anyway Great to hear from you Gregg and thanks for swinging by. Best Wishes, Eric
Using a few planks as an accent might be OK, but not too much. If you actually weigh the planks and the ¼” luan, you likely didn’t have a 2 pound difference. Also, planks won’t flex as easily as thin plywood which would have a correspondingly higher strength per square foot. The danger in using solid wood versus plywood is the weight on your trailer suspension and your center of gravity. Especially on smaller, vintage campers. I see articles about people replacing aluminum skins with planks and “manufactured” cedar logs! That’s a lot of weight and moves the center of gravity up higher than the camper was designed for. Danger comes in flipping the camper…especially in tight curves at even respectable speeds. And yes, “solid wood” acts differently to humidity changes than even thin plywood. Solid looks good, but you can get the same effect with saw blades or router bits to hint at plywood being solid.
Hey Jim, we’re in a Class A RV so I believe it may be a bit different when it comes to the effect on our center of gravity and the likely hood of us tipping. You’re probably right on the weight difference being more than 2 pounds, I didn’t actually weigh the 1/4″ luan and the planks, though I think we’d both be surprised at the small weight difference between the two. It’s small enough that if it were to make a difference in the safety of our traveling, I’d go ahead and say the coach wasn’t safe to drive in the first place. I’ve never worked on a travel trailer but it’s great to know that if you’re doing a planking job in one you need to take into account your center of gravity and weight in relationship to the center tires along with the height at which you’re putting weight. We’ve been traveling for about 2 years now and haven’t noticed any negative effect from adding the additional weight, or with the wood expanding or contracting any more than we planned for. I appreciate you bringing up a great point, that’s whenever you’re doing a project on your rig make sure to do your research so you know that the project will not compromise the safety of your rig. We all want our rigs to look good but we also need to maintain the safety standards that allow us to travel safely down the road.
Hi there! Love the remodel! We are wanting to use The same or very similar pine tongue and grooVe in our travel trailer. We usEd it on our ceilings in our bathrooms at home. My question tHough, is for the outside walls of the trailer, how long of a nail did you use for your nail gun? The spot we’re wanting to use the boArds is around the dinette and small couch 🛋 area. It is also the only slide-out area. It has the ugly borDer amd wallpapered luan Walls. Thanks so mUch!!
Hey Sherry, that’s awesome you guys are going to be tackling this project and that you already have experience with it. I can’t remember the exact size of the nails we used but we figured it out by taking the thickness of our material and adding a 1/4″ we did this because we know our panels are a 1/4″ thick. When we did this we also made sure our nail gun was on a setting that didn’t sink the nail too far into the material or the wall. Does that make sense? Feel free to let me know if I can clarify a bit better.