UPDATE: All new featured RV tours will be posted on my other website, Wanderful RV Interiors. Existing tours will slowly be moved to the new website, and anything already moved will automatically redirect.
Disclaimer: This post may contain affiliate links, meaning, if you click through and make a purchase we (or those featured in this post) may earn a commission at no additional cost to you. View our full-disclosure here.
Most people spend their birthdays celebrating with friends and family, either living it up or relaxing. I’m an odd bird, however, and this year I decided I wanted to spend my special day with the hubs painting our RV dashboard.
This was a few months ago and at the time I hadn’t spent much time in the RV because life kept getting in the way as it usually does. However, I was determined to make some progress and finally mark this project off our to-do list.

Prior to owning an RV, the idea of painting the dashboard in any vehicle I owned never even crossed my mind. It wasn’t until we starting making updates to the front of our coach that I began to question how the beige dash would look with all of the changes we were making. Honestly, it probably would have looked fine but as soon as I started to think about changing the color, I knew there was no turning back.
If you are considering updating the dashboard in your motorhome or vehicle then I hope this post will inspire you. As it turns out, painting the RV dashboard was super simple and offered instant gratification, which is always a bonus.
How to Easily Update Your RV Dashboard
At first, we were concerned that we may need to remove the entire dash from the RV, which would have been a total pain. Luckily, that wasn’t the case. Whew!
However, prep is key and will ensure your project goes a lot smoother. In fact, the prep probably took us longer than the actual painting of the dashboard.
Here’s a quick video of Eric talking about how we updated our RV dashboard:

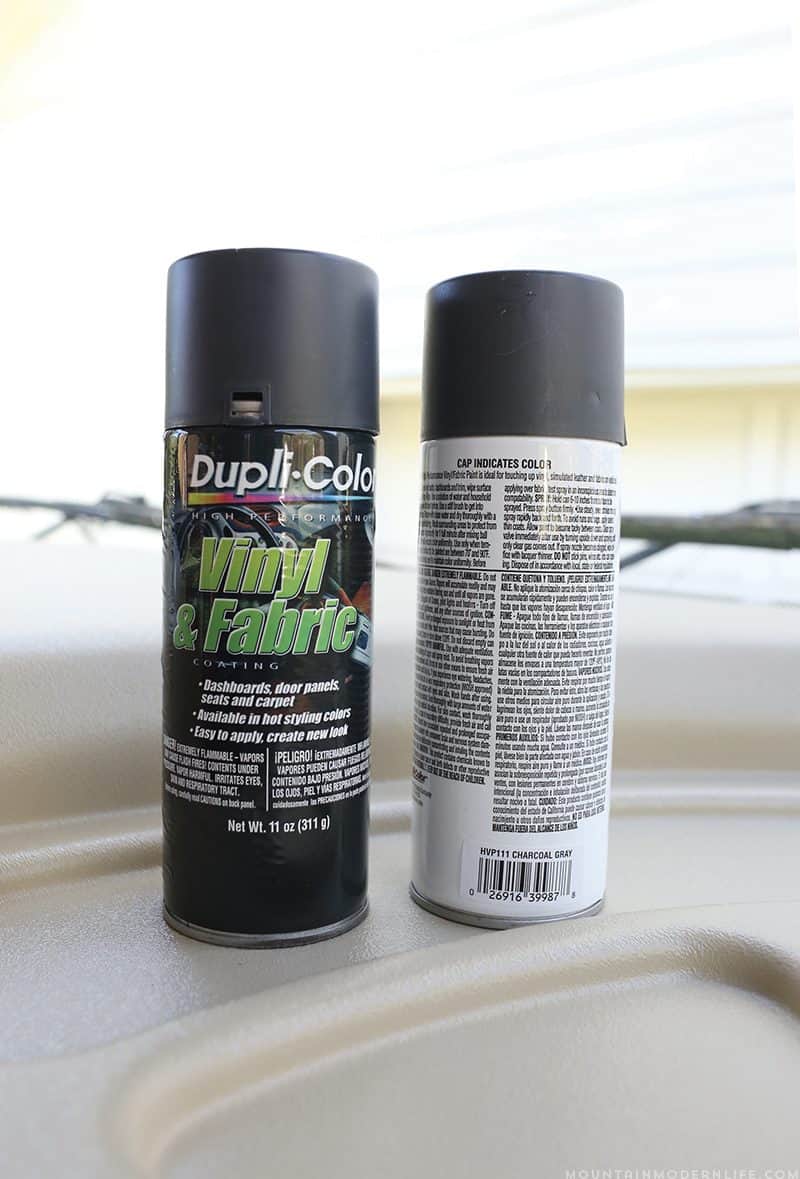
- Dulpi-Color Spray Paint in Charcoal Gray – we used 2.5 cans
- Clear Spray Paint Sealer
- Vacuum
- Cleaning Solution + Rag – degreaser is recommended
- Tarps
- Trash Bag – We used this to cover the steering wheel
- Painter’s Tape
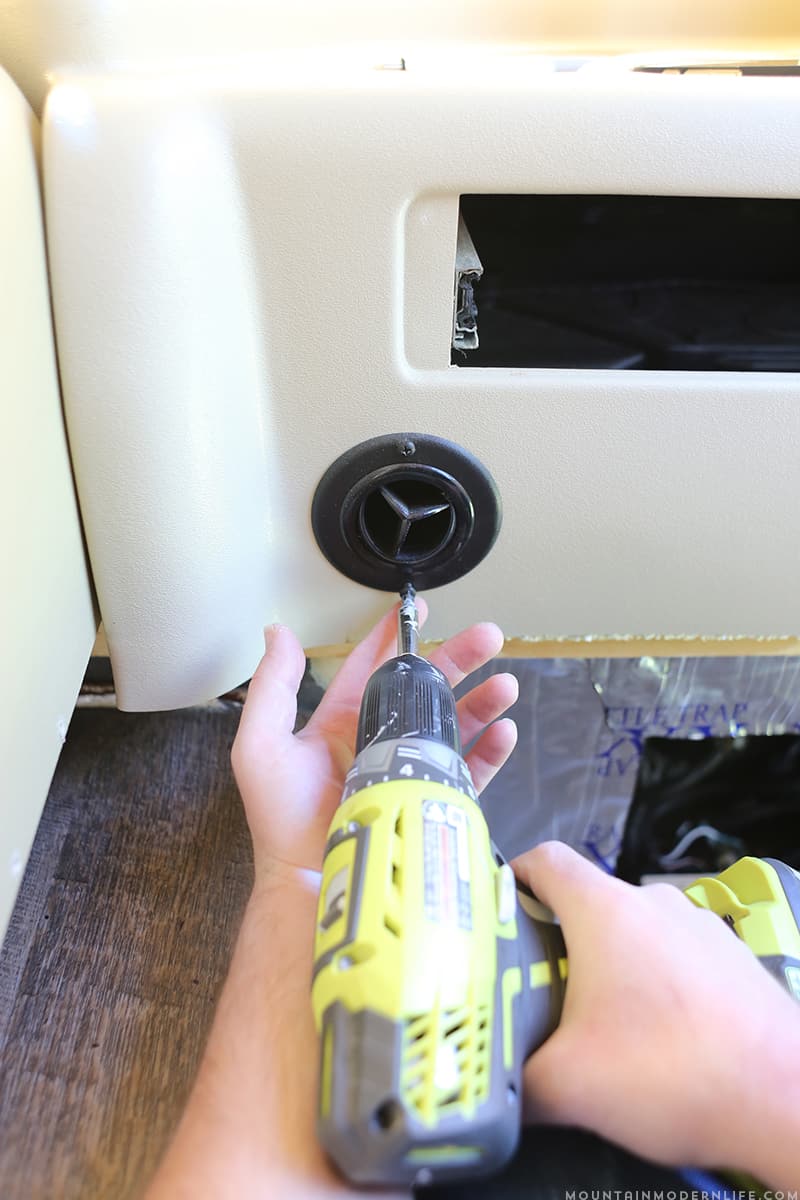
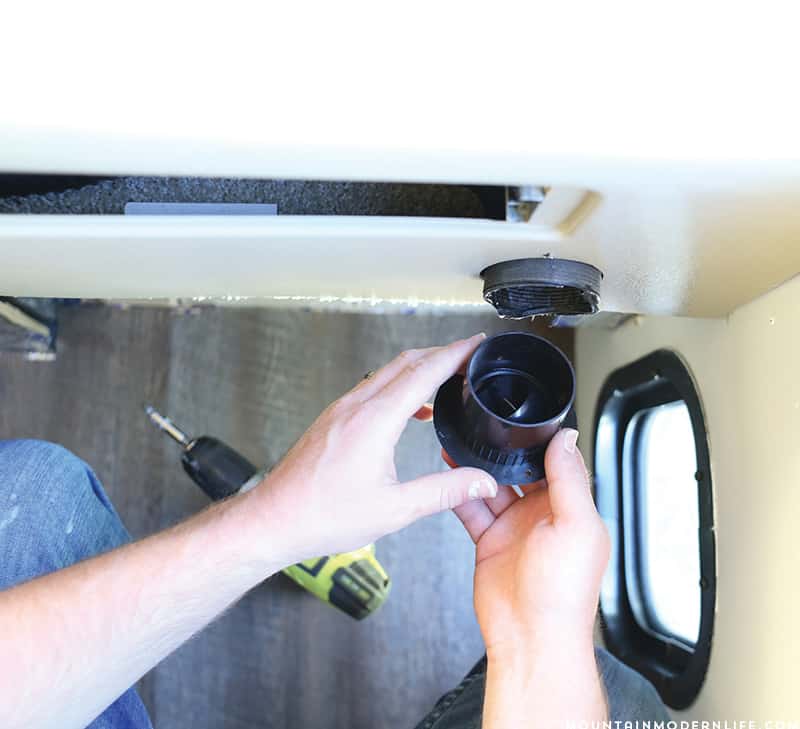
- Drill – to remove vents
- Face Mask
Keep in mind that this spray paint is really strong so you will need to use a face mask and open windows to allow ventilation into the space you are working in.
Step 1:
The first thing we did was remove any vents or outlets we didn’t want to get spray paint on. We could have taped these off but figured removing them was easier. We also removed the wood laptop tray from the passenger side.
Step 2:
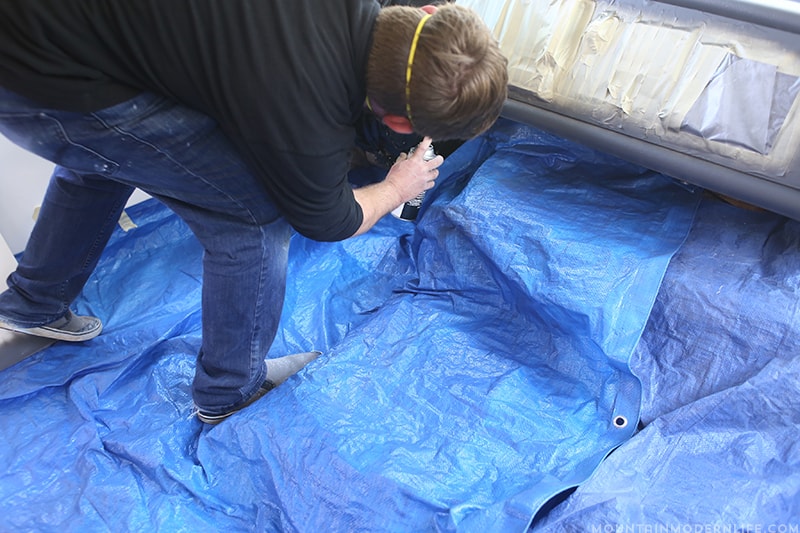
Next, we laid down some tarps and used tape to mask off any areas we didn’t want overspray to get on.
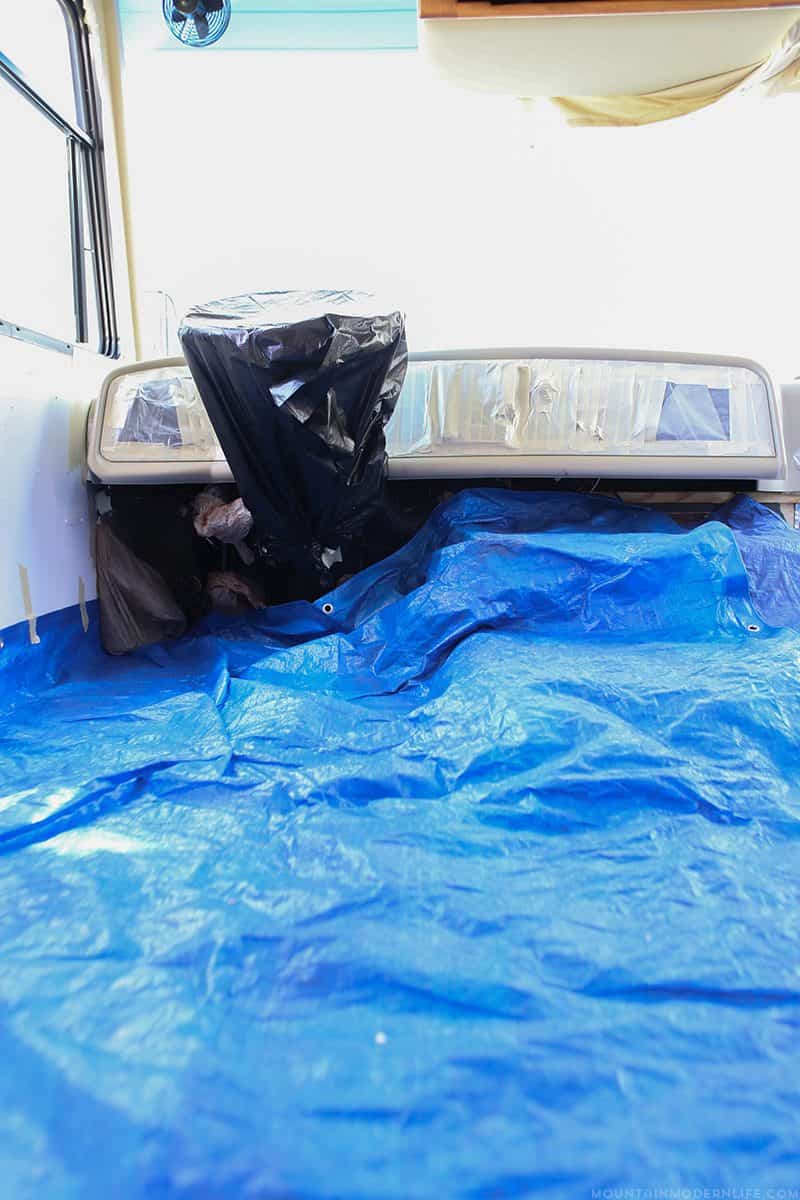
We placed a trash bag over the steering wheel which worked liked a charm.
You may also want to use a tarp to tape off your windshield. We just used a foam board which I held up against the windshield and slowly moved as Eric spray painted. Teamwork’s a Dreamwork.

Step 3:
As far as prep goes, you will want to make sure you clean the area you plan to paint really well. On the back of the spray can it says you can use Dupli-Color prep wipes. We just used a natural cleaner we had nearby and a rag.
Side Note: We did notice a bit of splotching in one area after painting and read from some reviews that some sort of degreaser like TSP or Simple Green is recommended to help prevent this. The splotching did go away after a couple of days, but if we were to do this again we would go that route.
We also vacuumed the dash a couple of times afterward to ensure all dust and debris was removed.
The reason we cleaned the dashboard AFTER we placed down the tarps was because we figured dust would fly around while we were getting the tarps in place.

Step 4:
Then once the dashboard was cleaned up and dry we shook the can for one minute before beginning to paint the dash. You want to use nice even strokes and don’t worry about covering everything in the first coat. We went with Dupli-Color spray paint in charcoal gray. All in all, we did 3 coats and about 2.5 cans. Wait to spray your second coat until the first coat is tacky to the touch.
Side Note: Our dashboard was already in pretty good shape but if yours is a lot older, or has some splotchiness to it as-is, you may want to consider using a primer first.
Watch the video
Video a video of Eric Spray Painting a section of our RV Dashboard:

Here’s the second coat going on:

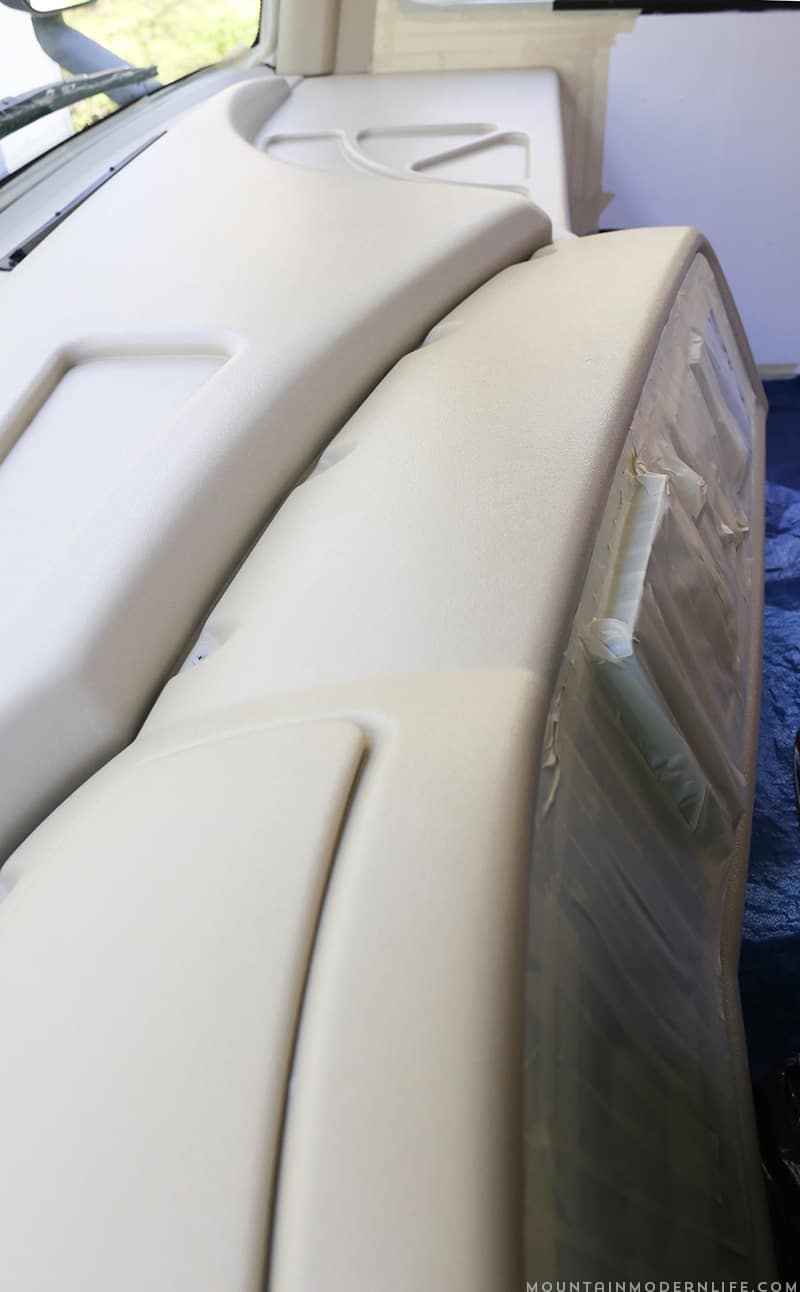
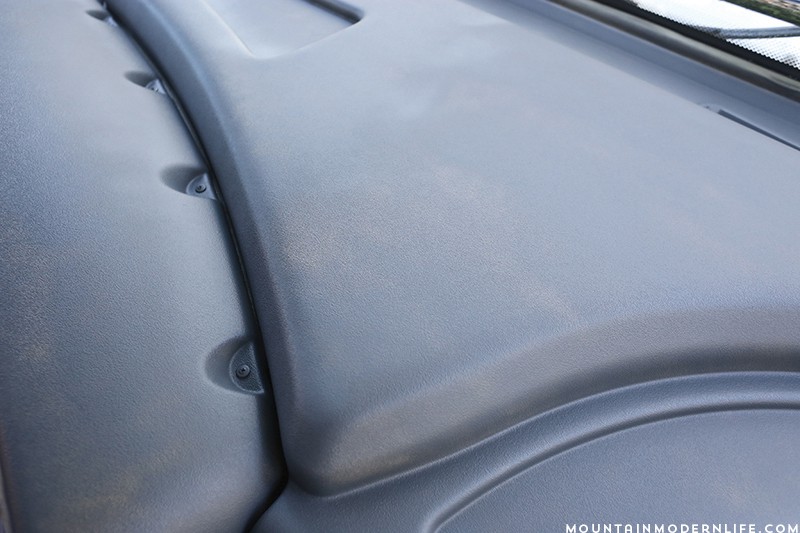
And here is our updated dashboard after the third coat:

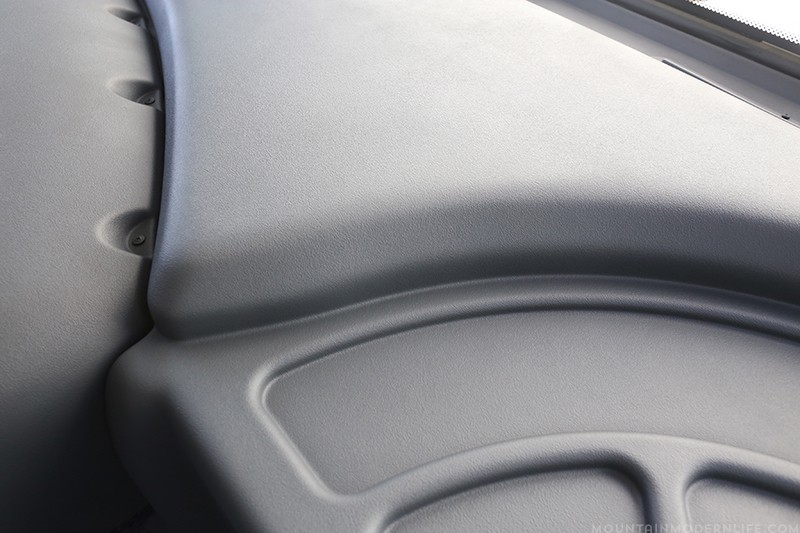
We were pretty excited at this point. It looked really smooth and although there was a bit of splotchiness in one area like I mentioned earlier, that did go away within a couple of days.

It’s now been over 2 months and the dashboard still looks awesome and is holding up really well. Based on what I’ve read you really just want to make sure not to scratch the paint within the first 2 weeks so that it can fully cure.

If you’ve updated your RV dashboard and have any tips you can share we would love to hear about them in the comments below!
Update: Come see what our painted RV dashboard looks like after 9 months!
How is your dash and captain’s chairs holding up with use?
Hey Shawn. The dashboard is holding up perfectly, we had the litter box up front for a while so it needed to be cleaned quite a bit, but it still looks like it did when we first painted it. The captain’s chairs are doing pretty good also, the backs are flawless, but there are a couple rough spots where we sit. In the next couple weeks we’ll be doing an update on how they are both looking. Thanks for stopping by and I hope this helps.