UPDATE: All new featured RV tours will be posted on my other website, Wanderful RV Interiors. Existing tours will slowly be moved to the new website, and anything already moved will automatically redirect.
Disclaimer: This post may contain affiliate links, meaning, if you click through and make a purchase we (or those featured in this post) may earn a commission at no additional cost to you. View our full-disclosure here.
Hey friends, I hope you enjoyed your weekend and had a beautiful Mother’s Day! My mom is nothing short of amazing and has always been such an inspiration for me, not to mention my #1 cheerleader. I remember watching her create a bookcase out of an old waterbed frame when I was in elementary school, restore dressers for our bedrooms in middle school, and she had a toolbox twice my size in high school.
She wasn’t afraid of power tools or getting her hands dirty and I am so proud to call her mom. Over the weekend I helped her set up a simple website for her recent invention, an Avocado Seed Planter. There is some more tweaking/info to be added, but you can check it out here. Isn’t she awesome?
Speaking of inspiration, I am soooo excited to have recently teamed up with 5 super creative and amazing bloggers to bring you a fun summer knock-off series! Every second Monday of the month, from now until August, we will each share a knock off inspired DIY project. This month our store inspiration comes from West Elm. I LOVE West Elm and if money was no object you betcha I’d be ordering from them more often. Of course, I’m always up for a DIY challenge and this one was so much fun. Did you ever see my West Elm Inspired Storage Rail System?
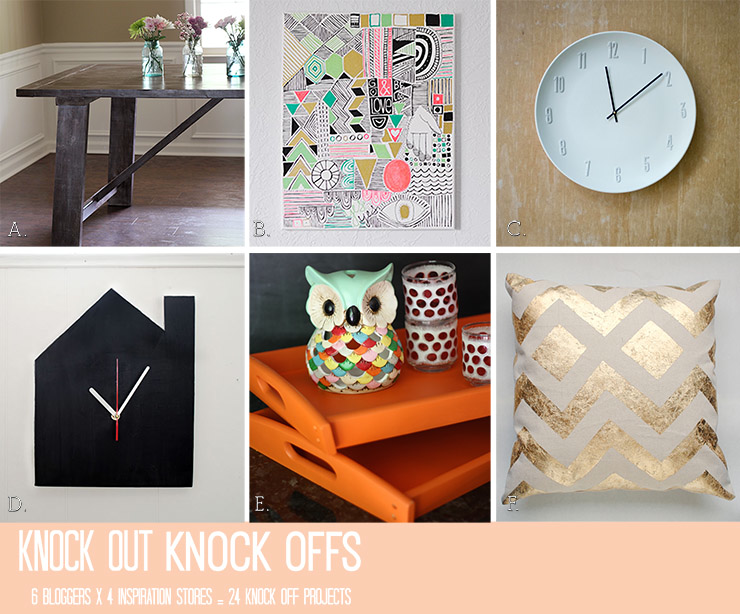
So here it is, round one of Knock Out Knock-Offs! First I will share my West Elm Knock Off, a wooden truss dining table, but be sure to hop on over to check out the other projects at the bottom of this post.
West Elm Inspired Dining Table
I have to say that this west elm inspired dining table wouldn’t have been built if it wasn’t for the super awesome plans via The Design Confidential. She shares great furniture building plans and just so happens to include the free plans for this wooden truss table, yay! Eric and I did run into a couple of snags and also had to tweak it a bit to fit our space, but her plans are pretty straight forward and easy to follow. I won’t go into all the steps since you can get them here but will share some before, during and after photos, along with what we changed.
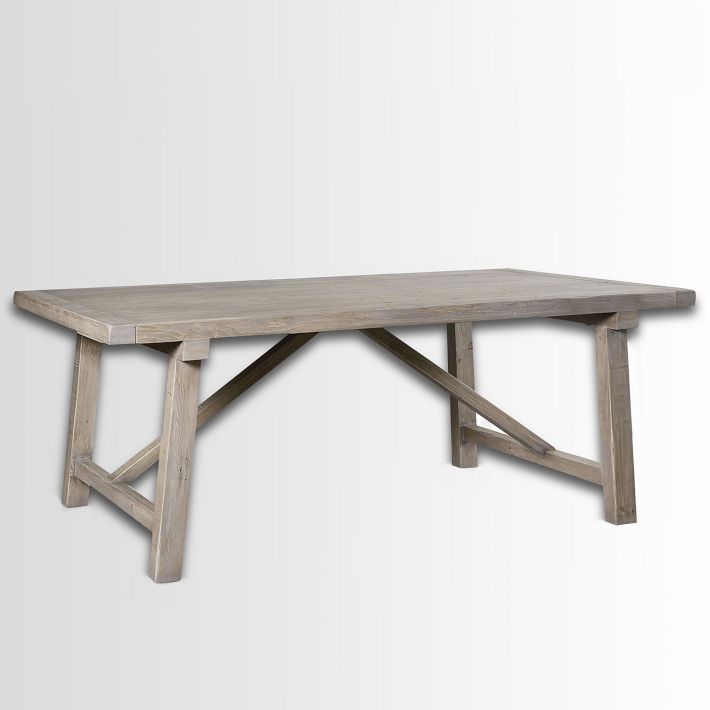
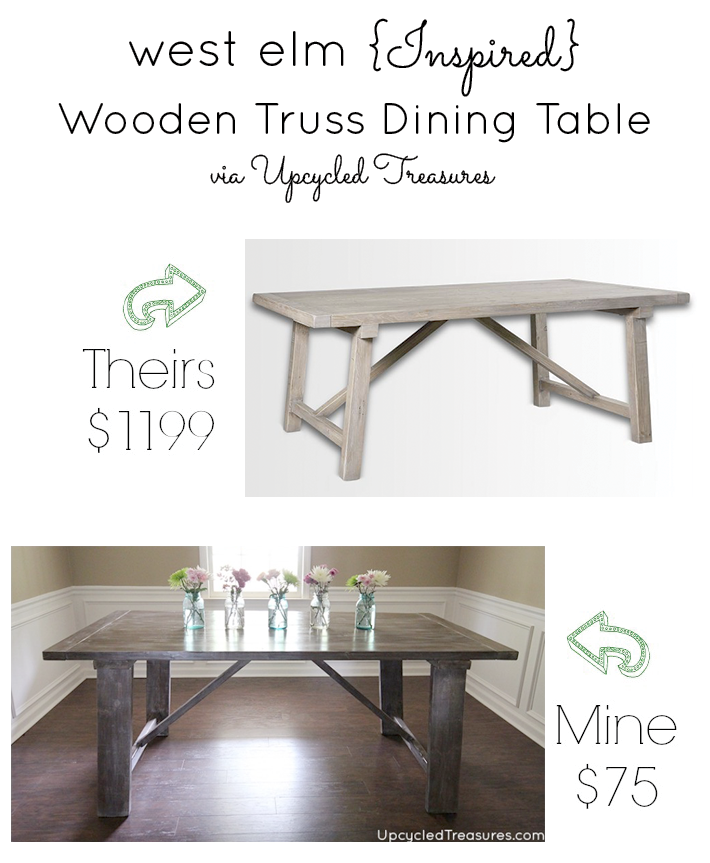
Here is my inspiration, the West Elm Wooden Truss Dining Table which comes with a price tag of $1,199, just a tad out of our budget. Gorgeous, isn’t it?
Ever since we moved into the {rental} house a couple of months ago, our dining room has pretty much been used for storage, so I’m excited to finally have our West Elm inspired dining table in there and make it a functional space.
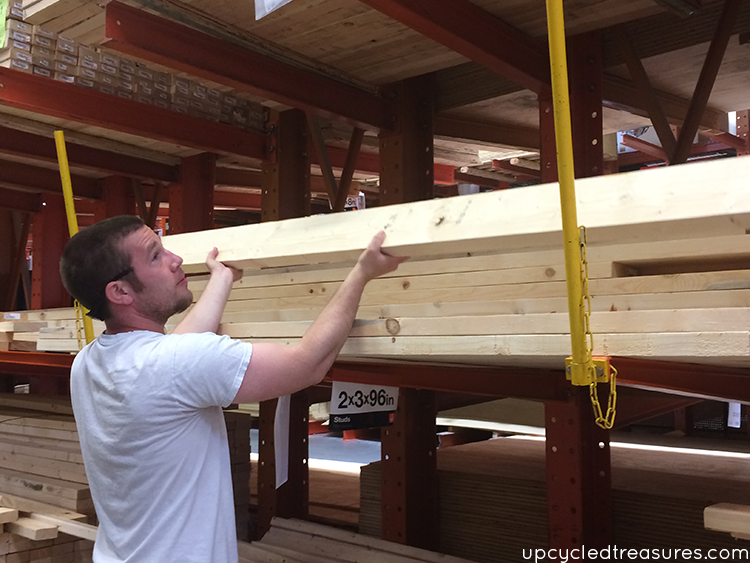
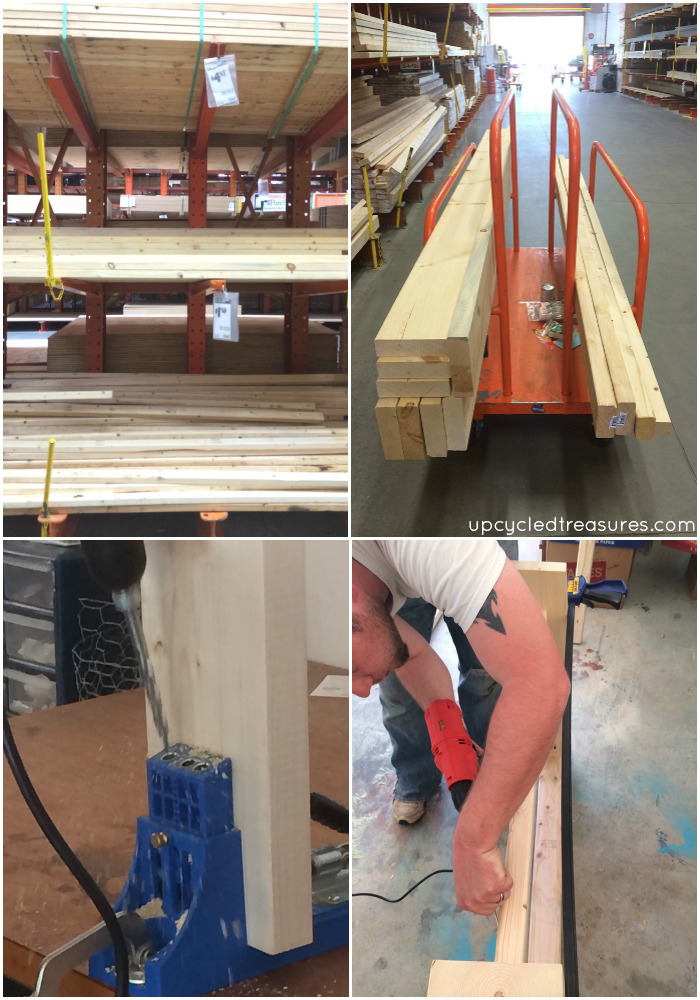
Before we got started on the building we made a trip to Home Depot for the supplies. Of course, we have learned over the past few projects that using straight boards makes everything sooooo much easier.
You may recall seeing one of the photos below on instagram last weekend. The supplies ran us about $75, not too shabby for a solid wood dining table, especially when compared to the inspiration table at $1,199, yikes!
I have mentioned it before but if you plan on building furniture you have got to get the Kreg Jig, that thing is AH-MAZING!!! It’s definitely one of Eric’s favorite tools and makes building so much easier.
Although he did do most of the building I was there to help every step of the way, I love it when we work in the garage together.
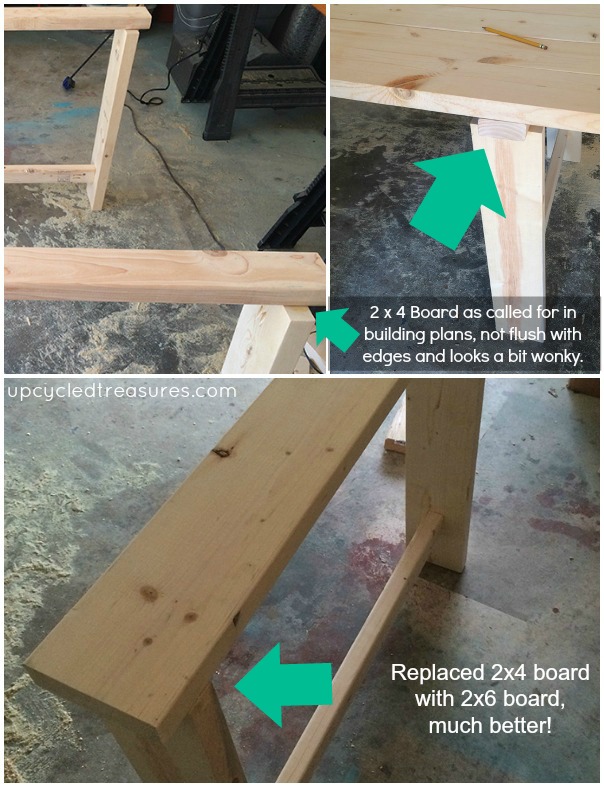
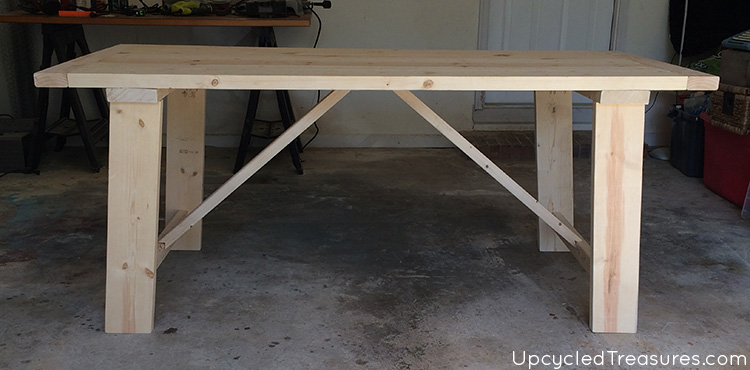
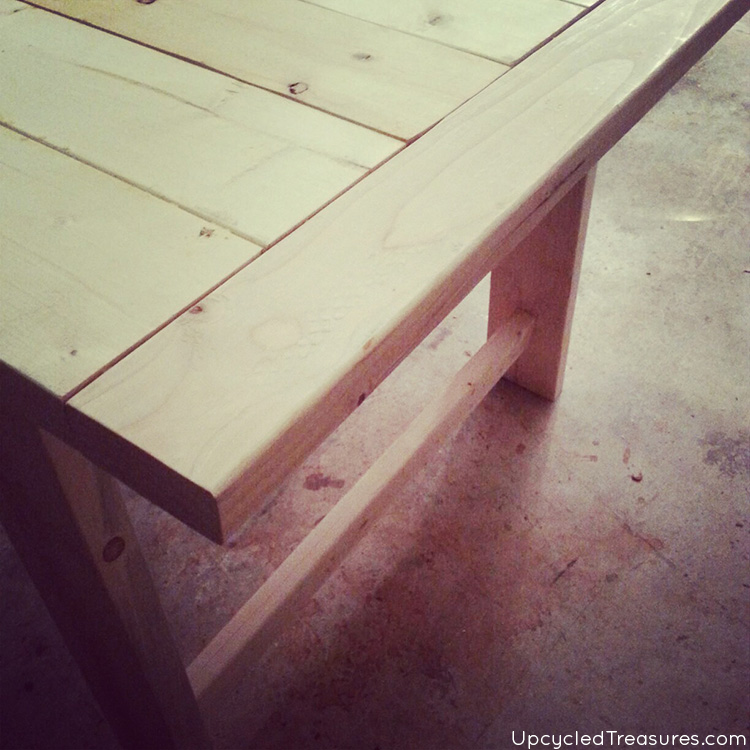
As far as the first tweak of the building plans, it called for using a 2×4 as the braces below the tabletop, but once we saw what it would look like with the tabletop we didn’t really like it since it wasn’t flush. So we wound up going back to Home Depot to get another 2×6 board and then reattached it, which looked sooooo much better!
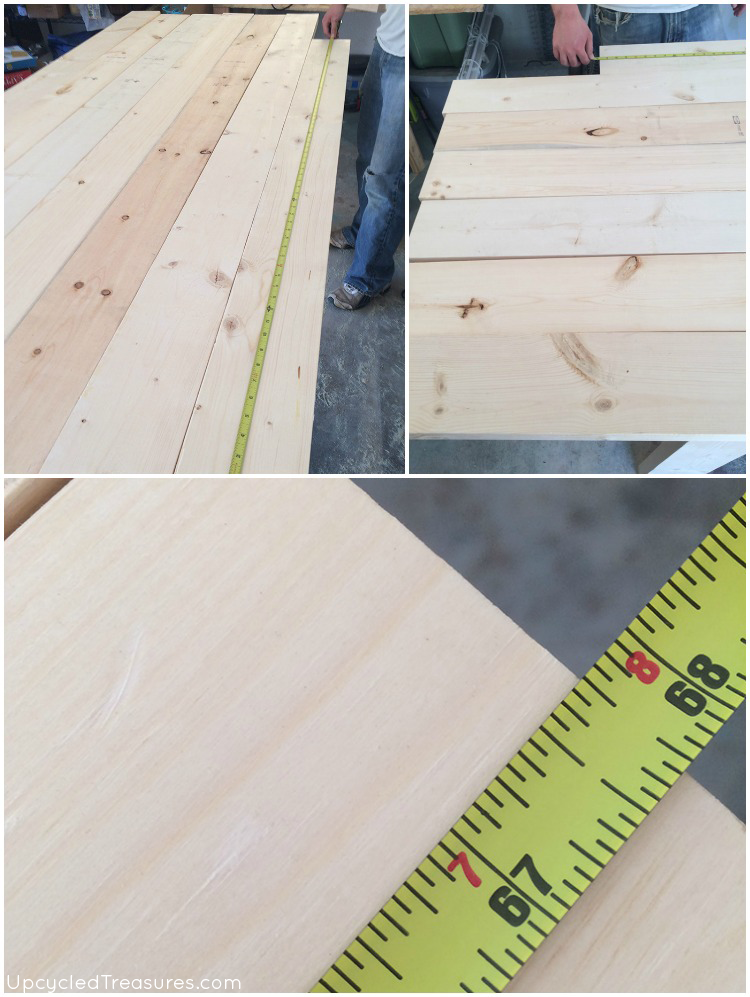
We had also realized that the number of boards the plan called for was short one board. This table is originally meant to be pretty big {fits 8-10 people} but we actually didn’t need anything that big so we decided just to cut all the boards down to 67 3/4, which made it 74 3/4 after we added the end pieces.
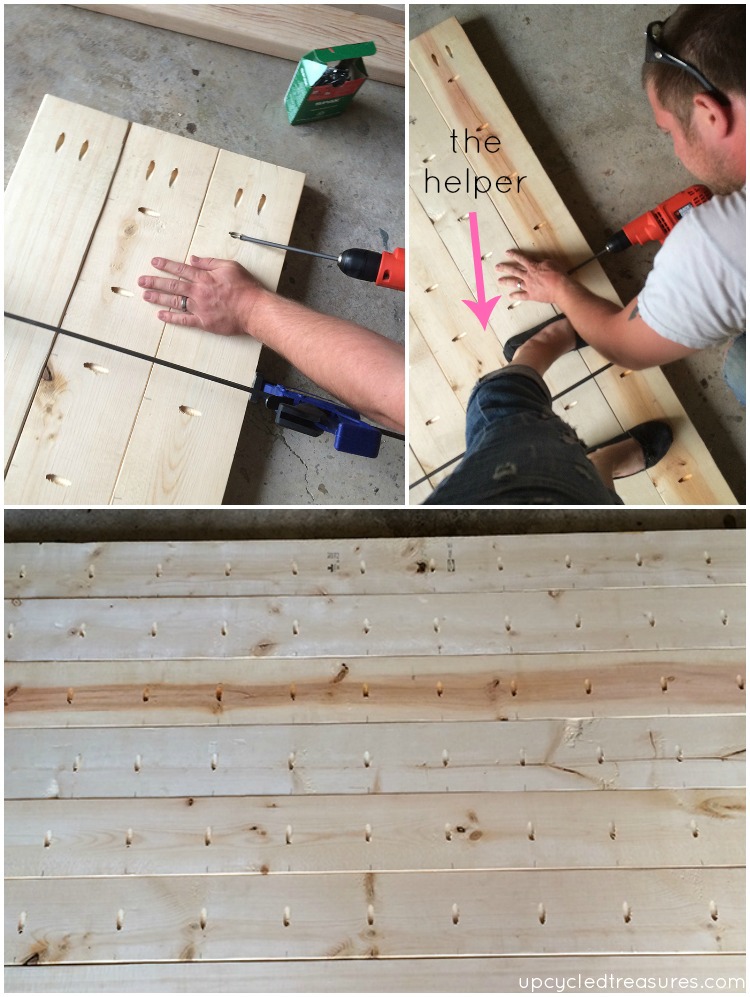
Here we are putting the tabletop together. We made sure to use glue between the boards before attaching them to one another but definitely could have used some more long clamps. Luckily I was there to help, but clamps would have been better, ha. Those are definitely on our list of things to get more of in the future.
Here is the West Elm inspired dining table all put together, yay!
And I had shared this sneak peek on Instagram:
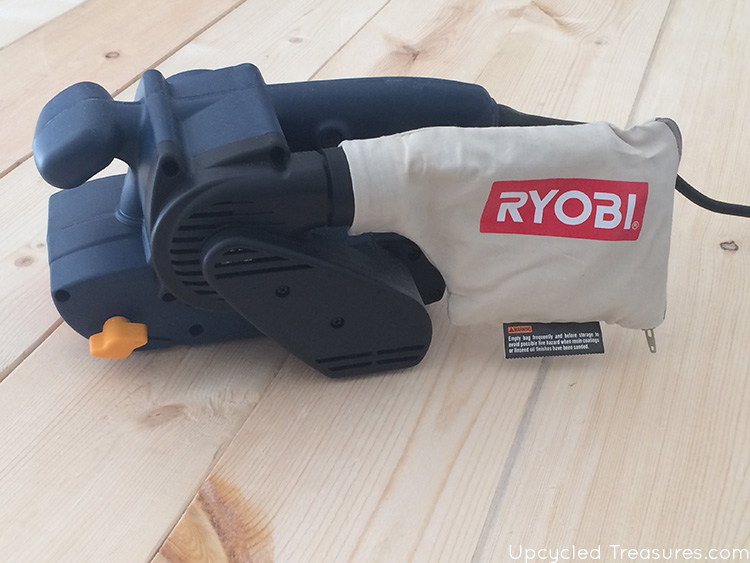
Eric and I have been wanting to pick up a belt sander for some time now, and finally got around to it. Let me just say WOW that thing is powerful! I still can’t get over how well it worked, and how much faster it got the job done. It would have been nice to have that baby a few projects ago. I have only used smaller sanders in the past that made my hand feel like it was vibrating the whole time. We went with the Ryobi Belt Sander and it didn’t make my arm vibrate, but man does it give you a workout! Totally worth it and it was awesome to be able to get all the boards super flat in a fraction of the time it would have taken otherwise.
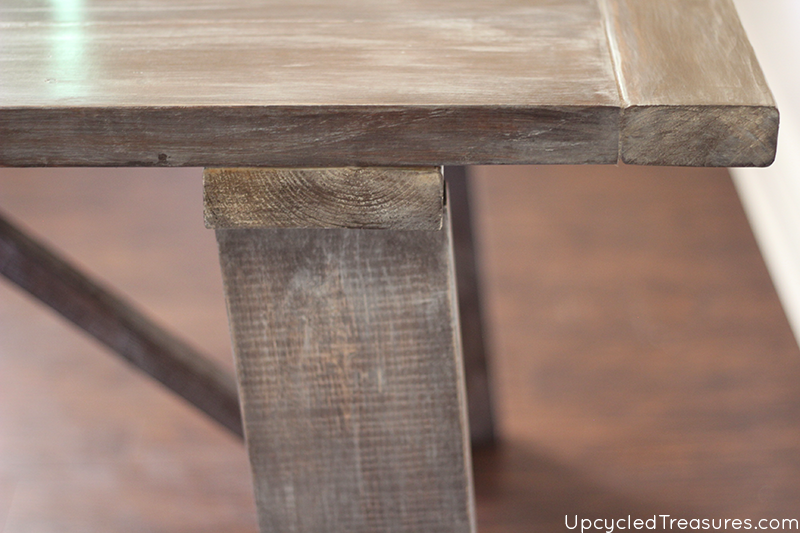
There were some cracks in between some of the wood boards on top {more clamps definitely would have helped}, and I originally planned on filling them in with clear acrylic silicone since I had read about that online but wound up just using wood glue and leftover sanding dust. Although the wood glue said it was stainable and paintable, the residue that was leftover {despite thinking I got it all off} stained differently and I wasn’t liking how it looked. In fact, I may have freaked out a little. I knew all along that I would stain the wood and then use a whitewash on top, and that the stain wouldn’t have to be perfect, but was still a bit worried. I did the same technique on a planked style coffee table last year.
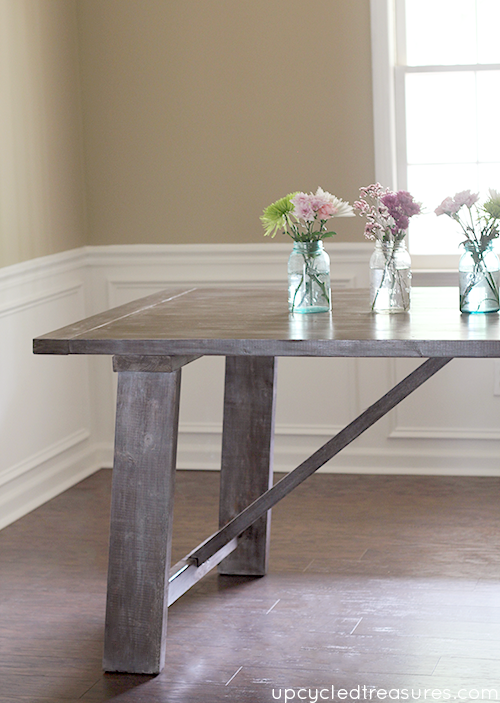
So I ended up going over the tea stain with a dark walnut stain {the same color we used on the DIY garden bench}, which didn’t help much. I wanted the table to end up looking like older, weathered wood in the end but was so nervous that all that hard work would be ruined. Luckily the whitewash definitely helped those marks blend in. I actually did a whitewash {50% water/50% white paint that I brushed on and then wiped off after about a minute two} then sanded it, then dry brushed some more white paint on. Afterward, I did a little more sanding followed by 2 coats of polyacrylic.
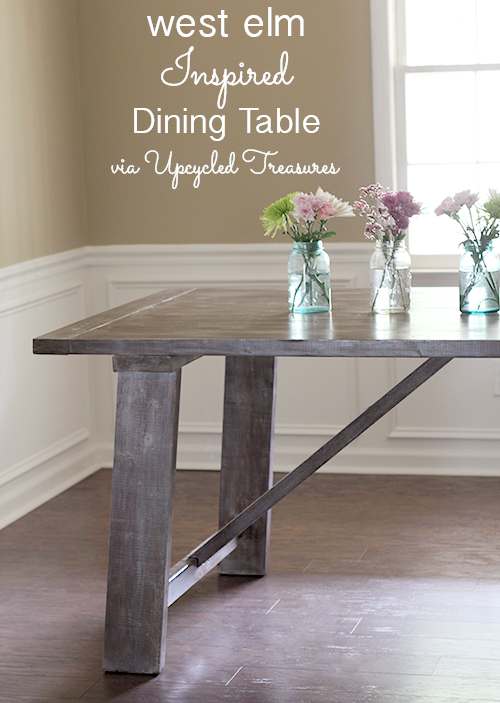
Our West Elm inspired dining table is by no means perfect, but I still LOVE how it turned out and get excited every time I pass the dining room. One project down, many more to go…I think a sitting bench and chairs will be next. And I also have another DIY rug on my list, amongst other things…
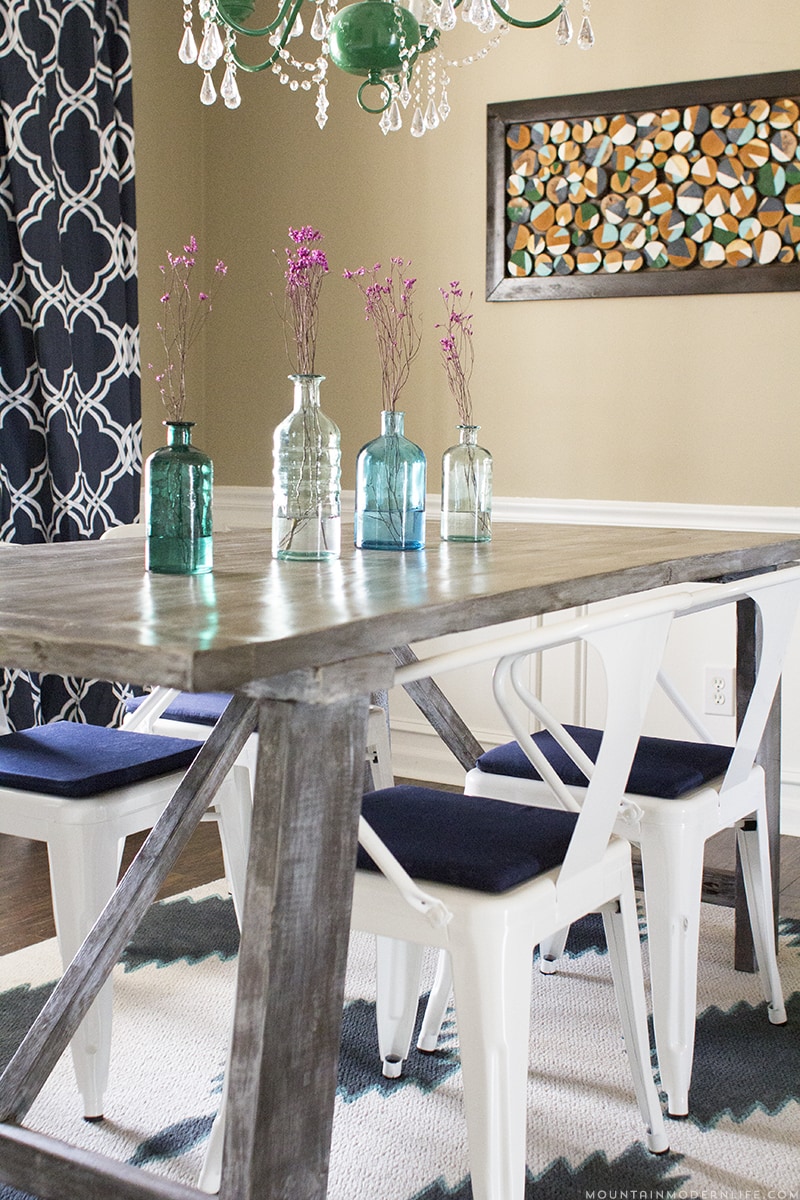
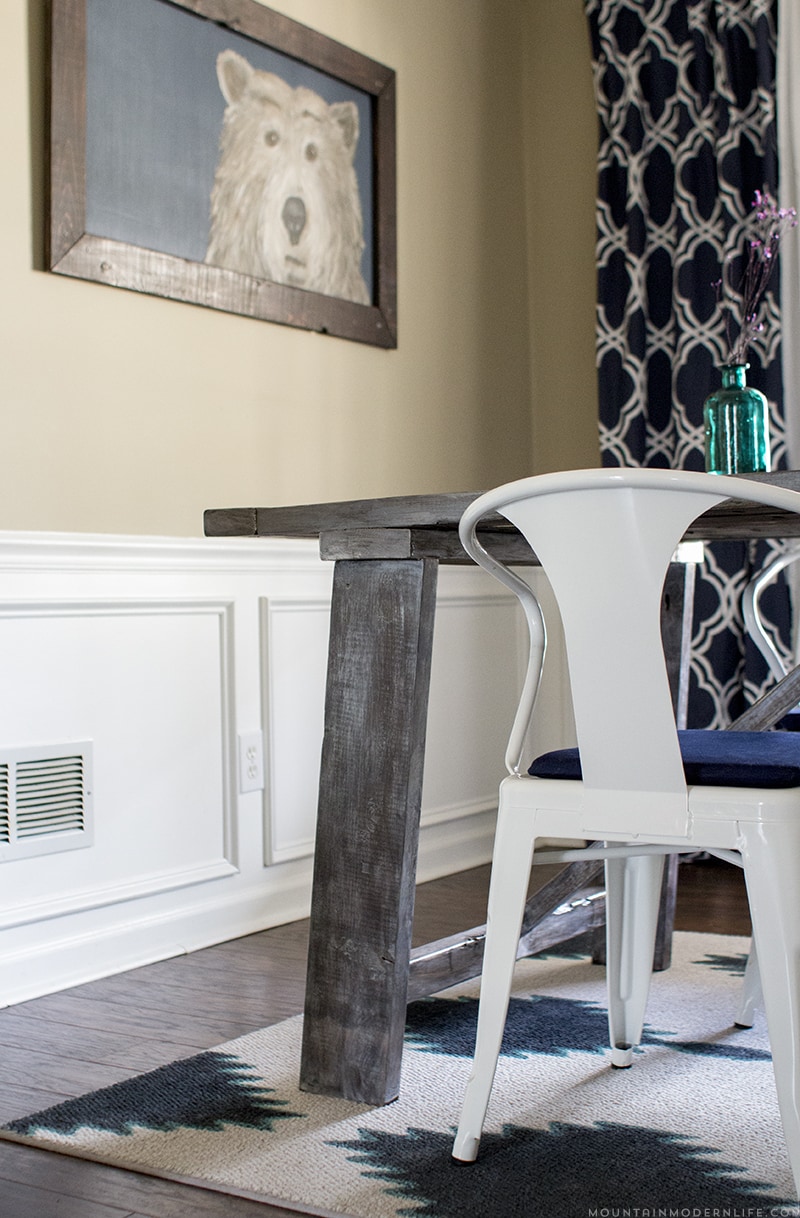
Here are some final photos. I know it’s not as light as the West Elm version but still think it looks so pretty. What do you think of our West Elm Inspired Dining Table?
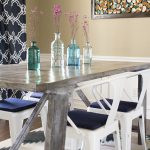
Here is an updated photo of our West Elm inspired dining table in our dining room:
Don’t forget to check out the other 5 West Elm knockoff projects via the links below:
A. Mountain Modern Life / B. Delineate Your Dwelling / C.Bigger Than the Three of Us / D. Brave New Home / E. Designer Trapped in a Lawyer’s Body / F. The Gathered Home


Love love love this! I actually adore the color of it (even better than the West Elm version)!
Thanks Ashley! I just can’t wait to put a light colored rug down to break up the dark floor from the table. One thing at a time, right? 🙂
STUNNING! You guys did an amazing job!!
Thank you so much Heather! I gotta admit that even we impressed ourselves 🙂
Katie, this is stunning! You guys did a beautiful job building it and I LOVE the finish you did! It’s making me want to whitewash the farmhouse table we built! Good job!
Thanks Katie! I’m gonna have to stalk your site for more building tips, all of your projects are so professional and beautiful!
Wow, that’s pretty amazing! I’ve never tried building furniture before. An West Elm is my favorite, too! I think I’ve only ever bought one thing from there but if I could I would furnish my whole house with their goodies!
Thanks Jennifer! We are pretty new to the whole building furniture thing and it’s so much fun, not to mention super cost effective. I think my favorite part is the memories we create while working together, and the personal touch we are able to add to our home 🙂
Wow girl, you KILLED it with this knock off! I’m so impressed! Your table looks fabulous and I love the way the finish turned out!
Thanks Brynne! It’s definitely one of my favorite pieces in our home…now we just gotta figure out the chair/bench situation, haha.
What an amazing knock-off! I think that I actually like that yours is a little darker, and am amazed that it cost only $75!
Kelly from http://www.lifeonbirchst.com
Thanks Kelly! I originally thought the light color would like nice against the dark floors in the dining room, but since we are going to eventually get a rug anyway I don’t think it matters as much. I love our table and I’m so happy you like it too!
This is stunning, it turned out great!
Thanks Emily!
I think it looks beautiful! Our dining tables could totally be friends. Love it girl! Shared on my FB. 🙂 xo
Lol, thanks Brandi! Hope you are enjoying your weekend!
Girl, you’re killing me. This table completely rocks. Way to just jump in and build a TABLE! Ha, I just love how it turned out, too.
Thanks Amy! Yeah, I hope I am preparing Eric for future projects once we buy a house, haha. Now we’re just gonna have to decide if we will sell our furniture before me make the move across the country, or bring it with us. 🙂
Katie, this is AMAZING! I love everything about it! The staining technique you used is gorgeous. I cannot believe you made it for $75! I honestly think I like it better than the original. My dining room might be getting one of these in the next year 🙂 GREAT knock off!
Awww thanks Tasha! I can’t wait to see the industrial table you build for your dining room!!!
The comparison photo and price-tag on the original and your knock-off is NO JOKE! Girrrrrrrl, you nailed it. (And not in the depressing-epic-fail-on-Pinterest sense…but in the legitimate hit-a-homerun-out-of-the-ballpark sense.)
Thanks Lauren! We definitely learn something new from each project we work on, and they are slowly improving. I’m definitely proud of us and the way it turned out, even though it’s not perfect 🙂
Oh yes!! You are so talented. This table is amazing! We will be featuring it this Sunday @ 2pm EST on Inspiration Monday Party! Congrats, Katie! ~ Julie redheadcandecorate.com
Yay, that’s awesome! Thank you Julie!
Okay, oh my goodness, this totally knocks it out of the park. Absolutely unbelievable Katie- I love it! Would make an amazing outdoor table too! And for that price… You could build ten!
Thanks Krista, and you are absolutely right about it making a great outdoor table. We could definitely use one too, and now that I know Eric’s got the skills it’s going on his “honey do list” hahaha.
Seeing your table which is absolutely awesome, makes me wish we had a dining area so we could have a table. I Love the shades you got it to, it’s so smooth, and the different angles show the shades in it. Great super job. (your hubs isn’t bad either). I might be old but I’m not dead. You two did such an awesome job substituting where you needed to. $75 for an incredible table, I’m envious. You two ought to be proud of yourselves. Happy weekend
Thanks Jane Ellen! Yeah, we had to sell our dining table in our last apartment because I used that space as my office/painting project area, so it’s nice to finally have a dining room AND a dining table back! Thanks for stopping by!
This is SO AWESOME!!! Tweeting this out! Thanks for linking it up at Monday Funday!
Thank you so much for sharing Katie, I appreciate it 🙂 Have a great weekend!
Visiting from Party Palooza – TT&J, love your new table it is gorgeous.
Beautiful, Katie!! The style and finish are perfect…and all for $75?! Wow!! Amazing!
You did such a wonderful job! this is gorgeous!
Thank you so much Taryn!
Katie your table turned out amazing!! I have a few pieces I am wanting Mr. Front Porch help me build but first I need to buy the jig tool. With the belt sander do you get any weird lines with it? I sand by hand now because every circular sander I have purchased always leaves squiggle lines every where and it drives me insane. Thanx for joining THT!
Hi Pamela, I didn’t get any weird lines with the belt sander when I was using it the right way, haha. The power really threw me off at first and I wasn’t used to using 2 hands to sand, so the very first time I made an indent with it but was able to sand that out and got used to it pretty fast. I have always used a little mouse sander so using the belt sander definitely cut back on time which was awesome! Yes, you should definitely get the kreg jig, that thing is a game changer! There is so much you can build with it and I’m sure your hubs will become obsessed pretty quick once he sees how easy it is to use 🙂 Thanks for stopping by and have a wonderful weekend!
This table is so impressive! I love it more than the original.
Wow. It looks just as great as West Elm’s. I am also working on painting a table right now hope it looks as great as yours. You both did an amazing job.
Thank you so much Mary! Have a great weekend!
Beautiful table! And the finish is simply gorgeous.
So Beautiful! I really want to learn how to do the distressed look. I have some furniture I want to refinish for a beach themed room.
Thanks Rachel!
Love the way your table turned out. Your experience reminds me of all the woodworking projects my husband and I have worked on over the years. Here a are few tools you may want to look at investing in. First of all, like you said, you can never have enough clamps; then a random orbital sander creates a smoother surface and makes it easier to avoid accidentally sanding grooves into your project; a biscuit joiner used with the clamps will give you a stronger, tighter invisible join between boards ( then the glue and sawdust concept works much better). If working on a soft wood like pine it needs a sanding sealer to help you get a more even stain coat. Keep up the good work! My daughter just graduated from college and I’ll be keeping this idea in my file for her first apartment. 🙂
Wow, Margot those are such great tips, thank you so much! I just read your comment out loud to the hubs 🙂 Have a great weekend!
Hi Katie! You and your Mr Handsome did a great job on your dining table. Made with love to be surrounded by love!
I’m impressed, and like your knockoff better than the original.
Your table looks amazing and I love how the room looks with everything finished. Stopped in when I saw your project on Pinterest and am now a new follower. Thanks for sharing–really is a lovely room!
Can you supply a link to the plans/directions you used so we can try and make this for our homes?
Hi Steve,
I link to the plans we used at the top of the post. Here it is:
http://www.thedesignconfidential.com/2013/05/free-diy-furniture-plans-build-wooden-truss-dining-table
Hope that helps 🙂
Katie
Nice! Thanks!