UPDATE: All new featured RV tours will be posted on my other website, Wanderful RV Interiors. Existing tours will slowly be moved to the new website, and anything already moved will automatically redirect.
Disclaimer: This post may contain affiliate links, meaning, if you click through and make a purchase we (or those featured in this post) may earn a commission at no additional cost to you. View our full-disclosure here.
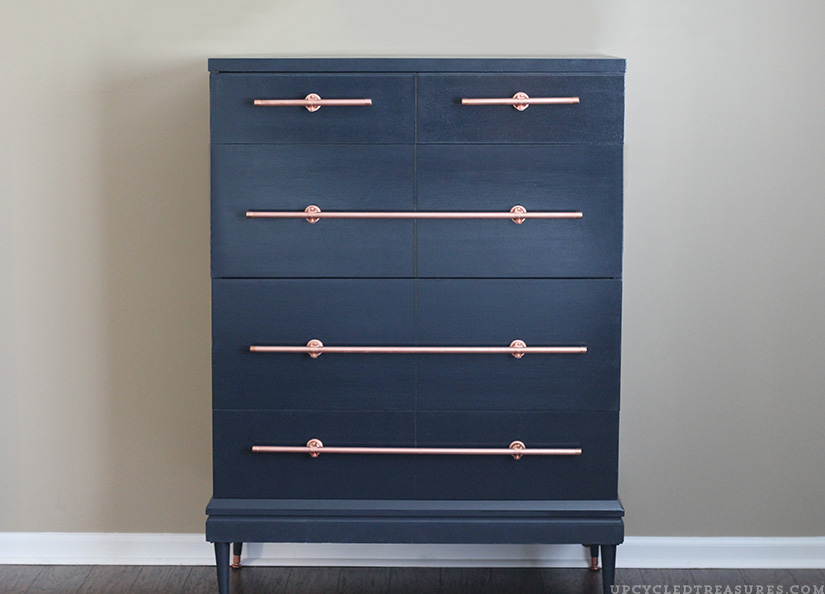
Today I am sharing our new navy dresser with DIY copper pipe drawer pulls, and it seriously makes me happy every time I look at it.
If you follow me on Instagram you may have seen this photo I recently shared:
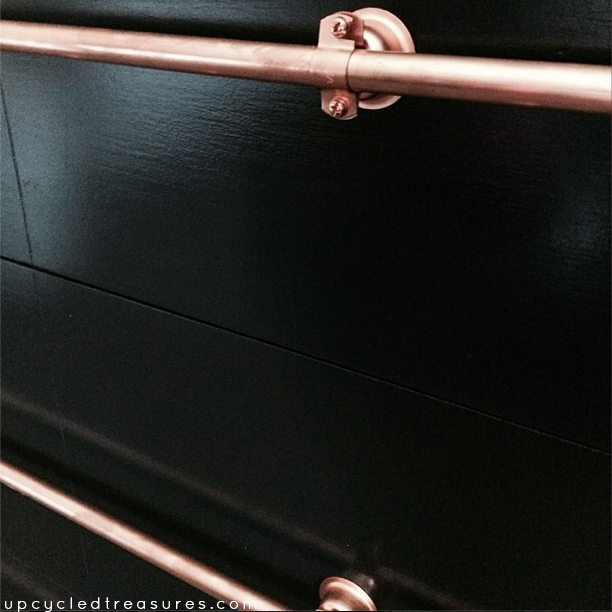
Dresser With DIY Copper Pipe Drawer Pulls
It’s kinda sad but we actually bought this dresser off of craigslist a year ago {yikes!} and it’s just been sitting in storage ever since. The main problem is I was so indecisive when it came to transforming it, so I just let it sit there until I knew for sure what I wanted to do. Do you ever do this?
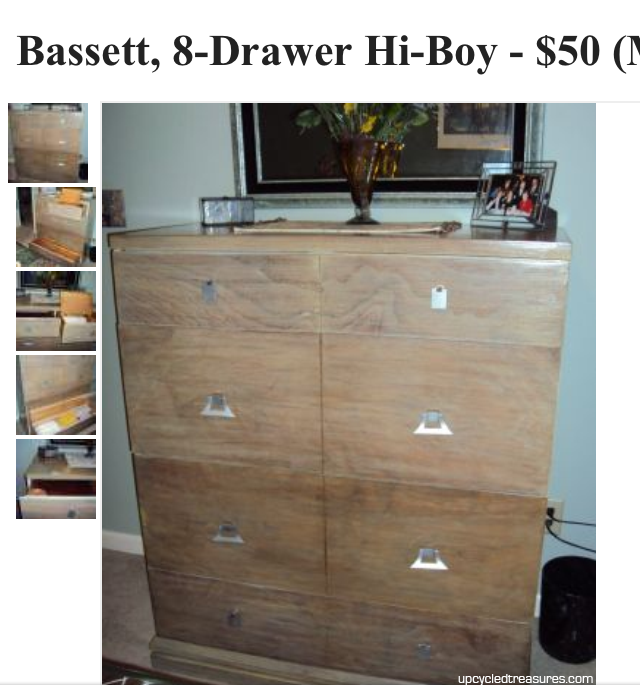
I know I have taken photos of this dresser numerous times whenever I thought a makeover maybe soon approaching, however, I had issues finding any of those photos. Luckily I did find the original craigslist ad from when I took a screenshot and sent it to Eric to see if we should buy it, haha.
Here is the photo from the craigslist ad. It said it was a basset tallboy for $50, not too shabby, eh? Well as it turns out it’s not a Bassett, and also not 8 drawers. It had 2 top drawers but the bottom 3 are large drawers with 2 knobs each, which makes them look separate.
Even so, I thought it was a great piece of furniture, at a very reasonable price. One of my favorite things about this dresser is the built-in jewelry compartments and cedar-lined drawers.
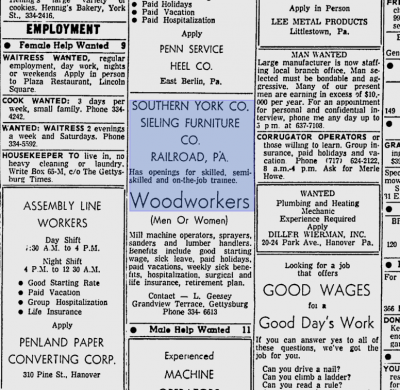
It was made by Sieling Modern Furniture, a company out of Railroad Pennsylvania that sold most of it’s furniture to NY and Chicago, but was short-lived and went out of business around the ’70s. I really enjoy reading about the history of furniture and this article, {which the photo below is from} was a really interesting read. I also remember reading a while back that the billboard was put up around the 1940s near the railroad and could only be seen by those traveling by train back in the day. Now I can’t seem to find that article but thought it was interesting regardless 🙂
I also found this ad for a job in the Gettysburg Times on September 18th, 1967:
Do you have any Sieling Furniture or know anything about the company? If so I’d love to hear about it!
Okay now on to the Transformation…
So the first thing I did was give the dresser a light sanding, followed by some custom mixed navy blue paint. Afterward, I followed it up with a couple of coats of Polyacrylic. I’ve gotta admit that I generally use wax on painted furniture and use the polyacrylic for wood surfaces, but I like the added luster it gave.
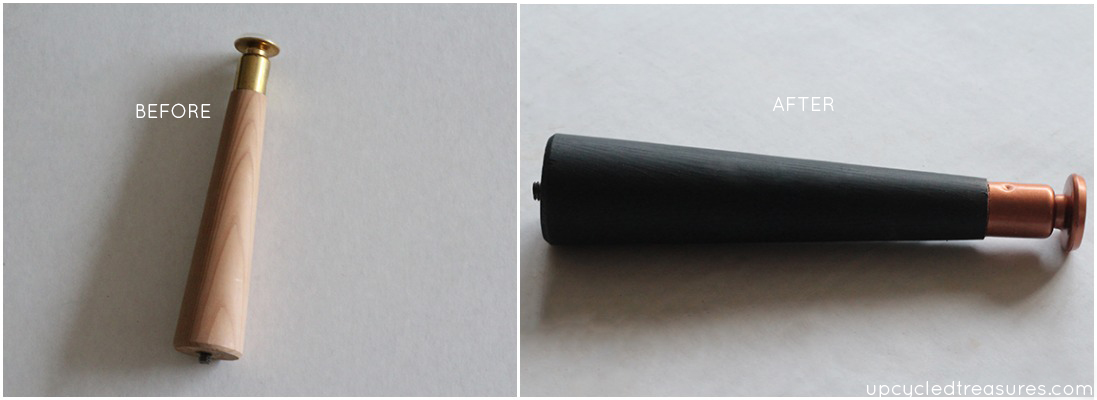
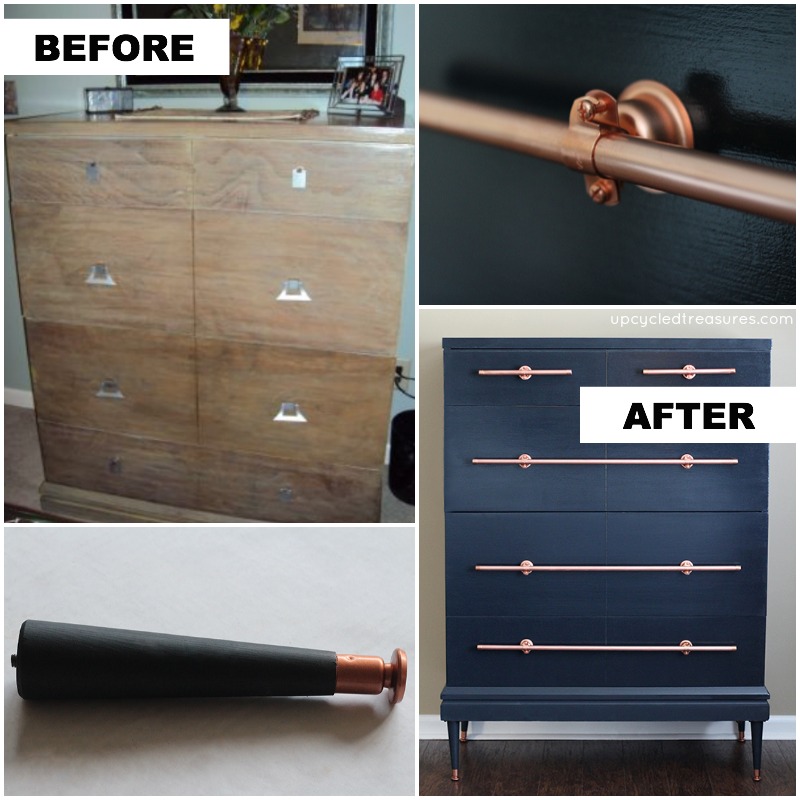
Since the dresser is pretty square I wanted to add some legs to the bottom to give it some added height and character. I purchased a 4 pack of wood furniture legs nearly a year ago {pretty soon after we had bought the dresser} at a True Value store, and based on the packaging I think it may have been there since the ’70s, haha. It was $7.99 for all four legs which was pretty awesome.
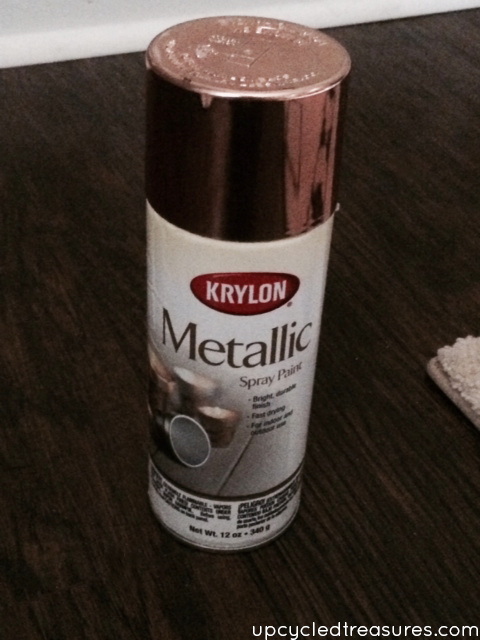
I painted the wood with the navy blue paint and then taped them off to paint the bottom with Krylon’s copper spray paint.
Here is the before and after photo of the furniture feet for our dresser with DIY copper pipe drawer pulls:
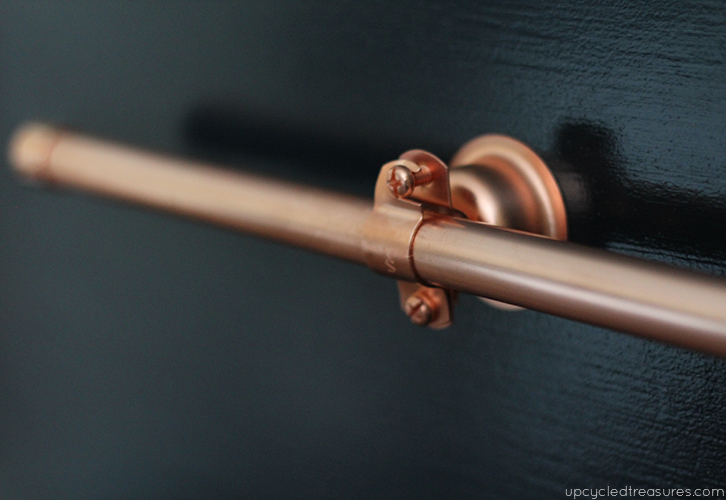
I was originally inspired by the whole copper pipe drawer pulls from my friend Brynne of The Gathered Home, who made an AH-MAZING desk with them. However, I knew I wanted my drawer pulls to sit away from the dresser so I browsed the hardware store until I came up with a solution… copper pipe bell hangers! The bell hangers basically hold the pipe in place and allow it to sit off of the drawers.
Copper Pipe
Pack of Copper Bell Hangers
Pack of Copper Slip Cap Fittings
Bolts and Nuts
Copper Cleaner (optional but this stuff works awesome!)
Overall I’d say the drawer pulls cost us about $28 total since we already had the pipe cutter, bolts, and screws on hand. I knew I wanted to go with longer drawer pulls versus knobs because the drawers are pretty heavy and it was difficult to open them with the type of knobs it originally came with. Plus copper pipes are awesome, amiright? 🙂 We bought a 10 foot 1/2″ copper pipe and then cut it down into sections with the pipe cutter.
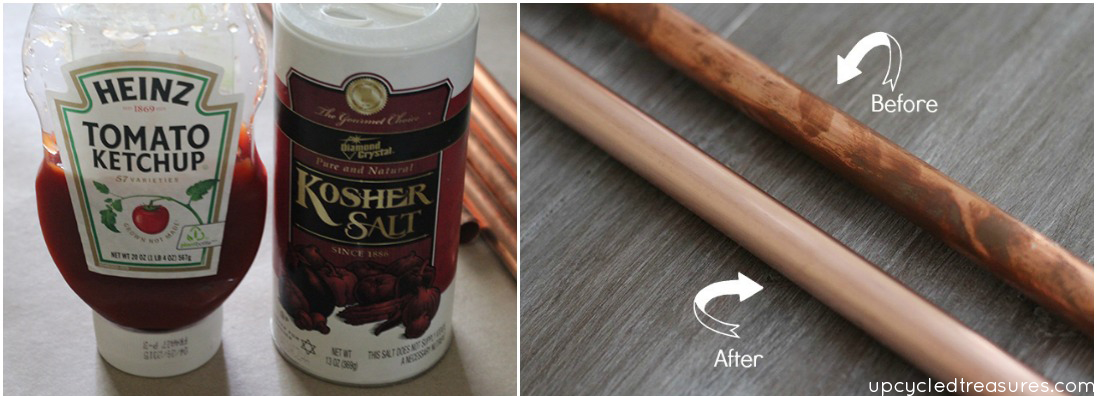
I figured this would be a good time to test out the whole cleaning copper with ketchup thing I’ve been seeing. I had read you could mix equal parts ketchup and kosher salt, rub it on the pipe, and wipe it off with warm water, so that’s what I did. I actually removed any gunky stickers first with fine steel wool. The ketchup/salt worked like a charm! I later tried it with just ketchup and it seemed to work just as well.
WOW, did those clean up pretty! I’ve gotta admit that these pipes can get dirty fast with smudgy fingerprints, but I don’t mind. By the way, there was a comment left by Karen that said if you spray clear spray paint on top of the hardware, it will prevent smudge marks and oxidation, so clever! Thanks, Karen!
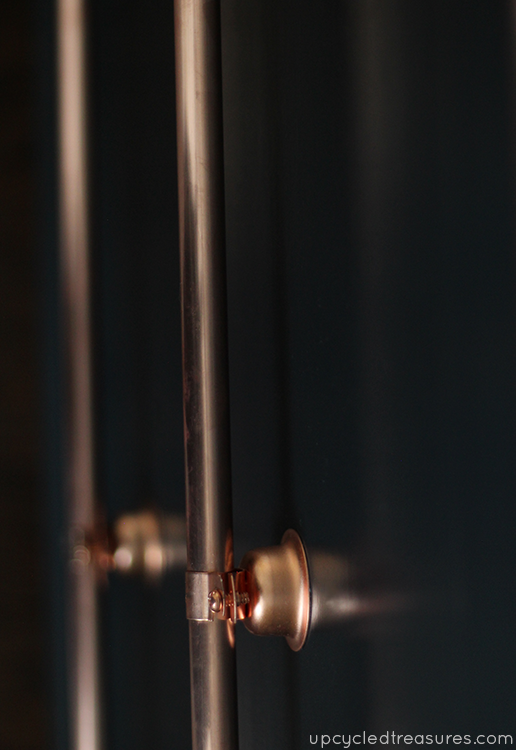
The bell hangers come with long screws in the center so we replaced those with shorter bolts that fit inside the dresser drawers and added bolts to the other end. Then we simply placed the copper pipes inside the 2 bell hangers and tightened the screws. Sooooo easy!
Update: Check out the full post on these easy DIY drawer pulls here!
For the top drawers, we just used one bell hanger and smaller cut pipes. Make sure you used flat headed bolts so they don’t take up much space next to the pipes. I then added the caps to the end of each pipe for a more finished look. Update: I actually wound up adding epoxy to the caps and then sticking them on the ends to keep them in place. If you don’t mind them being on there permanently, this is a great solution!
And here she is with the DIY copper pipe drawer pulls all finished! Isn’t she lovely?
Here is the before and after:
So what do you think of our dresser with DIY copper pipe drawer pulls? I love how the copper next to the navy gives it an almost nautical look. Are you sucked into the copper craze or not so much? I am using gold pipes in my office but was excited to incorporate some copper into other parts of our home.




So fantastic! I LOVE it!
Thanks Leigh!
This is absolutely gorgeous! I’m obsessed with copper right now too and I love how it pairs with the navy. Never knew about the salt/ketchup cleaning method; definitely going to have to remember that one! Pinned 🙂 Have a great day!
Thanks Breanna! You could really just skip the salt and just use ketchup. Using the extra fine steel wool worked really well by itself too 🙂 Thanks for stopping by!
This is one of the best diy projects I have seen in a long time! I absolutely love the legs and hardware that you incorporated. You created a gem, even if the original ad was slightly misleading. I also love that you included a little education about the furniture maker. Great finished piece!
Awwww, thanks Julie that is so sweet! You’re right and even though the ad was misleading it was still a really well built piece of furniture and $50 definitely wasn’t too shabby. So happy you like how it turned out!
What a cool transformation! So unique!
Thanks Allison!
Wow. That is one of the best makeovers I have seen in a long time. I am really impressed with the copper pulls. They go perfectly with the navy. It’s so creative, I love what you have done!!!
Thanks Heather! I am definitely a fan of the copper/navy too! Thanks so much for stopping by!
Hi Katie I love this project I want to paint my dresser the same color , what paint did you use ?
LOVE LOVE LOVE this! I am totally going to “borrow” this idea.
You should! It’s so easy and cost effective, especially for unique pulls that are nice and sturdy. Can’t wait to see what you do!
Katie that is so cool! It doesn’t even look like the same dresser!!
Thanks! I know, right? It’s amazing what a little love can do! I think the legs make a huge difference too 🙂
I love this transformation. How do you add legs to a piece of furniture like this? I have an end table that I want to add legs, but can’t figure out how to attach them.
Thanks Katie! The legs came with the plates and hardware to attach them to the bottom of the dresser. So we basically just screwed them into the bottom. It was fairly easy and they are very sturdy. I wasn’t sure at forest because the dresser is so wide and they seemed kinda small, but it’s all good 🙂
So In love! Beautiful job!
Thanks Ashley!
Are you freaking kidding me??? This has got to be one of my most favorite furniture makeovers ever. What an incredible color combo. I’ve never given that one any thought! Amazing job, Katie!!
Thanks Amy! It’s so sad it took me forever to FINALLY re-do this dresser but oh my gosh I love it now! Eric loves it too, which is a plus 🙂
love love love love LOVE!!!!! Seriously, the navy color and the copper…swoon!
Thank you Sara!
Amazing transformation!
Thanks Rayana!
You continue to blow me away. This is stunning. You honestly are so talented! Pinning, of course!
Thank you so much Amy! I haven’t re-done a piece of furniture in a while, so it was fun to get one done {and get one more thing out of the garage, haha}.
I love this so much! I am featuring you tomorrow… Thank you for linking up with The Party Bunch!!!
xo
Desiree
Yay, thanks so much Desiree!
Wow!! So smart to figure out how to fit all those pipes together to create such a dramatic piece! Love the copper and navy together!
Thanks Liz! I just saw the link for your post on getting spray paint off of skin, off to check that out now!
I was literally thinking “I wonder if I could use pipe to make new kitchen cabinet handles for I house I want to / fantasize that I might buy” and saw your link at MMS. Now I HAVE to buy the house, don’t I? Do you think these fittings would hold up for a vertical installation?
Absolutely Sharon! You can move the bell hangers in a different direction if you would like. Another option would be to use floor flanges and elbows, but that could cost a little more 🙂
Your talent seriously blows me away each week. I get so much inspiration from your blog. We picked up an old dresser a few weeks ago and it’s sitting in our garage waiting for me to do something with it. My hubby wants to keep the wood grain, but I want to paint it. I’ll have to show him your transformation. Would love if you shared you talents with us at the Merry Monday Linky Party tomorrow at 6pm PST.
Thanks so much Erlene! I can’t wait to see what you do with it! I’m off to check out your party now!
Ingenious…pulls can be soooo expensive….these are awesome! I love unique and original! This fits the bill
Thanks beck!
If you get tired of cleaning the copper, remove all the hardware, spray with clear spray paint. The clear coat will prevent fingerprint smudges and oxidation.
That is such a genius idea, thank you so much for sharing Karen! I’ll have to add that to the bottom of the post 🙂
that is so so SO good!
Thank you!
Wow! The wait was completely worth it! Your selections are perfect. I love the DIY pulls. They stand out perfectly against the navy.
Thank you 🙂
Talk about thinking outside of the box! What a great idea and it looks so cool too. You are freak’n talented and your projects never cease to amaze me.
Aww, you are too sweet, thank you so much Marie!
I LOVE this! I love the colour you picked, the legs are awesome and the pulls are genius. Great job!
I love this! I pinned it 🙂
Thank you so much Stacy!
What a really cool makeover!!! It was worth all the wait so you could figure out exactly what to do with it. It looks nothing like the original! I love that you found the ad in there from the 60’s! I found a bank statement from Oakland, California (not far from where I live) from the 50’s in the back of a desk drawer. I love treasures like that!
Thanks Karen, now that this one is done I guess it’s time to get to the other projects I’ve been hoarding in our garage, haha. I love finding stuff like that in furniture too, and how neat that it’s near where you currently live 🙂
That copper is so stunning, what a beautiful piece of furniture you have created and so unique as well. I think copper is going to be the new silver 🙂
Oh my that is AWESOME ! Such vision ! You were so right to wait.
I’m always a fan on navy blue and gosh, those copper pulls are just gorgeous!
Love love these copper pulls. You were featured today at our Link it or Lump it party! Be sure to stop by and grab a feature button!
http://www.delineateyourdwelling.com/2014/06/link-it-or-lump-it-party-number-42.html
WHAT A BRILLIANT IDEA! LOVE IT AND IT FITS THE PIECE, I WOULD LOVE TO FEATURE IT, IF THAT WOULD BE OK PLEASE LET ME KNOW
LAUREN
Nice idea with copper pipe drawer. Keep it up with experiments!
Well you are a genius – those are just gorgeous !!!
What an incredible transformation – just loving it ♥
Visiting from the DIY Dreamer – congrats on your feature 🙂
Hugs,
Suzan
I can’t believe I haven’t already told you how amazing this is! I’ve been so behind on my blog reading lately… Well, let me say it now: These are FAN-FREAKING-TASTIC! I absolutely need to get my hands on some of those bell hangers – pure genius!!!
Wow, you knocked this out of the park. What a wonderful transformation. The copper pipe provides a wonderful polished industrial feel. I love it!! I’m hopping over from Merry Monday. Leaving hugs and inviting you to share at my Thursday hop ( starts tonight 8 PM MST)
Wow! Not only a fabulous transformation but I love the pulls you made! I think I’ll have to pin them for a project sometime!
It definitely paid off to take the time to figure out what you wanted to do with this piece because it is awesome! The color and finish of the paint paired with that super cool copper hardware is a stunning combination. I have several projects on hold until I have a vision for them – I hope they turn out even half as nice as this! Great ideas and execution. Thank you for the inspiration!
Wow as a copper lover I have to say Bravo this idea of the copper hardware is so great and ingenious that I have a project and I so doing the hardware pulls I of course asking for your permission to do so thanks lovely and elegant transformations.
Absolutely brilliant! So glad I found you on Better After. Definitely BETTER AFTER!!!
Hi,
I think this is absolutely beautiful! I love the idea of using copper to up-cycle things for my home, but my father mentioned that copper can discolor over time. Have you had any issues with that? Or any ideas how to prevent that from happening?
Hi Diana,
The copper definitely can get smudgy over time, but you can always spray a clear sealer on top after you clean them. I have received comments that this will help keep them clean and shiny. I honestly haven’t done it and a little bit of oxidation doesn’t bother me. 🙂
~Katie
Where did you find copper bell hangers? All I can find are copper plated steel bell hangers?
Hi Brandi,
You can check with your local hardware stores or at Amazon, but I’ve found that Lowes almost always has them in stock. I recommend checking out their site first so you can see if they are in stock and how many they have. You can even just order from the site and then go pick them up. They often sell the singles as well as 10 packs.
Hope that helps 🙂
~Katie
What should i do to get rid of the residue each time i touch the puller. I cleaned and used the copper spray. i did not use the epoxy glue. Is this the missing ing? will this keep the lust and prevent oxidation
I found your post on Pinterest and decided to make these copper pipe pulls for a dresser and nightstand! Thanks for the tutorial! I just revealed the room on my blog– check it out!
http://www.kemleydesign.blogspot.com
Hi Kemley,
Awesome, I can’t wait to check it out!
Katie
Besides its obvious beauty, copper has another advantage: germs can’t grow on it. Copper is anti-microbial element. Hospitals are finding copper helps reduce drug resistant bacteria from spreading (bed rails etc). Copper is healthier for us than using antibacterial soaps. More reason to keep your copper “natural” and not coat it.
Love this hardware so much! I’m visiting you from Hometalk:) Love your site!!
Thanks Kayla! These pulls are one of my favorite DIYs and they were so freakin’ easy to make. Gotta love that 🙂
very inspiring. had a few of those surprises myself.
thanks
How did you determine how much pipe to get/ what are the measurements of your pipe lengths? I thought I saw something about it before, but I might have just been crazy. I am definitely doing this with my craft dresser!
I know its a long time since this post but I have just found your blog and it is exactly what I am looking for in my kitchen renovation project I am currently doing, my problem is finding the fittings here in the Uk and I wondered if anyone else had had a similar problem and if anyone knew of any suppliers for the fittings? any help would be fantastic, cheers Terri
I’m going to steal this and attempt a curtain pole! Beautiful blue as well. I love that you included the history as well.
You should! We actually made all of our curtain rods from pipe in our last home. It was a lot more cost effective than the ones you buy, especially for our larger windows, and I loved how it looked too 🙂
Do you happen to remember what Brand and name the paint was? It’s Gorgeous!!! Thanks!
Hi Flor,
The paint I had mixed was from a random collection of oops paint, so I don’t have any specific colors I can share. However, I later painted some nightstands and found a color pretty close, it was BEHR’s Starless Night. Hope that helps 🙂
https://mountainmodernlife.com/copper-pipe-drawer-pulls/
Katie
Hi Katie! What a beautiful transformation. I’m inspired to make over a dresser for my bedroom and was wondering the same thing as Flor, above. Do you mind sharing the brand and color paint you used?
Hi Sara,
I just saw both of your comments about the navy paint. The paint I had mixed was from a random collection of oops paint, so I don’t have any specific colors I can share. However, I later painted some nightstands and found a color pretty close, it was BEHR’s Starless Night. Hope that helps 🙂
Here’s the post about the nightstands:
https://mountainmodernlife.com/copper-pipe-drawer-pulls/
Katie
Thanks for these tips for making copper drawer handles like this. I definitely want to have a go at something like this.
I done all the steps but my I get getting copper residue every time I touch the handle and the copper went back to being dull and not as when i first spray it. Solution?
Do you mean that you cleaned the copper, then used a clear spray sealer, and the patina still comes back when you touch it?
To be honest I’ve never tried the clear sealer because I don’t mind the patina, but it was a tip I heard and have read (it was also left in the comments of this post which is why I added it). I did recently read that cleaning copper with lemon before spraying it with clear sealer doesn’t work because of the affect of the acid, so it may have something to do with what you cleaned the copper with. Again, I haven’t cleaned it with the ketchup solution and then sealed it so I can’t say if that affects it.
If so, you may want to try actual copper cleaner – I like Wright’s Copper Cream – and then test with a clear sprayer on top before using on all of the pulls. Sorry I couldn’t be of more help but let me know if you find a solution that works!
Thanks!
Katie
its beautiful bravo!!!!
Hi! Question: What kind of gloss finish did you use? Gloss? Semi gloss?
I love this!
This is fantastic. What great work. I have a pile of copper tubes in my garage and I am searching around to put them to good use.. I commend you on a job well done! (blue plus copper = gorgeous!).
Enjoy
Thanks Anne and I’m so happy it helped you find a new use for your copper tubes!
Wowsos!