UPDATE: All new featured RV tours will be posted on my other website, Wanderful RV Interiors. Existing tours will slowly be moved to the new website, and anything already moved will automatically redirect.
Disclaimer: This post may contain affiliate links, meaning, if you click through and make a purchase we (or those featured in this post) may earn a commission at no additional cost to you. View our full-disclosure here.
One of the biggest projects we tackled last month was installing the new ceiling panel in the RV. This was the suckiest project to date and yet possibly the most gratifying.
As you may know, a few months after we purchased our RV last year, we discovered a water leak coming in through the skylight. This really freaked us out because while we were planning to renovate our motorhome, we hadn’t planned on tackling such a daunting task. We’re just happy we found it before we started any big projects.
For those that are new here, we purchased a 2008 Tiffin Allegro OpenRoad 32LA, which we are transforming into a rustic-modern motorhome. You can read more about that here.
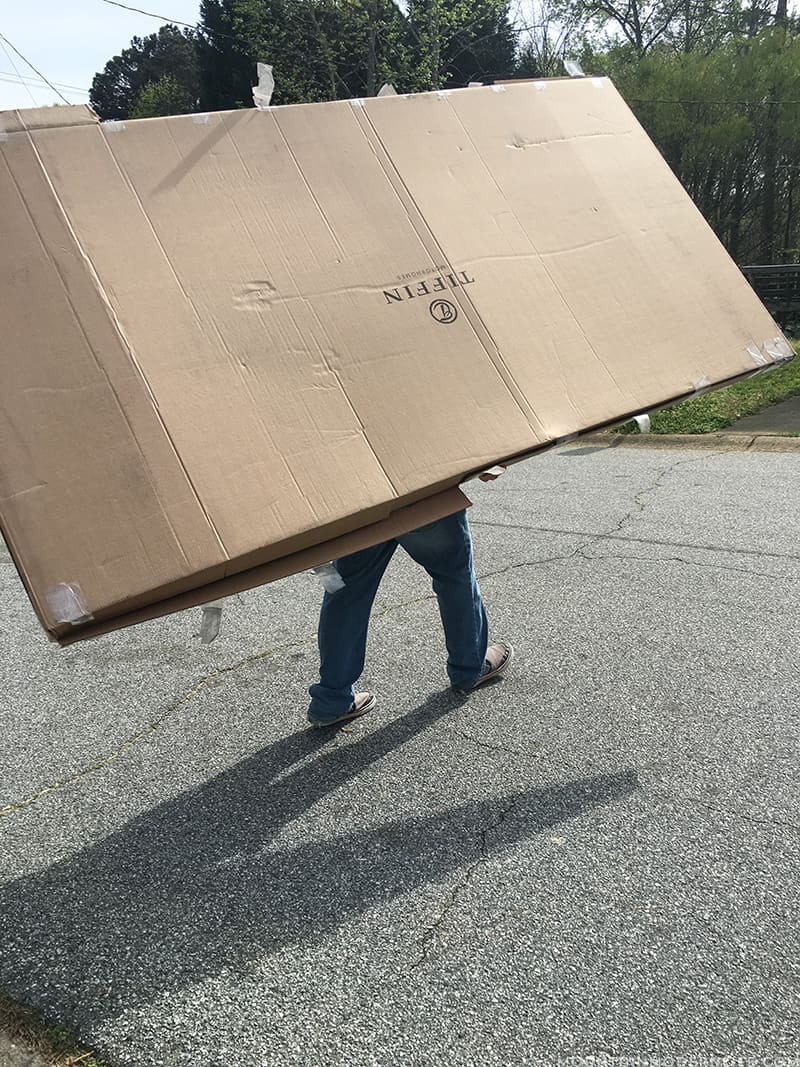
We had spent quite a bit of time cleaning up the damage, re-caulking everything to prevent future water issues, and installing the new skylight. However, the massive ceiling panel we had to have delivered on a freight truck just sat in our garage for months intimidating us every time we walked past it.
It was probably our scariest project to date just because we’ve never replaced a ceiling panel, especially one inside an RV that just so happens to be located between the kitchen AND bathroom with a nice pipe going through the wall. Fun stuff.
There was lots of measuring, then re-measuring, then re-measuring again before cuts were made, and there may have been a number of swear words even Abraham of The Walking Dead would be proud of. Needless to say, we are super stoked to finally have it up, woo-hoo!
Eric was a champ and did most of the hard work so I’ll let him explain how we replaced our ceiling panel. It may not be the most exciting project, but we are excited to have it done, that’s for sure!
How we Replaced the Ceiling Panel in Our RV
Below we will explain how we replaced the ceiling panel in our motorhome. We are not professionals and replaced our ceiling panel to the best of our ability with the guidance of our manufacturer. As with any RV project we recommend you check with your manufacturer for best practices, this way you will at the very least get information straight from the horse’s mouth so to speak. Also, it is important to understand that all RVs are created differently and some aspects may be different for your unit. With that said we hope the information below is helpful for you and your project.
You can watch our short video below:

Once we realized we had water coming in through our bathroom skylight we immediately placed a tarp over the roof and called Tiffin, our RV manufacturer. They were very helpful in walking us through how we could go about replacing the panel, but there is only so much you can do over the phone.
Once I was done with the call Katie and I stood in our bathroom, looked at the damage and considered our options.
Option 1:
Have it repaired professionally. Considering our damage was not covered by our insurance or warranty it ended up being a bit out of our budget.
Option 2:
Leave all of the walls and furniture in place and cut the new ceiling panel into various pieces, then put them in place.
Option 3:
Take out all of the walls and cabinets then place the new ceiling panel in place as a whole sheet.
Option 4:
Create our own option by mixing together options 1 and 2.
I wasn’t a big fan of cutting the panel into many pieces and fitting them around the walls that were in place. I couldn’t convince myself it was the best option, it may have very well been the easiest, but I felt either of the other options would be more secure.
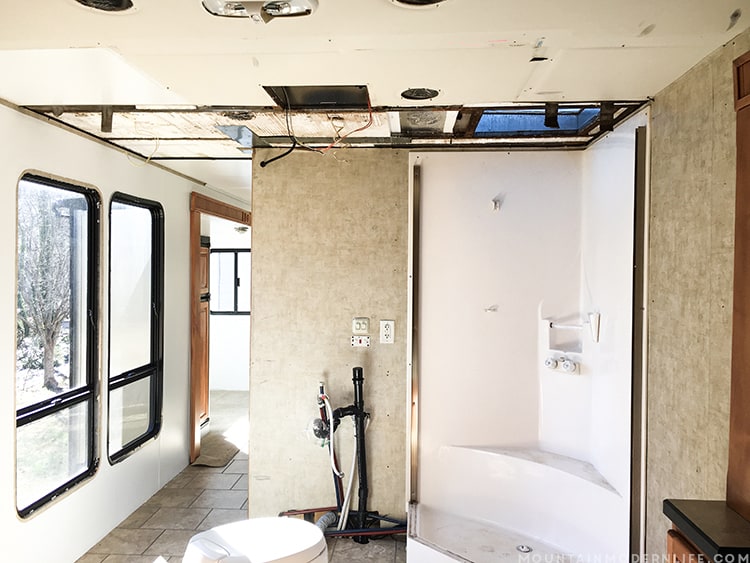
So, we stood back and looked at it again, realizing there were a lot of items we were going to be redoing, such as the bathroom sink and linen closet. As we stood back and looked we decided it was going to be best to remove the walls and fully replace the panel in its entirety.
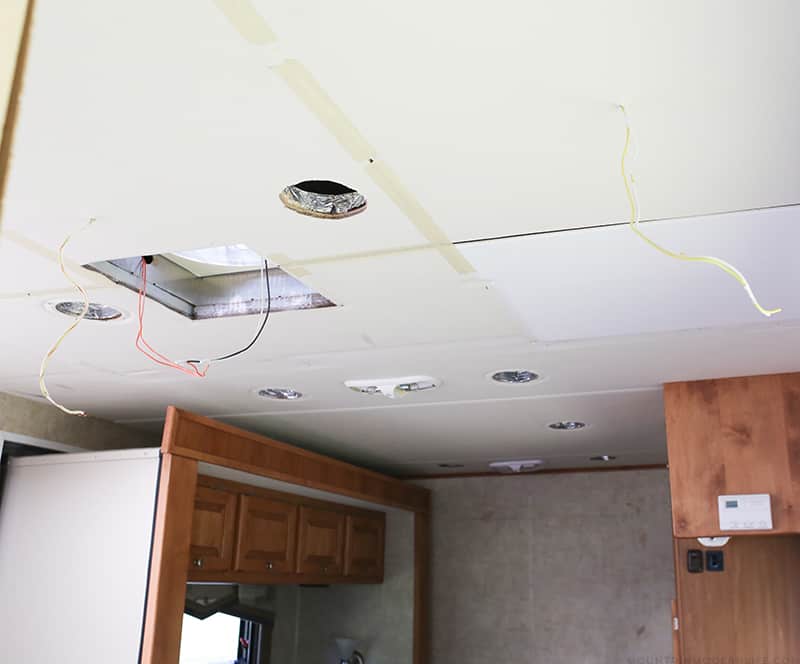
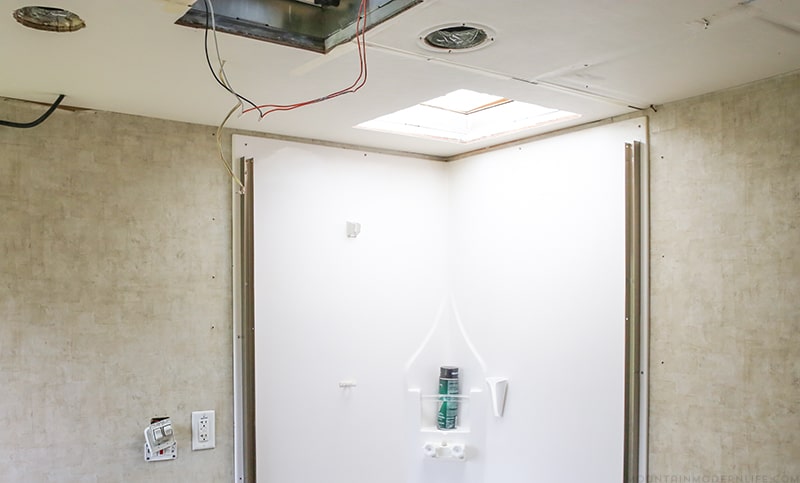
Once we arrived at the main kitchen wall (the wall still up in the photo above) we hit a couple of snags, namely the water heater, and heater were both installed against the wall in the lower kitchen cabinets. We looked at the situation and decided we could cut the panel into two pieces and still have it seem as if one full sheet had been replaced.
When looking at our ceiling with the old panel removed we realized we had two walls that could essentially cover both the cuts we would have to make. One wall being the main kitchen wall, the other being the hallway/bathroom wall.
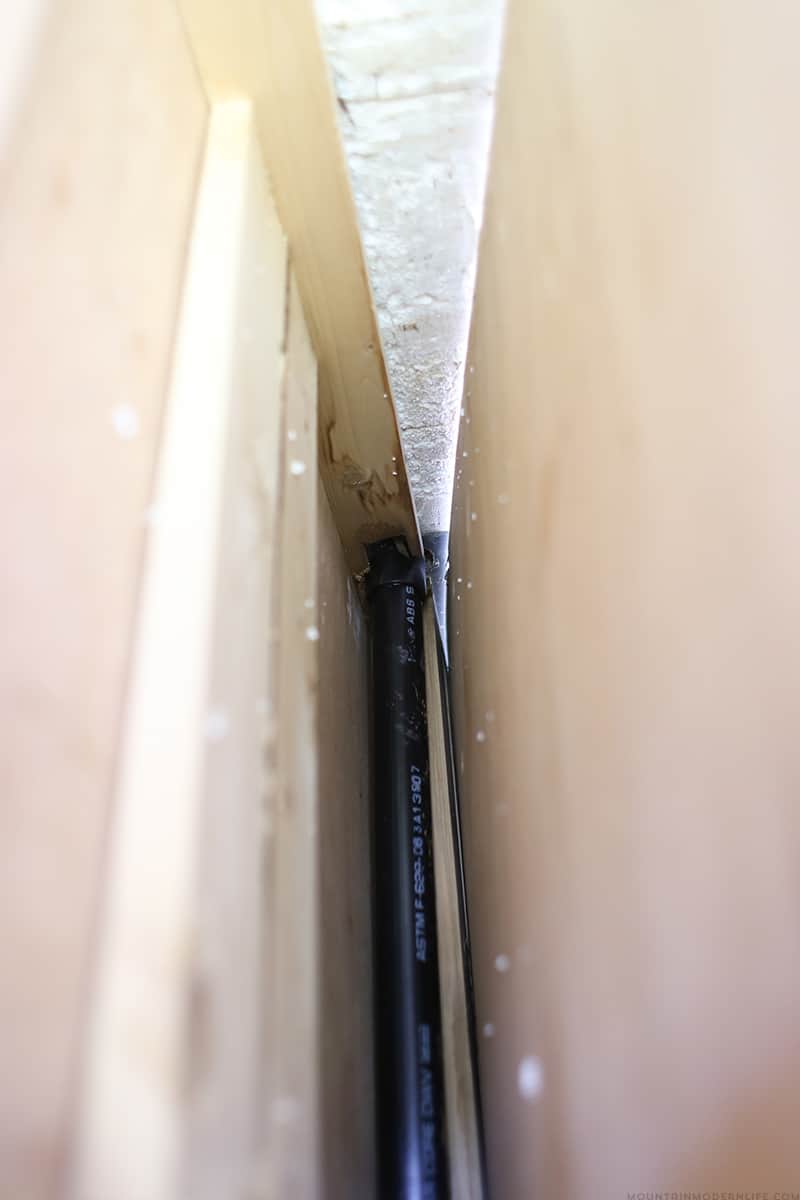
Side-Note: We knew we would not be removing the kitchen wall, however, we thought we may be able to slide the new panel (still in one piece) above the wall while it was still in place. Turns out though we have a pipe running all the way up into the ceiling, so we were not able to do it that way. We decided to make the two cuts.
Let me say that if you are replacing any panels that are not sandwiched between walls, this task will be MUCH easier for you. The damaged panel in our RV just so happened to be located in the most difficult spot. Go figure.
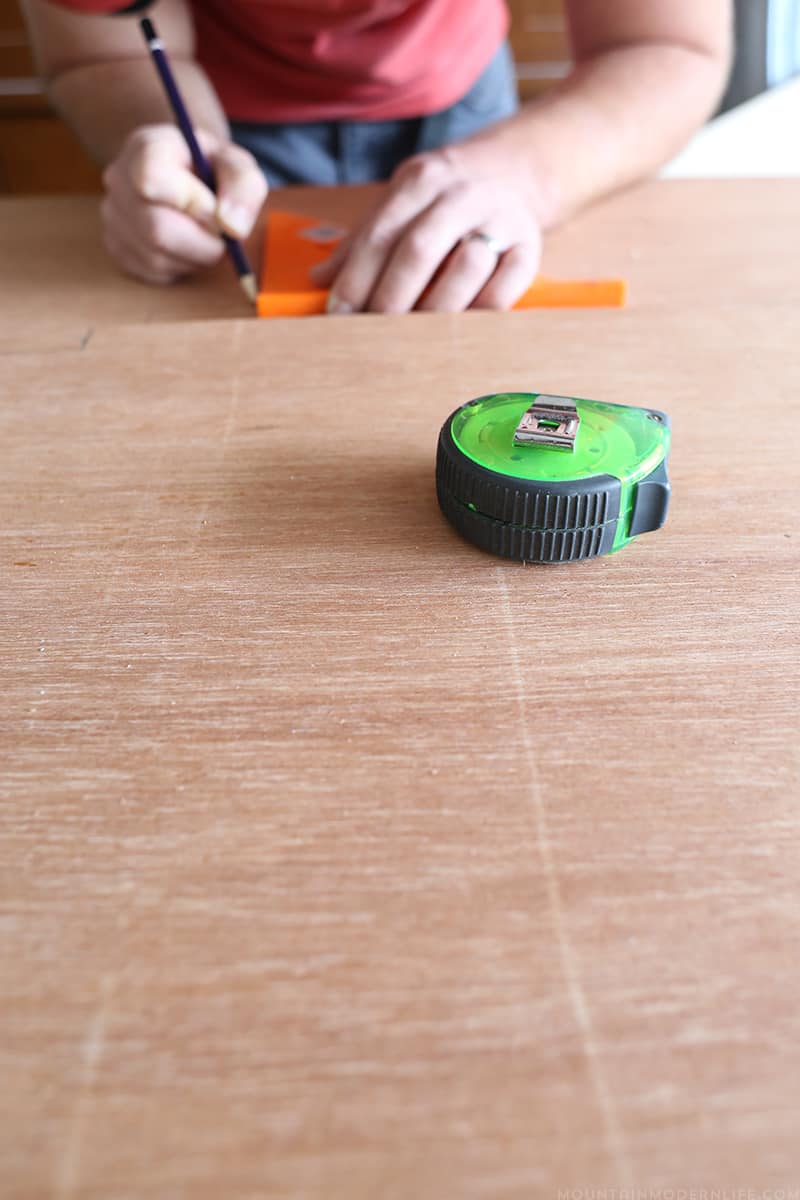
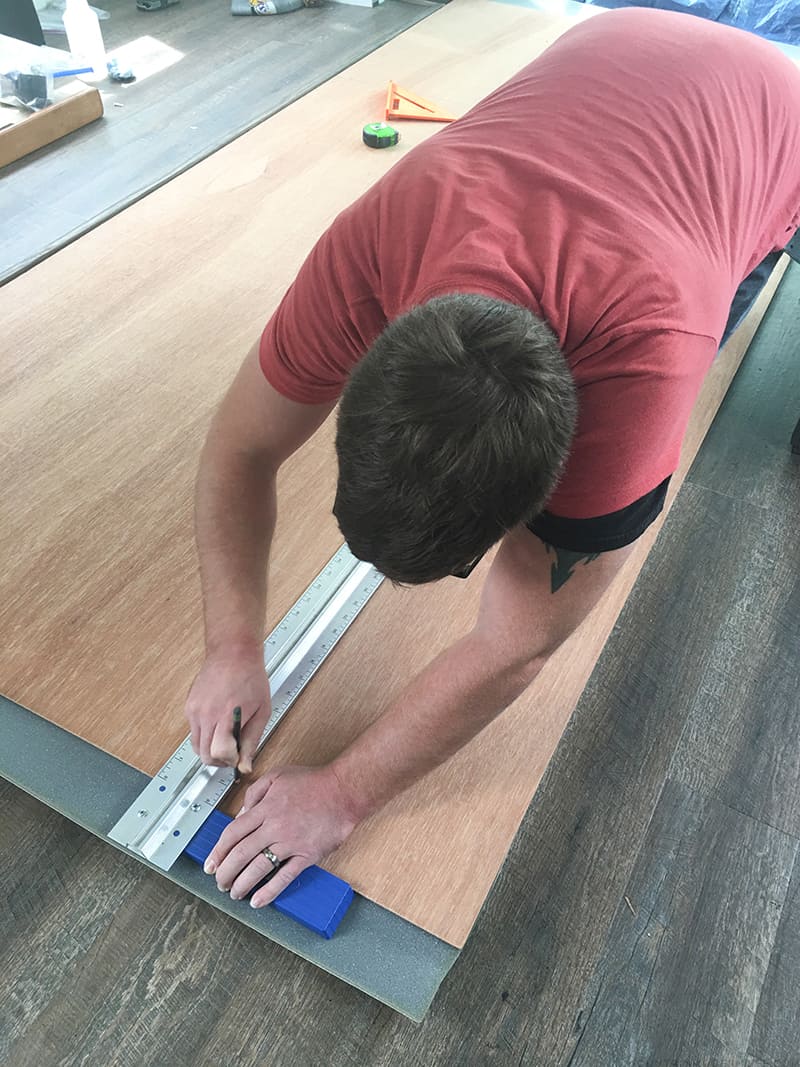
I went ahead and measured the distance from the edge of the panel to the middle of the kitchen wall (insuring the cut would be hidden under the wall). I also chose to do this because the wall would help act as a brace for the two pieces of paneling we would have after the cuts.
Now I measured from the outside wall to where the hallway wall will be once we put it back in place. The same reasoning behind this cut as the other, to make sure when the hallway wall was put back in place it would line up directly with the cut we made in the ceiling panel.
(in the above picture you can see that the panel goes underneath the kitchen wall, creating support while also hiding the cut we made)
So now we have two pieces of the paneling and we know where they are going to go, but what about the vents, skylight opening, and wires that need to come through the ceiling panel?
It is best to get those spots measured and pre-drilled before you put the panel up. When I was going through this step I choose to always measure from the panel edge that I did not cut, ensuring that it is straight edge. I also followed the old adage to measure twice and cut once, but to be honest I probably measured every spot 4 or 5 times maybe even 10 times, haha.
I marked my measurements on the wood paneling side of the ceiling panel so as not to make a mistake on the white vinyl side.
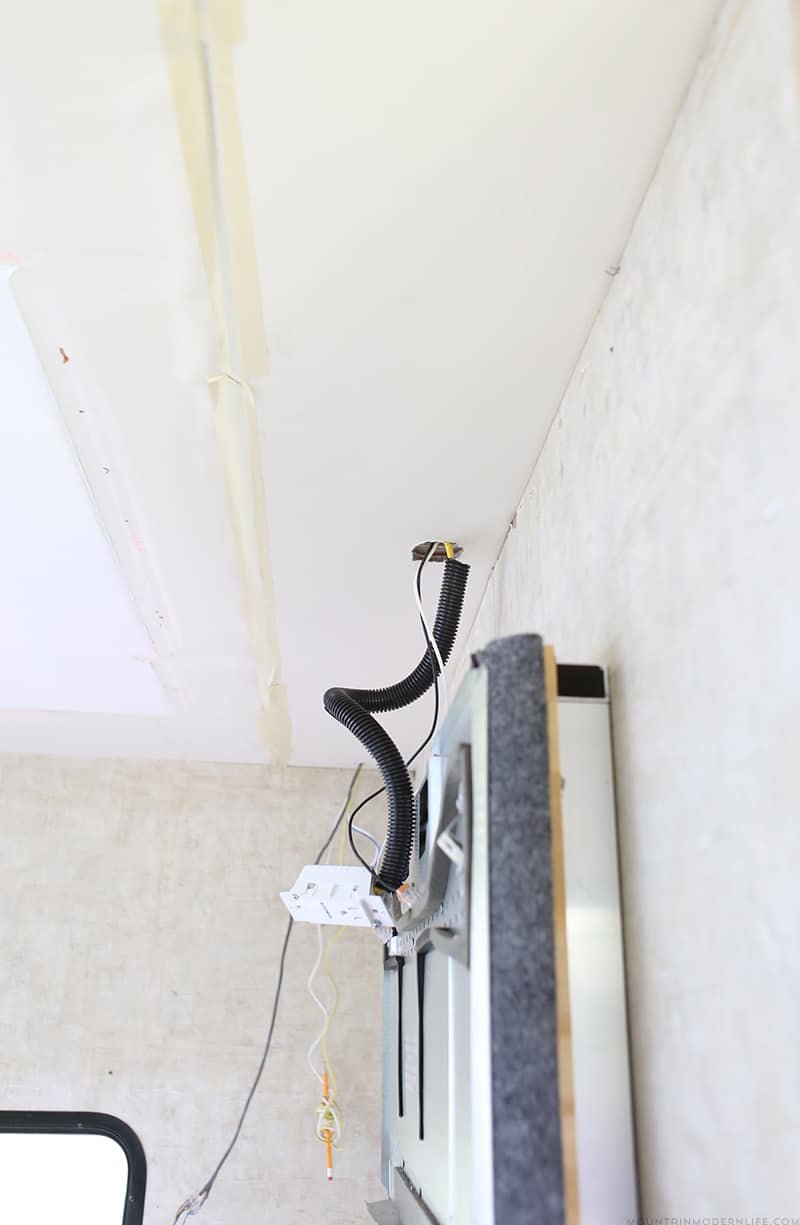
Side-Note: There were a couple of wires that came through the ceiling and went into the wall. Instead of disconnecting the wires, I made a simple cut with my circular saw to the pre-drilled hole so that I could slide the wires into place. You may want to disconnect the wires first, and that would be perfectly fine, I would say use your best judgment and do what seems right to you.
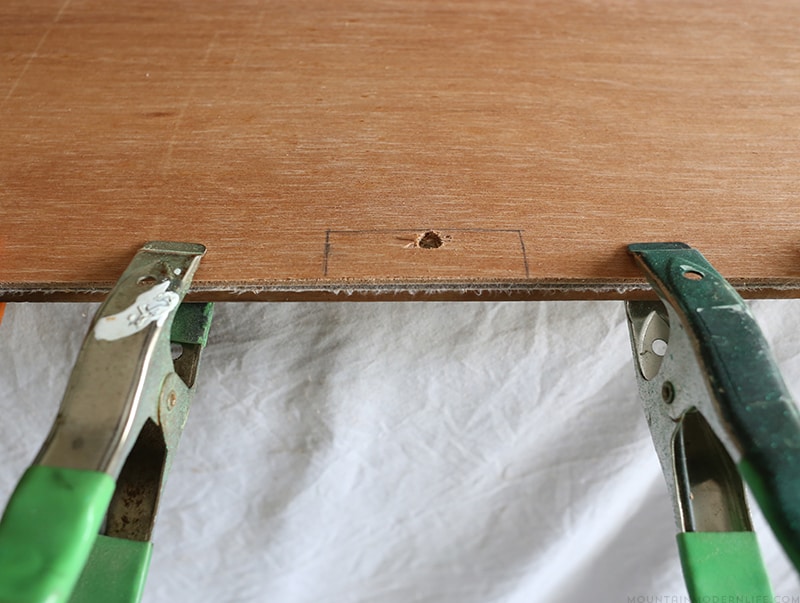
Once my measurements were good to go, I used a drill bit that was smaller than the actual size I needed for each hole. I did this so that I could put the panel up and make sure my marks were right with the thought that if they were wrong I could then use the right size bit and correct one way or another if necessary. Good fortune was on my side and all the measurements were correct.
For the spots where wires needed to come through, I used a bit big enough to slide them through.
For the vent covers and skylight openings, I used a drill bit large enough to allow my JigSaw blade in. I opted to get the panel in place and secured before cutting out the larger openings, I did this because I didn’t want to pre-cut then come to find out it wasn’t lined up correctly.
In order to secure the panel to the ceiling, we used 3M 90 Grade Spray Adhesive, along with the kitchen wall putting pressure on the edges. Before we put the adhesive on and placed the panels we actually needed to cut a very slight of the edges off. Once we had that accomplished the panels slid up into position, and we knew they would fit.
We took our spray adhesive and covered both the ceiling and wood backing of the panel, gave it a minute to become tacky then pushed the two pieces together.
Once up and secure I used our jigsaw to cut a bigger circle, then used the reciprocating saw to get closer to the edges. Looking back on it I would probably not use the reciprocating saw if I did it again, I would use a Dremel Router tool, or even just continue on with the Jigsaw.
Once I was closer to the edges I went back to the jigsaw and cut the panel nice and close to the openings.
The ceiling panel is now in place, YAY! That’s how we Replaced the Ceiling Panel in our RV!
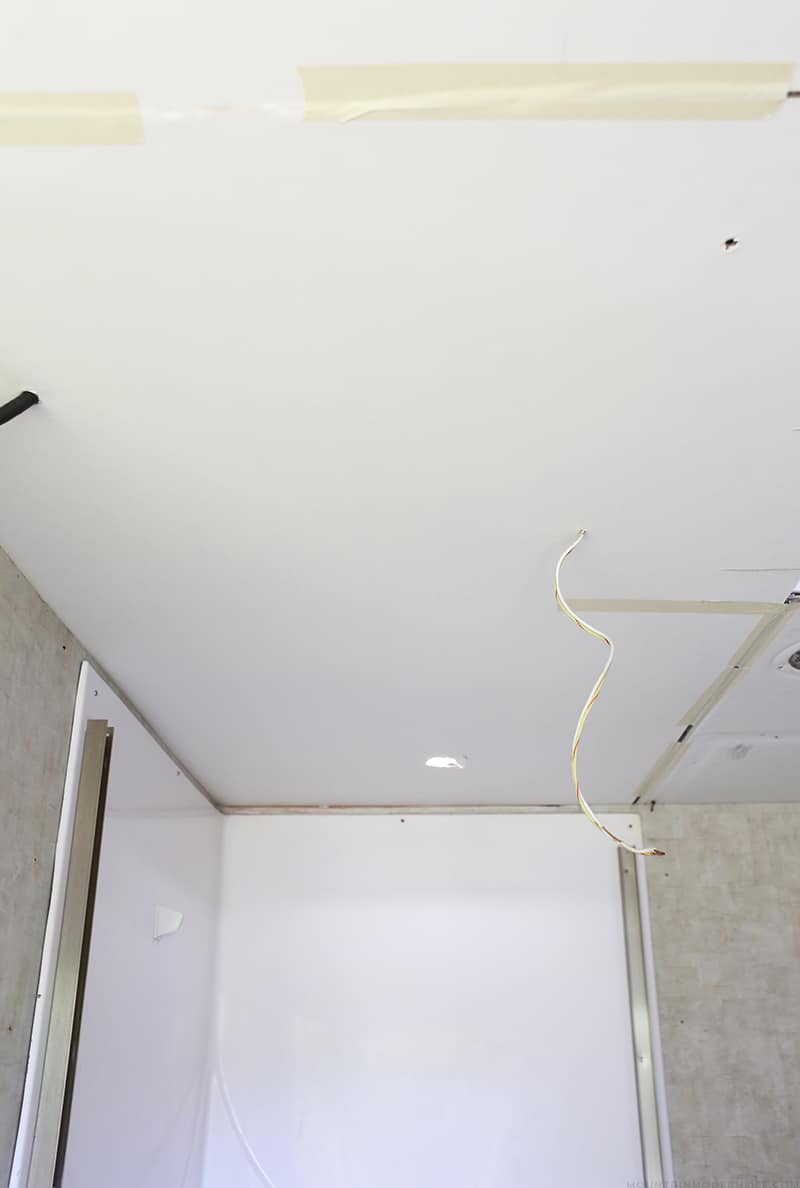
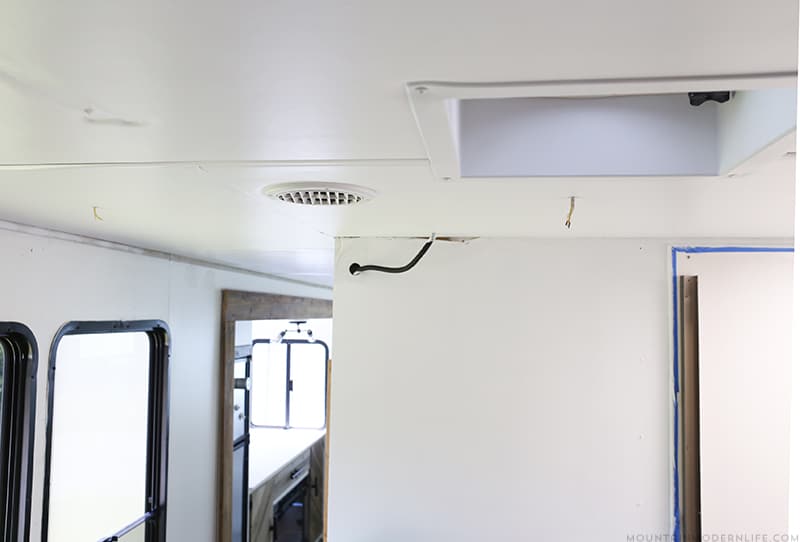
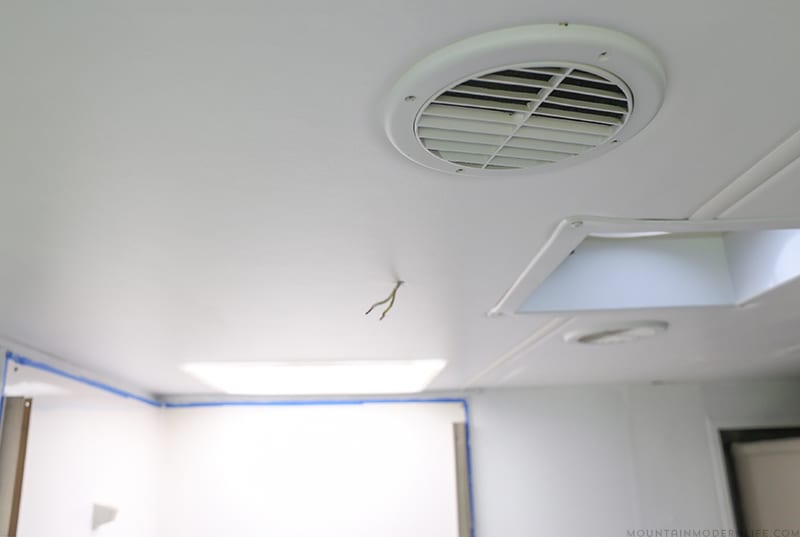
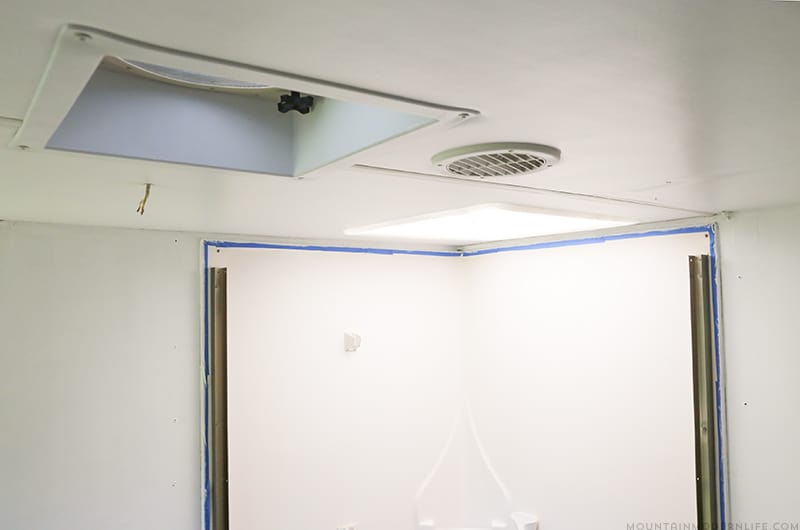
As you can see in the above two pictures, we have tape over where the vinyl strips snap into place in between the panels. We put the tape up until we had the vinyl strips painted and ready to be put back in place.
We actually replaced the ceiling panel back in early April but were kind of busy with other renovation projects. But we have had a little time to get all of the vents back in place. Below you can see a picture of the panel up and ready for the walls to be put back.
That’s how we Replaced the Ceiling Panel in our RV, and I hope this information was helpful in your project. If you have replaced the ceiling panel in your RV and have any tips to share we would love to hear about it below.

why did you put a sky light above the shower??? Did it not leak once? Did you use common sense or your brain? You should have placed a fantastic fan right above the shower so when you take a shower than the steam goes right up the fan outside. As I saw on your video, you are not 6′ tall so the skylight was a dumb idea. Well, it is your RV so you do whatever you like?;)
Good luck with the skylight, POINTLESS;)
Hey Tom, I didn’t even think of adding a Fantastic Fan there, that’s a good idea. To be honest this was before we started the renovation process so I hadn’t done any work on the RV. My main thought was oh no, the skylight is cracked and water came in, how do I fix it, get the same skylight and repair it. Oh well live and learn I guess, the new skylight does add light when you’re taking a shower which is nice. Anyway thanks for swinging by.
Wow, you were far nicer to Tom than I would have been in the same situation. Good job not feeding the trolls!
Thanks Julie, sometimes it can be tough but at the same time sometimes the people posting can be going through a rough time with it, so I think it’s better to take a deep breath and try to look at it from their prospective 🙂
Tom,
Many RV’s have a skylight as opposed to an electrical device located above the shower. I am assuming this is due to fear of water splashing up into the electrical device and electrocuting the person showering. I also can assume that you have a way of speaking to people that makes you sometimes seem more ignorant than what you probably are, this was one of those times.
Tom, I think YOU’RE the brainless one for posting YOUR dumb comment. And Eric was nice to not point that out. You could have suggested the fan without being a jerk about it!
yeah DICK
Eric, this is very helpful. I face a similar problem on a Class C. Snow melt backed up through a fantastic fan hatch a while back and damaged the surrounding padded ceiling above the forward area of our RV. The water incursion issue has been resolved but the repair to the ceiling has intimidated us. Our install process might end up being slightly different than yours but the suggestion of contacting the manufacturer is where we will start. I’m hoping I can purchase the panel from the manufacturer but we’ll check the source you refered to in your post.
We own a Four Winds 31 ft Class C and want to repair it in order to sell and buy a Tiffin Class A. We’ve been reluctant to move forward with the repairs but some of your work has made us a bit more confident about getting this done…finally. Great job with your Tiffin and also great job taking the high road with the rude poster above. Thanks for creating a very informative site.
Thanks Kevin M. I’m glad we were able to help you guys get that last step in confidence to get started. I know for us a lot of our delay was due to the fact we didn’t really know what we were doing and didn’t want to break anything (basically we were scared haha). I think once you get the repairs done and get the Tiffin you are going to be thrilled you did, we’ve loved everything about our Tiffin and wouldn’t change it for the world. Let us know once you get the repairs done and how it all went! Best of luck, Eric.
I am removing a second bathroom (1/2 bath) and bunk room in our fifth wheel to make room for a nice sitting area for my wife and I. I am removing two walls, one of which has a vent pipe in it and the other has all the wires for the TV/entertainment center. I feel better/confident about taking on the ceiling now that I saw you steps. Thanks for the helpful info! -Matt
Hey Matt, I’m glad it was able to help guide you in the right direction 🙂 You should let us know how it went once you’re all finished up, I bet is going to really open the space up. Anyway best of luck, Eric
Regarding the comment about replacing the skylight with a fantastic fan. Vent fans are 14″ square, Judging from the photos I would say that skylight is approximately 16″ x 24″. to replace it with a fan you would have to restructure the opening and either patch in the roof decking and put some type of flashing on the roof to cover the original cut out or replace the roof. It’s not the skylight that leaks, it’s the seal.
Hey Alvin you’re right on about the size difference, though I am looking around to see if they make larger skylight/fan combos cause I’m thinking it would be a nice addition but who knows. But either way, I’m going to replace it with something of the same size because I’m not sure I want to go through all the work you mentioned haha. Unfortunately our skylight actually had little hairline cracks that were leaking, anyway thanks for swinging by 🙂
we have a 1994 Hitch Hiker and it came with the sky light fan in the shower and I love it and we also just bought a 2018 Forest Sand Piper it has a fan sky light as well there is nothing wrong with having a vent, fan or sky light whatever you want to call it in a shower. It also prevents from the mirror fogging up.
I completely agree Connie! Our bathroom has the fan and skylight in seperate places, but to be honest I’m thinking about replacing the skylight with a fan/skylight combination, we’ll see here in the future.
Do you have a link or name of the paneling you elected to use? Ty.
Hey Adam, we actually don’t have a link. We ended up calling Tiffin and ordered it from them so I’m not entirely certain where they get them from. Sorry about that.
Can the water marks be painted over? We were hoping we didn’t have to replace the whole ceiling.
Hey Cathy, I’d imagine you can paint over the water stains but I’d make sure to use a primer as well. At the same time though I think it is important to make sure you don’t have mold growing anywhere if it was a sustained leak. Anyway I hope this helps, let me know if you have any other questions.
Skylights in the shower are typical and often installed to accommodate taller people. There is usually another vent w/ fan in the bathroom as well for ventilation. If the second vent is not there the bathroom door usually has a 3″ gap top and bottom for ventilation into the main cabin. Regardless of opinion hardly a polarizing article to generate such a harsh post…
Thanks for your comment and explanation Andre greatly appreciated 🙂
Skylights are fabulous over a shower. I’m into vintage campers and either a lightweight skylight or a hand crank vent are the two best options imo.
Thanks for sharing!
I couldn’t agree more Jim, thanks for swinging by 🙂