UPDATE: All new featured RV tours will be posted on my other website, Wanderful RV Interiors. Existing tours will slowly be moved to the new website, and anything already moved will automatically redirect.
Disclaimer: This post may contain affiliate links, meaning, if you click through and make a purchase we (or those featured in this post) may earn a commission at no additional cost to you. View our full-disclosure here.
A year ago we painted our RV kitchen cabinets. Twice.
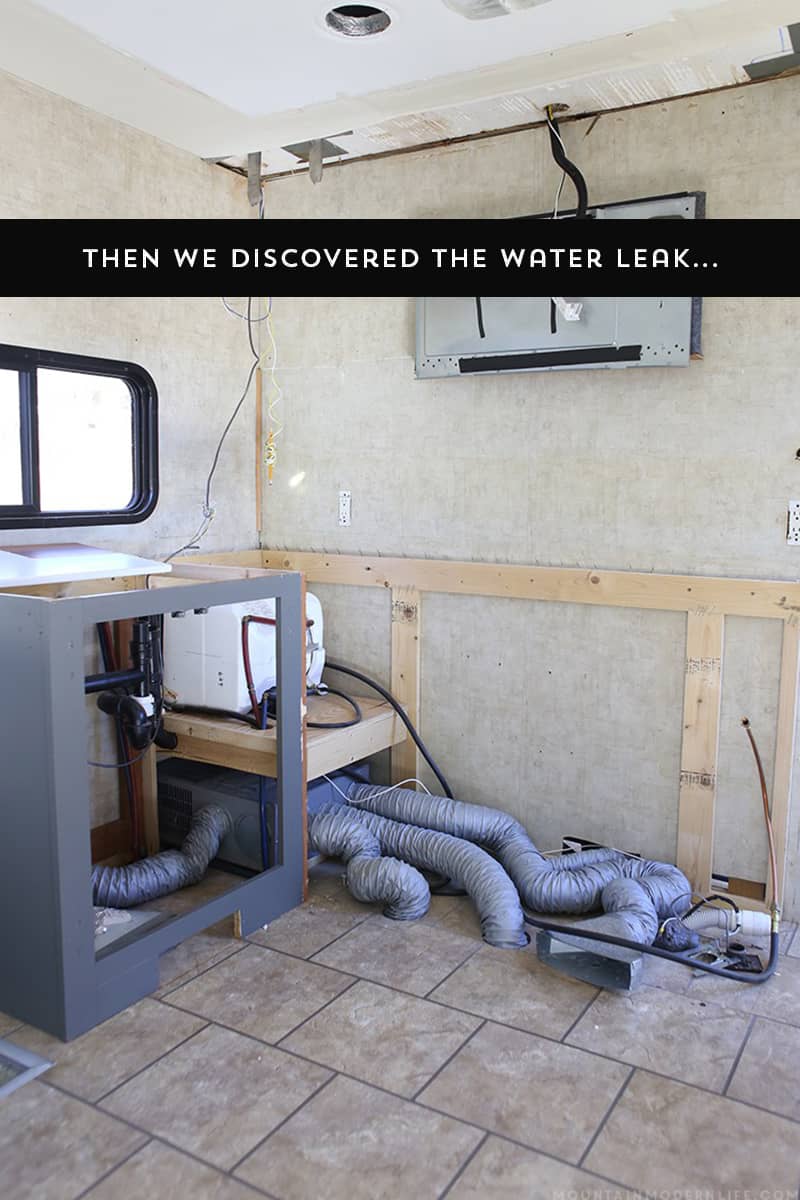
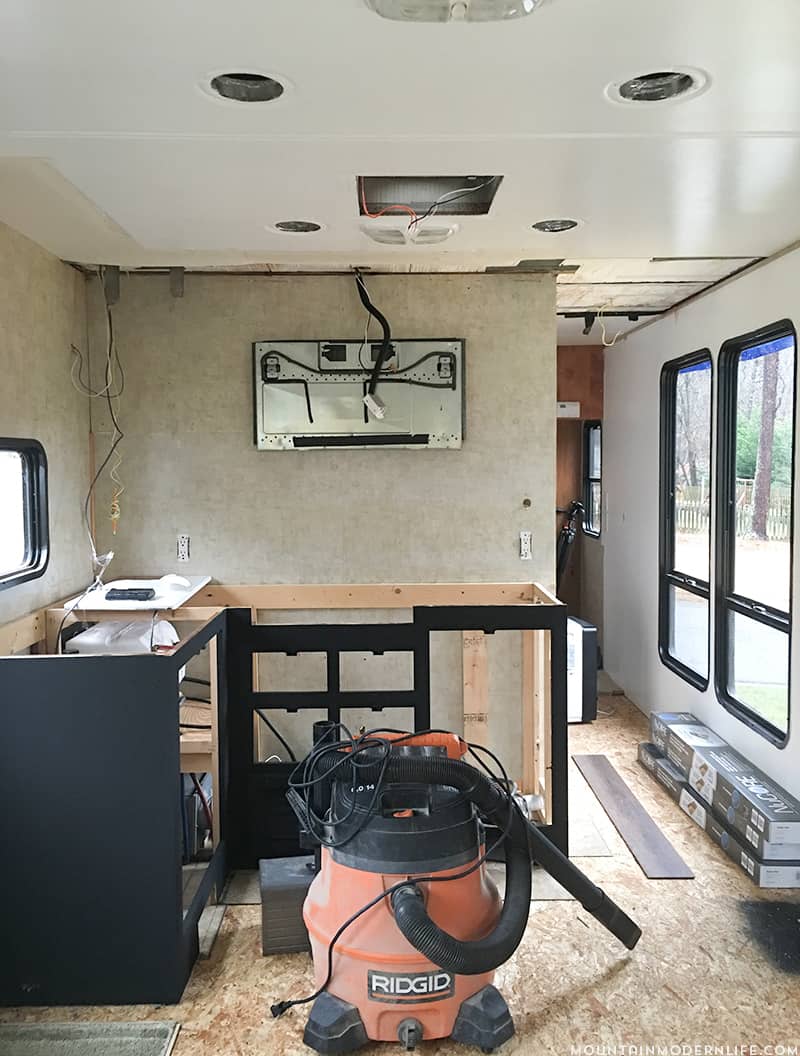
Okay, maybe more than twice when I think about how we had to remove the cabinets after discovering a major water leak in the ceiling.
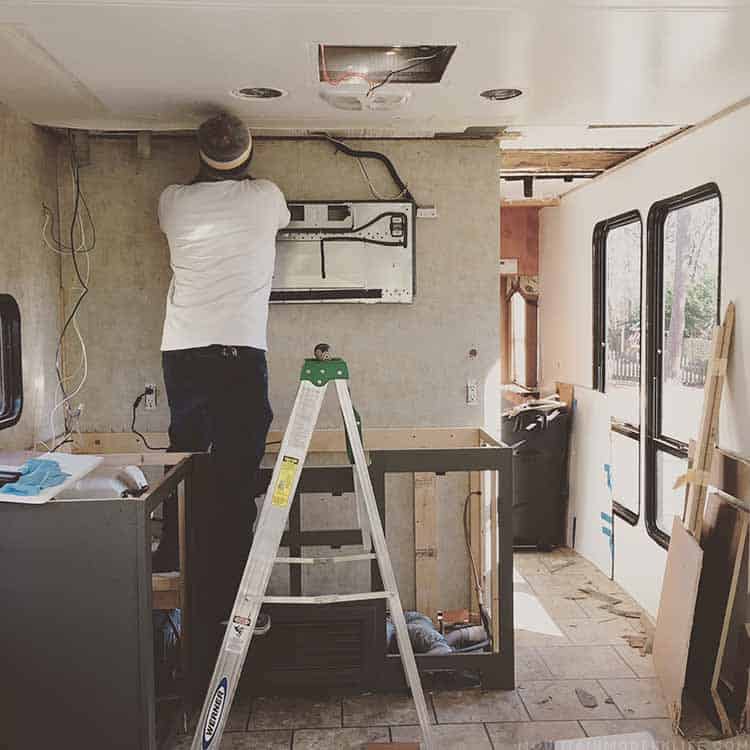
You see, we sort of just stacked the cabinets in our garage while we practically gutted our RV kitchen and bathroom, and for some dumb reason we didn’t cover them properly. After several months of them getting moved around in the garage they got dinged up and we had to paint them again. And that’s not including the fact that I originally painted the lower kitchen cabinets gray, only to decide I really wanted them to be black. Or that I tried several different topcoats on the black lower cabinets but they either turned out too streaky, too glossy, or birds crapped on them when I left them outside to dry and I had to paint them again. Yes, that really happened.
To sum it up I felt like a paint failure, and never wanted to see another can of paint. EVER.
Eventually, that feeling passed because I love me some paint, despite our love/hate relationship.
Truth is, I’ve been putting this post off for so long because it exhausts me just thinking about the process we went through.
With that said I’m finally gonna put on my big girl panties and share our painted RV kitchen cabinets with you. That way we can finally move on to bigger and better things like the wood counters, or the planked backsplash, or any of the other projects we’ve completed and I have yet to share on here. Woops.
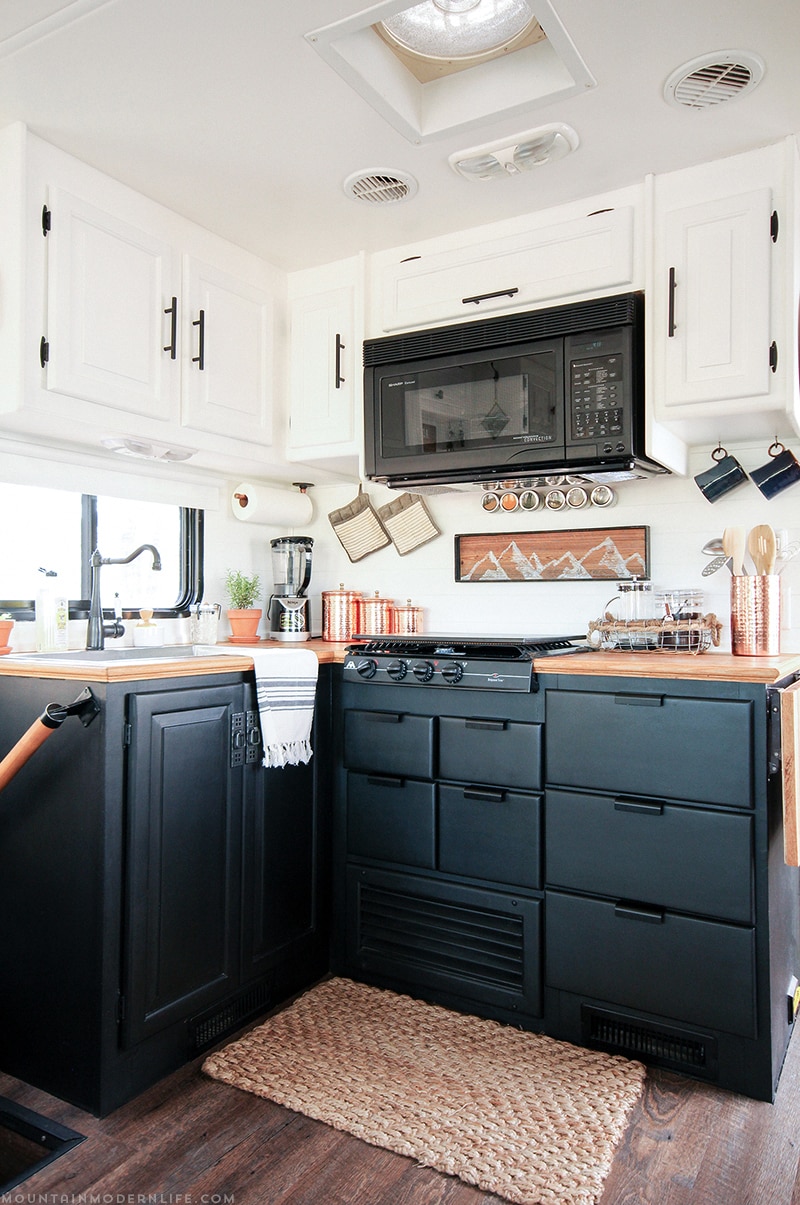
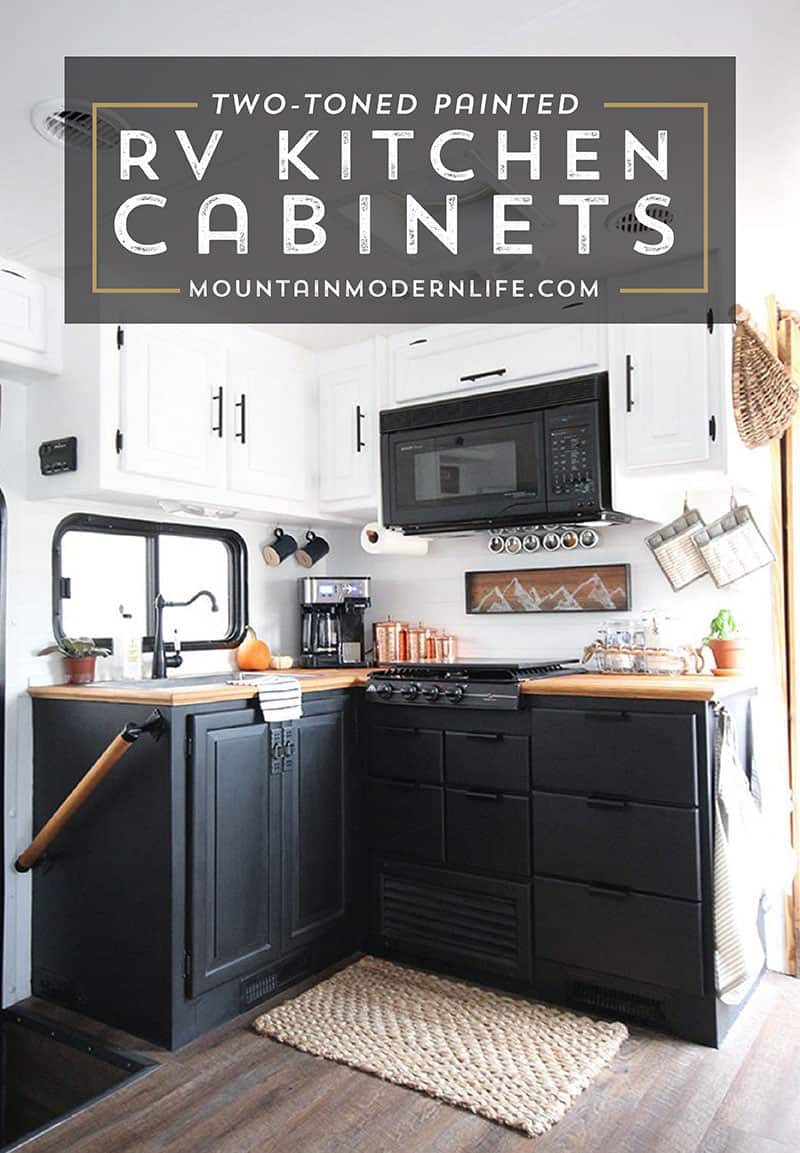
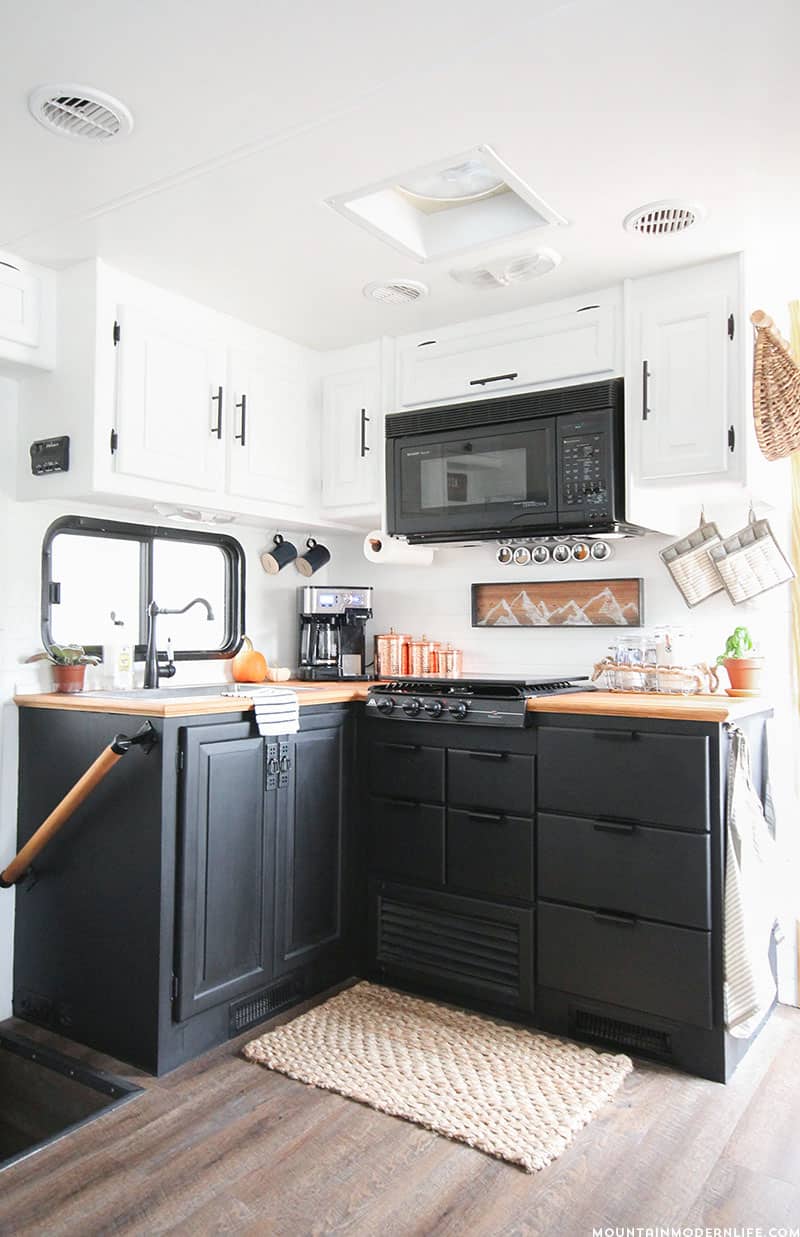
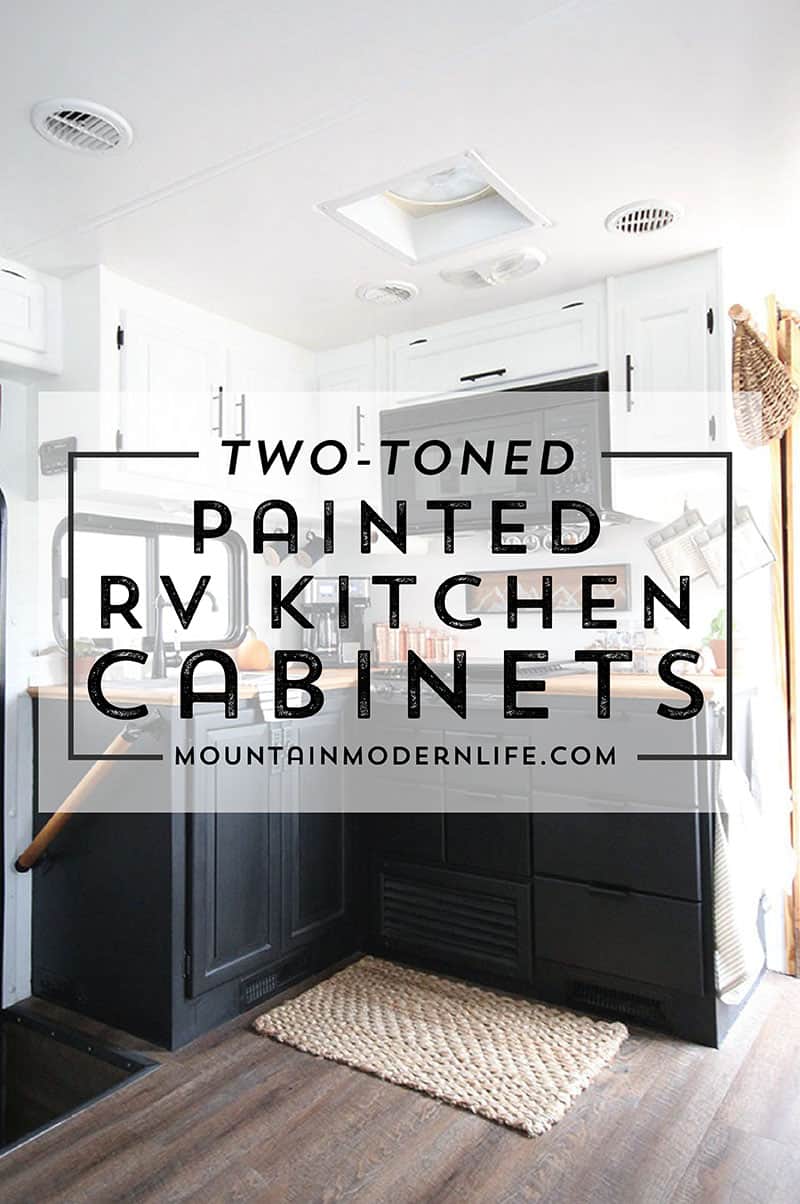
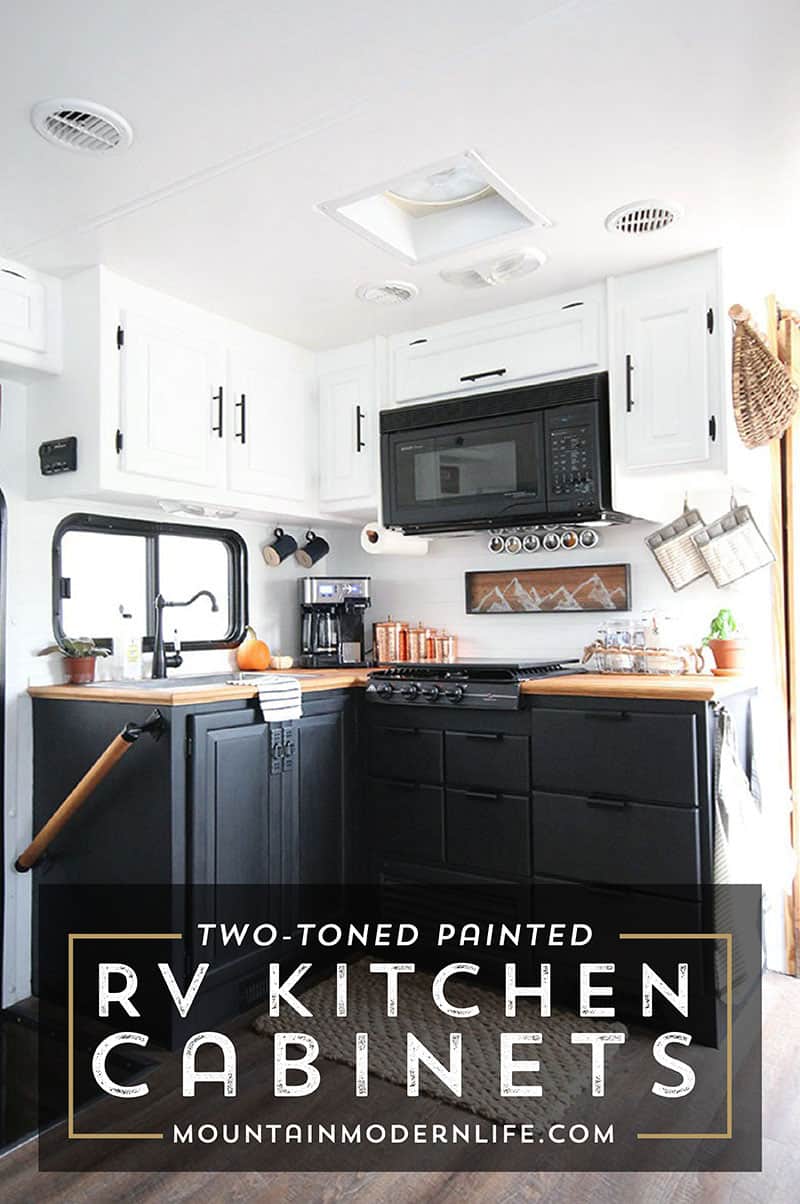
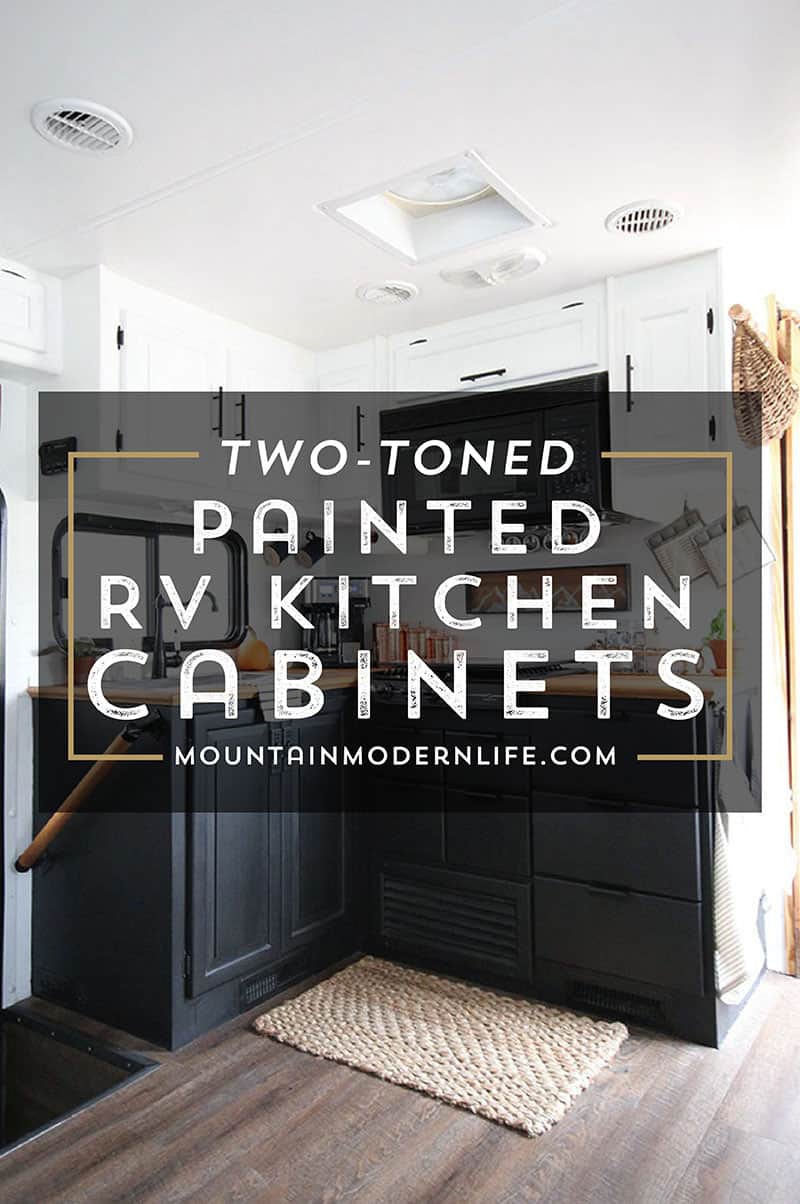
If you’re thinking about painting your RV kitchen then I hope this post will help inspire you in some way. Especially if you’re a little hesitant to use black or are considering the two-tone look. If anything I hope we can prevent you from making the same mistakes I made. You can also view more photos of our RV Kitchen Reno here.
Painting our RV Kitchen Cabinets (and what I learned the hard way)
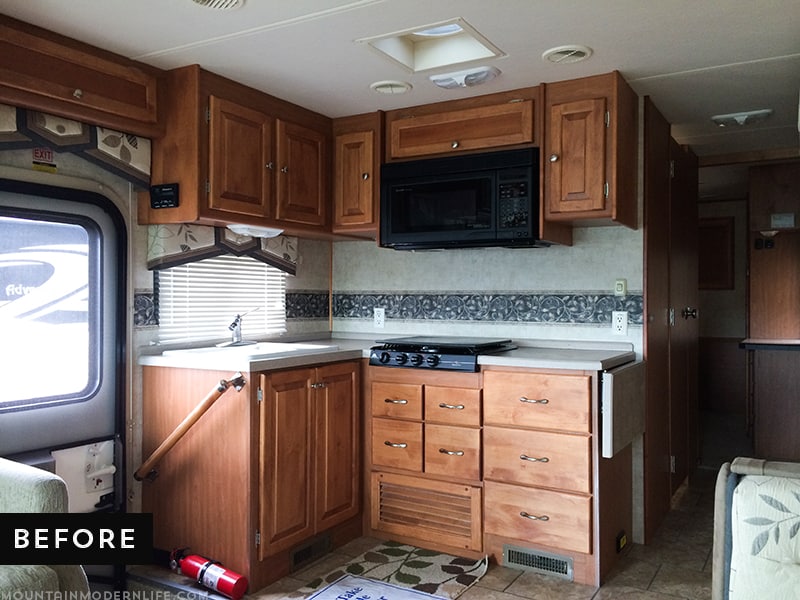
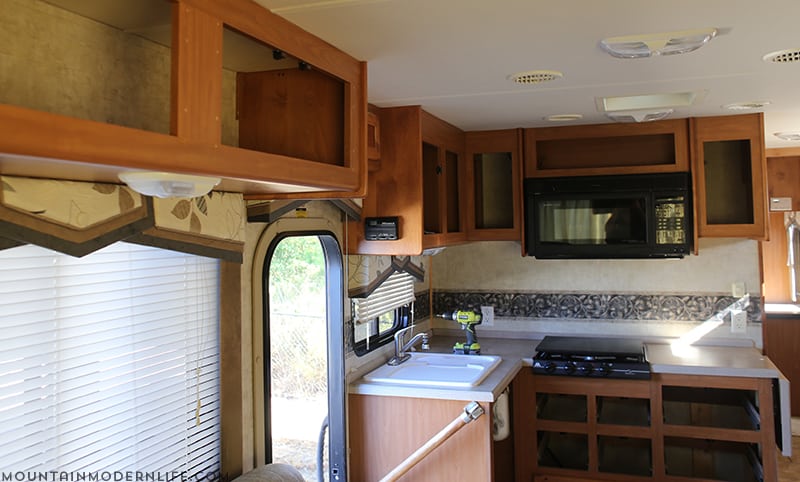
In case you need a refresher, here’s a photo of our RV kitchen when we first bought it. It’s a 2008 Tiffin Allegro Open Road 32LA.
At the time we decided to move forward with painting our kitchen, our RV was being kept in storage about 45 minutes away from our house. This obviously made painting the cabinets a bit more difficult.
The owners of the storage facility had told us we could work in the RV while there, which is pretty awesome. The only problem is we wouldn’t have any electricity and couldn’t use our generator. This was last October and the RV was getting pretty chilly during the day.
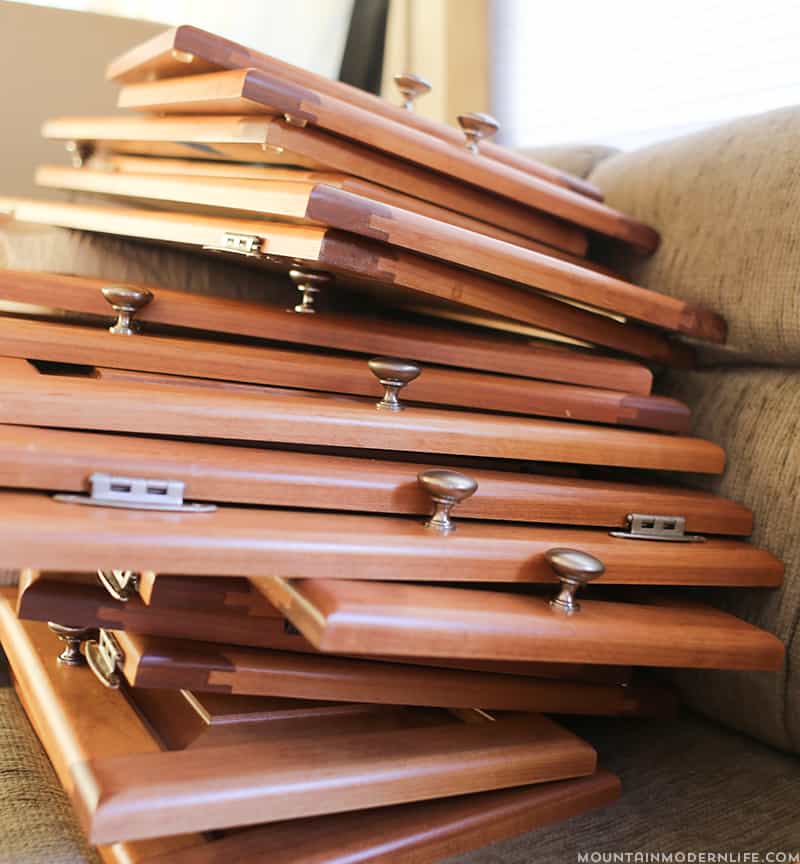
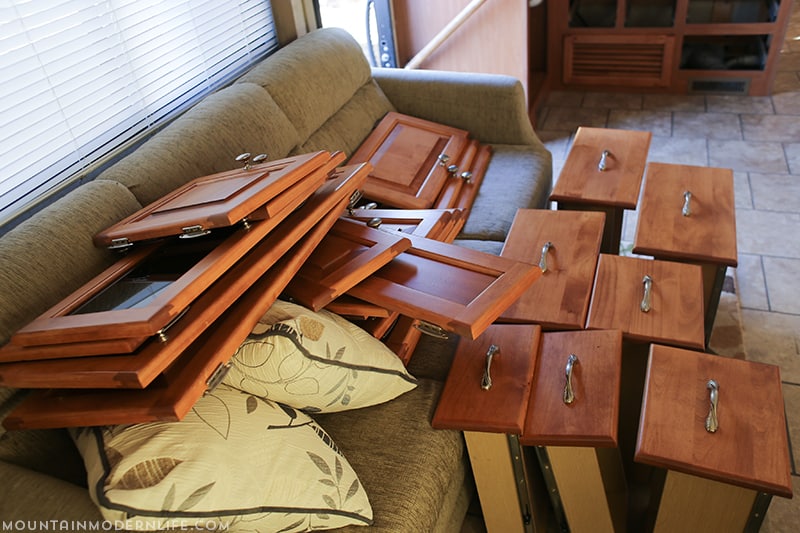
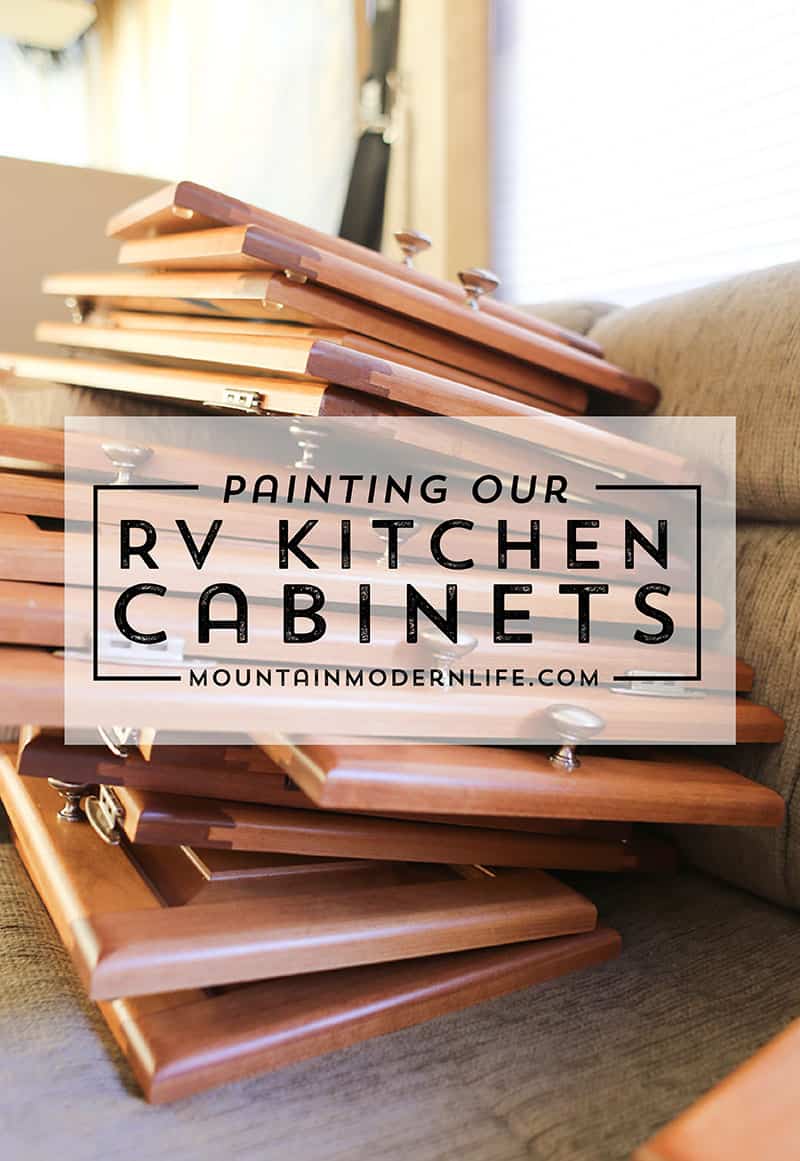
Being so far from home without water or electricity, and not a ton of space to work in, we ultimately decided it would be better to remove all of the cabinet doors and drawers upfront and bring them home. This way we could paint them with our paint sprayer.
We figured we could then take the RV on a short weekend trip where we could hike during the day and prime the inside cabinets at night with the “luxury” of electricity.
Removing the Cabinet Doors and Drawers
Before we headed out for our weekend trip, we decided to remove the cabinet doors and drawers and leave them back home.
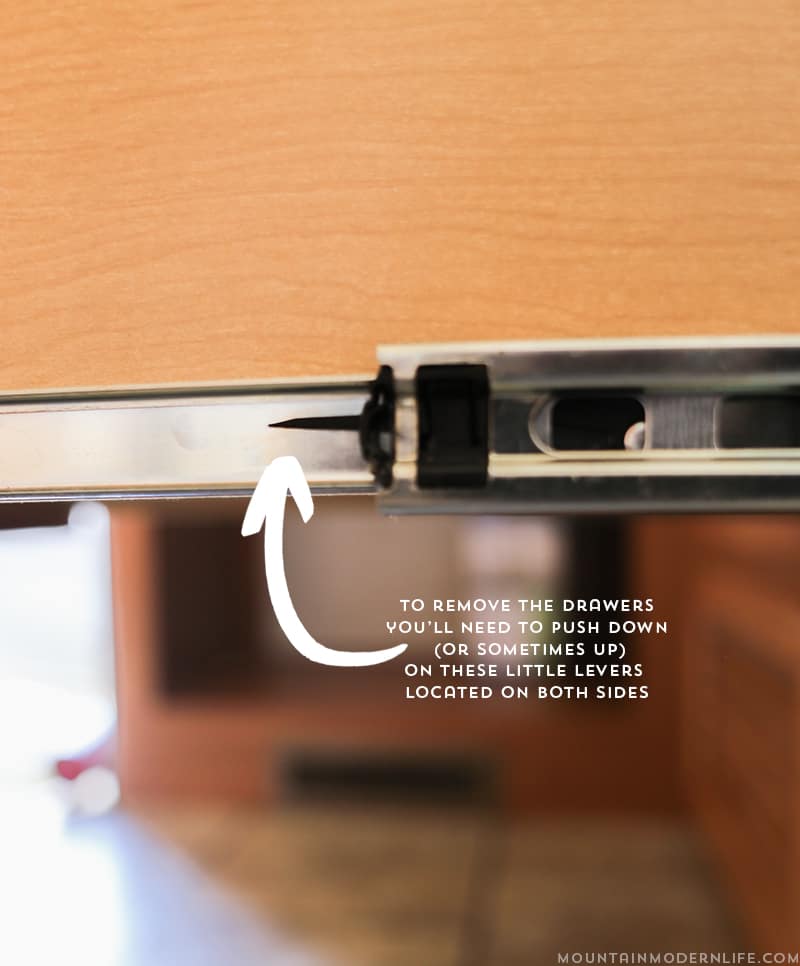
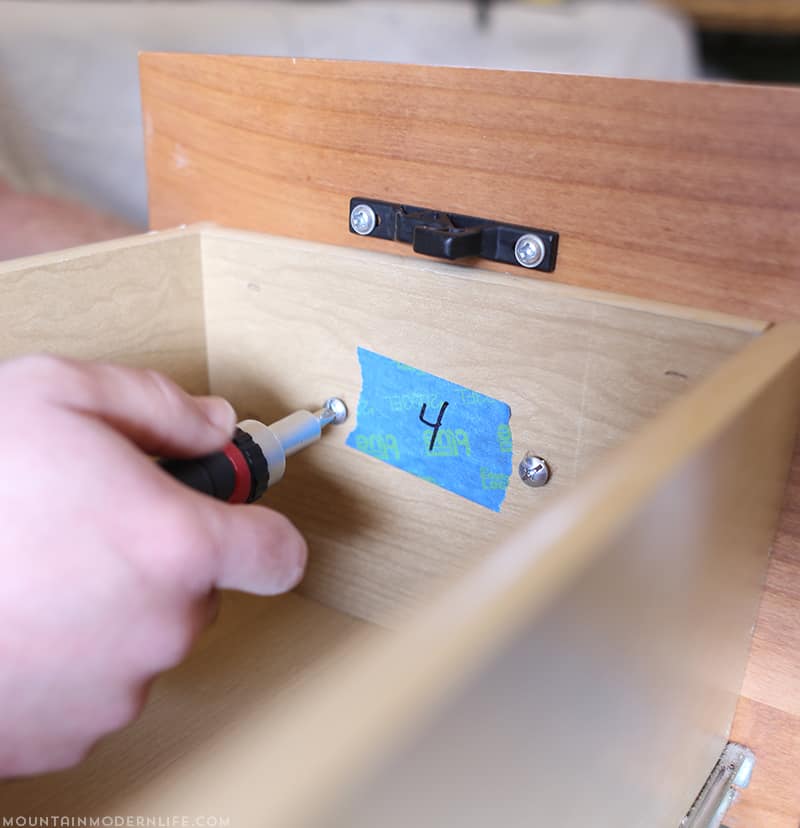
It may sound silly, but it took us a little too long to figure out how to remove the drawers from the kitchen. Just in case anyone else runs into this issue, all you need to do is push down (or sometimes up) on the little black levers located on both sides, while sliding the drawer out.
I didn’t realize how many cabinet doors and drawers there were in the front of our RV until we removed them all.
Oy Vey.
At least that meant we had a decent amount of storage, right?
Prep and Primer are Key!
Prep and Primer are key if you want quality results.
We enjoyed our short trip to Helen, GA, and saw some pretty amazing waterfalls. It turned out to be a rainy weekend, but it was still beautiful and we didn’t mind staying inside a little extra to enjoy our new to us rig and get a taste of life on the road.
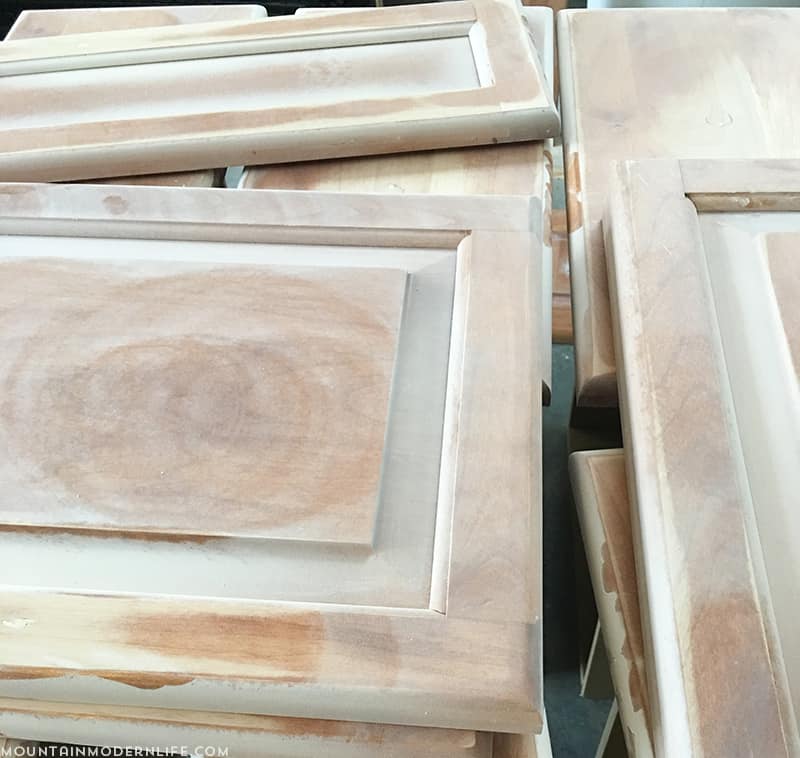
At night, we grabbed some booze and played a movie in the background while we primed all of the cabinets, which are mostly made of particle board and wood veneer. We had already previously lightly sanded all the cabinets and wiped them down with cleaner (I recommend using Simple Green).
If you plan to use chalk-style or mineral paint you can generally skip this step, but I originally chose to use latex paint.. at least the first time around.
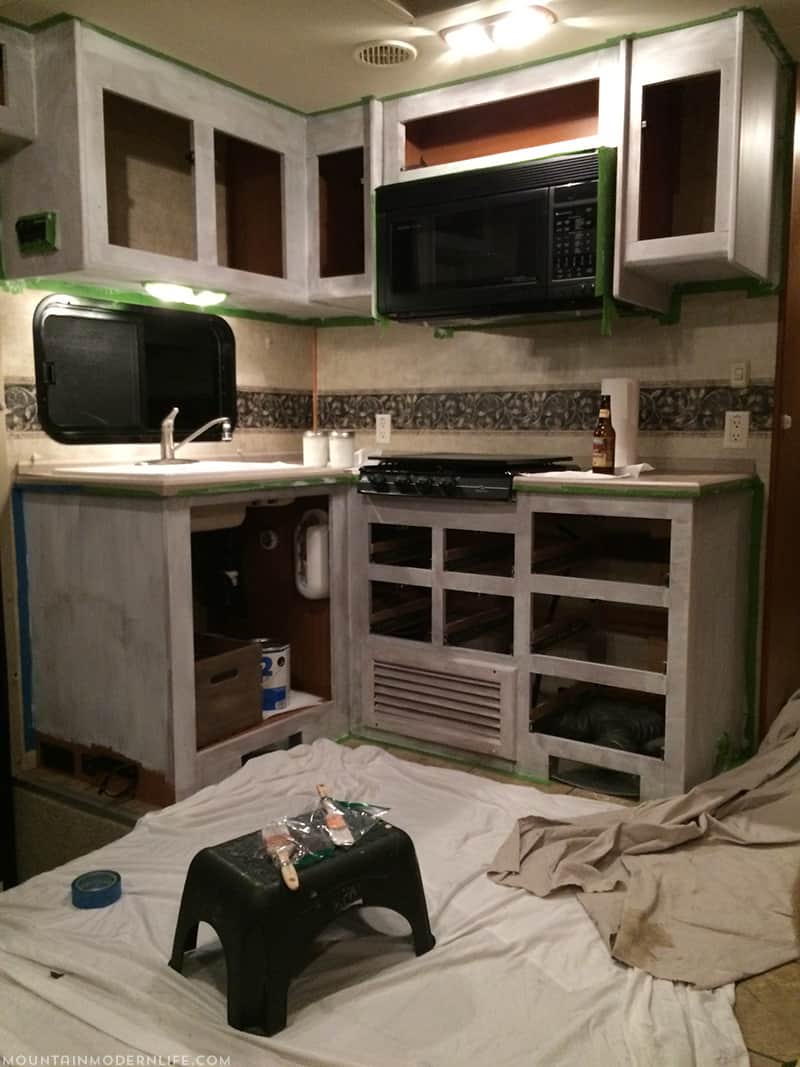
Here is our tiny kitchen during the first coat of primer. Not the best paint job, but it was progressing in the right direction. We used primer we had grabbed from our garage before the trip, but I’d recommend buying a bonding/gripping primer, especially if painting a non-wood surface.
We also should have picked up quality rollers before we left on our little excursion, but instead, we had to paint the first coat with brushes since the nearest hardware store had already closed for the night. We did pick up some rollers the next day though, which got a lot better coverage.
If you plan to paint your wood cabinets white I recommend 2 coats of primer with a quality roller, followed by two coats of your white paint. The exception would be if you’re using a bonding/gripper primer because it’s much thicker, and in most cases will only require one coat.
Side note: We later decided to remove the microwave, which helped us paint a little further into the side cabinets. It also made it easier to install our wood backsplash, which we’ll share in a later post.
Back to the Cabinet Doors and Drawers:
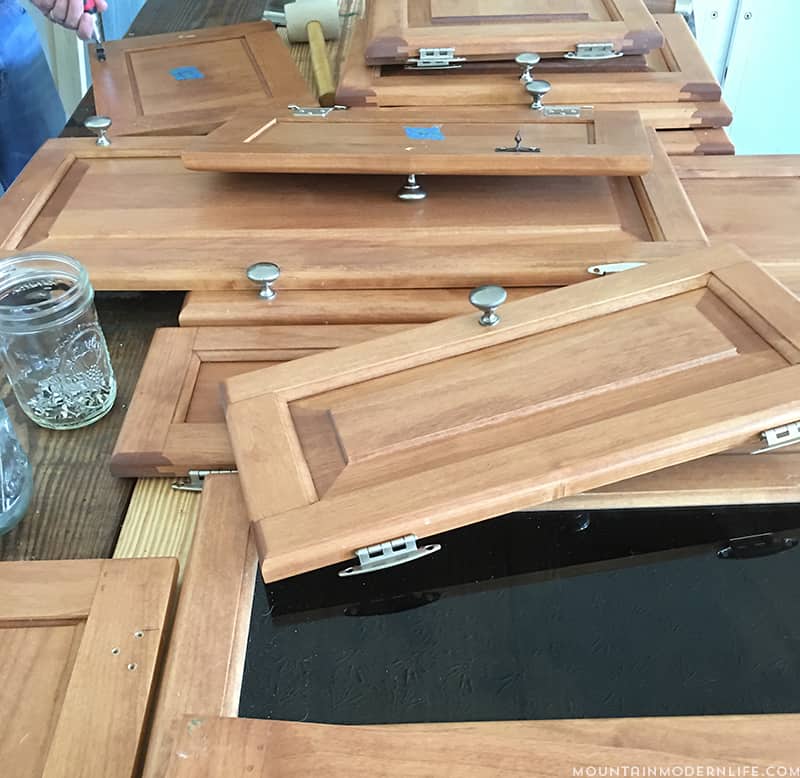
Once we were back home from our weekend in Helen, we removed all of the hardware from the cabinets to prep them for painting. You may notice I had labeled everything. To be honest, I don’t know if this really helped all that much, but it seemed like a good idea at the time.
We separated the hinges and screws into jars to make them easier to find later on.
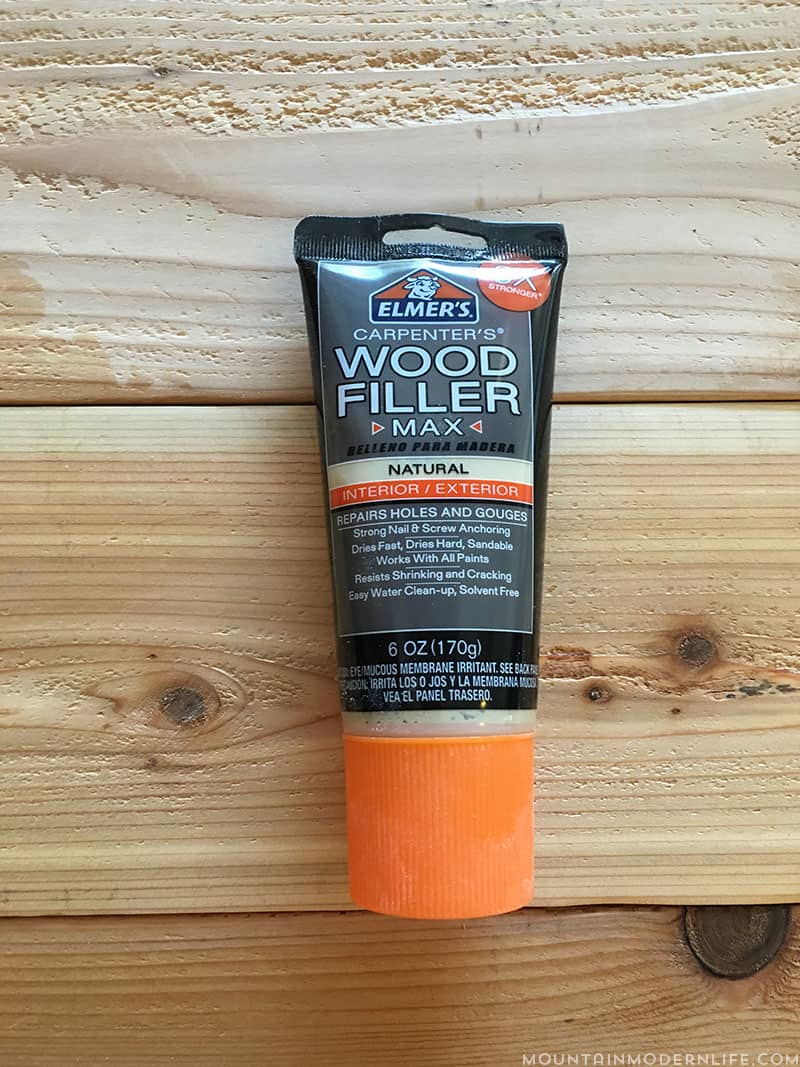
Our new knobs and drawer pulls didn’t fit into the existing holes, so we filled those in with wood filler. Afterward, we sanded down all of the doors and drawers to prep them for paint. We also cleaned them up so they were free of dust.
These cabinet door faves were real, solid wood so I decided (hoped) light sanding would do the trick and chose to skip the primer.
If you are painting anything other than wood, you definitely want to make sure you use a bonding primer! When in doubt, use primer first.
Setting up for the Paint Sprayer
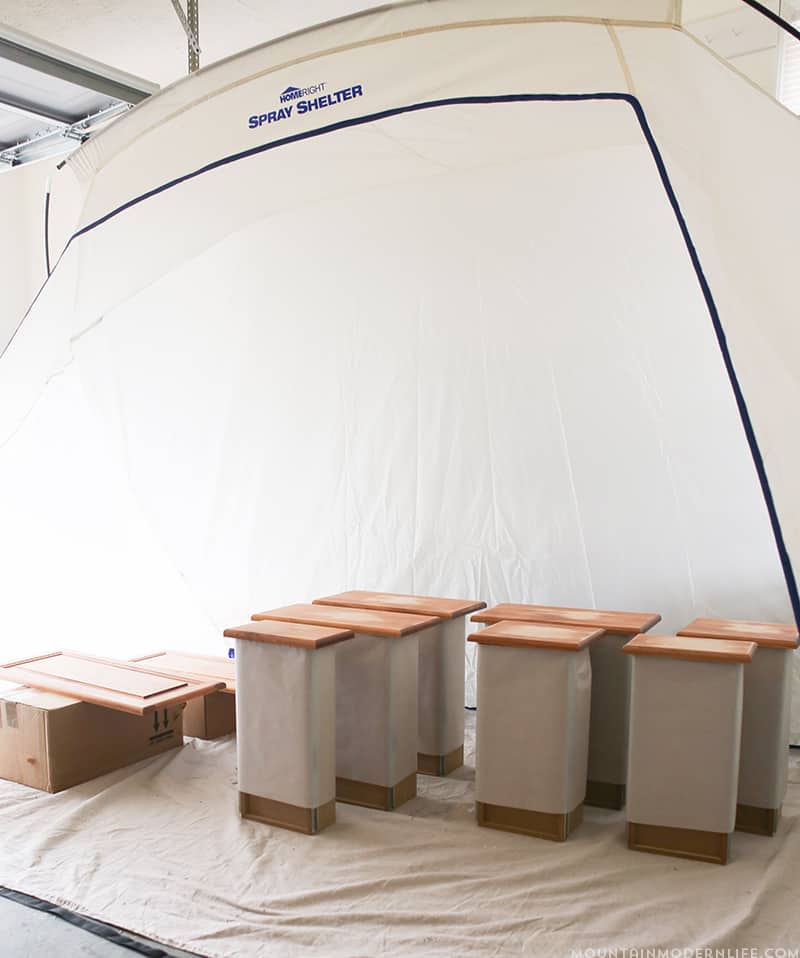
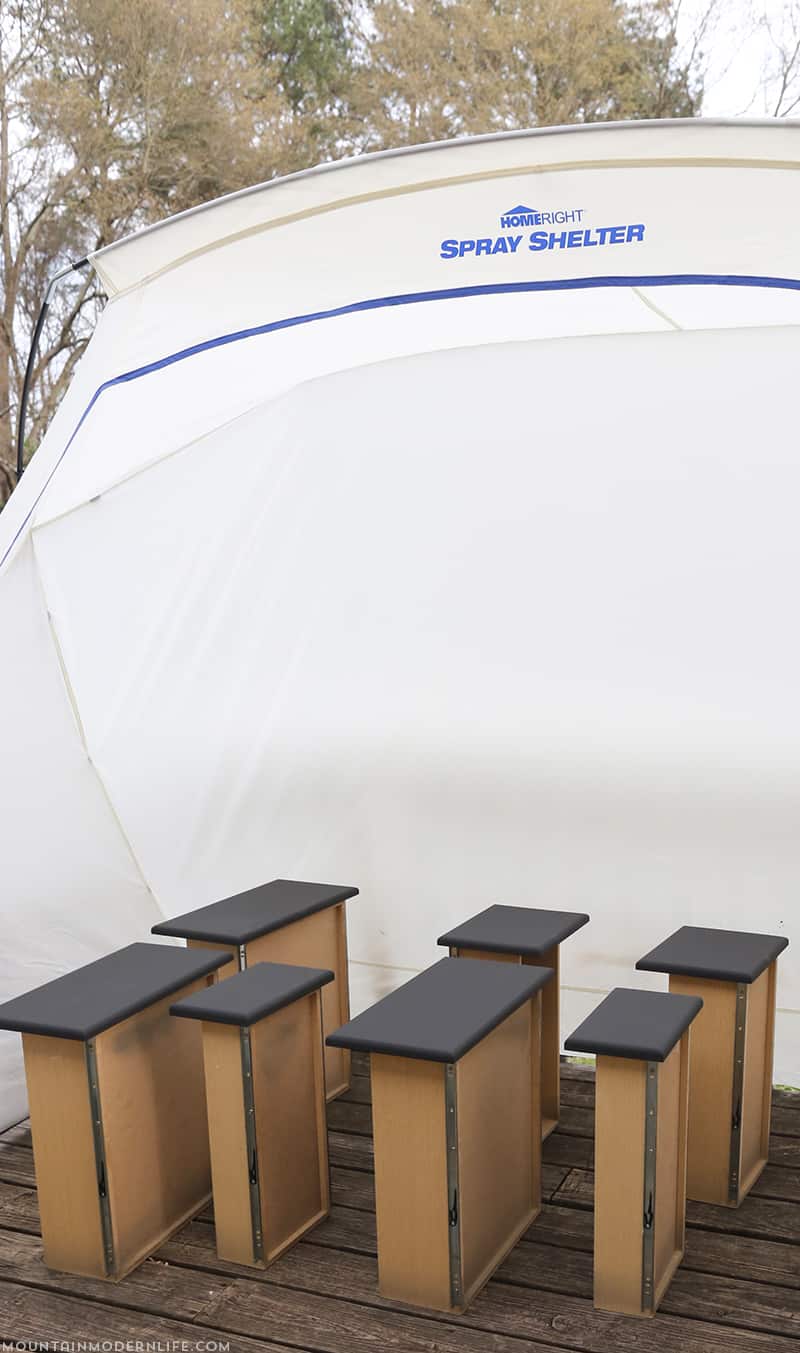
In an attempt to make things easier I taped parchment paper around the drawers to help prevent overspray. I then set them up in this super awesome painting spray shelter Homeright had sent us to try out. (Here’s a smaller version)
From the beginning, I knew I wanted two-toned cabinets, but was torn between painting the lowers black or gray. To be honest, I really wanted black but everyone kept telling me I was crazy to put black cabinets in such a small space. In most circumstances, I would have done it anyway but for some reason, I was more nervous this time around with this being our first real renovation project.
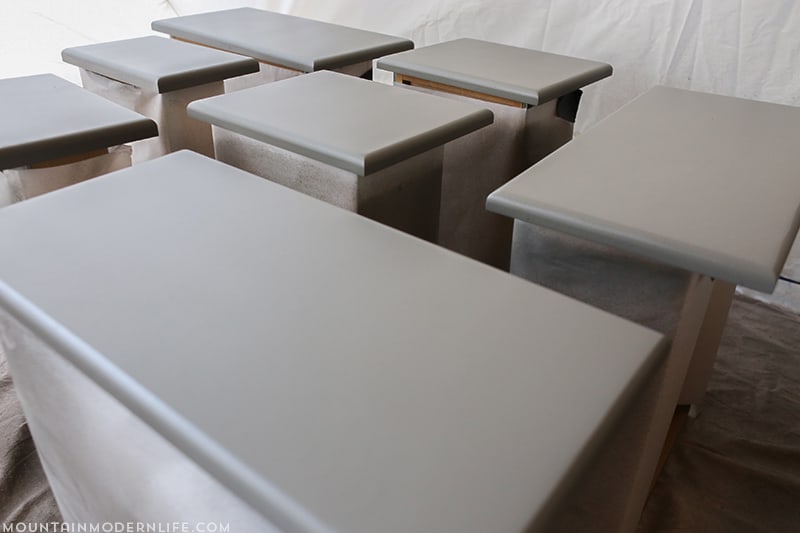
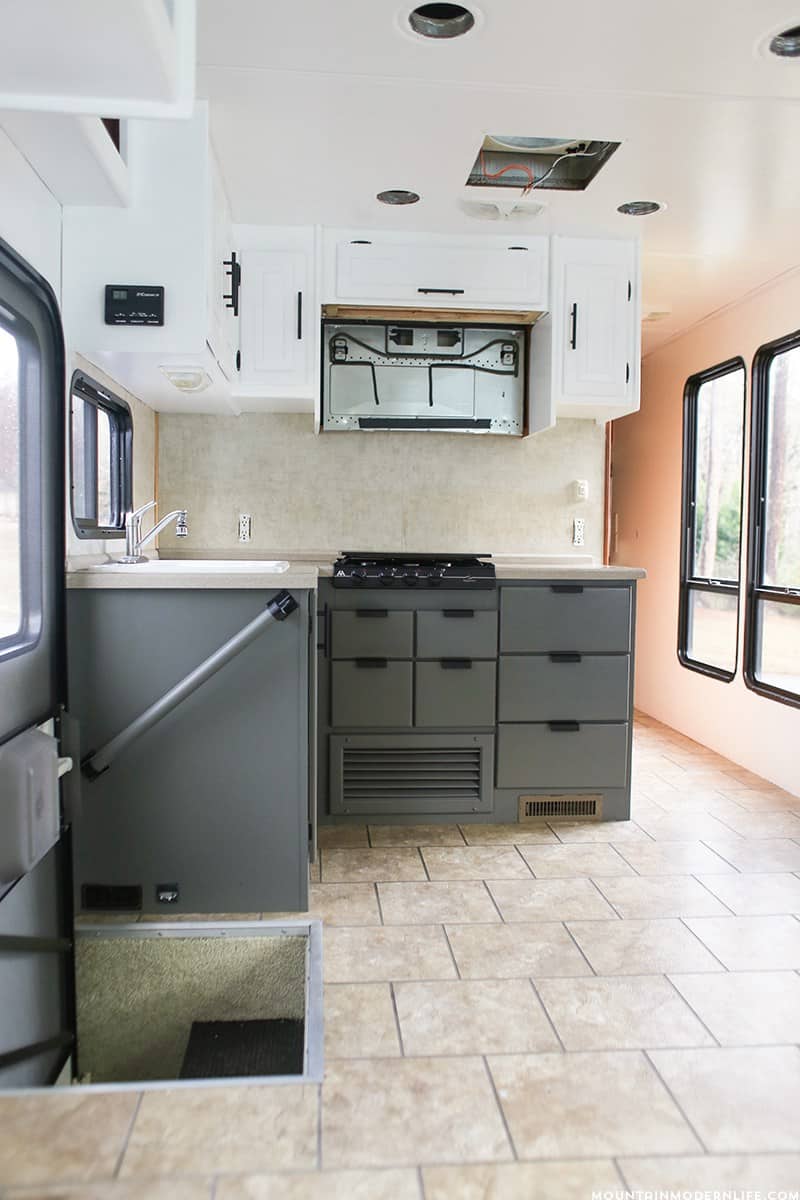
So we painted the upper kitchen cabinets white and the lower cabinets in a medium gray.
After two coats our lower cabinets looked so buttery soft and pretty. That’s why I love paint sprayer’s so much, they prevent brush strokes and make the paint look so smooth.
Side note: I did a test on another cabinet first to see if I needed to prime these first, but ultimately decided it wasn’t necessary because this paint color had great coverage.
I used 2 coats of primer on the upper kitchen cabinets, followed by two coats of white paint.
Sealing the Cabinets:
Once everything was dry I sealed all of the cabinets with a Wipe-on-Poly, which worked well. Overall we were very happy with how the cabinets turned out. They were pretty, and everything seemed to go smoothly during the painting process which seemed like a success.
There was just one problem…
I didn’t love the color.
It felt more contemporary than rustic if that makes sense, and the lower hardware felt really bulky. It just didn’t feel right, boooooooo.
I told Eric I was going to re-paint the lower cabinets, and although he was cool with that, he thought I was a little crazy because they looked good gray.
Yeah, they looked good, and probably could have come together once the rest of our reno was finished, but I knew they would look even better in matte black.
Even so, I decided to give it time and thought I may re-visit the idea after we completed some other kitchen projects.
Only that didn’t happen because less than two weeks later we discovered a massive water leak in the ceiling due to cracks in our skylight. The upper cabinets had to come out so we could replace the ceiling panel, and that’s when I made the decision to go with my first gut instinct and repaint the lower cabinets black.
I figured I would use chalk paint this time around because at least then I wouldn’t have to re-sand the cabinets, and could just paint right on top of the previous paint job.
I’ve used Annie Sloan chalk paint before but thought it would be fun to try a different brand. Plus I know Annie Sloan paint isn’t always easy to find, and I thought it would be nice to try something almost anyone could find locally.
Long story short, I used a different brand of chalk paint that could be picked up locally, but it was only available in smaller containers. The paint turned out to be on sale for 40% off at Hobby Lobby, but they only had two containers left. I snagged them up, hoping it would be enough. And technically it would have been since I was only painting the lower kitchen cabinets, and it’s a pretty small kitchen.
Side Note: I would stick to 16-32 oz containers unless you want to test the color or use it on a very small project.
I decided to paint the cabinets using a roller this time around since I didn’t have a whole lot of paint to work with. Even so, I still set them up under our paint tent to dry.
The paint went on smooth, covered nice and while two coats looked good, I did three coats which looked better.
I LOVED that it was a pure, matte black.
It wasn’t until I added some of my Annie Sloan wax that my excitement started to fade. (I don’t recommend sealing kitchen cabinets with wax.)
The first drawer looked AMAZING but for some reason, the others looked like they had spots all over them. I had wiped them down prior, used a lint-free cloth, and even tried buffing out the marks but nothing seemed to help. I had no idea why the first one was so different from the rest.
All of this happened around the time my computer crashed, which is why I don’t have any photos of this process. I lost months of photos I hadn’t backed up for some crazy reason. I was obviously off of my game, to say the least. Haha.
I’ve used chalk paint and wax numerous times in the past but never dealt with this before. It was pretty frustrating.
I did some research and read that sometimes darker chalk paints can show wax and imperfections much easier than lighter paints.
I watched countless videos and read numerous blog posts but nothing seemed to be working as it did for everyone else. I think if I had been going for a distressed look, maybe one of these products would have worked better, but I wanted a more modern look.
Due to the issues I was running into, I ended up needing more paint. These cabinets were quickly becoming more expensive than I had anticipated.
Once re-painted and dry I tried a different wax but the same thing happened. I then tried spray-on-poly, which is something I had never used before but thought it would be easy, and it left awful streaks. So I tried the same wipe-on poly I used on the upper cabinets, but it was glossier than I wanted, even though it was satin. (This was before flat paints and finishes were super popular and easier to find.)
I felt pretty defeated at this point.
Ultimately I went with a satin varnish (that I don’t actually recommend) and called it a day. Looking back I wish I would have just ordered this water-based wipe-on poly online.
This is the risk you take when using new products. Sometimes you find a gem of a combination, and other times you fail and learn what you don’t want to do in the future. This was obviously one of those latter experiences.
While I believe the products I used would work well on other projects, I don’t recommend them for kitchen cabinets. I share what I do recommend at the bottom of this post.
I know this post is long and I wanted to share the products I used to paint our RV kitchen, mainly because so many people ask. With that said, I thought of this as an experiment to try new products…probably not the best idea, and if I were to do it all over again I wouldn’t go the same route. Sometimes learning what not to do can be just as valuable as learning what to do. At least that’s what I’m gonna tell myself…
Would I use this specific chalk paint again?
For kitchen cabinets? Nope. Mainly because I could only find smaller containers, and sealing it was frustrating, but it does have great coverage and would work well for smaller projects. I probably would have been better off using a primer followed by black latex paint.
Do I recommend Chalk paint or chalk paint alternatives for RV Kitchen cabinets?
Absolutely! While I wouldn’t use it on walls, I still recommend using a chalk or mineral type paint for your kitchen cabinets, especially since it can cut down on prep. However, I recommend testing your sealer option on a practice board first, especially if it’s a product you haven’t used before. This way you can play around with different sealers to see which gives you the look you want before using it for all of your painted RV kitchen cabinets.
Update: When we redid our lower kitchen cabinets, I used Black Fusion Mineral Paint on top of the old chalk paint job and it worked great! We also used Annie Sloan Chalk Paint in Graphite on our RV bathroom vanity (I wanted more of a charcoal color vs pure black).
Is there a better sealer option that doesn’t suck?
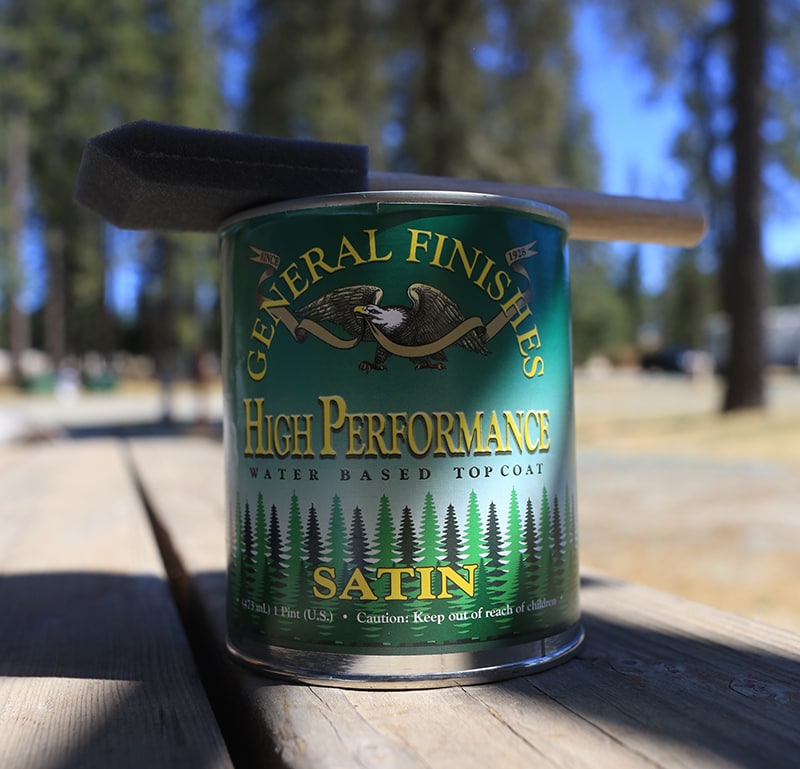
Yes! Since writing this post I have used General Finishes High-Performance Water-Based Poly many times, and LOVE it! It’s now my go-to for sealing projects. If you have another product you recommend, I’d love to hear about it!
PAINT/SEALER USED:
I had worked with BEHR in the past so I used paint they had sent to me for previous projects.
Primer – if painting a faux wood surface, I recommend using a gripper/bonding primer – be sure to follow the dry/cure time guidelines
BEHR Marquee Ultra Pure White in Satin – This is the color of our walls, ceiling, all of the upper cabinets in our RV, and even the painted wood backsplash.
BEHR Marquee Mined Coal in Satin – This was the gray color we originally used.
Fusion Mineral Paint in Coal Black – this is the black paint color we later used for the lower framing of our kitchen cabinets after we redid them with reclaimed wood. This would be a good alternative to the chalk paint I used.
I used wipe-on poly for the white cabinets which worked well, but my new favorite sealer is General Finishes High-Performance Water-Based Poly.
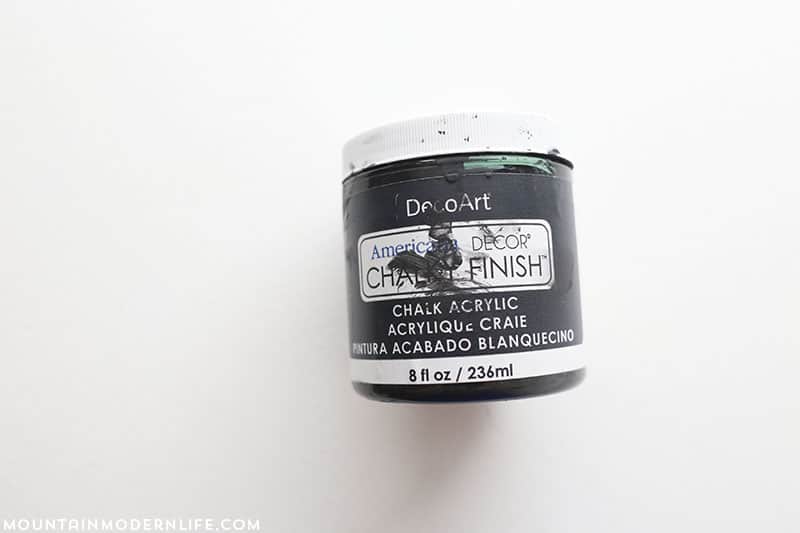
DecoArt Chalky Finish in Carbon – This is the Black Chalk Paint I used but don’t exactly recommend for Kitchen cabinets because of the reasons mentioned above, although it would be great for smaller projects!
HARDWARE USED:
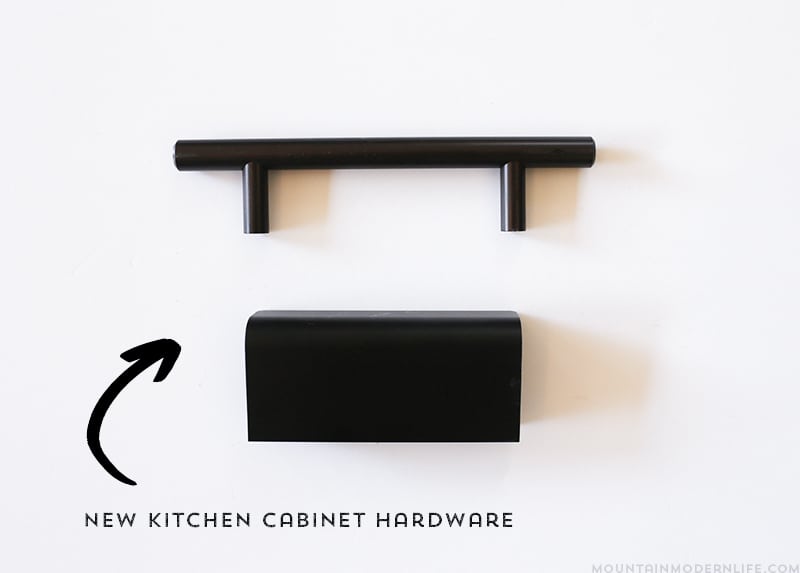
The kitchen hardware came from D. Lawless Hardware with the exception of those below the sink. We planned to use the bar pulls below the sink too, but I didn’t like how they looked and ultimately went with these instead. I would have used the same ones we used on our bathroom vanity, which are the same ones we had used for the barn door style cabinets, but the holes we drilled were too far apart and I didn’t feel like filling them in.
1. Trust your gut.
2. Don’t leave any of the cabinets or drawers in your garage without proper protection for several months unless you don’t mind the possibility of having to paint them again.
3. Chalk paint IS worth the extra money in my opinion because it’s environmentally friendly, dries quickly, is easy to clean up, and requires little to no prep. However, I would stick to 16-32 oz containers, unless you want to test the color or use it on a very small project.
4. If you have a lot of cabinets to paint I’d use a paint sprayer if you can. I have used this one and this one, and have read good things about this one too.
5. Nothing is worse than a crappy roller that leaves furries behind, or a brush that leaves little bristles in your paint. Buy Quality rollers and brushes that are recommended for the type of painting you are going to use them for. Foam rollers are most popular for painting cabinets because they leave a smooth finish, although I used woven ones.
6. TEST sealers on one drawer before sealing all of them.
7. Always use a water-based sealer on white or light cabinets, otherwise, they could yellow over time.





I want to paint our RV cabinets so badly, but I can’t convince my husband. I hope, after showing enough pictures of others doing it he’ll see the light. Thanks for the tips and sharing.
I know what you mean, but I think if you find the style you both like he may jump on board. Sure they may be in decent shape, or look fine as is, but they could look even better if you paint them! For us, it really brightened up our RV and made it feel a lot bigger 🙂 Good luck!
Hello Katie+Eric,
First, thanks a lot for all the wow infos+tips+sharings : )
That will help in my RV projects.
Since you pointed all the cabinets and the wall, my questions is, is the paint stay on them ? Any scratch sensibility ? More than before or it is really solid and stick to the walls/cabinets ?
Thanks a lot
Dave
Hi Dave,
The paint has held up really well in our RV so far. I don’t know if it was the TSP, the primer, the paint, or a combination of all the above but we’re happy with the results 🙂
Katie
Can you tell me what you used for your countertops?
Hey Tricia Burkett, we actually ended up using red oak hard wood flooring. If you check out the link below I link to our post that goes into detail on what we used and how we made it.
https://mountainmodernlife.com/create-wood-counters/
I hope this helps and please feel free to reach out if you have any questions. Best Wishes, Eric
Hey Katie!
I absolutely love how your cabinets turned out! My question for you is do you think this would work for cabinets that have veneer on them??? We desperately want to paint on cabinets in our rv but unsure how to go about it since its veneer… Any insight would be greatly appreciated.
Thanks!
Crystal
Our cabinets doors were made of wood but the base was veneer so as long as you use a good gripper primer first, or go with chalk paint, you should be good to go 🙂
Hi, Katie,
Thank you so much for your informative blog. I’m reading everything and it’s helping with all the mistakes I’ve made or was going to make. 🙂 I’ve read that your income is largely based around your blog but notice that you also seem to have some sponsorships (such as HomeRight in this post). Can you please write a blog post on how you got started with affiliates and sponsorships, please? Or, link it if you have one I missed? I’m making a sudden move and need to augment my income. Thanks! I appreciate your knowledge!!
Hi Shelly, I have a free ebook on why I started blogging as well as some additional resources available here: https://mountainmodernlife.com/blogging, but nothing touches on affiliates on sponsorships just yet.
This post wasn’t sponsored by HomeRight, but the spray tent was sent to me probably a year before I did this post and while I had mentioned it in other posts, every time I mention using a product that was given to me, I like to disclose it. I do have a few sponsored posts, such as our TV lift and fireplace or back when I was working with BEHR paint, but to be honest we don’t do too many of them unless it’s something we plan to purchase or products we really love and it makes sense at the time. With that said, you can absolutely create extra income from sponsored posts and there’s a really great ebook you may want to check out called Bloggers & Brands (http://bloggersandbrands.net/)
Here’s another great post worth checking out:
http://www.melyssagriffin.com/how-to-work-with-brands-as-a-blogger/
Hope that helps!
Katie
I am so excited to have found your blog – you have given me so much more information than anywhere else! We purchased our first TT this month, and I knew right away I wanted to paint & re-upholster everything! Thanks for the inspiration & confidence boost!
Yay, that’s so awesome to hear! Congrats on your new TT and have fun! Feel free to reach out if you have any questions along the way 🙂
Katie
I am buying a new travel trailer and while it is beautiful, I, like you, want it to be “mine”. Do you think I could use the chalk paint for the cabinets without the primer? I did this on a FEMA trailer remodel I did and the paint seems to be holding up well. I am going for a more rustic look but want to do the white/black like you did. Thank you!
Nancy
Absolutely! That’s the beauty of chalk paint 🙂 I’ve used chalk paint on too many projects to count, and have never used primer. The only reason I originally primed the lower kitchen cabinets is because I painted them with regular paint, and it wasn’t until later that I decided to go back and paint them darker, and this time with chalk paint.. I’ve heard of people using Zinsser Shellac on pieces with water damage, stain that bleeds through the paint due to an oil finish, or pieces that have a funky smell, but if you’re painting your RV kitchen cabinets you likely won’t be dealing with any of those issues.
Thank you Katie and hubby for you everything you guys do! Thank you Nancy for already asking my question. So to confirm if we use chalk paint we don’t need to use primer first….do you know if I need to sand? And you mentioned that if you were to do it all over again and you were starting for scratch on the wood you’d use this to begin with correct: http://www.behr.com/consumer/ColorDetailView/N520-7 because of the availably, etc? And do I need to seal it? If so what do you recommend? Thank you thank you!!!!
Love your post and your renovation! I had a question about the walls. Did you do any prep work or just clean and paint directly on the wallpaper finish that most camper walls seem to be? We just brought our new to us tiny home into our driveway and are prepping it for life. Was hoping to get your onsite in the walls before I get elbow deep in renovations 🙂
Thanks so much,
Raquel M.
Hi Raquel,
Congrats on your new tiny home! We did do some prepping and I wanted to throw the paintbrush and never look at a can of paint again, but in the end it was worth it. I have a post about the walls here:
https://mountainmodernlife.com/painting-the-walls-of-your-rv/
Hope that helps 🙂
Katie
Hi Katie! My husband and I are going to be renovating our RV this spring/summer, and I’ve loved reading and looking at your blog for inspiration and tips and tricks! Thank you so much for all that you put out there for folks like us to read! 🙂 I am wondering if you have a direct link to the hardware you used on your black drawers in the kitchen… I noticed you linked the company you used, but I was hoping to get the particular pull’s name. We have a lot of drawers in our bedroom and kitchen, and I’d like something like those to make them look less busy and more discrete.
Thanks so much for your help! I hope all is well with you and Eric and your travels are going well! 🙂
Awesome, sounds like you’ll be working on some fun projects! I can’t believe I didn’t link to the specific pulls, I’m so sorry about that and will have to update the post. Here’s the link and I hope it helps 🙂
https://www.dlawlesshardware.com/96mm-black-tab-pull.html
Katie
I was just wondering what sealers you recommend for the cabinets. I just painted my RV cabinets, which are fake wood. I used Glidden Gripper and them Glidden paint but the paint is scratching off easily and I want to seal them with something to prevent this.
Maybe I’m just tired, but do you mind clarifying which sealer you ultimately recommend? I think it’s the water based wipe on but I want to make sure. Our upper cabinets will be white and I’m leaning towards the BEHR charcoal for our bottom cabinets. Did you also use this sealant on your walls?
Hi Katie!
We recently sold our house and are in the process of building but will be moving into a travel trailer on our property for 6 months or so. While I don’t want to spend a lot of money on something that we won’t actually be living in for too long, I thought it might be a nice way to hopefully add value and make some extra money (or at least break even) when it comes to selling it once we’re done with our house. If you had used to Behr paint products for the bottom black cabinets, what would you have sealed it with? The same (water based wipe on poly) as the top? I have picked out Black Suede by Behr and hope it will look similar to your color.
Yay, that’s super exciting and what a great idea too! So I have had my battles with sealers, and it seems they all react different depending on the type and color of paint or stain they are going on. With that said, if I were to paint the cabinets black with BEHR paint, I would definitely try the water-based wipe on poly. My only advice is to first try it on a small drawer or inside the cabinet, or any small section to test it before doing the rest. Whatever you do, let me know how it turns out!
I am in the process of redoing the cabinetry in our RV. I am planning on painting all cabinets in our RV black (going more for a mid-century modern effect). I am wondering how your black cabinets have held up as far as finish, chipping, wearing, etc.
Thanks so much for answering this. I LOVE what you have done with your camper!
Hey Candace, we actually used a varnish to seal the cabinets, but since then we’ve actually had better results using the General Finishes Clear Top Coat. You may want to test a small sample area first. Anyway I hope this helps and let us know if you have any other questions.
I am just starting to repaint my RV cabinets and have been brought to a dead halt by the silicone caulk used around the cabinets. Removers and heat are too harsh for the walls, and ceiling. Did you have silicone caulk and, if so, how did you get it off? Thanks for any help you can offer.
Hey Gale, to be honest, silicone caulking can be an extreme pain. If the removers and heat are too much you can always try using a putty knife to get bigger chunks off then come over the area with a sander to try and remove the rest. I’ve found that has worked for us when we redid our bathroom countertops. Hope that helps 🙂
Hello! Did you paint your old hinges or just buy new one?
We painted ours but I’d honestly recommend just buying new ones from Amazon. It would be much easier and they don’t cost too much. We couldn’t find any matte black options locally and I was impatient.
Thank you for the inspiration. I have been living on the road with my husband on and off for over 30 years. We travel in a 5th wheel and have been in it for over 5 years right now. I am going to redo a lot of our and make it us. We also have a bighorn.
That is awesome news Laura, I think you’ll love the experience of making it over! On and off for 30 years is absolutely amazing, I bet you guys have some stories to tell 🙂