UPDATE: All new featured RV tours will be posted on my other website, Wanderful RV Interiors. Existing tours will slowly be moved to the new website, and anything already moved will automatically redirect.
Disclaimer: This post may contain affiliate links, meaning, if you click through and make a purchase we (or those featured in this post) may earn a commission at no additional cost to you. View our full-disclosure here.
If you’re looking for an affordable way to update your kitchen, today we’re sharing how we created wood counters from unfinished flooring in our RV.
All in all, I’d say this project cost us about $100 but could be more or less depending on the materials/tools you have, and how big your kitchen is. As you can imagine, our RV kitchen is pretty small.
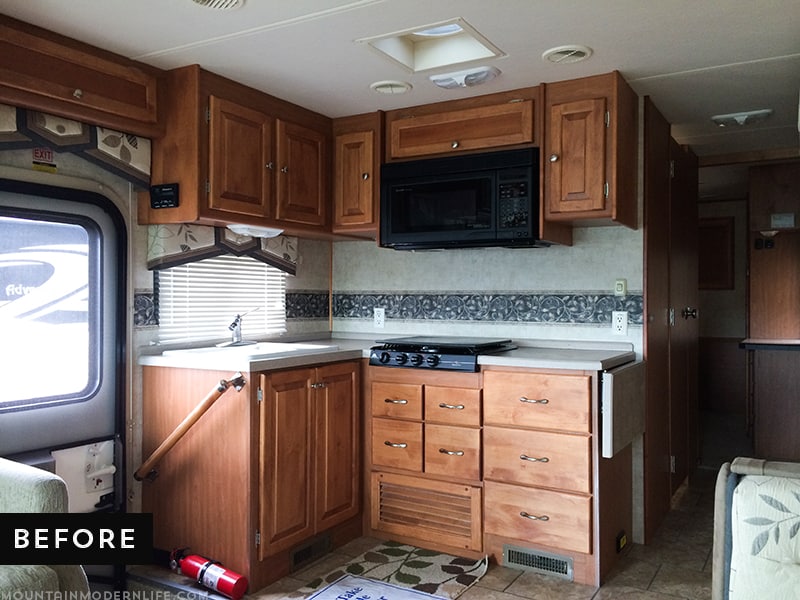
Here are a couple before photos of our RV kitchen:
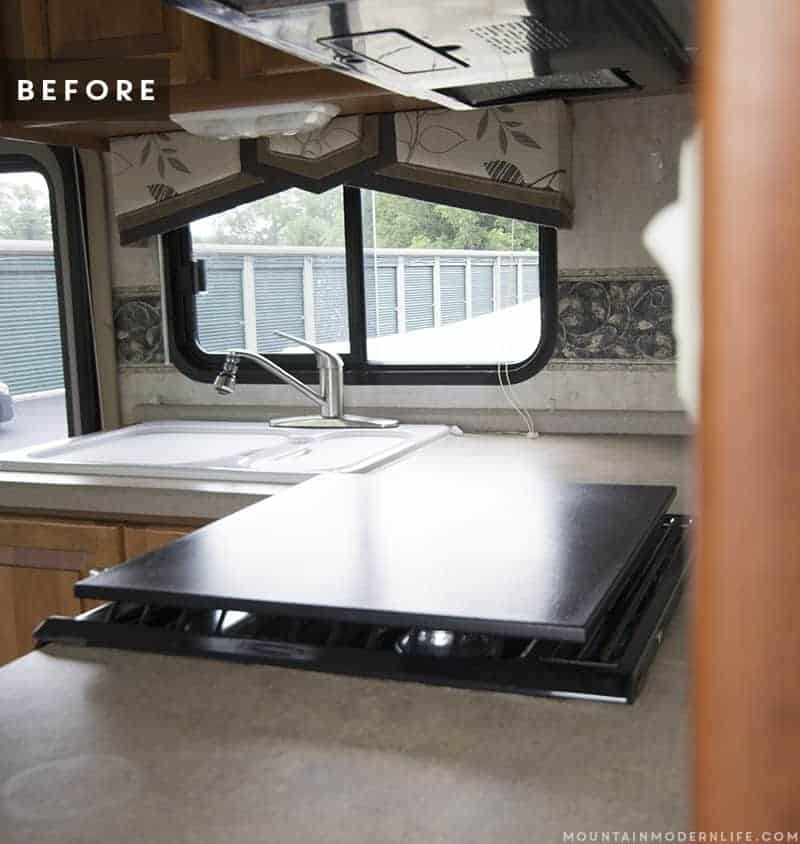
While our kitchen was in pretty decent condition, it wasn’t our style. We think it’s important to create a space that reflects your personality, tells your story, and ultimately makes you happy. This kitchen was functional, but it didn’t feel “ours” and we were ready to put our stamp on it.
A little Backstory
As we planned our RV kitchen renovation, our first instinct was to purchase counters from Ikea. We figured this would be one of the most affordable options, plus it would simplify the project vs. building them ourselves, a huge plus considering our massive to-do list and time constraints.
However, we had to consider the amount of weight we would be adding to our RV, something you don’t need to stress about in a residential home. What we discovered is most wood counters were at least an inch thick, with the majority being closer to an inch and a half. While this is beautiful, it also means more weight. Womp Womp.
Update: I was overly cautious about weight in the beginning of our RV reno, to the point of stressing about adding a cutting board that was too heavy, ha! It’s important to know that while you need to be mindful of the weight you add, that doesn’t mean it can’t be done. This is when removing the bulky/heavy cabinets and furniture can work to your advantage. You just need to prioritize where you want to add weight and what weight splurges are worth it.
We tried finding options through other companies that were closer to 3/4″ thick but those turned out to be out of our budget.
It was at this point we looked into additional options including using contact-paper, plywood, faux-wood laminate, or a more green-friendly option, but nothing made us as excited as using real wood.
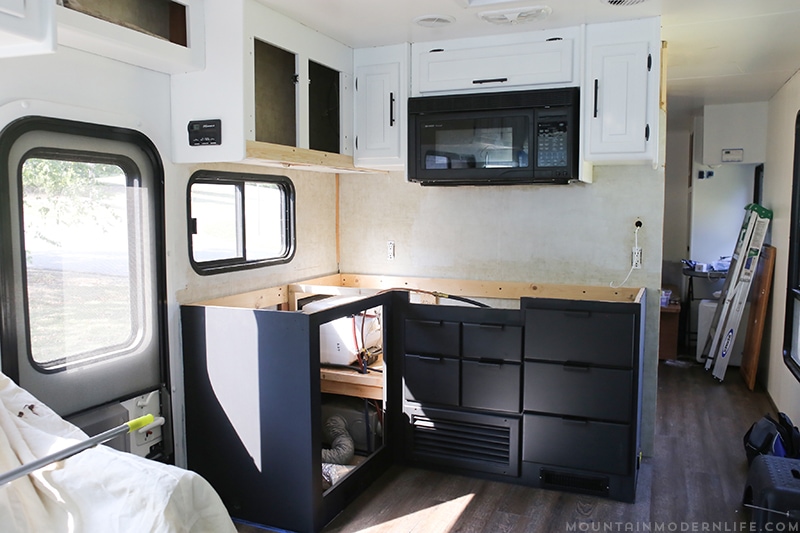
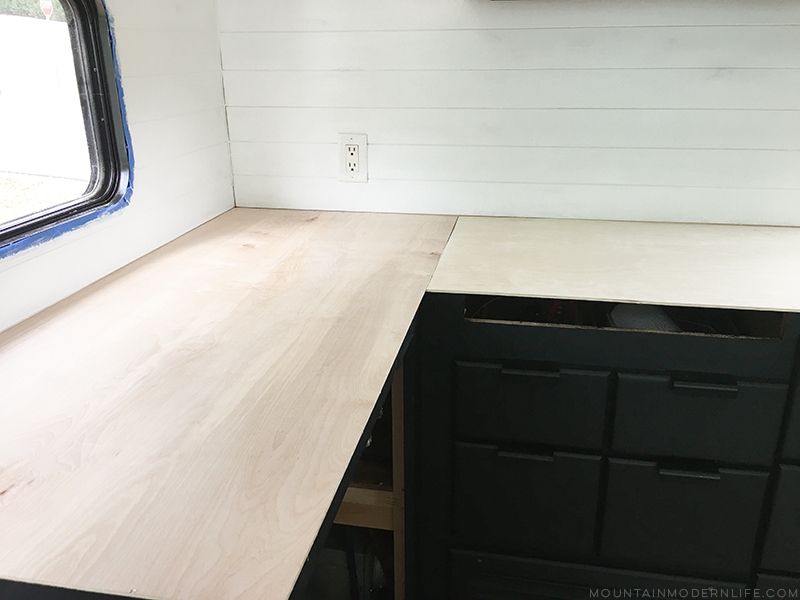
Here’s a photo right before we installed the backsplash and countertops.
Back in June, we made a trip to North Carolina to pick up reclaimed wood from the wedding venue we were married at. We left thinking we had wood that could work for our counters, but unfortunately, that didn’t pan out (although we did use it in various other RV projects).
We were running out of time and were too lazy to make the hour drive to Ikea so instead, we drove 5 minutes down the road to our local Floor and Decor. This is where we picked out our RV flooring, and we were hoping they may have some affordable, and lighter wood counter options.
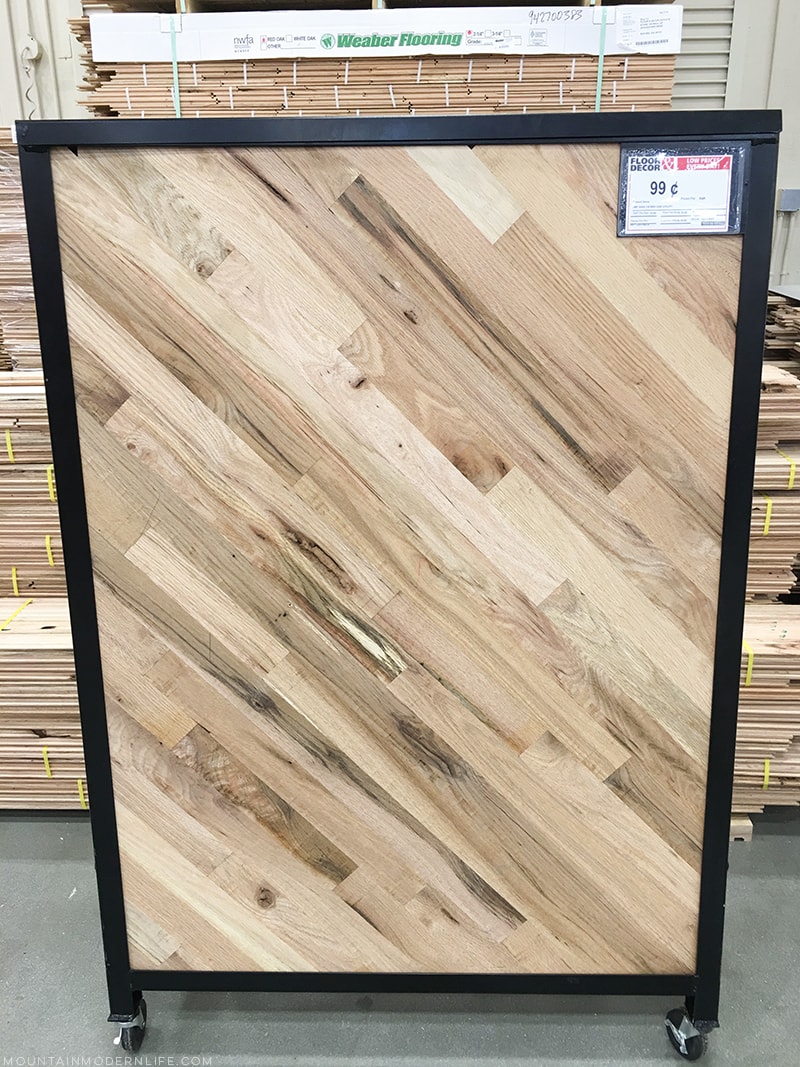
While their butcher block was out of our budget, we came across another option that we could afford… unfinished red oak flooring. I had seen flooring used as counters in the past but had dismissed it because we wanted something “easier”.
What’s funny is I was drawn to this unfinished wood back when we were looking at actual flooring options, but it was too heavy and impractical for our RV so I forgot about it. For our counters though…. we knew it would be perfect! Not to mention this would make our countertops about 3/4″ thick, including the plywood base, meaning we could save on weight vs. buying a butcher block top.
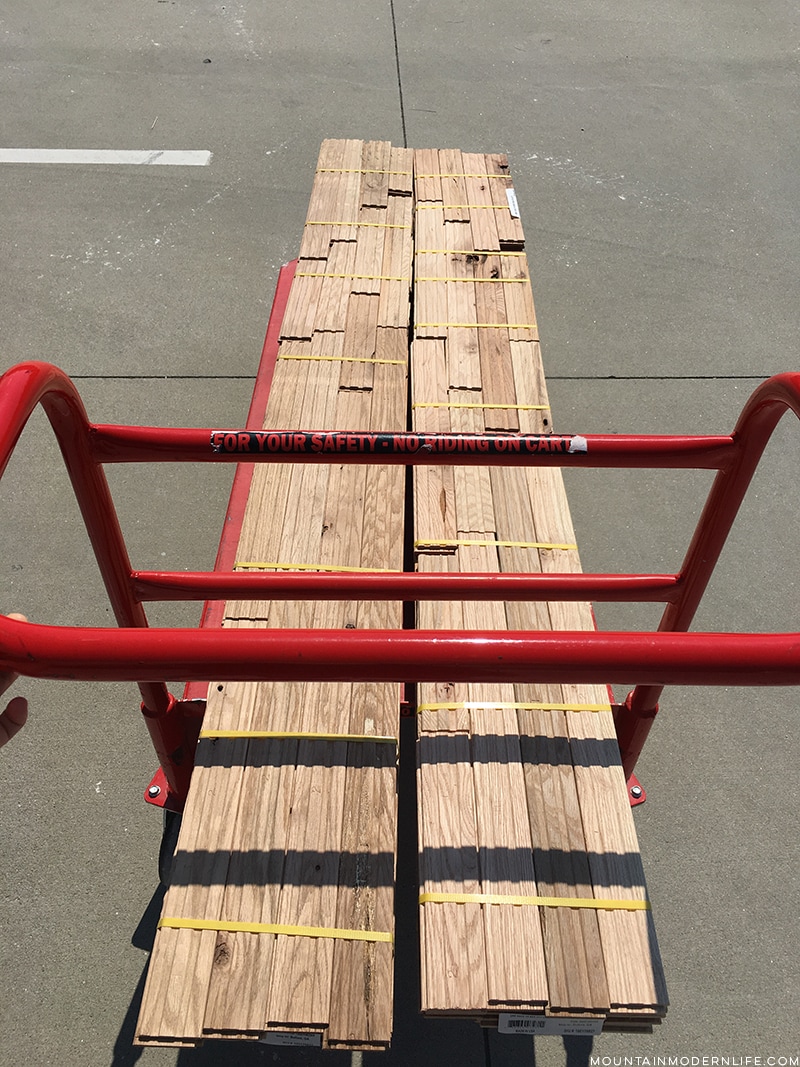
There were 3 different options for the flooring available and the one we chose was “Utility”. This is the least expensive option because it has the most imperfections, and we were told the bundle would have more “throwaway” pieces. We figured this would just add character, and purchased two bundles at $20 each, to ensure we had enough wood.
If we were to do it again, we would have bought the next grade up, because the quality would have been better, and we wouldn’t have wasted as much wood. Just something you may want to consider.
While creating our wood counters from flooring was somewhat time-consuming, it was a fairly easy process, affordable, and helped transform our RV into a rustic modern motorhome.
Something to Keep in Mind
One thing to consider before installing wood counters is that they do take a lot more work to maintain. You’ll need to be cautious of water stains and scratches, plus you’ll need to re-oil them every so often. Chances are they won’t stay in pristine condition, but if you love the warmth they add and the rustic element they bring into your kitchen, that extra work may be worth it. We knew they would require more maintenance but were open to the challenge, so we installed them anyway.
We’ve had our countertops installed for roughly 8 months now, and we plan to share an update on them soon. Would we do this process over again? Yup, because we feel like we got a lot of bang for our buck and love how they look, imperfections and all.
I’ll hand it over to Eric to explain how we installed the wooden kitchen counters in our RV.
How to Create Wood Counters from Flooring
If you’ve come this far I’m guessing you’ve decided to use flooring to make some awesome countertops. I’m thrilled you have because we couldn’t be happier with the way our RV kitchen countertops turned out.
Watch the Video:
Here’s a quick video where I touch on the steps we took to create the wood counters from flooring in our RV.

- Ryobi Airstrike
- 1 1/4″ Brad Nails
- 3/4″ Brad Nails
- Wood Glue
- Epoxy
- Wood Filler
- Kreg Jig
- Jigsaw
- Miter Saw
- Tung Oil with Citrus Solvent
- 1X2 Boards
- Tung and Groove Hard Wood Flooring
- Edge Trim
- 1/4″ Plywood
- Mallet
Side note: If you’re working on your countertops inside your home or RV you’ll want to cover/protect your cabinets, especially if you haven’t sealed them yet. Yeah, this is one of the reasons we had to paint ours again. We decided to install our counters right in our RV kitchen, but you may find it easier/better to build your counters somewhere else and then install them. We also used wood glue AND our nailgun which may have been overkill, but we wanted to make sure our wood counters stayed put, especially while driving down the road. You can still see some of the nail holes, even after filling them in, but they blend in pretty well, especially after we sealed them. Even so, you may want to only use the nailgun if you’re attaching trim, but that’s up to you.
Step 1 – Measure
Before you measure your countertops you’ll want to remove any items installed on them. For us that included our kitchen sink and stovetop. If you’ve never removed an RV kitchen sink or stove you can check out these posts: Kitchen Sink Removal, and Stove Top Removal.
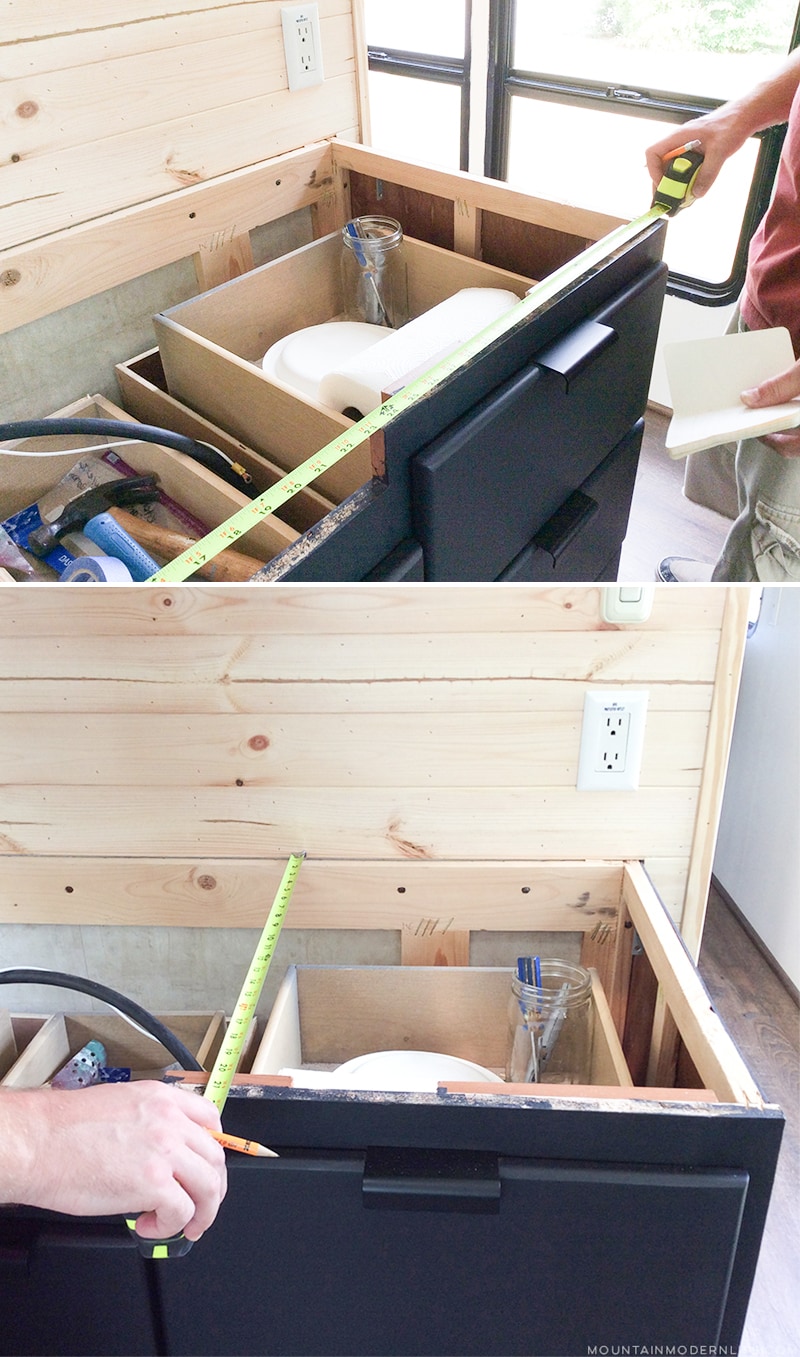
Once you’ve removed them you’ll want to measure all of the outer edges of the countertop. Meaning you should measure all the edges including the back wall and cut-outs where the sink and stove sat.
To help keep track of measurements, I draw a rough shape of what I’m building on a piece of paper. For this project, I drew our countertops as a shape that resembled an L. Then as I measure each edge I label the corresponding line on my drawing.
With all the measurements written down, you can go ahead and remove the old countertop.
We had to use our cabinets as a template because back when we removed our counters, they were glued down so tight that we broke one area in order to remove it. Oops.
Step 2 – Create a Base
Now your old countertops are out and you have all the measurements you need to make the new ones. But you can’t just put the flooring down because there isn’t a solid surface to attach it to.
This is where your plywood comes in.
As you know, our countertops are in our RV which meant we needed to conserve on weight but also provide good support. In order to accomplish both objectives, we chose 1/4″ Plywood as our base. If you’re creating these countertops for your sticks and bricks home you’ll likely want to use thicker plywood or MDF board.
When we were going through this step I stood back and stared at the open-top cabinets in place and pondered on how to cut my plywood. I considered cutting a 45-degree angle which would have split my L shape from the corner. I ultimately decided against that because I knew I’d be taking that approach with the top flooring layer.
I felt it would be stronger if I cut the plywood into two different pieces, but splitting it where the bottom part of the L shape meets the top. Basically creating an L out of two straight pieces of plywood.
I made my cuts then placed the two pieces on top of the cabinets. Once placed I used my hand to apply pressure in various spots to find any weak points.
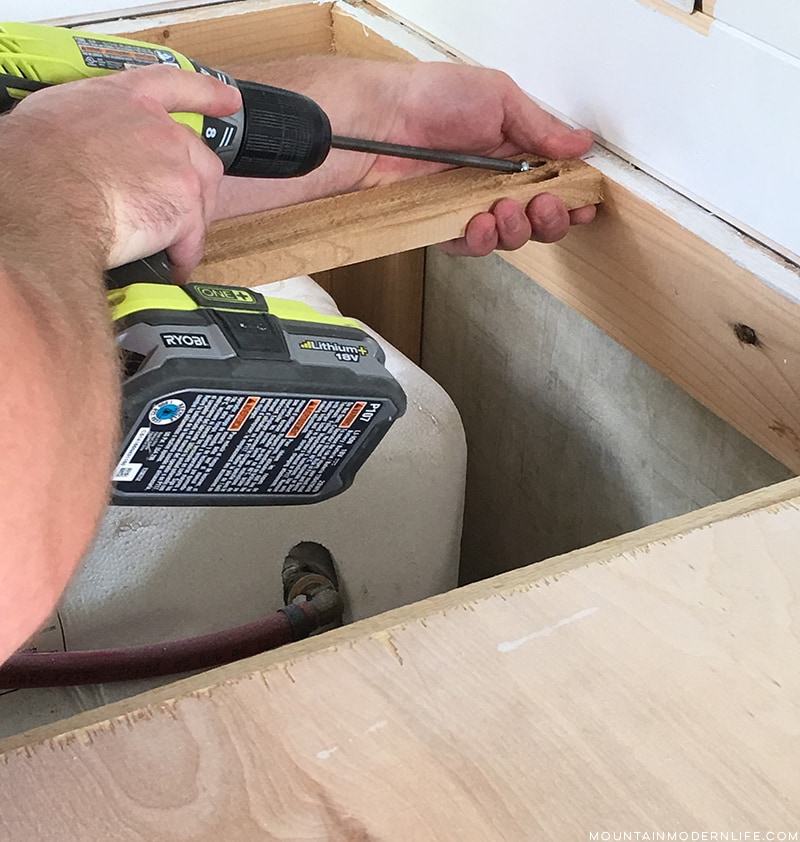
There weren’t spots that created concern, however, I choose to add a couple of cedar braces anyway using 1X2 boards and our Kreg Jig. This step was a precaution I chose to take, this may not be necessary, use your best judgment.
Cutting holes for the sink and stove can be done before installing the plywood on the cabinets or after, it’s totally up to you. I chose to cut the holes before I had installed the plywood.
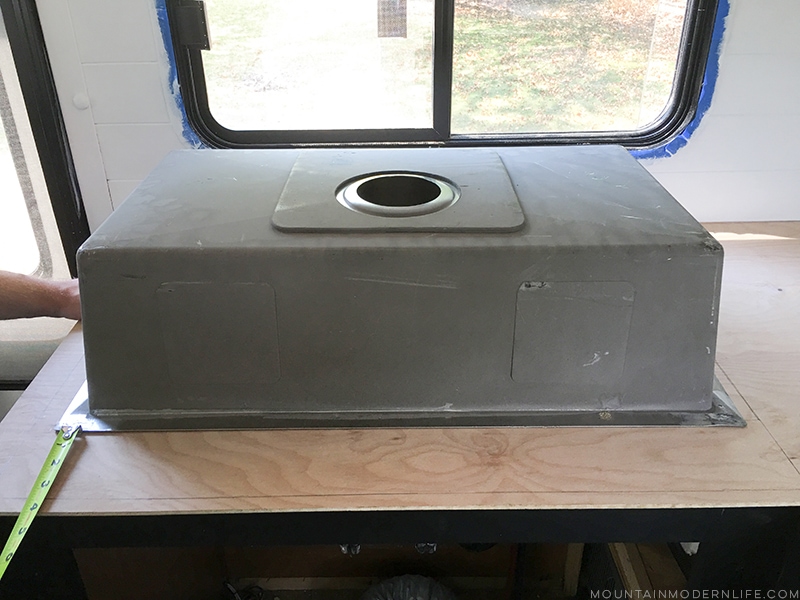
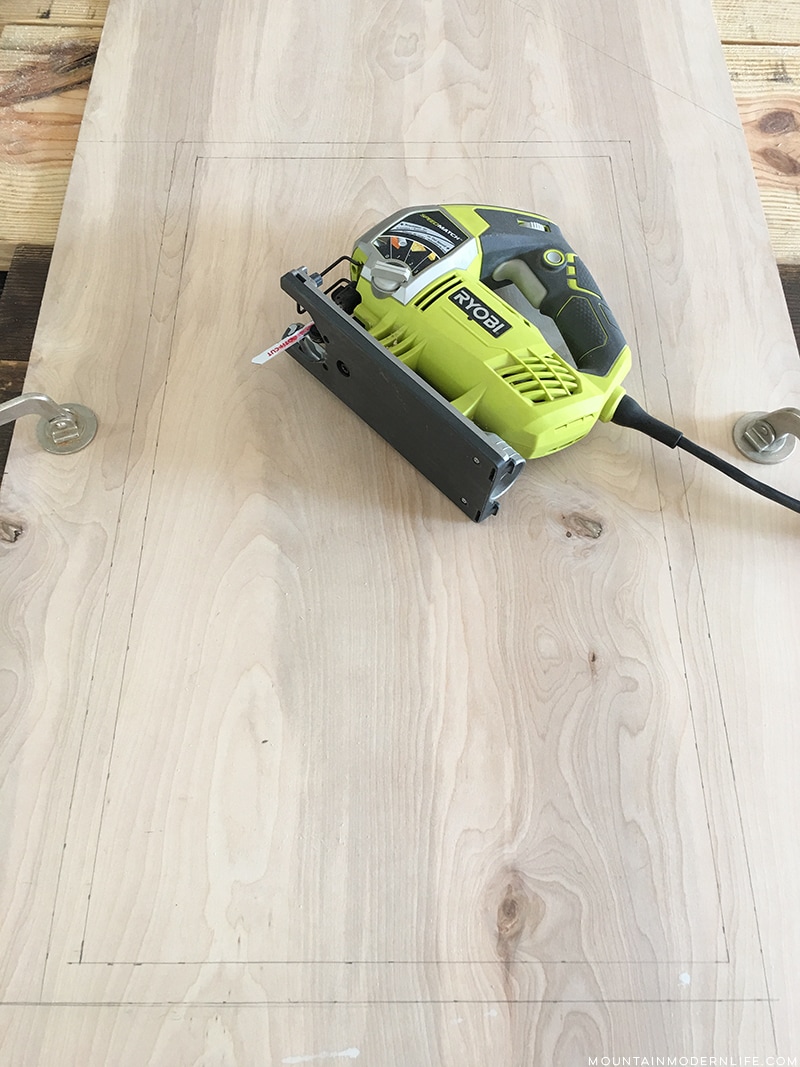
I went back to my L shape drawing and grabbed my measurements. Then mark off the cut-outs I’d need on top of the plywood, for good measure We then placed the sink where we wanted it on the plywood and used it to create our cut-out template.
We purchased this sink off eBay for $20 so it didn’t come with a cutting template, but most sinks will come with that. You’ll basically want to follow the instructions for installing your sink into your counters, which will vary depending on whether it’s under-mount or top-mount. The same will go for your faucet – we installed ours later on.
After that, I drilled a hole in the center of the sink template to make it easier to then cut out the hole for the sink using our Jigsaw.
Next, you’ll want to do the same for your stove.
Note: If you’re going to cut it out after the plywood is installed you’ll want to make sure there aren’t obstructions on the underside of the plywood when you use the Jigsaw.
Once I had my sink and stove cut-outs I decided to add a couple more braces underneath the sink. I ran two 1X2s long ways across the edge of my cut out. This way I would ensure the sink was fully supported. After we finished the countertops I realized how sturdy they were and am not sure these braces were necessary. Regardless I added them and know for sure our sink is supported.
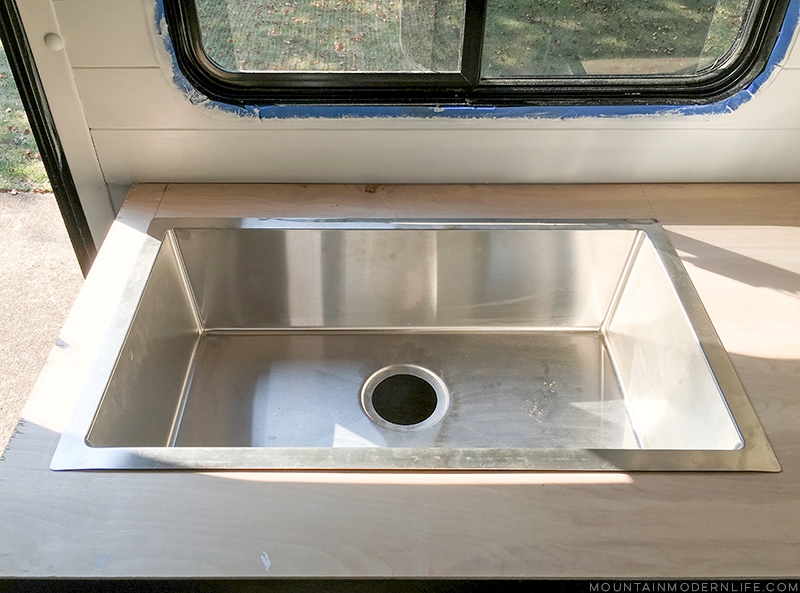
We did a quick test just to make sure the sink fit, which it did.
This was another quick test we did with our sink after we put the plywood base in place.
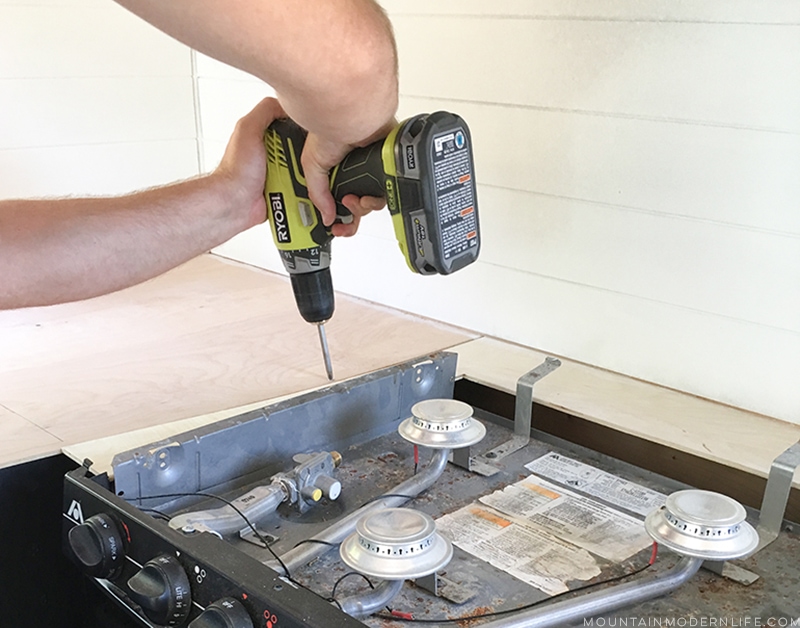
I had my braces in place and my plywood cut so it was time to attach it. I placed my plywood back on top of the cabinets then grabbed my Ryobi Airstrike, 3/4″ Brad Nails and my Ryobi Drill and screws.
Before nailing and screwing down your plywood you’ll need to know where the supports are, that way you’ll actually attach to something haha.
Knowing where I’d be placing my screws and nails I secured the first piece of plywood. If you’re using the Ryobi Airstrike you’ll want to test how deep it’s sending the nails on a piece of scrap plywood first, this will ensure you’re getting the best hold.
After the first piece of plywood was secure I moved to the second.
Below you can see me using screws to attach the plywood to a brace below.
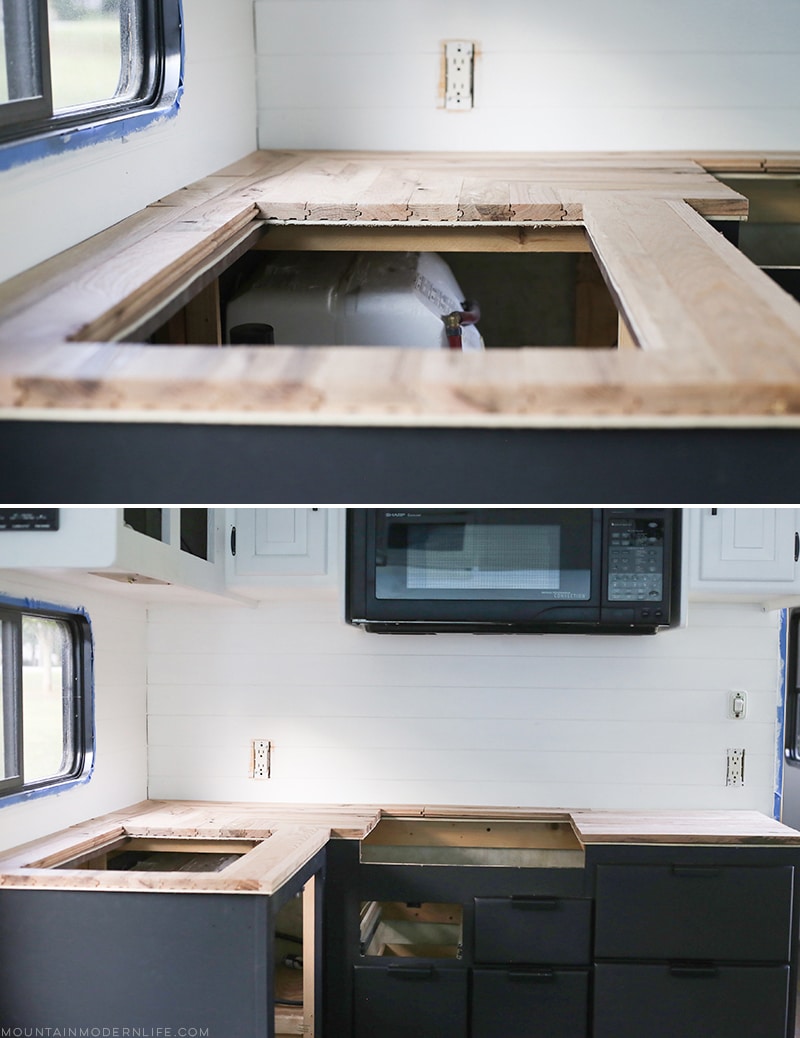
Now it’s coming together! With the holes cut for the sink and stove and the plywood attached it started to look like a countertop.
Step 3 – Arrange
Once you have your solid surface to work with it’s time to play around with your flooring. If you elected to go with utility-grade tongue and groove flooring you’ll have to try a bunch of different combinations to get it to line upright, and may have to toss out several broken pieces. If you went with a higher grade flooring it may be a bit easier.
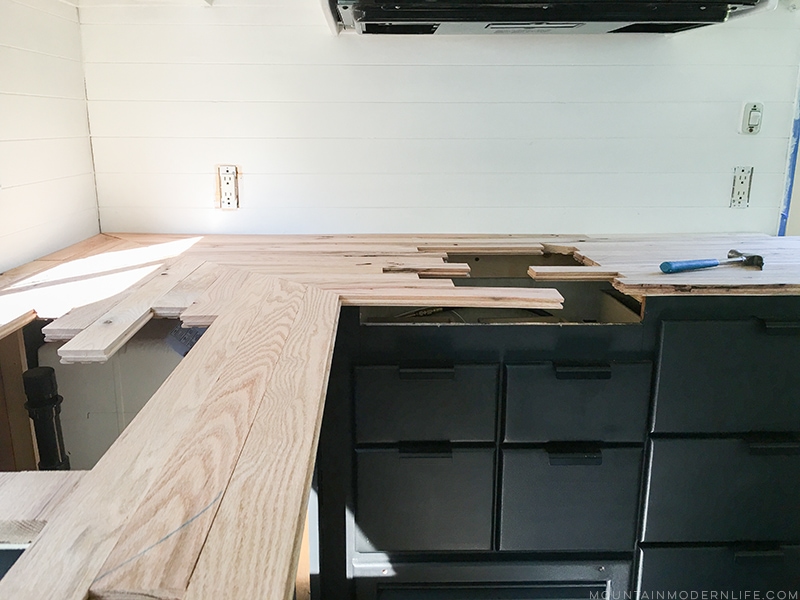
We decided to arrange our flooring on top of our countertop base first. This way we could see how it would look without attaching it permanently, before making our final cuts and gluing/nailing it down. You don’t have to do it this way, but it worked out well for us.
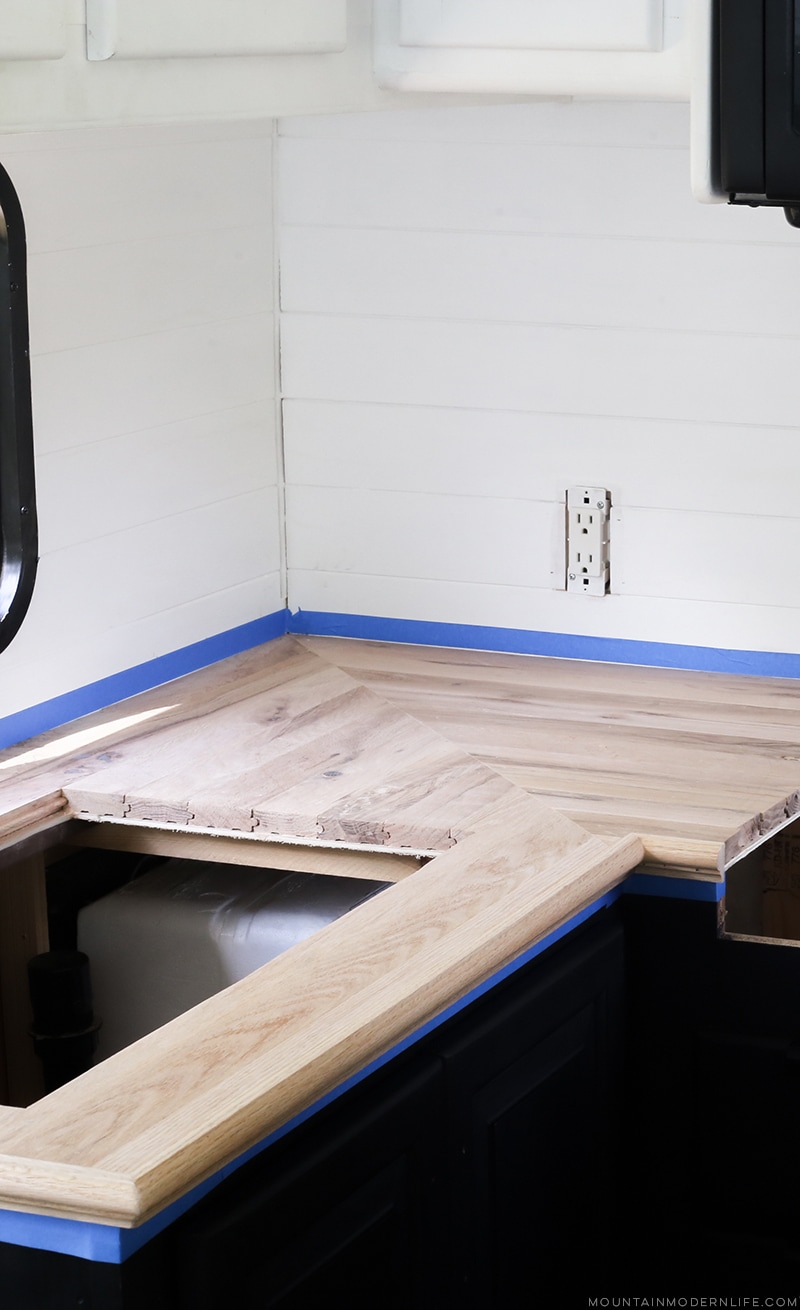
We started with the back corner of the counter then built out row by row with the groove side facing the walls.
We found the first two pieces we were going to use and cut the groove ends to 45 degrees so that we could get them to line up correctly.
Once that was done we placed the 45-degree cuts together creating the beginning of our first row. Next, we built rows along both walls connecting the pieces, end to end.
At this point we didn’t worry about the length of the rows, meaning the rows actually hung over the edge of the plywood base we’d created.
We continued this process, picking two pieces to begin each row with then cut the groove ends to 45-degree angles. We’d connect each new row to the previous using the tongue and groove.
After finishing two rows we came to the openings for the sink and stove. When this happened we’d leave a little overhang there as well. We made sure not to place flooring completely across the openings in order to make it easier later on.
We then repeated this process until our entire plywood surface was covered with flooring.
It looked funny because we had overhang at every edge, but not to worry the funny look wouldn’t last for long.
Step 4 – Cut
All of that overhang I mentioned in the last step is going to come in handy. With all your flooring placed on the plywood base, you can look at it from underneath to see where your flooring pieces need to end.
Grabbing a pencil trace the line from underneath the flooring where the plywood base ends. You should repeat this process for all edges, included the edges for the sink and stove.
Once all your pencil marks are created you’ll want to pull up the flooring piece by piece. When you do this make sure to create a system that helps you remember which pieces go where. We stacked our wood on the floor in rows so we would know which piece to attach to the counter next. You can find a system that works best for you, perhaps numbering the pieces on the back.
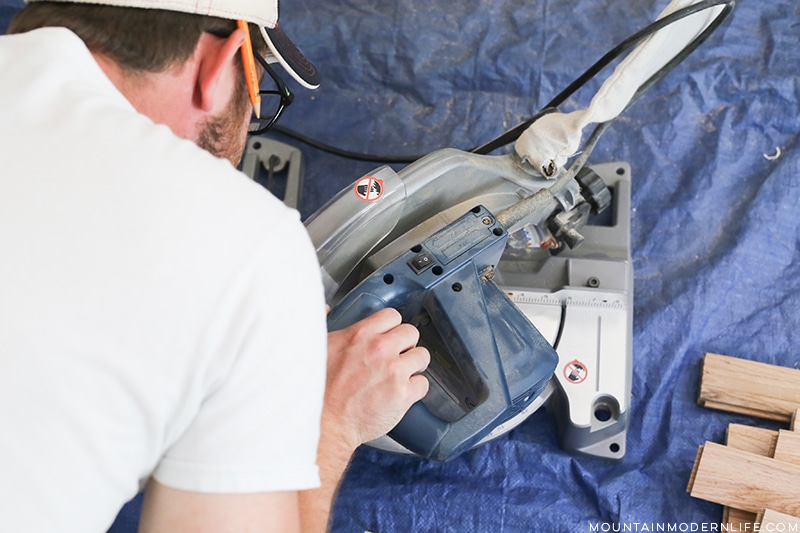
Then use your miter saw and cut the pieces of flooring to the appropriate lines you’ve just drawn.
It’s important to note that some of the pieces that go along the sink and stove openings may need to be ripped down. If that’s the case, the easiest way to accomplish this is by using a table saw. If you don’t have a table saw I would suggest using a hand saw. There were a couple of cuts I didn’t feel comfortable putting on the table saw so I used my hand saw, while it took a lot longer I felt it was much safer.
Once all of your cuts are made it’s time to actually install the flooring onto the plywood base.
Step 5 – Install
You’re looking at the flooring resting on your cabinets and are pretty excited, but now it’s time to make it permanent.
First, you’ll want to take it all off again making sure to keep it in order. Then you’ll want to grab your wood glue and 1 1/4″ brad nails.
Next, grab your first two pieces and place wood glue on the bottom of each piece as well as on the plywood where the pieces will sit. I’ve found the wood glue works best if you spread it around evenly on the piece of wood using a brush. Then place your first to pieces down.
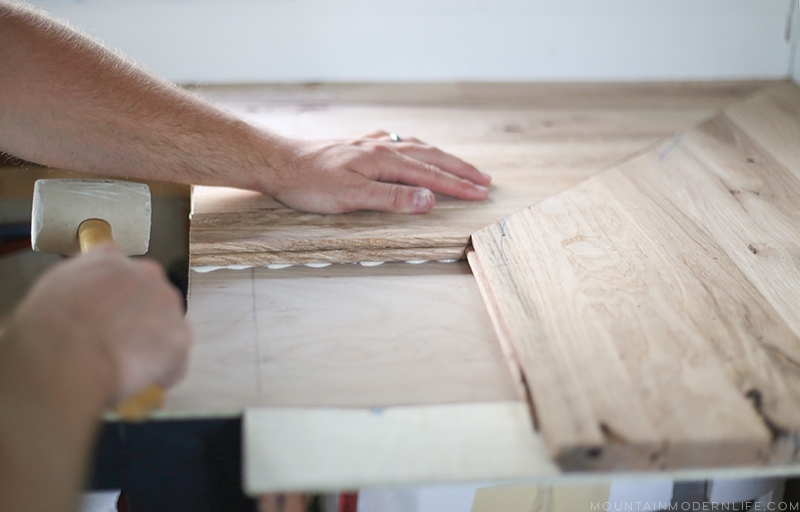
Now you’ll want to do the same for the first two rows all the way to the edge. After you have them in place grab your mallet and give them a tap. This will help make sure everything is tightly together just as if you were putting it down as flooring. We also used our nail gun and put a couple of nails in each piece while pushing the row tight in place against the wall.
Then continue the process for all of the pieces you have.
Step 6 – Trim
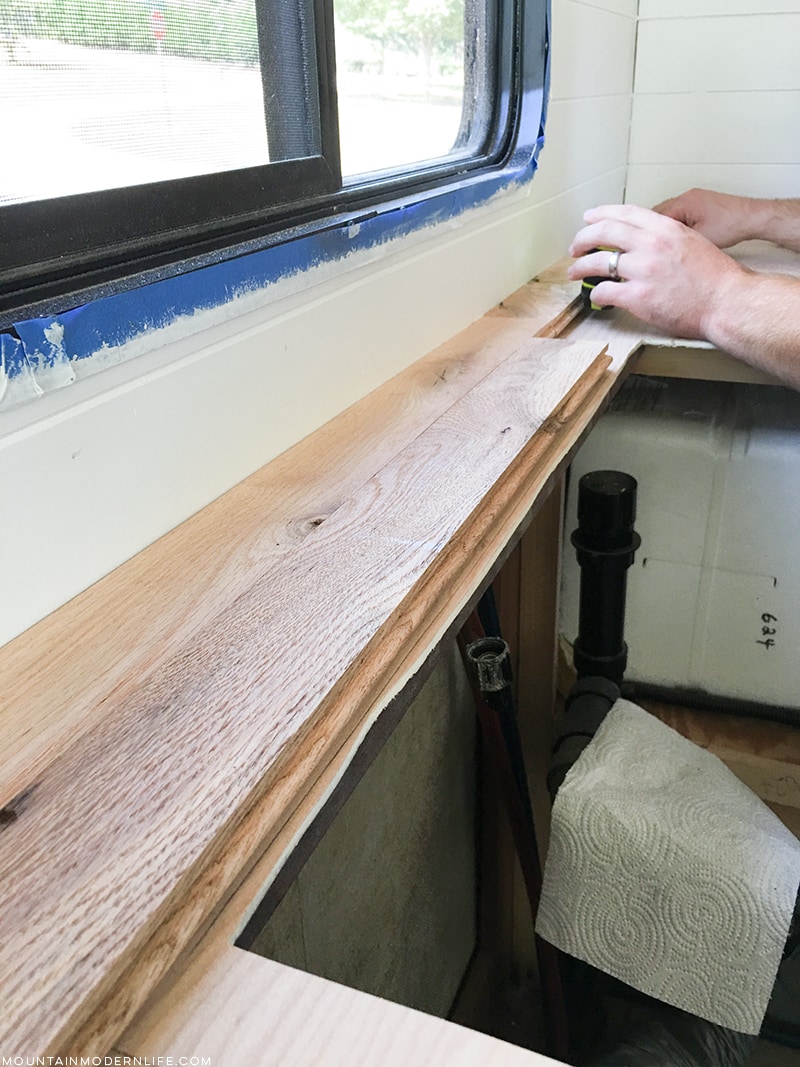
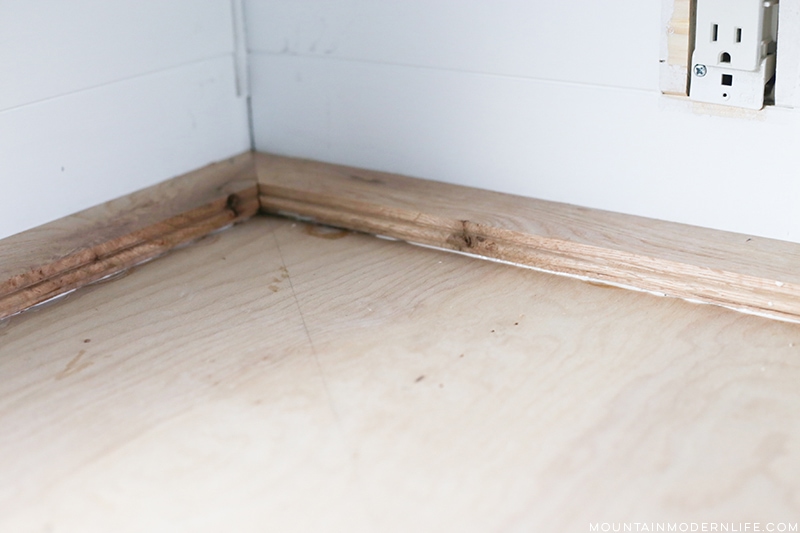
If you look at the edges of your new countertops you’ll see the tongue and groove showing through, so you’ll likely want to add some trim to the edge to give it a more finished look.
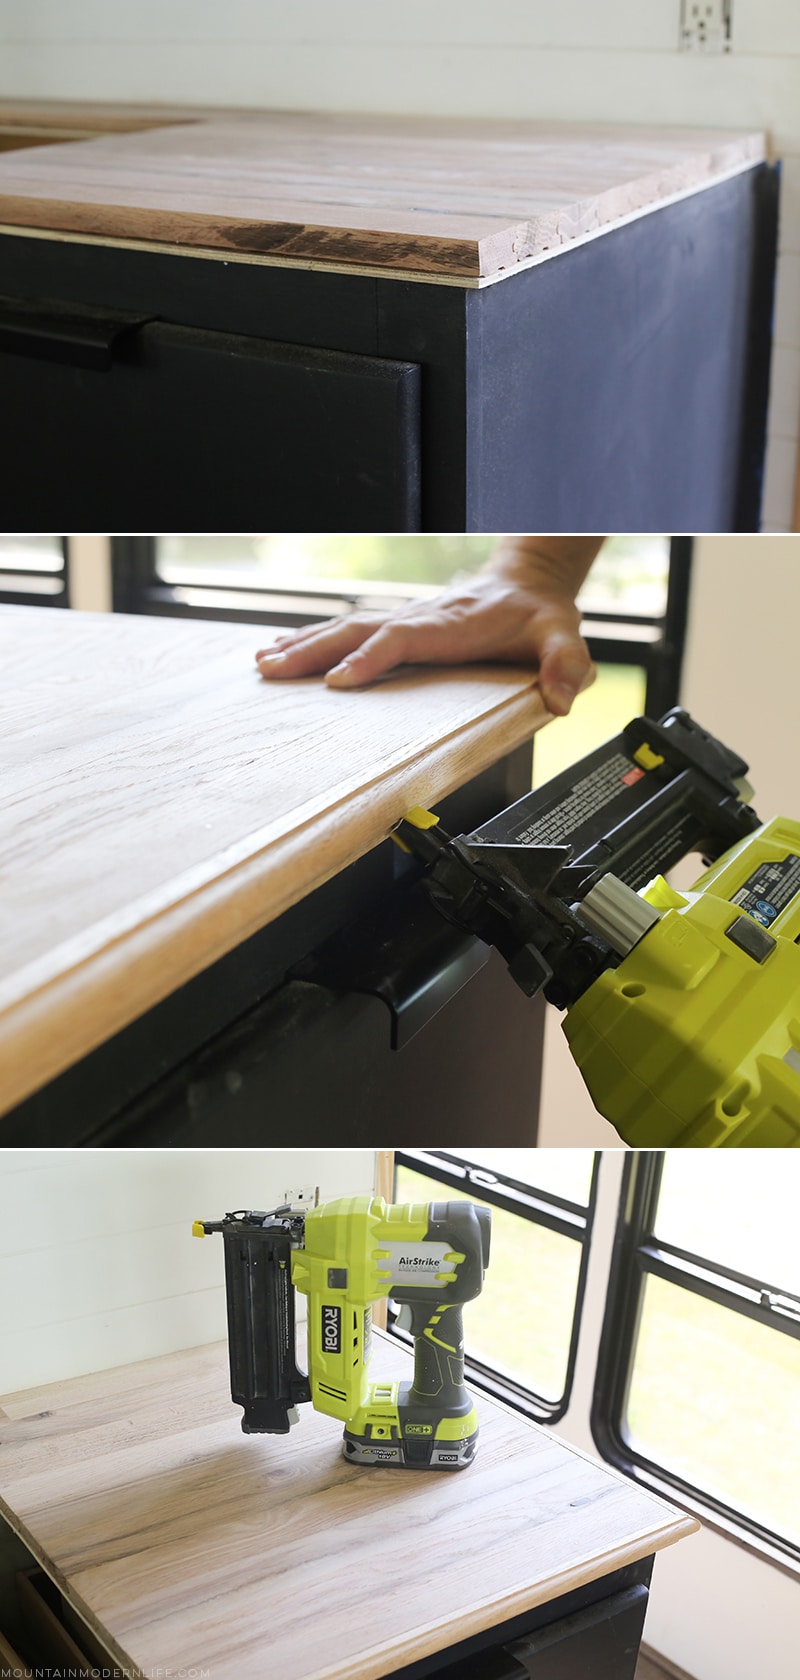
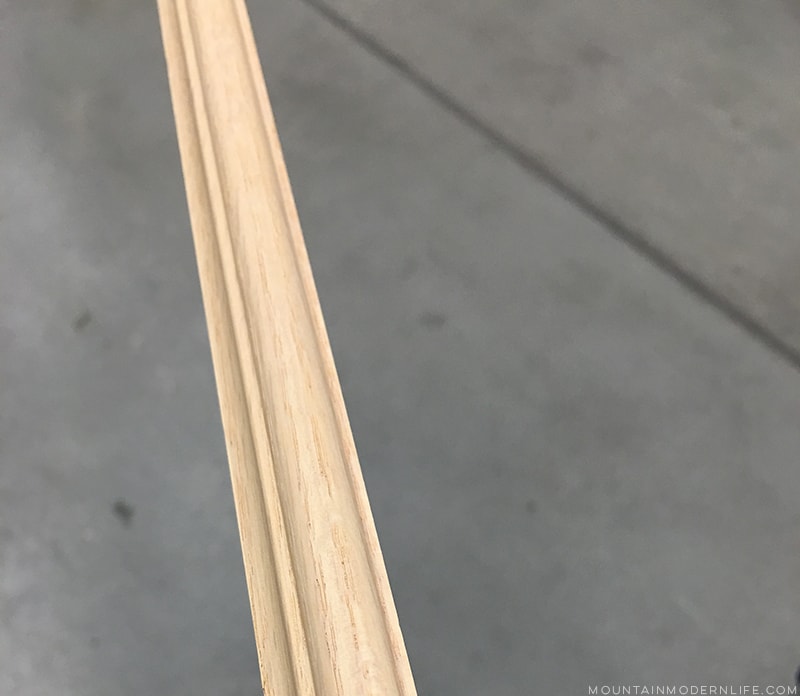
Finding the right trim can be a bit tricky, so you’ll have to look around at your various hardware stores to see if you can find the style you want that matches the wood you used. You may want to use something with clean lines, or something like this, which is what we used, mainly because it was red oak and the perfect size.
I’ve always found 45-degree angles to be a bit tricky but they always work out well. In order to make it as easy as possible, you should start on one side and work your way all the way around one piece at a time.
Sometimes as we create things measurements may be slightly off so I’d remeasure your edges before beginning to make cuts to your trim.
Once you cut your first piece you can go ahead and use the same wood glue and nail trick for the trim. Continue the rest of the way around and your trim is done.
Step 7 – Fill
As you stand back and look at your new countertop with the trim in place you may see a couple of knots and little nail holes. The objective of this next step is to get those filled in.
First, you’ll want to use your wood filler to fill in the nail holes that exist. Once you’re done filling those in I’d run your hand across the surface of the countertop to see if you can find any other indentations. If you do, go ahead and fill them in.
Next, you’ll want to epoxy any knots or larger holes you can find, which you may or may not have depending on the wood you use. (The photo shows Golden Oak wood filler, but we should have used Red Oak to match our flooring).
We followed this awesome post from Pretty Handy Girl. The epoxy will fill in clear which allows for you to still see the character of the knots. If you happen to get epoxy on the countertop outside of the holes you can wipe it up. It is better to wipe it up quickly, but if you miss it don’t worry because you can get it up later.
After you’ve filled the knots with epoxy and nails holes with filler you’ll want to give it roughly 24 hours to set (at least if you used epoxy).
Step 8 – Sand
When you come back the next day you’ll want to sand down the entire countertop. If you notice the epoxy has raised a bit higher than the surface of the countertop go ahead and sand it flush. Another reason you want to wait to sand even the wood filler is that the dust can get into the epoxy and create a hazy look.
Note: The sandpaper you use on the countertops will depend on the stain/sealer you’ll be using later. We chose to use a natural tung oil with citrus solvent which suggested we not use a sandpaper with a grit higher than 150.
Step 9 – Seal
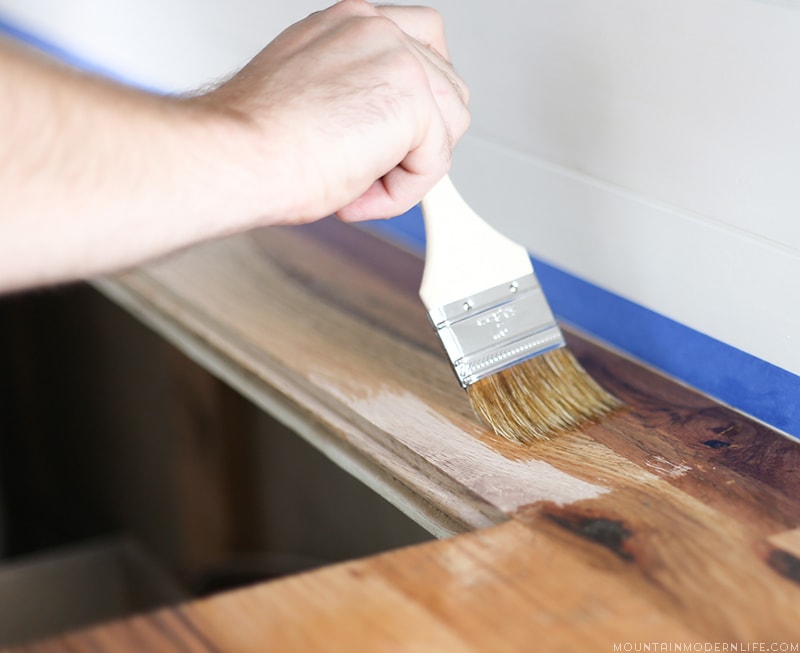
There are various options when it comes to sealing your wood countertops, but we opted to go with Tung Oil. You can check out our post on sealing our countertops naturally here.
Planning to create wood countertops from flooring? I’ve put together some additional resources you may find helpful:
DIY Butcher Block Countertop Guide | This and That
Countertops Made from Flooring | Workabout House
How to Build a Wood Floor Countertop | Sawdust Girl
Bathroom Remodel Counter from Flooring | Domestic Imperfection
DIY Butcherblock Style Countertop | Addicted 2 Decorating
DIY Wide Plank Butcher Block Countertops | Simply Maggie
DIY Butcher Block Kitchen Island | Addicted 2 DIY
DIY Butcher Block Counters | HGTV
How to fill in wood knots with Epoxy | Pretty Handy Girl









I have done 2 tops like this. I did a basket weave for the inside 90 degree turn. I think it looks much better than mitering all those boards.
Wow I bet those looked beautiful! Do you have any links to photos? If so we would love to see them!
You have done a beautiful job,the panelling is great and the white paint makes it so bright,love the wood looking forward to seeing the countertop.
If I use this technique to make a bathroom vanity top, what would you suggest I seal the wood with? The flooring I have is left over from when the house was built. It looks like oak to me. Didn’t know if I should use the tung oil with citrus solvent or something else. Your countertop looks very nice. Thanks for sharing the how-to. P. Frederick
We used the same method for our bathroom counter, but there are tons of options out there. The main thing to consider with Tung Oil is the upkeep of re-oiling. I don’t mind this so much in the kitchen but for the bathroom I’m not so sure I like the extra work. You also won’t need it to be food-safe so you may want to consider a different option. At the same time, I LOVE how our bathroom counter turned out so if you don’t mind the extra work then it could be worth it for you! We installed a copper sink in our bathroom which also requires more care so I have my work cut out for me, haha. Another option would be a water-based poly, but if you want something more natural I would reach out to The Real Milk Paint Company and see what they suggest. I’m not saying not to use Tung Oil because we love how it turned out in our bathroom, I just want to warn you of the extra work involved with having a wood countertop 🙂 Let us know what you go with!
What a great idea! I’m really inspired by watching the two of you. This is another fantastic project and the epoxy fill is a great solution for the knot holes. I wouldn’t have thought about using solid wood flooring for countertops. Nicely done! I am an interior builder for Timeless Travel Trailers in Colorado. We customize Airstreams and mobile spaces. So, I’m very interested in what you are doing. I was excited to find your blog and I will be following along!
Thanks Victoria! I loved the epoxy idea too and it worked out really well. I used to just fill those in with wood putty but the effect is so much prettier with epoxy 🙂 Ooooh now I can’t wait to visit your site and check out the Airstreams and mobile spaces!
Came across your video on YouTube and I’m soooo glad I did, I happened to luck out and snagged a deal on a local yard sale site in my area for nearly 70sqft of pre finished Bella hardwood flooring for $20 drive 20 minutes to go pick it up today… Thats going to be more than what we need I think for our Prison bus rv conversion project.
Thanks for making the vlog because I honestly would have never even thought to do that for our project!
Thanks the4englands in NC!
That’s awesome and I hope you’ll keep us updated on your bus conversion! Sounds like a fun project!
Katie
Katie or Eric you two have become my go to site to do anything in our rv! Love, love, love everything you guys do! So I have a few questions…1. Do you have an after pic of counters?, 2. How are they holding up? 3. Could they be stained? And if so what finish would you recommend for a kitchen? And last 4. Do you think prefinished would work on a kitchen counter? Thanks so much!
Hey Cheryl, we’re so glad you found the information helpful! They are holding up really well, we did just notice on of the pieces of flooring is getting a little rough so will probably end up sanding it all down and refinishing it again. They could be stained, we ended up going with Pure Tung Oil + Citrus Solvent from The Real Milk Paint Company. We chose this finish because it is all natural and water resistant. In the link below you we walk through how we sealed the kitchen countertops – https://mountainmodernlife.com/natural-wood-sealer/ I think a pre-finished wood could work if that’s is a direction you’d like to go. Also if you go to this link you can see some finished pictures of our kitchen and countertops – https://mountainmodernlife.com/rv-kitchen-renovation/ I hope this helps but please feel free to reach out if you have any other questions. Best, Eric.
Thanks guys!
Would the IKEA butcher block been too heavy?
I’m looking at doing something similar in the 97 Itasca we just bought – the countertops are terribly warped from water damage.
It’s a TINY space – not even as much surface area as y’all have.
It’s funny because that’s what we were first planning to purchase, but I was so scared about weight that we just made our own counter. To be honest, looking back we definitely had more leeway for adding weight with wood, but I just didn’t know and we hadn’t been weight yet. I think it depends on your RV, so I can’t say if you will or won’t be overweight, but would think it would be okay. You may want to get weighed before starting any projects just to be on the safe side, or keep an eye out for what you take in and take out.
We are in the process of fixing up our extremely damaged 5th wheel to live in while we build a new home this year. We currently have really bleached out but structurally sound solid surface kitchen countertops. I’m wondering what your thoughts would be to use this technique to apply the flooring right on top of the existing countertops? We have removed tons of cabinets so far and weight is not as big of a concern.
Hey Cheryl that’s awesome you guys are bringing the 5th wheel back to life while you build your new home. I think the technique should be fine for the most part, you may not even need nails since you’ll have a full flat contact surface underneath that you’re attaching the wood to. There are a lot of adhesives out there so if you go this route you’ll need to find an adhesive that will adhere to both surfaces. I am a little worried that placing the wood on top of the other countertop may make the overall countertop thickness too much. But if you think the thickness will be ok the process of attaching it should be very similar to how we placed ours or even to how you’d place tongue and groove flooring.
With that said I do want to let you know I haven’t implemented the technique in this way so everything above is my opinion of the situation. I did however find this video – https://youtu.be/nVZWBLSZCzE – which I thought did a great job of showing how to place wood on top of an existing countertop.
Anyway I hope this helps and let me know if you have any other questions. Best Wishes, Eric
How thick was the flooring you used?
Hey Redds, If I remember correctly the flooring we used was 3/4 of an inch! Hope that helps, let me know if you have any other questions.