How to Replace RV Flooring
This post was written in 2016, but updated in 2023
Disclaimer: This post is sponsored by Floor and Decor, who I contacted directly after being impressed with their product selection and quality. The content and opinions are our 100% our own. This post may also contains affiliate links, meaning, if you click through and make a purchase we may earn a commission at no additional cost to you. View our full-disclosure here.
When we purchased our RV, we were excited to replace the dirty beige carpet and tiles. Not only was it dingy and dated, but traveling in an RV with carpet and fur babies seemed like a disaster waiting to happen.
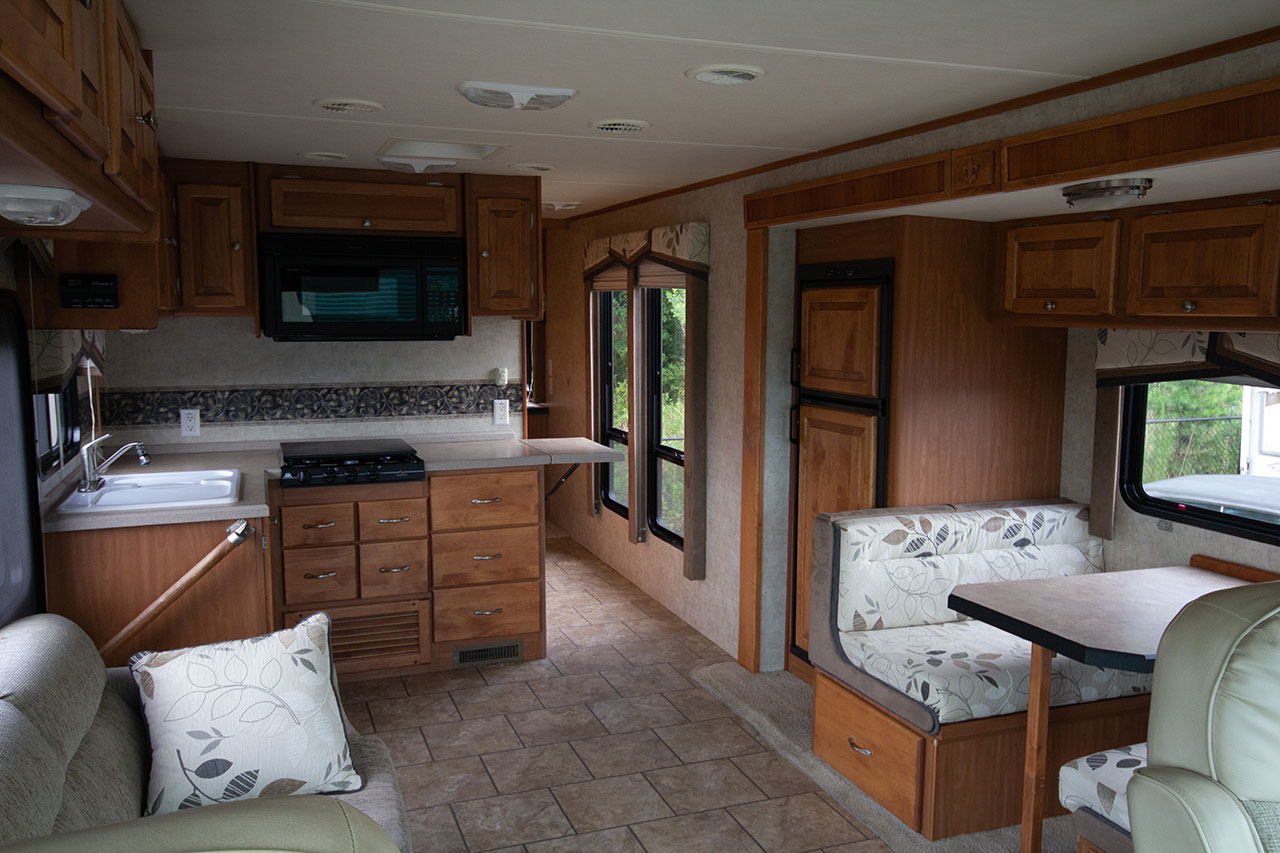
After countless hours researching options online, Eric and I decided on a floating floor made of luxury vinyl planks. We chose luxury vinyl planks because we wanted something lightweight, flexible, and waterproof that would be stylish and durable.
A floating floor doesn’t require nails or adhesive for installation and instead uses a locking system. Since it floats above the subfloor or existing flooring, it can contract or expand as the temperature and humidity fluctuate, which can be both beneficial and a burden. Beneficial because humidity and temperatures often change when you travel in an RV, but there is the potential of buckling over time.
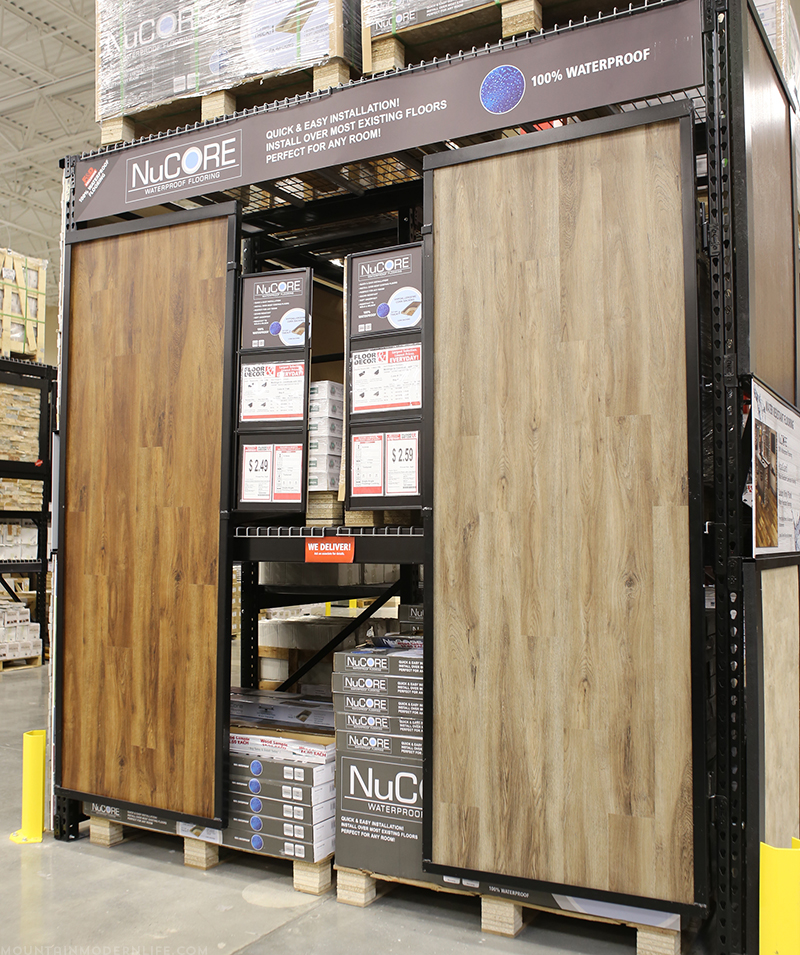
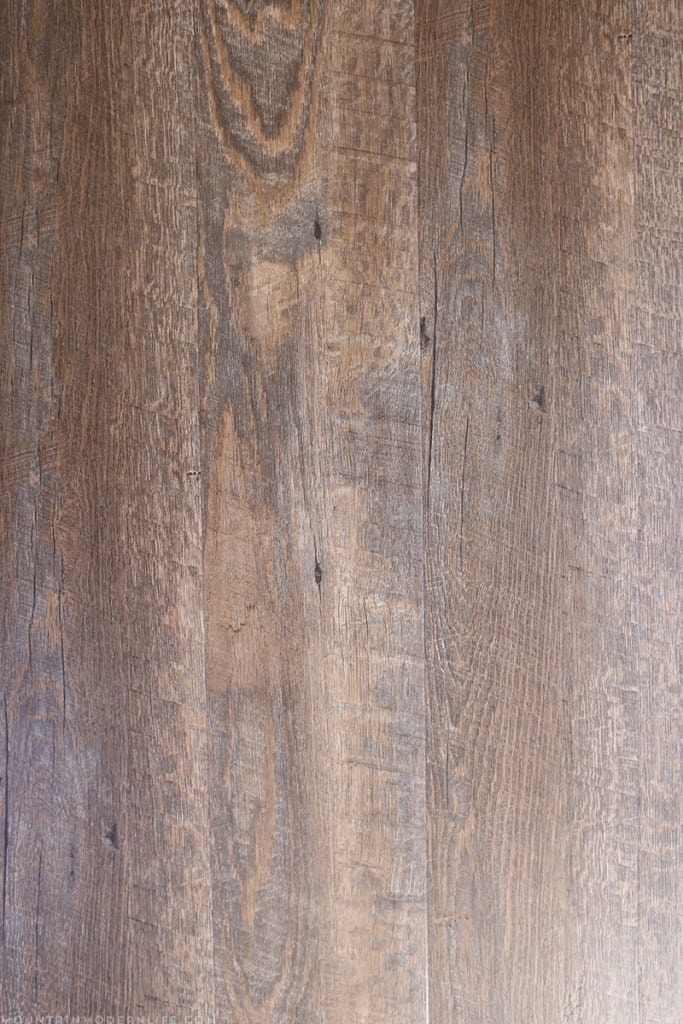
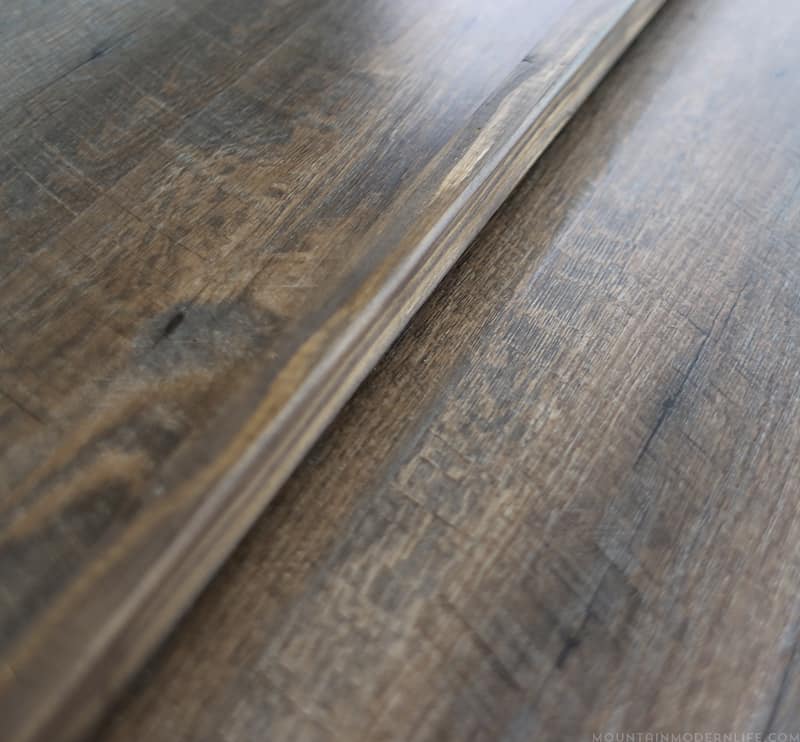
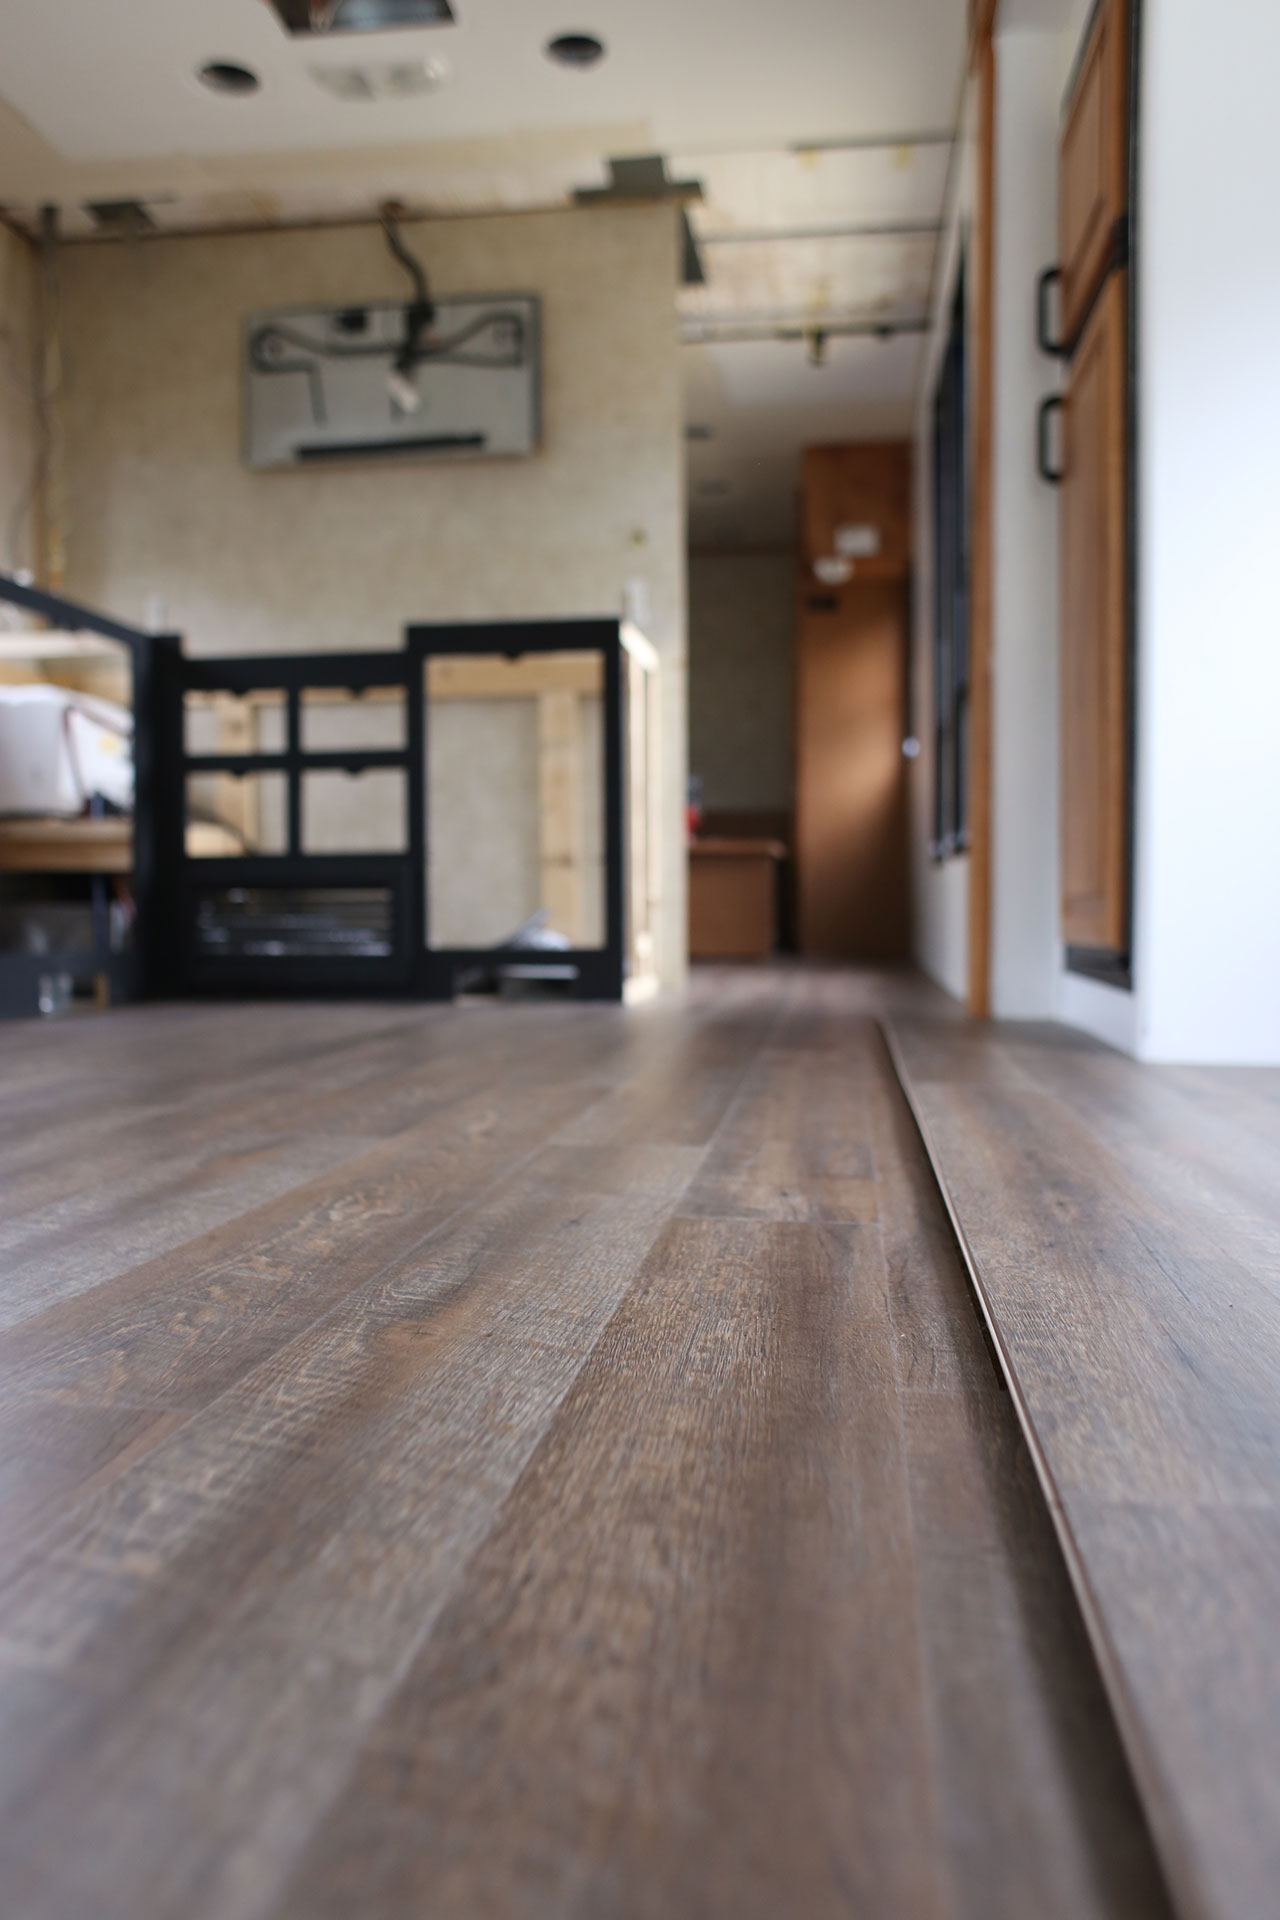
We teamed up with Floor & Decor for this project and used Nucore Handscraped Ashen Oak.
It’s technology only available at Floor & Decor, and although it’s not exactly vinyl it’s an engineered flooring with a layer of luxury vinyl adhered to a waterproof core. It also has a hyper-allergenic cork backing that is soft underfoot and resistant to mold and mildew. It checked every box so we knew it would be perfect.
With that said, there are several flooring options available, each with its own set of pros and cons. Do your research, consider your budget, skills, resources, and lifestyle, then choose the best-suited option for you. While eco-friendly flooring was limited and expensive during our renovation, more options have become available at various price points.
In my opinion, it’s best to look for something waterproof (or at least water-resistant), lightweight, durable, and easy to clean. And according to most RV renovators, it’s also best to stick to flooring under 5mm thick, especially if you have a slide-out, though ours was slightly thicker and we never had an issue.
A couple of our big concerns with replacing the carpet in our RV with new flooring was how we would address the slide-out and the area around the “doghouse” aka engine cover. We have created separate posts for those areas, which you can check out here and here.
Although I assisted Eric throughout the process, he did the majority of the work so I’ll let him give you all the details on how we replaced the RV flooring, along with some tips we learned along the way. Even though we installed this flooring in our RV, it’s technically made for a sticks and bricks home, so if you don’t have an RV I hope you find this post helpful as well.
How to Replace RV Flooring
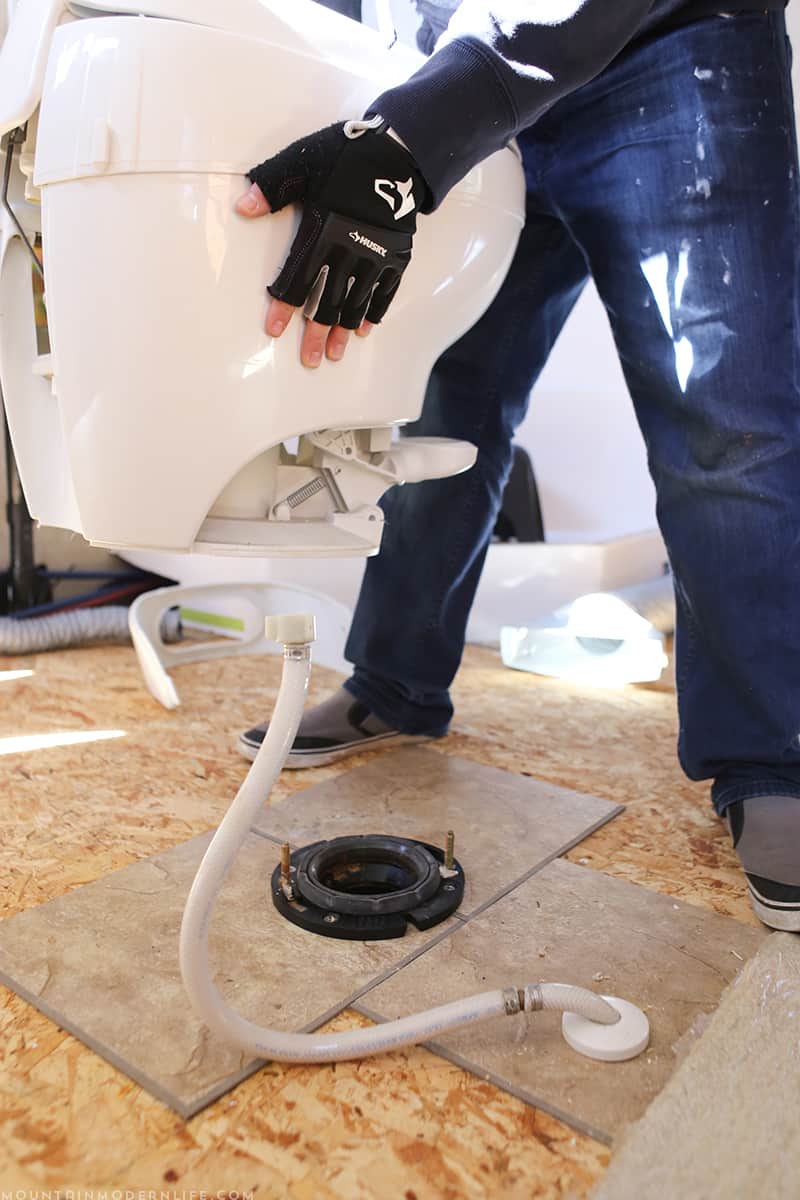
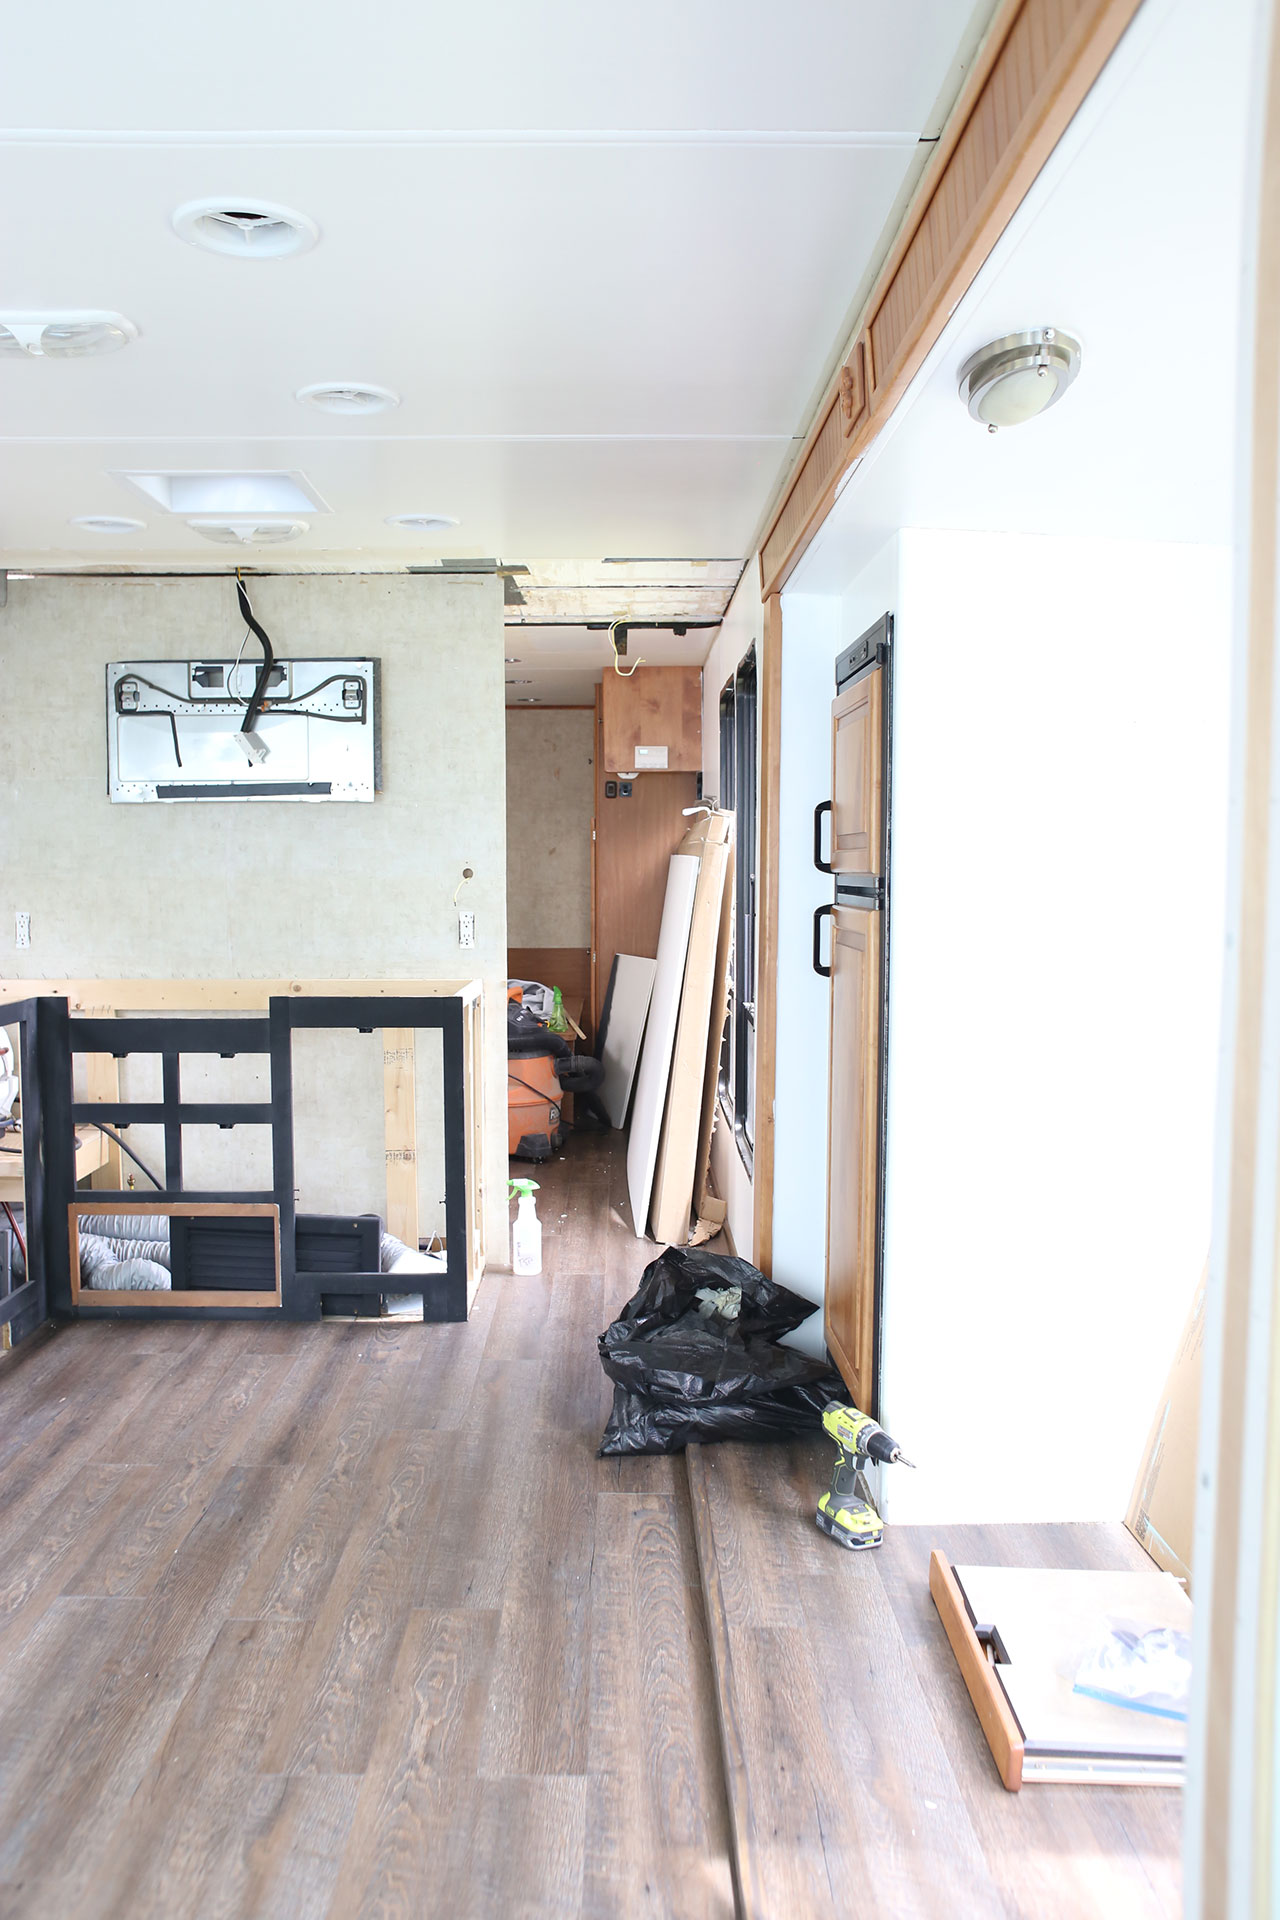
I’d first like to mention that Katie and I recently discovered a water leak in the RV, so we made the decision to remove the bathroom walls and fixtures in order to remove the damaged ceiling panel. We planned to make updates to many of these items anyway so it wasn’t a big deal, but this isn’t necessary if your only objective is to replace the RV flooring. If you want to remove some of your furniture first you can see how we removed our sofa here and our dinette set here.
When I first thought about replacing the RV flooring I have to admit I was a little nervous. I had never installed flooring before, let alone inside a moving vehicle. Sure, I had my moments when I had to make some crazy cuts (like around the toilet), but overall the jointing system on the NuCore flooring made it literally and figuratively a snap. After you make a few cuts you get the hang of it, allowing the process to speed up.
The NuCore flooring we used is essentially a “floating floor” so it can be placed over most existing flooring, with the exception of carpet. The other great thing about this LVP flooring is that it doesn’t need to acclimate before installation. It’s ready to go straight out of the box.
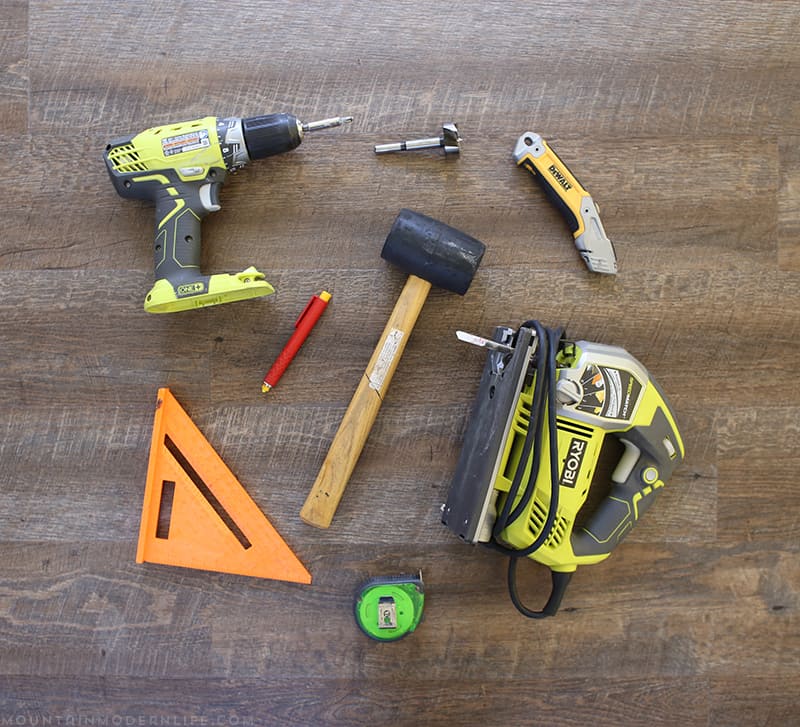
Supplies/Tools
- NuCore Flooring
- Quarter Round
- Baseboard (optional)
- Spacers
- Rubber Mallet
- Ruler/Square
- Pencil
- Tape Measure
- Utility Knife
- Jigsaw/table saw (optional but can speed things along)
- Drill/Forstner Bit (if you need to make holes for any wires)
- Oscillating Multi-tool or staple lifter to remove all the staples in old carpet
Remove the Old RV Flooring
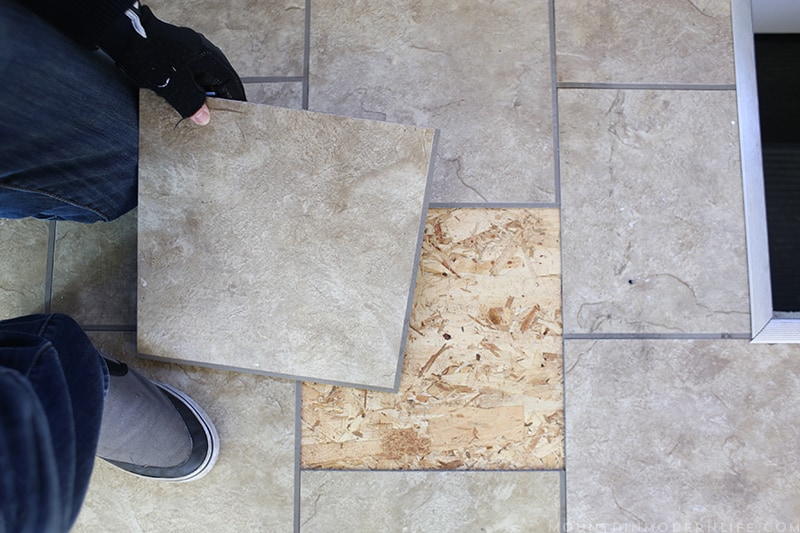
We started by removing the peel and stick vinyl tiles we had throughout most of our unit. Technically we could have placed it over the tiled areas of our RV, but as many of you may know, weight is of utmost importance in the RV and we wanted to remove any unnecessary weight and ensure everything was level.
These were relatively easy to remove with a miniature crowbar. What was surprising was the weight of the tiles. When you hold just one it didn’t seem that bad, but once you had 3 or 4 in your hand the overall weight will blow your mind.

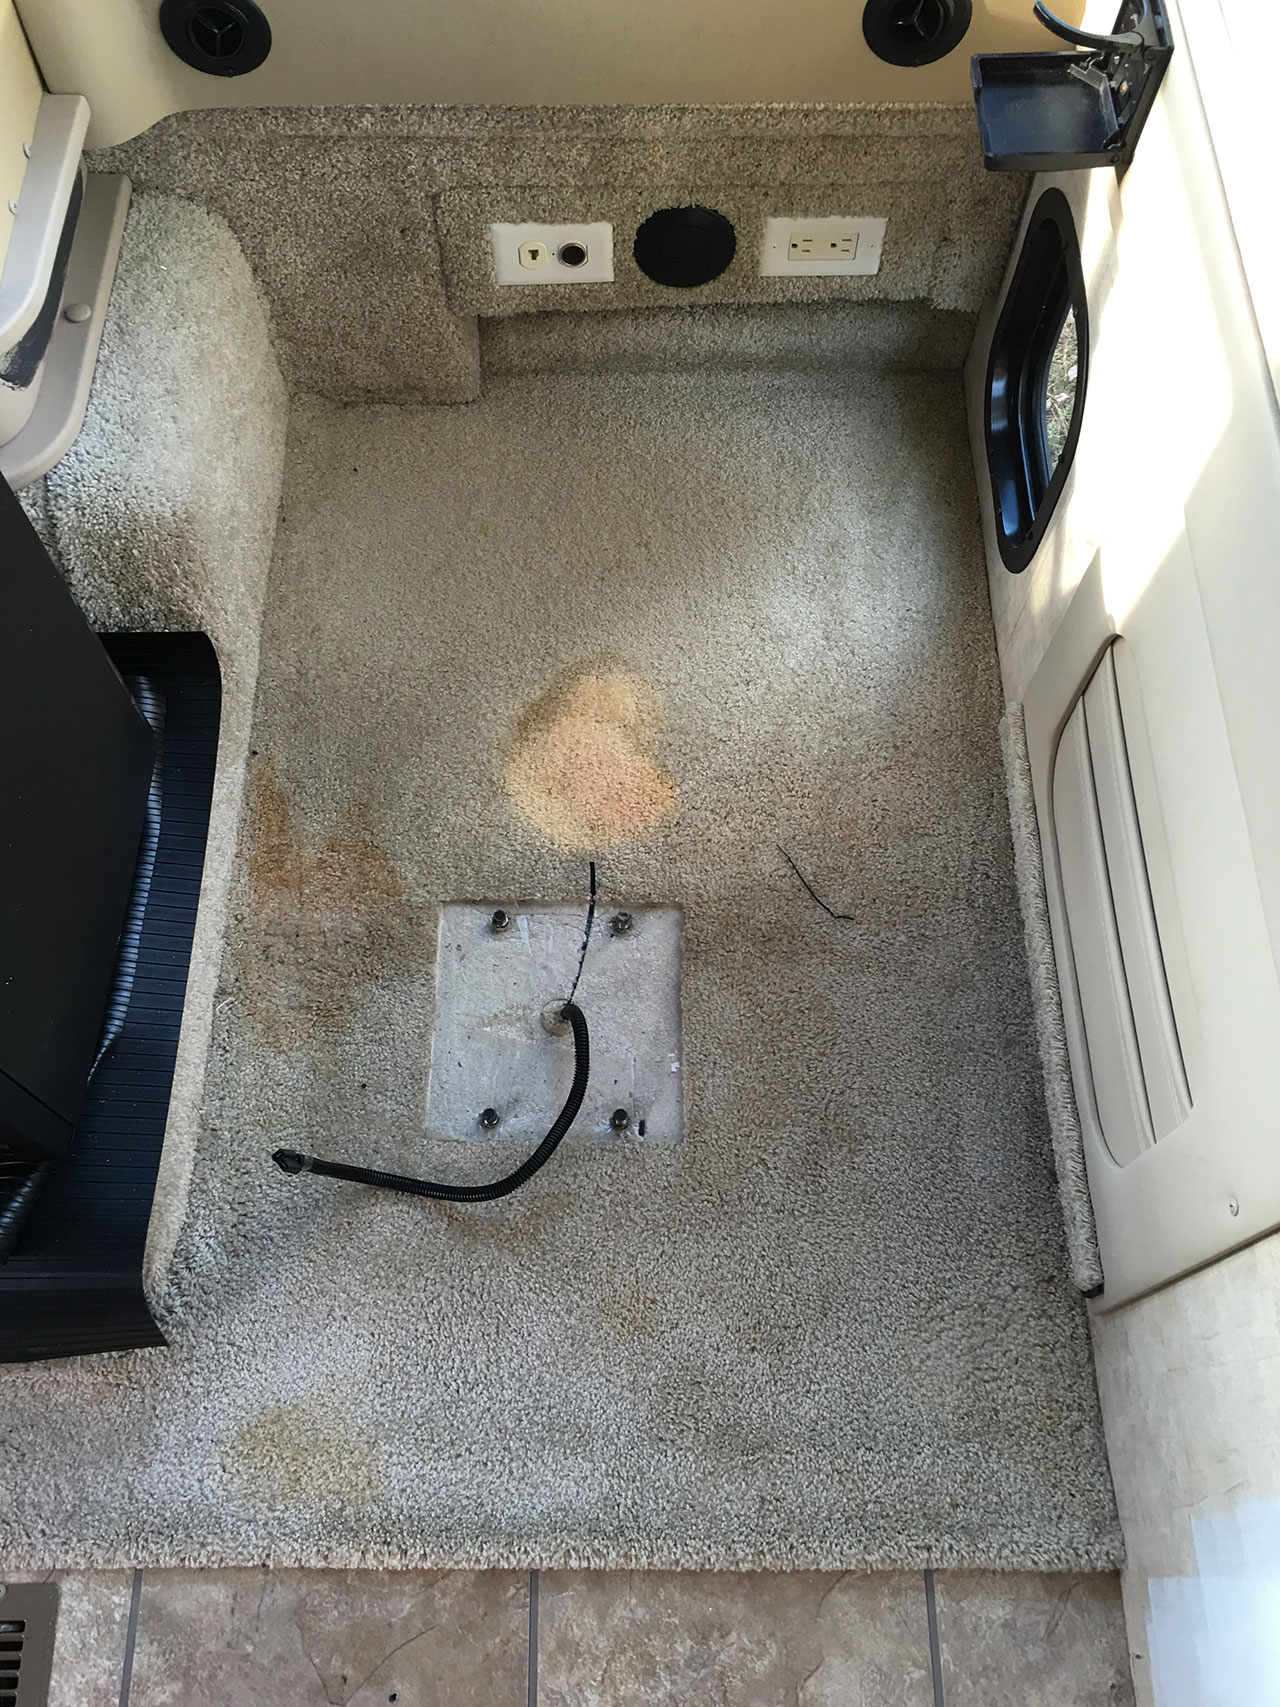
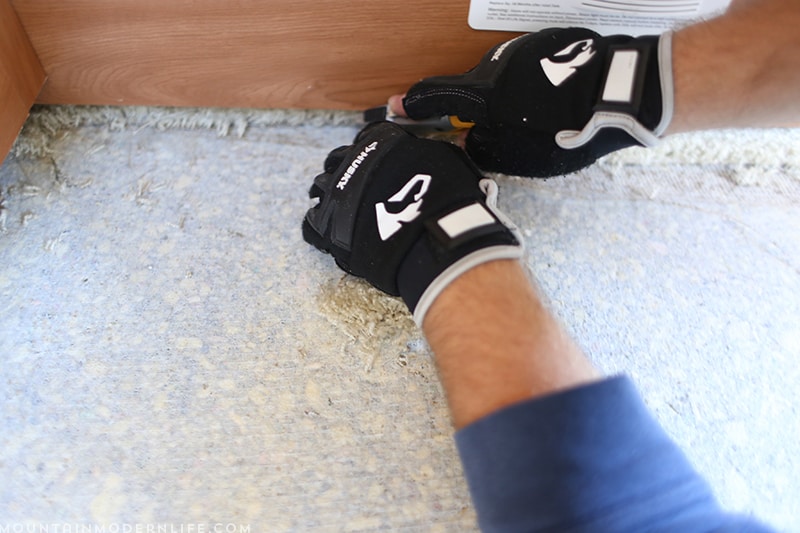
After we had all of the tiles removed we turned our attention to the carpet. For those that don’t know, the flooring is generally installed inside the RV before the walls are put up, which can make it a bit trickier to remove. Wearing gloves is highly recommended during this process.
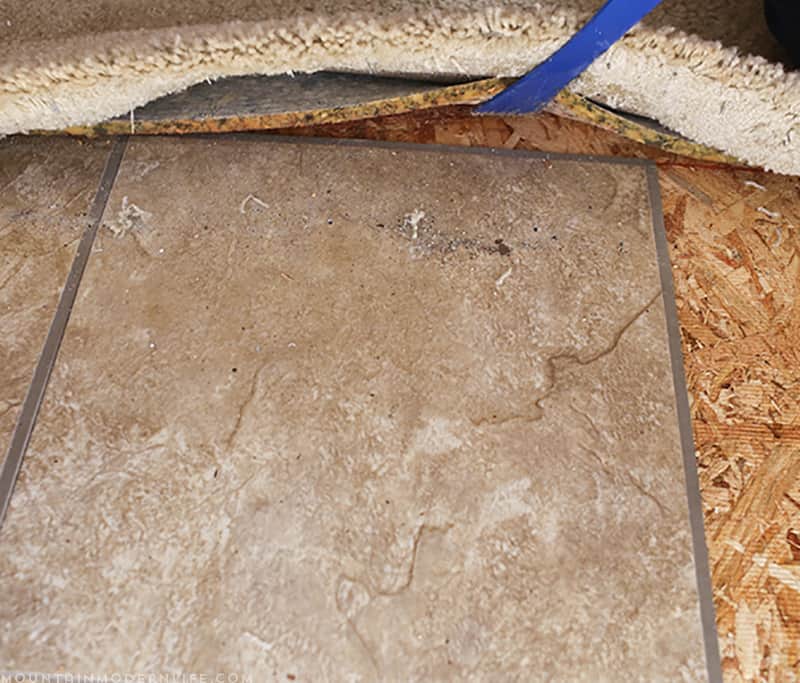
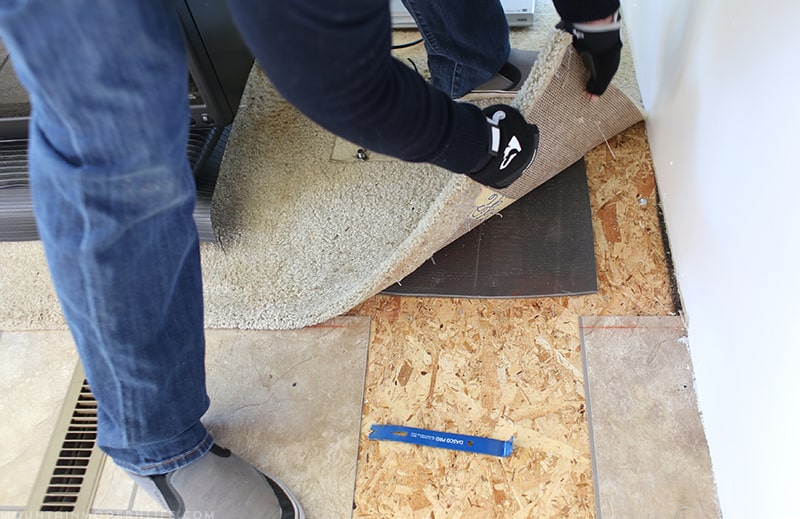
I wish I could tell you that the carpet removal process was as easy as the tile, but I can’t. Due to the number of staples used, it may take a bit of time to get all of the carpet removed from your RV. After seeing the number of staples used in the carpet of other motorhomes, I actually think we were pretty lucky. Even so, it was still rough.
I used several different tools in an attempt to gain any advantage I could, but the most useful was the utility knife and a pair of square-headed pliers.
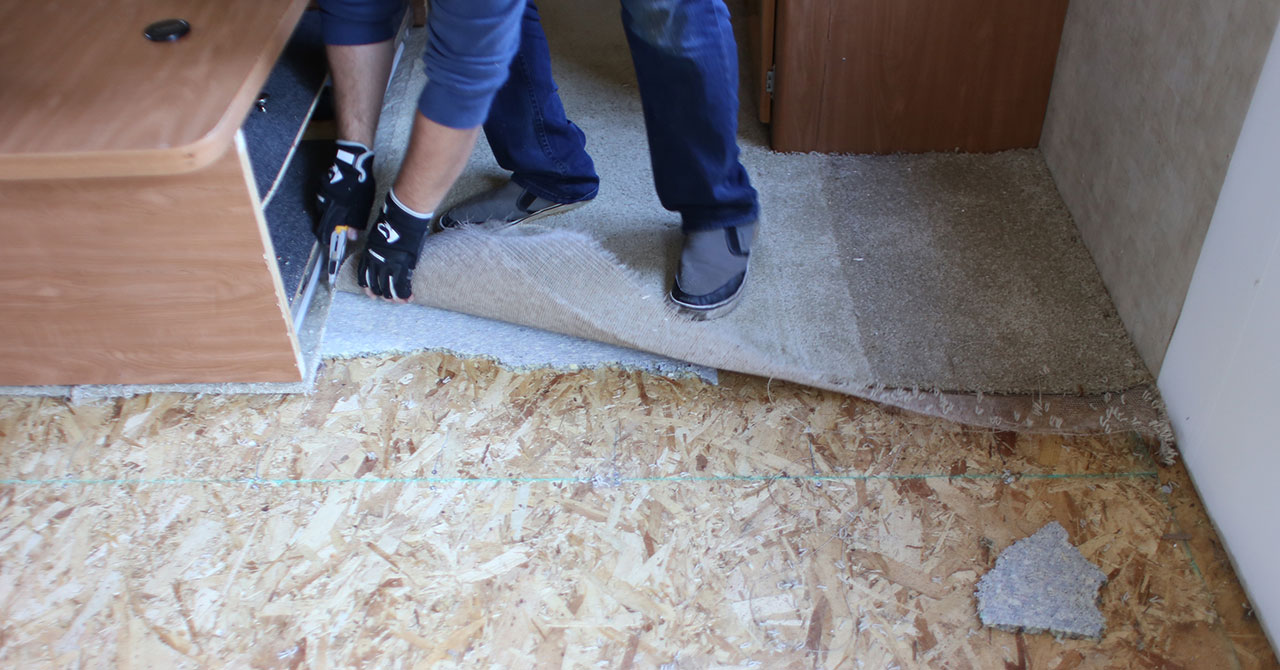
You may get frustrated and exhausted while pulling up the carpet, but know that the outcome will be well worth it. You just may never want to see another staple. Ever. Again.
Do I need to replace the RV flooring under the bed?
For us, the answer to this question was no. We have seen where other people completely removed their bed frame in order to get the flooring underneath. However, the mechanical system for our bedroom slide-out is actually located under our bed. (This is also the reason we had to nix the murphy bed idea.)
For this reason, we decided it would be best to cut out as much carpet as possible before installing the flooring around it.
We removed the panel at the foot of the bed in order to make this process a little easier.

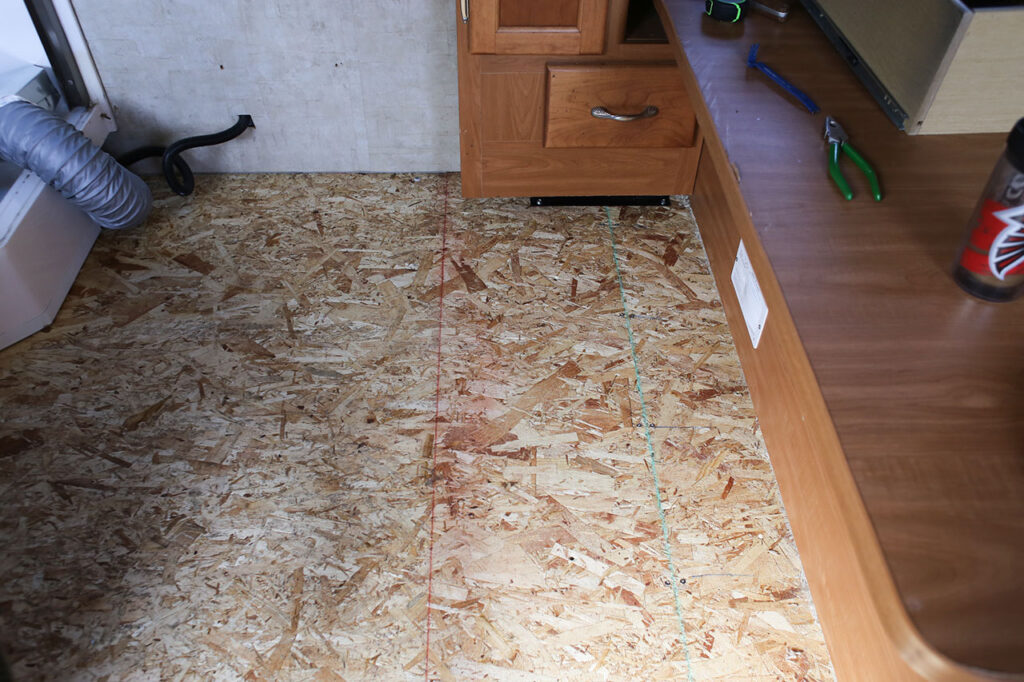
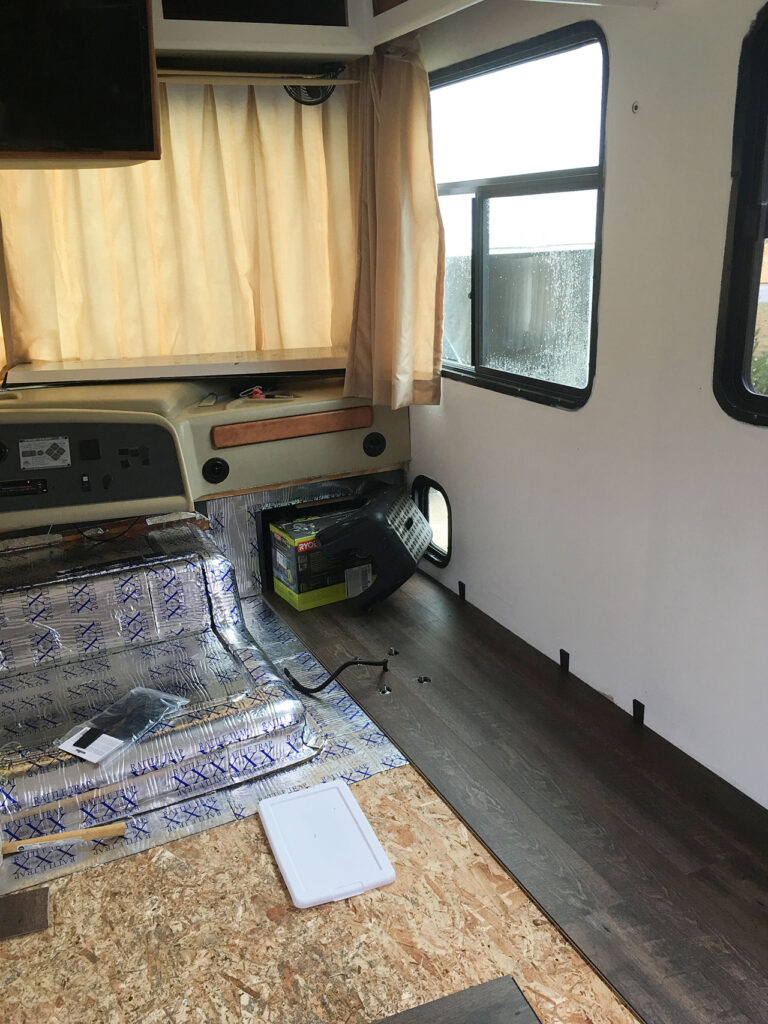
Once the old flooring was removed we vacuumed the subfloor and made sure it was clean and smooth.
How to Cut Luxury Vinyl Plank Flooring
You can cut the flooring planks by using a utility knife and a leftover piece of flooring, or a square. I opted for the square when cutting straight lines, however, as you progress through your RV you will notice many detailed cuts you need to make. For those cuts, I used our jigsaw. And while a table saw may not be necessary (depending on your flooring thickness), it sped things along and made the process even easier. Especially for a few pieces that we needed to cut down pretty narrow.
How to Install LVP Flooring in a RV
When installing the flooring in your RV you will want to start with the planks against the longest wall in the unit.
Once you have your flooring in hand you will see that it has different connectors on each side that interlock. You will want to have the female connector of the plank facing away from the wall, as the male connector comes down on top to connect.
Ok, so now you are ready to lay your first piece on the LONGEST WALL. Make sure to use your spacers to create space for the flooring to expand and contract with the climate changes.
In a rush to replace the RV flooring after all of the obstacles we hit, I ended up starting our flooring against the passenger side wall (which is not our longest wall). Once past the kitchen cabinets, we had to start a brand new section from the back left corner of the RV and start coming back toward the front. We had measured the distance from side to side in our RV at three different locations and they all lined up so we knew that it would all come together, at least we hoped it would. Luckily it did and we didn’t need to use a transition strip. As long as you follow the included instructions you should be good to go.
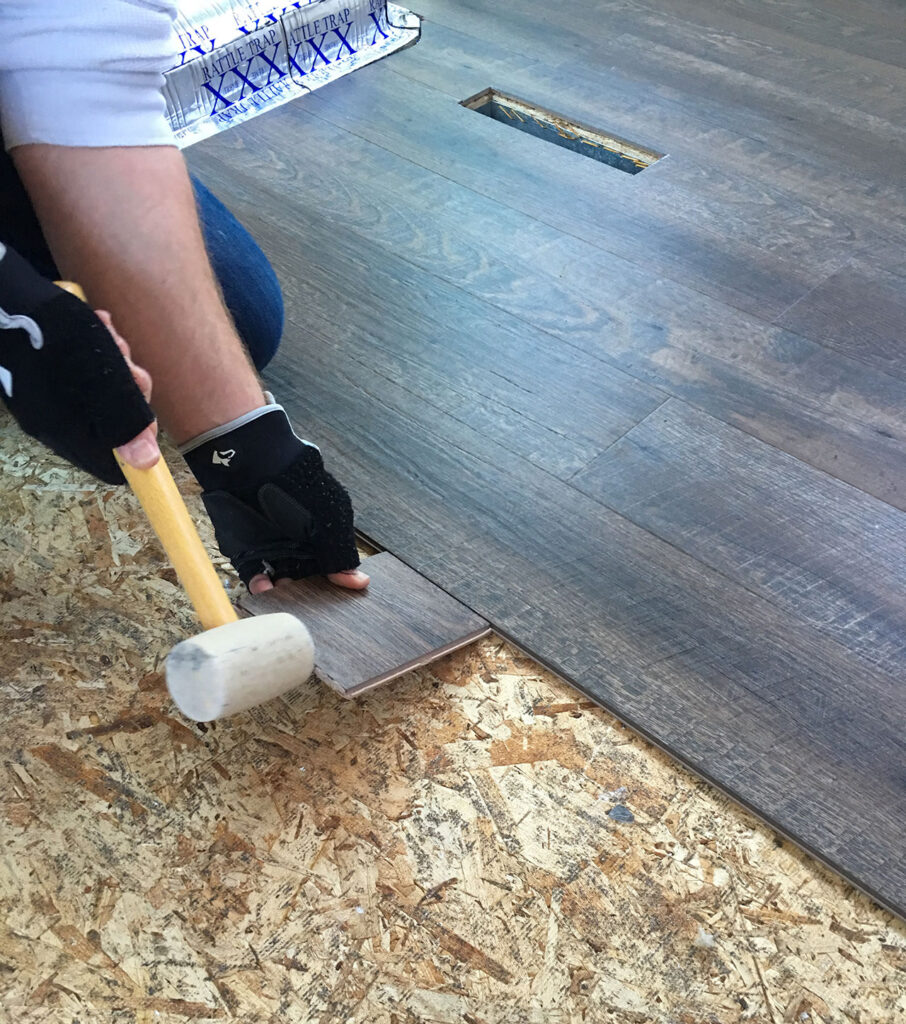
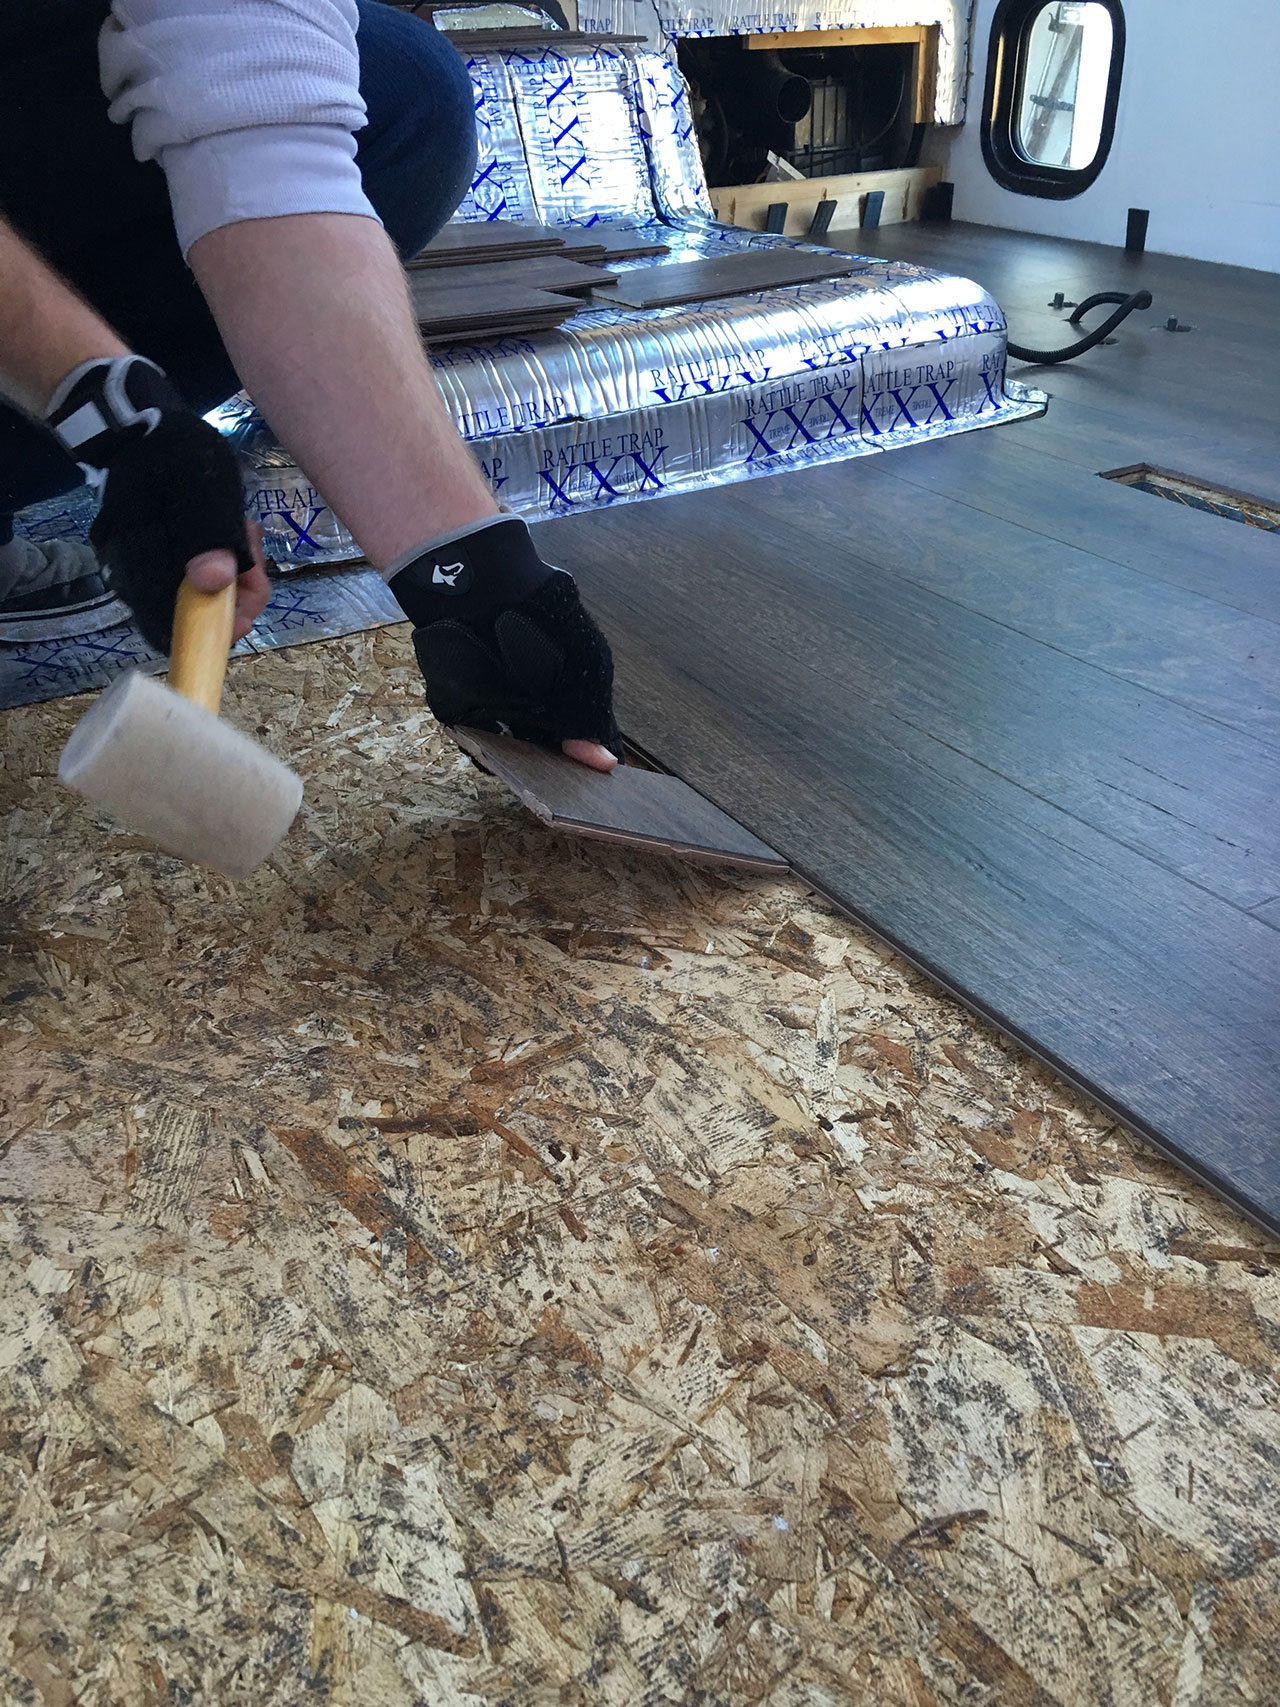
Line the female connector from the first piece up with the male connector of the second piece and give it a slight tap with the mallet to secure it. Continue this process down the length of the wall.
Once you arrive at the end you may need to cut the last piece to finish the row (when doing this, do not cut off the side of the plank with the connector you need).
Use the leftover piece from your cut to start your next row, this is an easy way to ensure your joints are staggered.
The angle-tap installation makes this process pretty easy. Just make sure to attach your next piece at a 45-degree angle then push down to ensure they snap together. Then securely attach the end with a few taps from your rubber mallet.
It’s important to remember that you don’t want to have any pieces that are less than 12 inches long. If you do not have to cut one to fit in the end you will still want to cut a piece to start your next row. I say this because you do not want the seams of side by side rows to match, in fact, the seams should be staggered at least 12 inches apart.
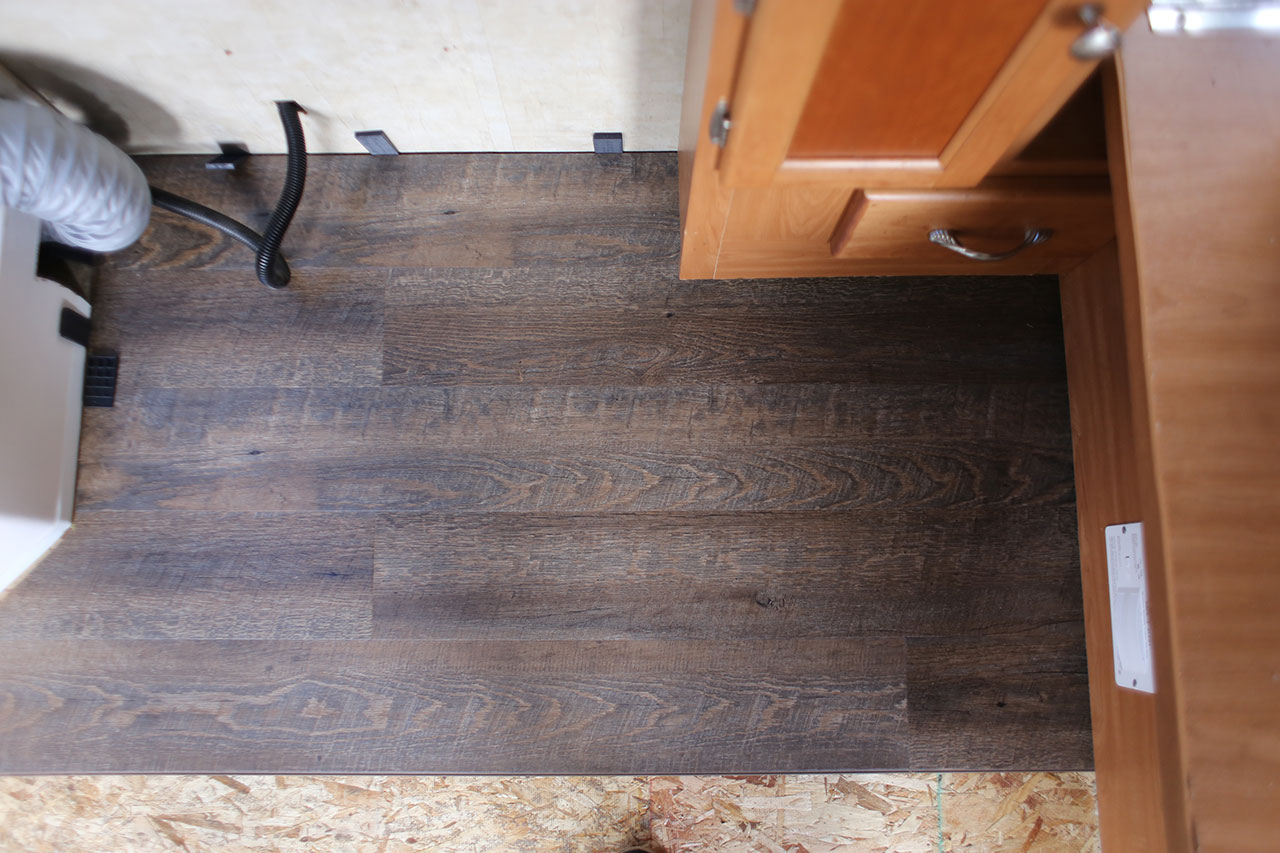
The only area that we didn’t follow this was the small 3-inch gap between the stairwell and our kitchen cabinets.
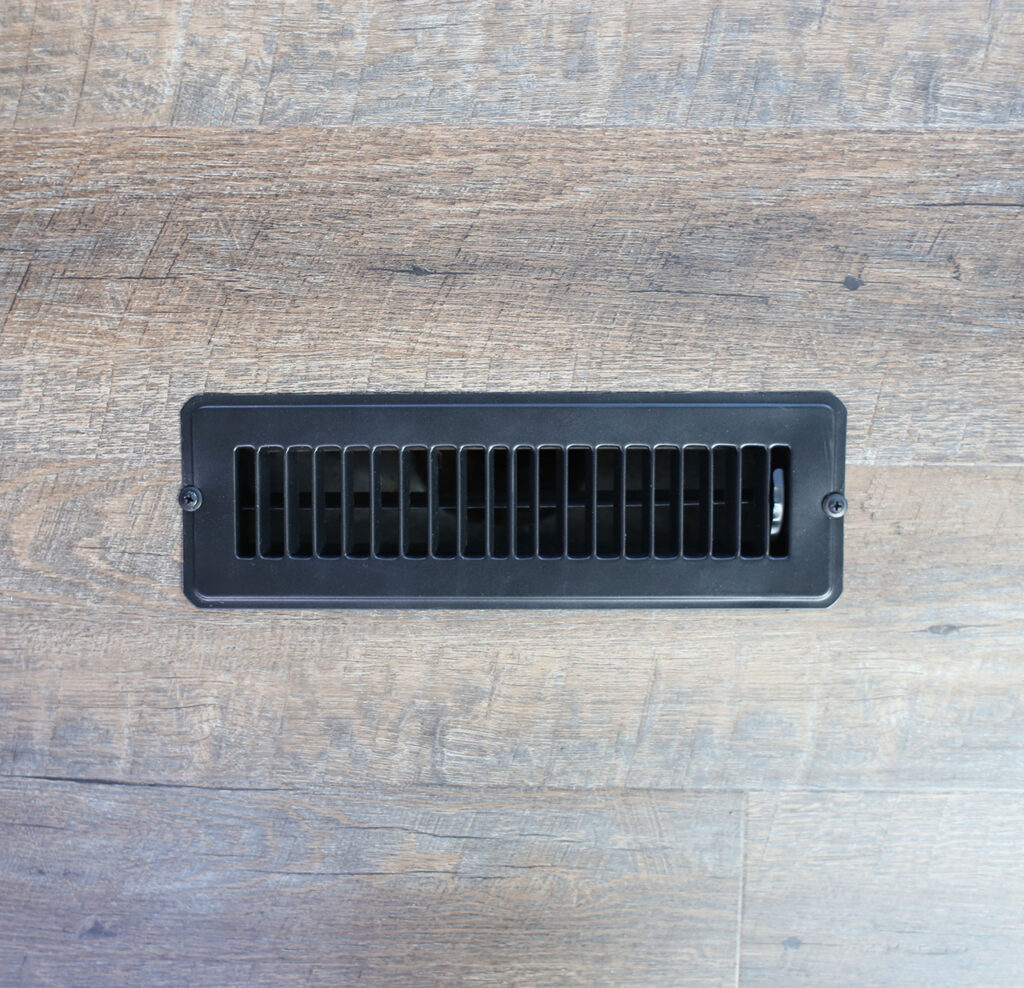
At one point we considered completely removing the kitchen cabinets, but due to the water heater being secured underneath them we decided it wasn’t necessary. I do recommend keeping your vents inside the cabinets unlike we did. Of course, removing them from the floor is a good idea.
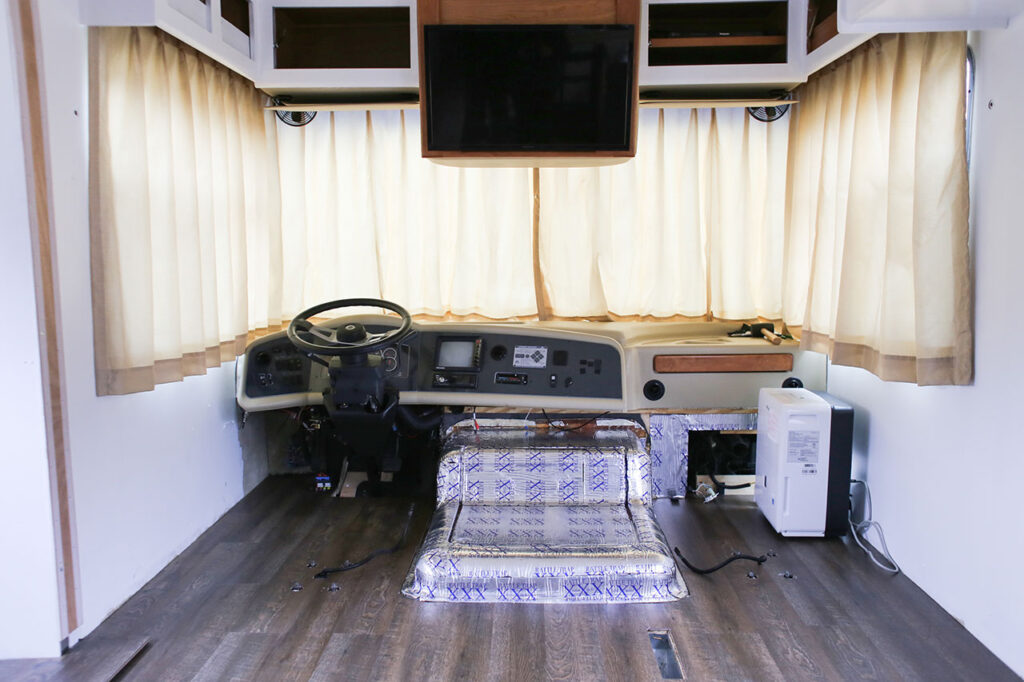
Cutting Holes for Electrical Wires and Chair Bolts
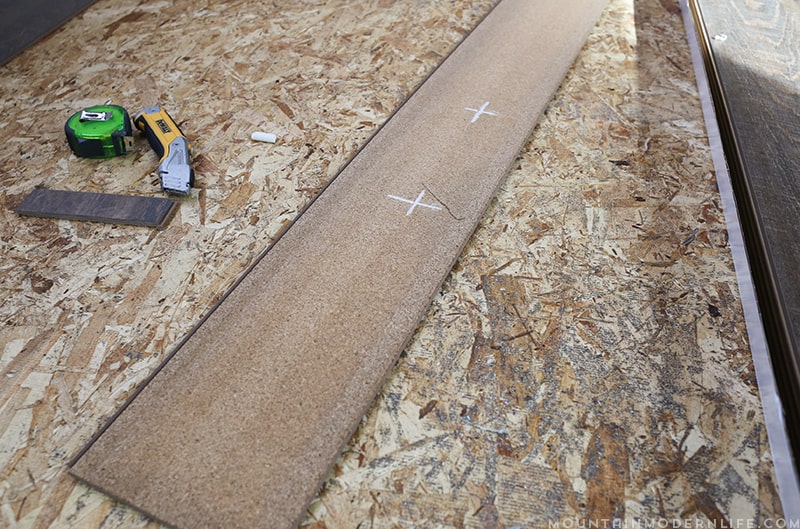
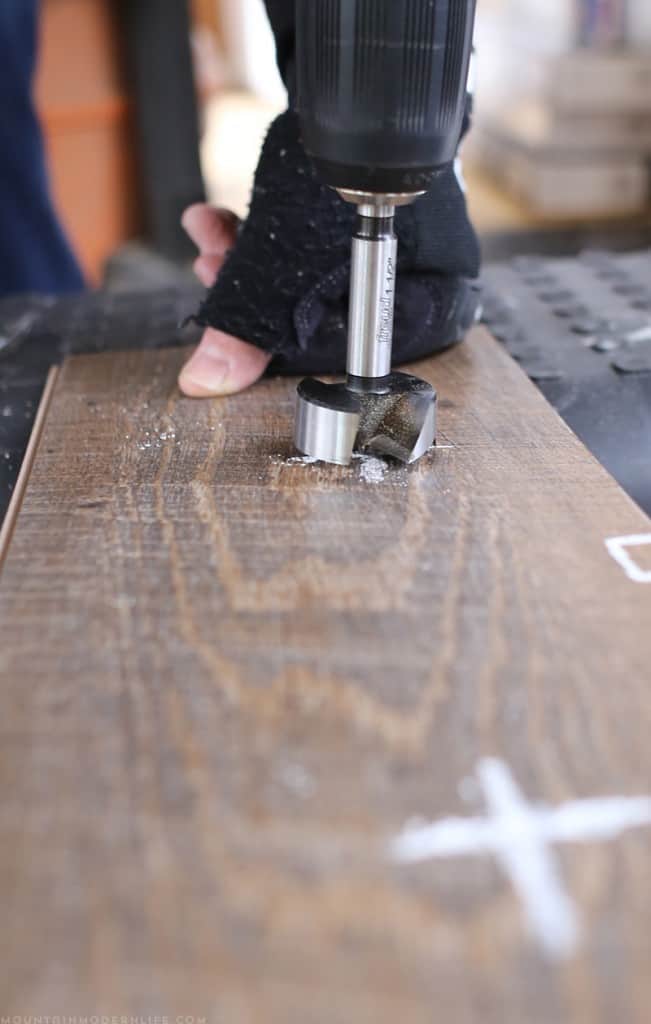
We didn’t want to leave any of the carpet upfront so we removed our Captain’s Chairs, which also allowed us to run the flooring throughout. This, in turn, left the four bolts for each chair that we had to operate around. We measured out the exact location of the bolts on the planks and then drilled the holes with our Forstner Bit. Our bit size was 1 1/2 but with every RV being different you should find the size that is right for your situation.
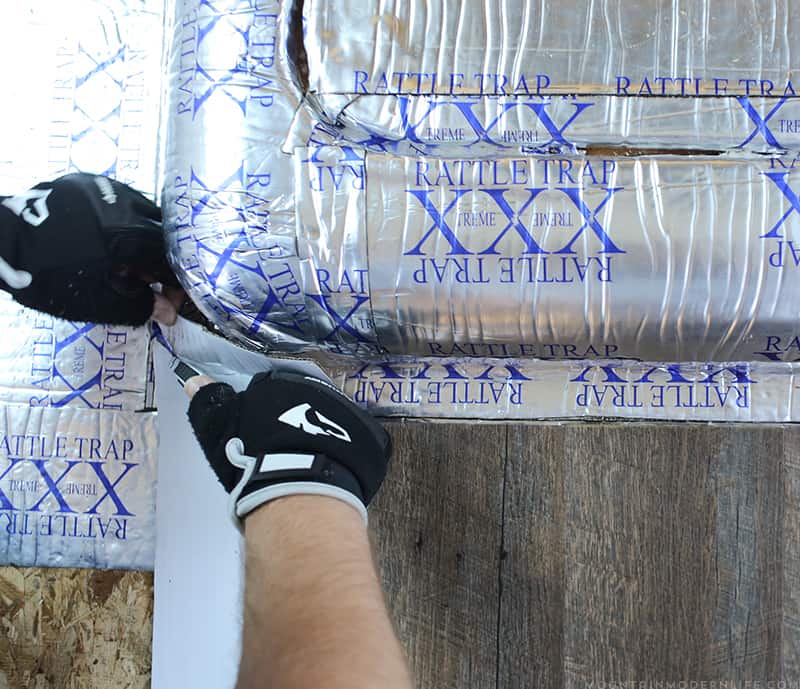
Installing LVP Flooring Around the RV Doghouse aka Engine CoVer
If you don’t have a motorhome, you won’t need to worry about this. The framing around the engine cover gave me a bit of anxiety in the beginning. I mean I was just getting started on the install and I had already drilled out the holes for the bolts of the captain’s chair and now I would have to make the flooring hug around the doghouse/engine cover.
Thankfully, it wasn’t nearly as bad as I had anticipated. I used cardboard from one of the leftover boxes from the flooring to create a template. As you continue throughout the RV you will need to make other precise cuts, so I suggest keeping the cardboard boxes in order to make your templates.
Installing LVP Flooring on the RV Slide-Out
Every RV is different. So, unfortunately, there’s no cookie-cutter way to replace the RV flooring in a slide-out. We wrote a separate post on how to update the flooring in a RV slide out here, or you can watch the video below.
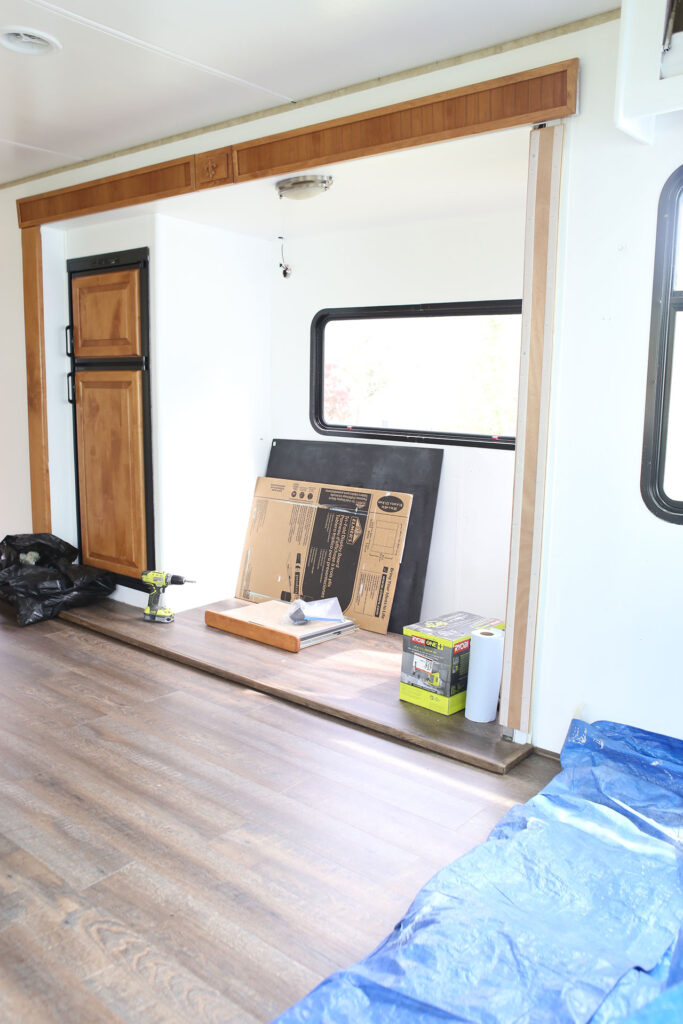
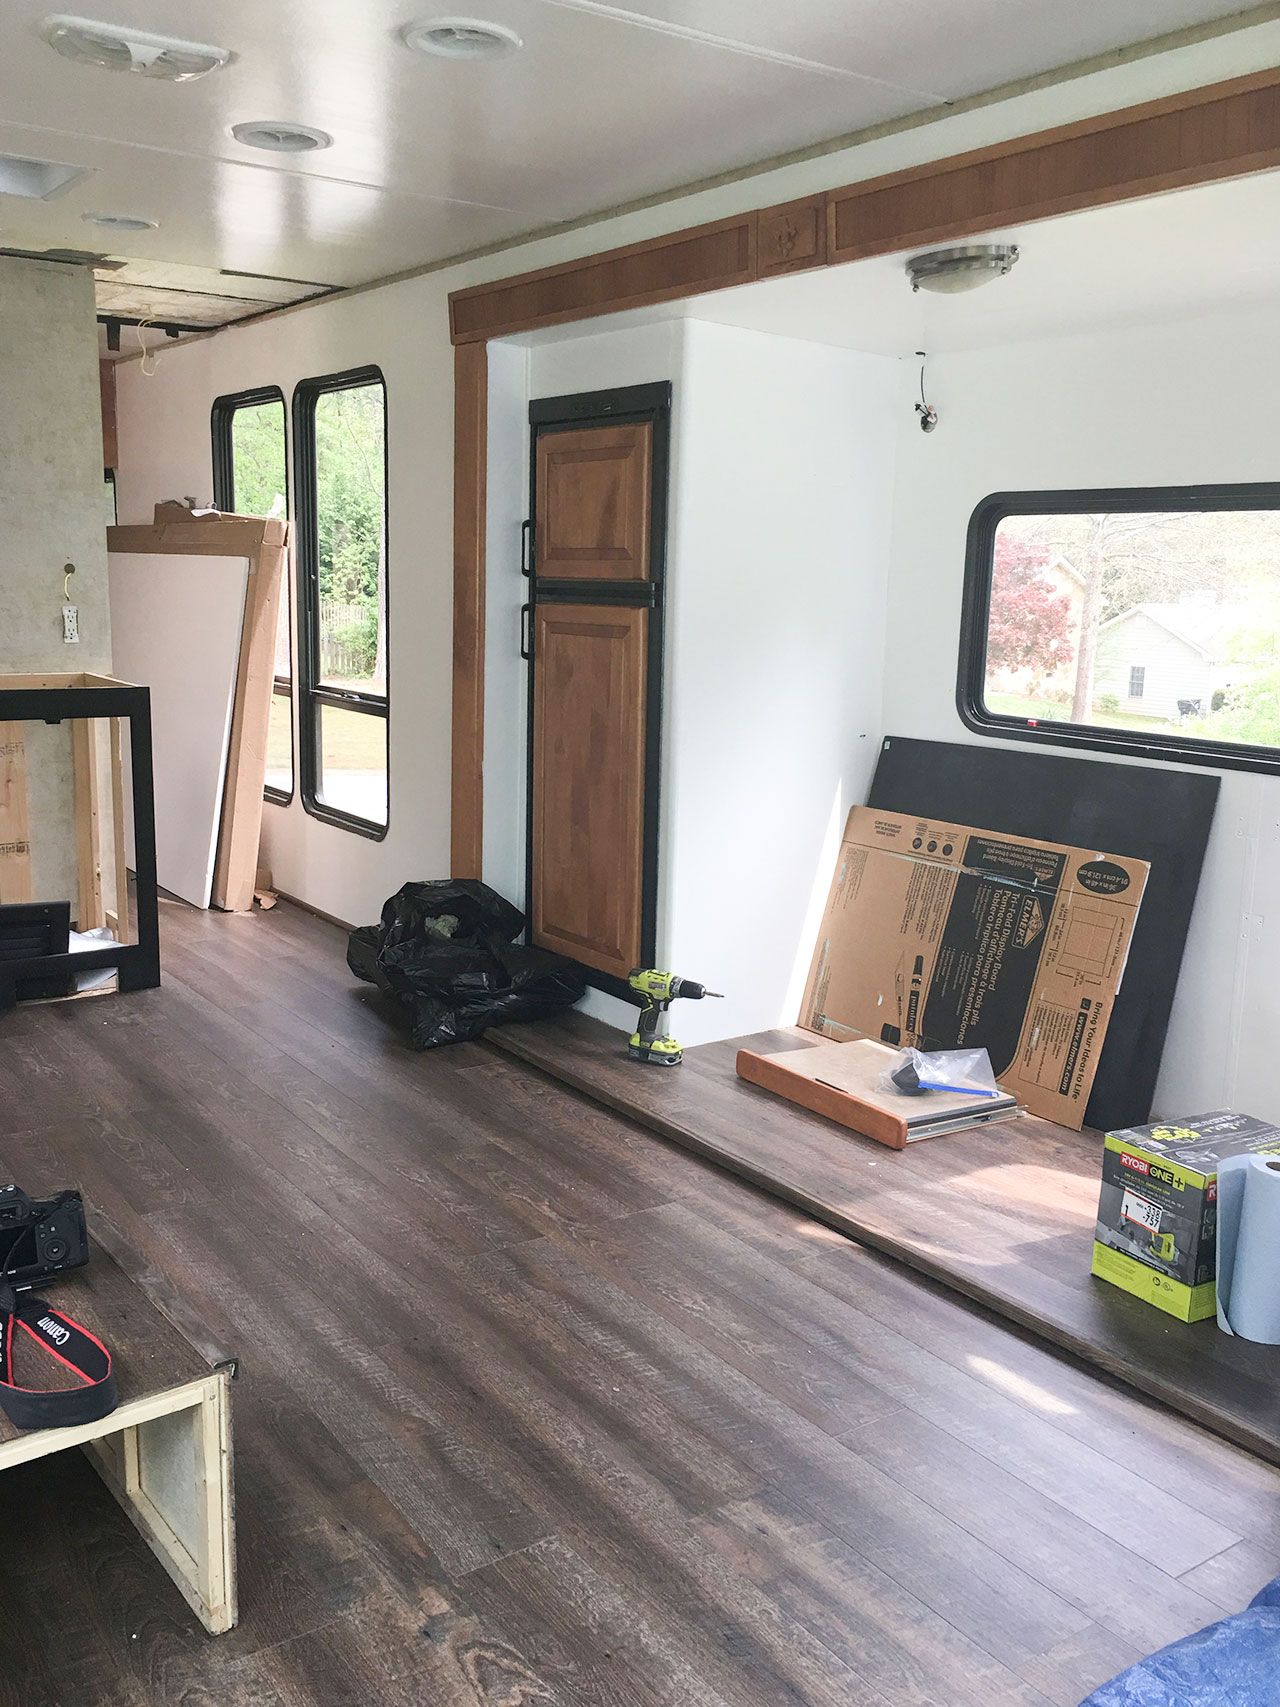
Adding Quarter Round Trim
We added quarter-round trim around some areas of the RV using our nail gun (you may choose to add a baseboard instead of or in addition to quarter round trim). Use caution whenever screwing in or nailing items inside the RV. We used smaller nails along the edge of the walls and it seemed to work just fine, though you may want to consider other options like construction adhesive.
We have custom furniture plans in the works so we didn’t add trim everywhere as you can see in some of the photos. We figure we will wait until all of the furniture (and walls) are back in before finishing up the rest of the trim.


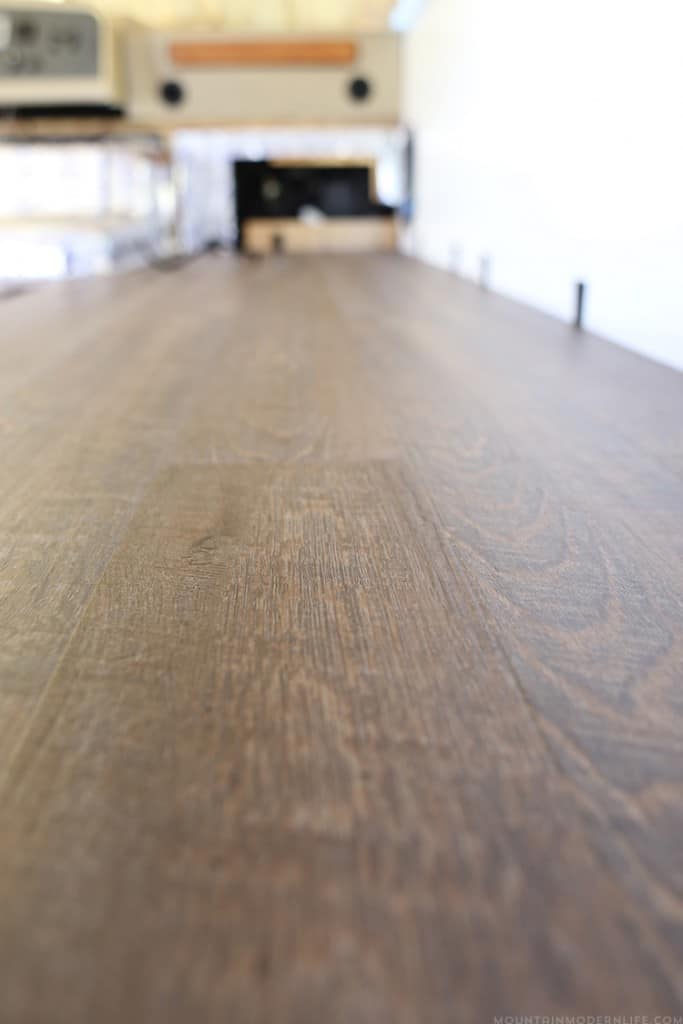
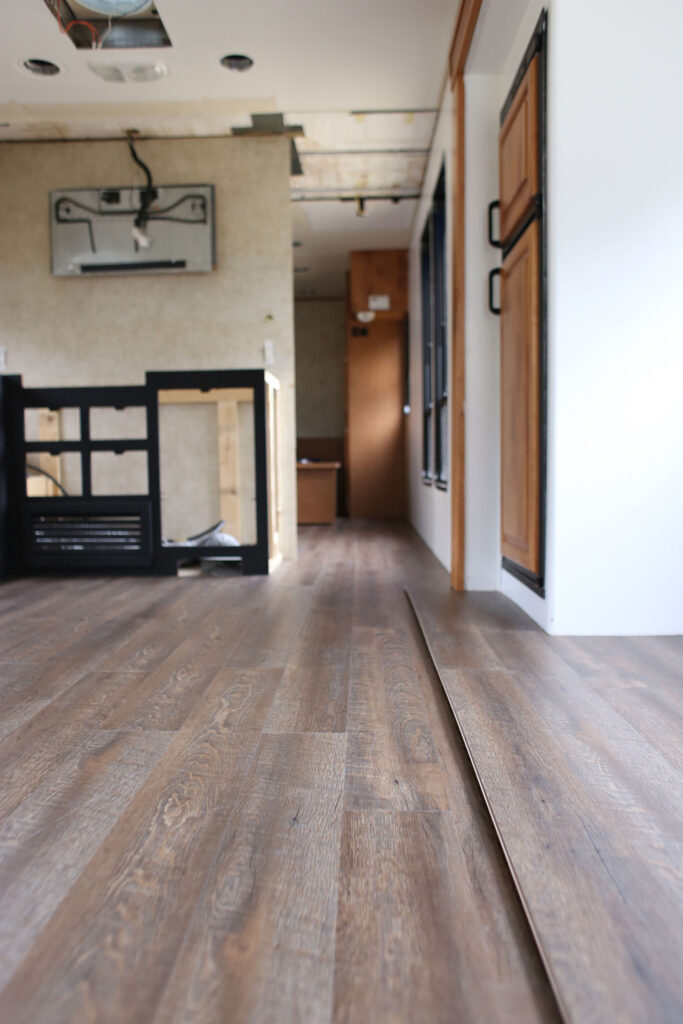
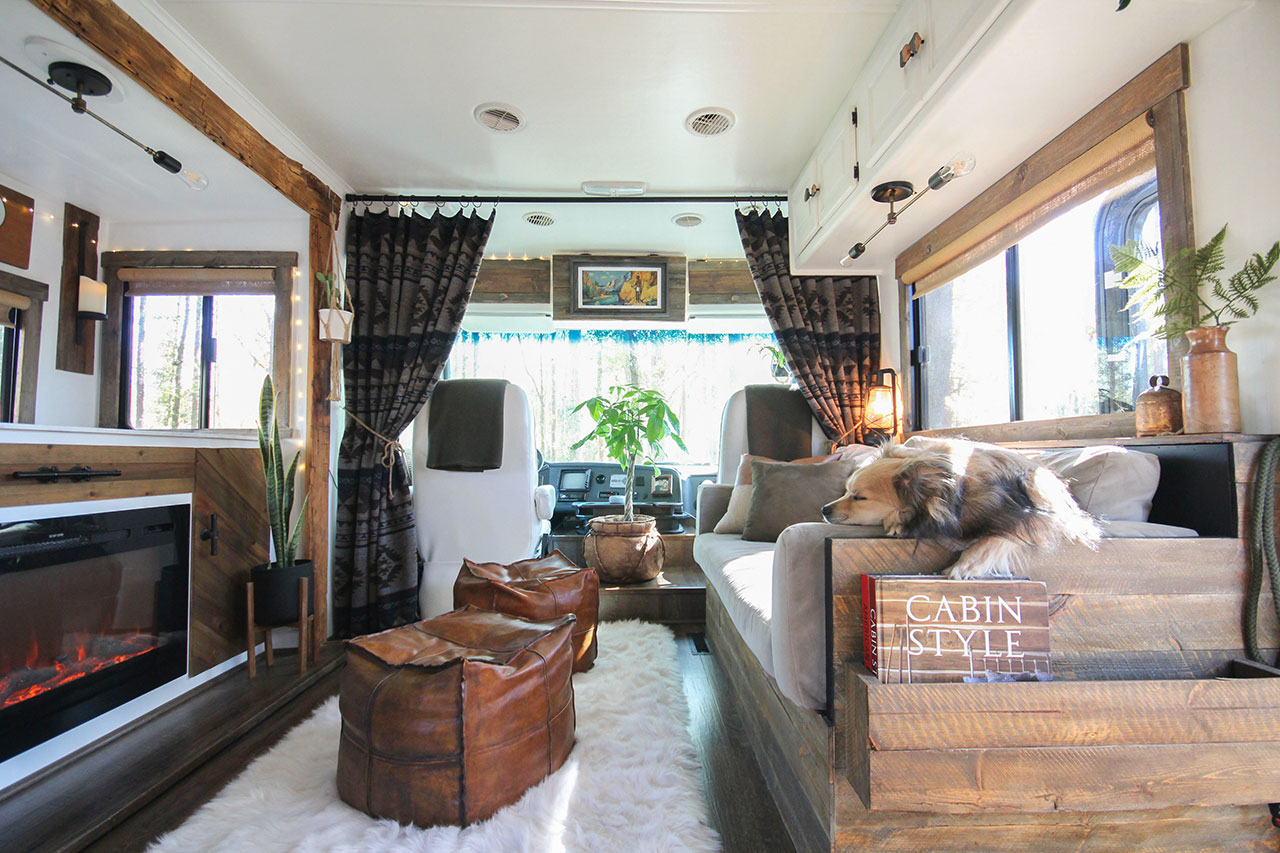
It may not be perfect, but we are both excited about how it turned out. It’s certainly the first step in transforming our RV into our rustic modern motorhome.
Here are some updated photos:

Well, that about wraps it up for how we replaced the RV flooring. I hope this post was helpful for you or guides you in the right direction. And if you plan to update your flooring be sure to stop by Floor & Decor for beautiful yet affordable options that are easy to install.
What I (Katie) would do differently
Our floors are pretty dark, much darker than I anticipated. Looking back, I wish we would have chosen a lighter floor color.
In my experience, most people fall into one of two categories:
- You want to see dirt so you can clean it.
- You want to hide or camouflage dirt, so you don’t need to clean it as often.
I fall into the first category, at least in this season of life. While it can be annoying to see dirt or pet fur tumbleweeds, I’d rather know they are there. I can decide if I want to clean them up right away or not, but either way, I want to see the dirt rather than have it camouflaged into our dark flooring.
After traveling around in an RV, I can also tell you that different locations have different bug issues. When spiders, ants, or the dreaded Asian beetles make their way in, I want to know about it. If you fall into this category, you too may want to consider going with a light or medium colored flooring, and the same goes for the paint colors you choose. Lighter flooring will also brighten up the RV interior.
Whether you see it or not, the dirt is there, but I can understand the desire to make it less noticeable. If you prefer an interior that hides dirt more than showcasing it, you may want to consider darker colors. Once you understand your personal preference, it’s easier to make a decision based on your lifestyle and needs.
If you’re still on the fence, there are several websites with a flooring visualizer where you can upload a photo of your RV to get an idea of how different flooring options will look in the space. To find one of these websites, do a quick google search for “Floor Visualizer,” and multiple options will pop up. Regardless of the flooring you choose, I highly recommend ordering samples first so you can get a true sense of how the color and texture will feel. Not to mention how it feels underfoot – not all flooring is created equal and that extra cushion some offer, can make a world of a difference!
Related Posts
Additional Resources
Check out The Nomad’s Guide to Decorating ebook for more RV interior tips and inspiration.


The flooring looks amazing, I can’t wait to see it this weekend!
This is such a great post! I’ll be bookmarking it for sure – we plan to invest in an RV this spring/summer and I’m sure we’ll be going the fixer upper route. The new floors look great!!
Thanks so much Mandy! How exciting, I am sure your RV will look amazing and we would love to see some photos when your finished.
So helpful!! Thanks for sharing! We just pulled up most of the vinyl and carpeting in our RV and were totally stumped at what to do with the lip of the slide, but I love your solution. How well has the flooring held up in terms of scratching? Also, I’ve heard the slide can give the flooring under it a bit of a beating, have you had any experience with this? Thanks so much for the great piece!
Hey Tayloe, I am glad this was helpful, I know we learned a lot going through the process. Our flooring has been holding up really well, no real concern with scratching as of yet. As far as the slide goes, we had heard the same thing about the slide beating up the flooring. To counteract this we have the trim piece (a piece of outside corner moulding) ever so slightly off the ground, this in turn makes sure that the floor is not scratched when the slide goes in and out. We are going to be posting more detail in the future about how we did this. Thanks for stopping by and best wishes on the rest of your flooring project.
Its been awhile since you posted this, i was wondering how the flooring is still holding up? We are getting ready to Renovate our 2003 fifth wheel to update the old green carpeting and we are a little nervous about the slide and the Flooring under it.
Our floors have held up awesome so far! I’m honestly surprised with how durable they’ve been, and no lifting or anything since we’ve been traveling. They also never got scratched..until this past Christmas when I slid a planter filled with heavy rocks across the engine “doghouse” (we put our tree in it). That put a small scratch in the floor but not surprisingly. Ooops. Other than that we’ve slid chairs and all sorts of things and never had an issue.
This is GORGEOUS! OMG – I can’t wait to see shots of the entire thing!
Thanks Amy, we are pretty excited to have it all together as well.
WOW this is an incredible amount of work but it looks amazing! LOVE how you showed all the necessary steps and walk us through it.
Thanks so much Jennifer, it was a lot of work but definitely worth it!!
Were purchasing our RV this weekend and i’m super nervous and excited all at the same time to get the remodel going! neither one of us are “handy”.. so fingers crossed!!
How exciting Tracy! Have fun and we would love to see the progress you make! We are doing a lot of these projects for the first time too so just try to be patient and know the end result will be worth it 🙂
This is the most complete post I have read to date. Thanks so much. Hubby is really concerned about the slide I think this will give him some relief.
Hi Pat,
I know it was a lot of information but we certainly wanted it to be helpful so that’s the best compliment you could give us 🙂 We even wrote a second post with tips for installing flooring inside the slide-out, which you can find at the link below:
https://mountainmodernlife.com/replace-the-flooring-inside-a-rv-slide-out/
Have a great weekend and let us know how the flooring install goes!
Katie
Hello , sorry for my English, I speak French. I would put the same floor attorneys in my rv but I live in Canada. Floor & decor not book there. Do you know another similar mark ? Thank you !
Hey Sebastien, I believe that Floor & Decor ships to the United States and Canada, you may want to give their website a gander. Otherwise you may just want to do a google search for Rustic Flooring in your area, hope this helps!
How did you get the carpet out from underneath the slide – the carpet from the coach floor that goes underneath it?
Hey there, we actually didn’t have carpet underneath the slide-out. We had a vinyl tile that was below, and to be honest that was a real pain to get out as well. Once we had the slide out in the out position with the vinyl tile removed (for the most part) from the main floor and the carpet removed from the top of the slide out I was able to reach underneath with a pair of needle nose pliers and pull out little piece by little piece of the vinyl tile :(. Sorry I don’t know of an easier way.
Love post on you new flooring in the RV. We have a 2005 Monaco Diplomat and need redo ours. Your pictures and explanations are so helpful. Great job, going to show my husband.
So glad the information was helpful to you!! If you have any questions please feel free to ask and we will do our best to help guide you in the right direction.
Hey Eric,
I’m doing my 91′ Fleetwood Limited and decided to remove the dinette and put a loft bed for my son and 72 inches of cabinets underneath. Should I lay flooring underneath it all or set the cabinets and bed and floor around them?
Hey Larry, that is a good question. I think it boils down to a matter of preference. When we built the media cabinet it was on the slide out and I wanted to flooring to go underneath in order to help create a tighter fit. However, we didn’t remove the lower kitchen cabinets so I ran the flooring up to the edge for them. Both ways look good and serve their purpose. I do want to say that after we had our kitchen complete I noticed I would not be able to fit trim down because of the cabinet doors and vents, so you may want to consider that as well. Hope this helps.
Hi Eric,
The flooring looks great! I own a 2007 Allegro Open Road (very similar to yours) and I also want to replace the carpet in my RV. My plan is to go with a laminate as well. Will you please answer a couple of questions for me? Regarding your refrigerator slide-out, does the rollers on the slide come into contact with the main floor? If so, what did you do to prevent the rollers from damaging the flooring?.As the slide is fully extended, it tends to slightly drop down as it seats in the fully extended position. Does the front edge/corner edging of the slide hit or rest on the main floor? if not, did you do anything to prevent it or is their enough spacing to begin with? Thank you for your time. Im really impressed with the transformation you are doing to your RV!
Hey Steve, thank you much for the kind words :)! I will try my best to answer your questions.
The rollers on the refrigerator slide-out do come in contact with the main floor, however it is very little. It is almost more of a glide over, rather than a full contact. In the beginning before I had the flooring in place on the slide out, I could see that the middle roller didn’t come in contact with the main floor, though I am sure it does now. For the second part, I didn’t change anything, the rollers just haven’t caused any damage to the main floor. I would pay close attention to this though, because depending on the thickness of your new flooring it could create more contact than the flooring we chose.
So when our slide goes completely out, neither the trim or the flooring actually hits the main floor. For us there was enough spacing to begin with. With that said, I did end up adding a piece of plywood for underlayment along with the thickness of our flooring which raised it up a bit. But before I added the underlayment and just had the flooring, it still did not rest on the main floor.
Side-note: Our trim piece is about 1/4 inch off of the main floor (when fully extended), but there is enough of a give in the underlayment and flooring that if you step on it, it comes in contact with the main flooring. You can’t feel the give when you step on it, and it hasn’t done any damage as it rest on the main floor when pressure is applied.
I hope this makes sense and helps you along the way, if you need clarification or have any other questions please do not hesitate to ask and I will try my best to help. And again thank you much for your kind words!!
Eric,
Thank you for responding! Your answers have cleared up my questions. And, you have given me a boost of confidence to replace my flooring. Thanks again and safe travels.
Steve
This is one of the most detailed, relevant, and well-written articles I’ve ever read on RV remodeling. Thank you for being so thorough.
Thank you so much Kathy for the kind words! We hope that it was helpful 🙂
Thanks for sharing your transformation. It looks GREAT! Wow! We thought about doing pre manufactured flooring but decided to do something we’ve never seen done in an RV. Recycled PALLET WOOD flooring. Check out our flooring install here https://www.youtube.com/watch?v=ueTKXvHT0vI. We are very happy with how it turned out! Check out all of our RV renovations @ http://www.youtube.com/DuetJustusVlogs.
Thank you much for the kind words! We really enjoyed your video on the pallet wood flooring, it turned out fantastic. And unless you’ve done quarter round in an RV you really can’t understand the struggle haha! Can’t wait to see more of your projects!
hi Eric the flooring looks fabulous!! is there a special kind of vinyl flooring you have to use for rv?
Hey Deb, thank you much for the kind words :)! We used the NuCore Ashen Oak Hand Scraped Plank with Cork Back, it is exclusively at Floor and Decor. We have loved it so far, and it was extremely easy to install. This link goes to the NuCore section of Floor and Decor’s website https://www.flooranddecor.com/laminate-vinyl#prefn1=productSubtype&prefv1=NuCore
Hi Eric and Katie!
Thanks so much for taking the time to write such an in depth post. My fiancé and I are buying our first RV this week (a 2001 Coachmen Catalina) and will be renovating the inside ourselves, starting with the floor. I’ve looked at both vinyl and laminate options, and have read similar posts on installs for both, but am still kind of at a loss for which way to go.
We’ll be living in our rig full time, and traveling cross country continuously for my work. Very rarely will we be parked anywhere for more than a few days or a week at a time. I’ve read that floating floors can experience separation after extensive travel in an RV, and it’s been suggested to use vinyl planks in conjunction with adhesive instead. Have you had any issues with separation or movement with your floating flooring over time?
Thanks in advance for any insight you might be able to offer 🙂
Elli
This is really great stuff that you’re putting up. Clearly, we all appreciate these posts. I have a question on the main floor replacement.
How did you handle getting the new flooring UNDER the slideout? I’m in the process of re-flooring my tagalong camper with vinyl plank flooring and I’m at wit’s end on how to handle that part of the project. I’d love some helpful suggestions on that portion of the project.
Hey Andy, Thank you much for the kind words! I hope I am able to give you some direction. Our slide out is one that doesn’t come completely flush with the main flooring in the RV, therefore it leaves about a 1/2 and inch section for the main floor flooring to hide underneath the edge. I basically cut the main flooring next to the slide so it would slip underneath the lip of the slide out.
I have seen some slide outs that come completely flush with the main flooring. I haven’t specifically worked with this situation, but if I were I think I would take the main flooring up to the edge, then I would look for a transition strip at say Home Depot or Lowes. Then depending on the size of my transition strip and how it sits on the main flooring, I may have my slide out flooring stop a bit before the edge so that the transition strip can come flush as the slide sinks into the fully out position.
I hope this helps, but if not you can email me at [email protected] and include some pictures so I can get a better idea of what you are working with. Also you may want to check out the facebook group RV interior ideas, I know I have seen a lot of different people post photos, and the good thing there is that there are so many different types of RVs. Anyway hope this helps.
Hi guys … great job of educating. I have read that large temperature variations can cause problem with seams on vinyl planks … we’re looking at near freezing to over 100 degrees when not in use … what’s been your experience (I just bought a BUNCH of NuCore for MY RV project … THANKS!!! btw, there is a cutting (not sawing) tool for oscillating saws that is not toothed, but wavy, and it went through our carpet like butter completely flush with the edges …
Hey Jay thank you much for the kind words! One of my biggest hidden fears when we began the flooring was the possible problems with the seams based on temperature. But so far we haven’t had any issues to speak of. We’ve been in weather at -25 degrees and weather at around 100 and the flooring still remains the same. I think it’s important to note most the time the weather has been between 40 and 85 but we spent at least two weeks in each extreme. We are very pleased with the way it has maintained. I wish we would have found that cutting tool because the carpet can be the hardest part haha. Thanks for the tip and swinging by, and good luck with getting the NuCore put in place I think you’ll love it!
Thank you for all of the info. Can you post information and pictures on how you tackled the step when you enter the motorhome?
Hey Linda, we were waiting on the steps because we’d planned to add a cat door down there for the litter box. Unfortunately that didn’t work out 🙁 but here in the future we’ll share a post on how we did it. Overall it was very similar to the flooring throughout as far as the process goes. If you check out the link below to how we created our custom doghouse it should give you a much better idea as well because we followed essentially the same process.
https://mountainmodernlife.com/custom-rv-doghouse-cover/
I hope this helps and if you have any specific questions I can help with please don’t hesitate to ask. best wishes, Eric
Hi, Eric.
Thanks for sharing such detailed information on how you installed your flooring. We went with the Nucore product as well and will be installing it this week. I know you’re supposed to install it on the longest edge–but does that also include the slide out edge? It’s not necessarily a wall, but I think we could install it there. There’s a little bit of a lip that we could tap the boards against. However, the slide out edge isn’t the straightest either… Any advice? Thanks!
Ashley
Hey Ashley, great question! We kind of actually ran into this same problem and learned how not to do it :). From what we learned I’d say start at the front of the RV, and on the side that goes the furtherest back without a wall interruption.
As an example we started by our passenger seat up front, but soon realized we weren’t able to put more flooring down as we came to the bathroom. That happened because we were going right to left but when we got to the bathroom we needed to go left to right. If we would have started on the drivers side with the slide out pushed out we could’ve ran a straight row pretty much all the way to the back wall. By doing this it would have allowed us to go left to right for the entire surface of the floor. Luckily for us I was able to start from the back and meet in the middle perfectly.
I really hope this helps as it’s kind of hard to explain without pictures. If there is anything I can further clarify or answer for you please don’t hesitate to ask. Best Wishes, Eric.
Getting ready to do my motorhome floors and looking for tips regarding the slides and the doghouse. Loving all your details. I chose a vinyl plank; and all carpet absolutely has to go due to full-timing with multiple cats. Because of the round doghouse we were actually thinking of laying them horizontally starting with the front and working backwards thinking it would be easier to transition the curve and not have a thin pointy plank where so much had to be cut out of two planks to go around it. You’ve given me new ways to think about covering that area.
Hey Guys,
Great article! Just curious now after having the floors a bit if you are still thrilled with them. We recently purchased an old airstream and are researching flooring options. Like you, my primary concern is expansion/contraction of the planks (leaving gaps). Thanks so much and have a great day!
Hey James! The floors have held up great so far, and are easy to clean. The only thing I would maybe change is to go with a slightly lighter color just because I like to “see the dirt” and the dark color hides it better. I know some people prefer floors that hide the dirt, so that’s really just a preference thing, and we vacuum nearly every day anyway since we have pets. Overall, we love the flooring!
I really found your information to be the most detailed and helpful of all the makeovers I have looked at. I hope to tackle my trailer in the Fall. I want to paint the interior, do wall paper, and add new flooring I know i will be referring back to this blog for a lot of help. I hope to find some talented men to assist me with my remodel. Being a woman, its not that I don’t think I can do it, its a matter of mastering the tools….. The tools get me everytime, but I will give it my all and have some great ideas for changes to the decor. I have a 2004 Jayco Eagle and it is time for an update.
Yay, that sounds so exciting and good for you for stepping outside your comfort zone! We really didn’t know what we were doing either, haha. Best of luck and let us know how it goes!
Great article as we start our rv renovation. We have an allegro open road 35 qba that looks to have the same slides. It looks like you used flooring that is 6.5mm thick. Did this give you any issues when moving the sides in and out? Did you need to adjust your slides to compensate for the thickness difference from the original laminate? Thanks in advance for your help!
Nope, we didn’t have to make any additional changes and the slide-out rolls over with no complications. There haven’t been any scratches to our floor and it’s now been over a year since we installed it. The only thing we have noticed is that a few of the nails in the slide out trim piece (not the flooring) have popped up a few times and we had to hammer them back down. Using contact cement may have been a better option for that…
Love love love your tiny home on wheels — what an inspiring space 🙂 We are in the middle of our own flooring renovation (carpet and linoleum and about a million staples have been removed) and we’re still wavering on which flooring option will be best for us. We have several carriage bolts sticking up 1/8 inch above the plywood so we’re grinding those down just a bit and we’re thinking of going with the NuCore flooring and digging out just a little from the bottom of the planks where it will rest on top of the carriage bolts. Did you encounter bolts like that?
Just curious as well how much the flooring weighs. A similar product we saw at Home Depot (lifeproof brand: no acclimation, waterproof) would be 420 lbs for our 250sqft project. I couldn’t find the weight online for the NuCore…wondered if you still had a box laying around and could post that info?
We’re planning to build a box for the doghouse as well. And we’ll have to get a little creative in our living room slide-out, but we’re feeling fairly confident it’ll come together 🙂 Thanks for all the helpful posts!
-Maggie
Hey Maggie, not worries I’m glad the posts have been helpful, I’m also happy to hear you guys are making changes to your unit, it will all come together and be just as you want it :). We did come across a couple of carriage bolts though they were for our Captain’s chairs. I ended up measure where the carriage bolts were and drilling holes for them to slide through the flooring. Though I think grinding them down and digging a little of the underneath of the flooring out is a perfectly good idea, especially if you don’t need them to come through the flooring. I looked at a box we have lying around and it didn’t have the weight on it, it had all the same information that is on the website. Though we did weigh our RV a little while ago and we were still under the max weight by quite a bit. I hope this helps you out but please feel free to let me know if I can clarify anything.
Great job. I look easy but I suspect it was quite difficult, love your solutions – one problem then one solution.
Wondering about the dog house do you happen to have pics of that? I planning on tackling a similar project
Nice choice of colors.
Hey Garth, thanks for the kind words. If you want to check out the link below it goes into more details on how we made the cover and what it looks like up close. https://mountainmodernlife.com/custom-rv-doghouse-cover/ I hope this helps and feel free to let me know if you have any other questions about it. Best, Eric
Hi I am wondering how your floor is holding up so far? My boyfriend is concerned about moisture, gapping or swelling from water and wet dos! He thinks we should use a vinyl sheet material, but I love your floors.
Thanks!
Such a class act … both your RV and blog. I’m looking at using a product by GemCore that is a vinyl plank with limestone in it. My biggest concern is Arizona heat when fifth wheel is stored. I read that you were in temps over 100 for two weeks, but did you have your AC running? Thanks for taking the time to do such amazing reporting!
Thanks Wanda! We had our RV in pretty hot and humid temps during the reno, but didn’t have any issues with our flooring and only ran the AC when we were working on it. We’ve also been in extreme cold without issues. With that said, we are living in it now, so we do run the AC or heat when necessary. I’m not familiar with the flooring you’re going to use, but would love to hear about your experience if you go with it!
Katie
You have wonderful information here. We got an estimate to replace the floor in our 5th wheel and it was very expensive. We are thinking about doing it ourselves when I know we can do. One thing point out to us was the slide out rollers and if we replace the carpet area with vinyl we would get marks from the rollers and it would ruin the vinyl. Is this accurate? If so, is there a way to avoid marks on the vinyl floor from the rollers?
Thank ;you.
Hey Holli, I’m not sure about the rollers leaving marks. The problem is all RVs are different. We haven’t had any marks show up on our flooring where the slide rollers come in, but then again our slide out doesn’t actually come flush with the main floor it actually sits up a bit. We were concerned in the beginning about this happening but once we had the old flooring removed we place a piece of the new in position and ran the slide in and out to check. What type of rig do you have and does your slide out come flush with the main floor when it’s all the way out?
How did you remove glue from the floor around the engine cover and under captain chairs.
Hey Randy, we actually didn’t have any glue under our captain chairs, since we were removing the flooring in that section of the RV we would’ve probably just removed the flooring with the glue still there. As far as the engine cover, we only had glue on the actual fiberglass cover where we removed the carpet. Since we were building a custom doghouse cover that would rest over the existing engine cover we left some of the glue on it (not a lot). Though I did spend a long time trying to remove every bit of it. I found that the goo-gone spray bottle teamed up with a paint scrapper worked pretty well though it was still a chore to get it off. Anyway I hope this helps, best wishes, Eric
The first thing I did after purchasing our new to us 2001 Newmar was to remove the shag green carpet (yuck) and put down self-stick vinyl tiles . Looked great for a while until they started to”migrate” and curl. Some areas stayed tight, other gapped to 1/4″. I’ve been advised that plank flooring other than glued down laminate planks will do the same. Have you had any issues with your floating planks gaping at the seams?
Thanks. Nice looking project and very informative.
Hey Bob, that is one of the first big projects we did in our rig as well. I have to say that we’ve had no gapping or movement with our plank flooring. Everything has stayed in place and stayed flush with the ground. It’s been a little over two years since we put it in, but we’ve only been living on it full time for a little over a year and a half. It’s funny you ask this question though because just yesterday I was telling Katie how happy I am that our flooring still seems the exact same as the day we put it in. Anyway I hope this helps and feel free to let me know if you have any other questions. Best Wishes, Eric
We have removed the tile and carpet flooring and replaced it with the planks as you have described. When we hit the button to close the slide-out, the entire floor started buckling as the slide-out pushed into the flooring. Clearly the tile is taller than the carpet had been. Any advice to allow the slide-out to travel over the flooring?
Hey Jennifer, I’m so sorry to hear that happened! It’s tuff sometimes when doing the flooring because all RV slide outs are different. Our slide out actually lifts up a tiny amount then slides in which allows for the wheels of our slide to go on top of the flooring. I guess my first question would be did the carpet have a foam underlayment under it? If it did, did you remove it before putting your new flooring down? If not you could probably lower the new flooring a bit if you did remove it. If you wanted to send me some pictures to [email protected] I could take a look. Anyway I hope this gets figured out.
Hi guys, great job on the flooring!
How did you hold down the plank that went under the slide out?
Hey Dennis, sorry for the late reply. To be honest the plank that goes under the slide out really only goes under about a 1/2 inch, maybe a little more or a little less. But with the flooring we used it all worked together to hold it in place. When it came to the row that was going to be under the slide out a bit we made sure the piece that would first go under the slide have half still in the wall to wall section with the other half going under the slide. That ways we were able to create a stronger bond between the rest of the floor and the section that would be under the slide out. Does that make sense? I wish we would’ve gotten a video because it can be hard to explain in words. Anyway let me know if it’d be helpful for me to explain further. Best Wishes, Eric
Love your flooring!!!! It’s the exact same as what we had put in our home! And thanks for all the info. We are planning on buying a “new” used camper I’m pretty sure the carpet will have to be removed because we have a dog.
Thanks and that’s awesome you’ve used the same kind! We’re pretty happy with how it turned out and how it’s held up. With 2 cats and a dog, I can’t imagine keeping the carpet that was previously in here!
AMAZING!!! I love the finished look, the wood adds so much character. We are currently in a remodel phase on our 2005 Cedar Creek fifth wheel, and i must say the rustic look is the choice we decided on. Looking forward to incorporating your ideas into our trailer and can’t wait for the final result. thanks so much for all the inspiration.
Hi I’m the one with the metal base in the front under the captain chairs. I’m trying to send pictures but I can’t
Hey Delords, I think I just responded to your email, did you get it?
Interesting and informative
Dear friends,
You mentioned thos floor job was done a a floating floor install. How has the floor responde after a few years and is there anything you would do different now.
I have done one floor insyall on a motorhome.but sold it months after so I have no info on how it lasted. I am going to install on our Pace Arrow 38P and could use your input.
Thank.you
Hey Sergio, I’m sorry for the delayed response to your question, but hopefully, it will still be helpful. To be honest I’m completely surprised with how well our flooring has held up. We’ve had absolutely zero problems with it, no bunching, no pulling apart, nothing. They look the same as the day we installed them, well they could use a mopping haha
So excited about this post! I am following all your MH posts and LOVE your work. We are trying to figure out new flooring and a solution for our dog house. Complete Reno of a 73 Dodge Superior MH… all metal construction like an airstream! My husband is having panic attacks over my removal of the carpeting! Haha… anyhow we were told by flooring people that you can’t put underlay under vinyl plank engineered flooring as you did all up front. The flex could buckle the seams that click into place? I really need to insulate that area for sound and heat as you did but what gives with vinyl plank? The products I’ve looked at are very similar to your NuFloor just not that exact line. Any thoughts?
Hey Cindy and thank you guys for following our posts, I hope they’ve been helpful. To be honest, I’m not sure exactly why that would be the case. Our flooring does have the cork backing underneath so maybe that provides extra flexibility. We haven’t had any issues with the connections breaking or the floor moving. I can’t pretend to be an expert on vinyl plank flooring as we only have the one experience to go off of, but ours has been holding up great, it’s been over 2 years and something like 10,000 miles. The insulation we used up front was fairly thin so maybe that helps. Sorry I didn’t have a more solid answer but I hope it helps regardless.
Thank you for the very detailed information! I’m trying to convince my husband to re-do the floor in our 5th wheel. He is hesitant, but I think this info will help convince him. Thanks! Your project is gorgeous!
No worries at all Lisa, I hope it’s helpful and feel free to reach out to us if you have any questions about the process. Best wishes 🙂
Hi I was wondering if your floors after ripping up carpet etc…were uneven at all? We ripped up our carpet and the ply wood is uneven at some joints and a bit wavy..no water damage though. Is there a solution for this? It seems like if we install wood flooring it will eventually pop up..or come apart?
That’s interesting Nicole, ours was pretty much flat underneath at all of the seams. I guess my question would be how uneven are the joints, is it like an 1/8 or a 1/16 of an inch or is it more like a 1/4 or a 1/2? The reason I ask that because if it is smaller like 1/16 I think you may be able to actually sand down the area to get rid of that small raise (though I don’t know if that would be the professional answer). If it is larger like 1/4 or a 1/2 I’m not exactly sure what I’d do in that situation. Anyway let me know, also, I know I’m getting to your question late so if you’ve already fixed the problem I’d love to hear your solution.
MY kids and I will be STATIONARY FT RVer’S in six weeks tIme, and I decided to do some renovations on our RV first. Thank you so much for the amazing tips and INSTRUCTIONS here! I think you mentioned in other comments placing trim under the slides to help wIth the floor movement, but could you explain it again? My dad will be helping me install new flooring in a couple of weeks.
Hey Rebekah B, I’m so sorry for the delayed response, I’d imagine you’ve already gone ahead and installed your flooring, I hope it went great. With that said if on the off chance you have done it yet I’ll try to explain. So, we didn’t add trim under the slide-out but instead added a layer of underlayment on the slide-out itself. By doing this we were able to give a bit more support under the flooring that hung over the lip of the slide-out, does that make sense? It was essentially to add another layer of solid material creating more strength. I wish we’d been more use to YouTube at the time so we would’ve filmed it better. Anyway, if you need any further clarification please don’t hesitate to let me know and I’ll do my best to help.
I have been wanting my RV flooring replaced for the last 3 years but estimates from contractor was more than I wanted to pay. Your “walk thru instructions” are the first time that I have hope of being able to do it! Very thourough and informative. BTW yours looks awesome. THAnk you so much for sharing.
That’s awesome, we are so happy to hear it helped! We’re always learning when it comes to DIY projects but have saved a lot of money going this route too. Plumbing and electricity are the two areas we’re more likely to pay someone to fix, otherwise, we’ll probably try it ourselves first, haha.
WOw! What a difference. Beautiful! Are you at all concerned about added weight of the flooriNg and weight of other mods? I want to trade our dinette for a sofa and replace the carpet and thin vinyl flooring with nucore, but by my rough estimates, it would be adding several hundRed pounds. Wonder how others are Calculating weight? Do you weigh what you take out and then what you take back in? I am seeing Giant 100+ pound recliners replacing plywood dinettes. Would love to do the same but with a full fresh water tank, i think we would be over weight. Thoughts?
Hi! My husband and I are about to tackle our first Rv renovation. We have a holiday Rambler vacationer 32ft. No slides. So, I really like the lifeproo vinyl planks from Home Depot which are similar to the kind you used. My question is, the instructions say to not install any permanent fixtures on top of the flooring. This has us a little concerned on how it will hold up doing the same as you as far as drilling holes for the sofa and dinette benches and bed. Any tips or info you can give us? Have you had any issues?
Hey Jennifer T, we haven’t had any issues with our flooring by installing permanent fixtures such as our sofa and media cabinet. With that said I’d imagine flooring can be different by the manufacturer. I’d probably try to find contact information for the manufacturer of the flooring and give them a call to see what they think, that way you can feel more comfortable in your decision based on information straight from the horse’s mouth. Anyway, I hope that helps 🙂
Thanks for this post, it was really helpful. I have not installed flooring before, so this makes it less intimidating. I was wondering how I would finish the sides and I saw that you used quarter round. Did you just stain it in a close colour?
We found matching quarter round so thankfully we didn’t have to stain it, although we did have to stain the slide-out trim. With that said, if we ever redo another camper reno I’d probably install actual floor/base molding. Those details make an RV look more like a home in my opinion 🙂