UPDATE: All new featured RV tours will be posted on my other website, Wanderful RV Interiors. Existing tours will slowly be moved to the new website, and anything already moved will automatically redirect.
Disclaimer: This post may contain affiliate links, meaning, if you click through and make a purchase we (or those featured in this post) may earn a commission at no additional cost to you. View our full-disclosure here.
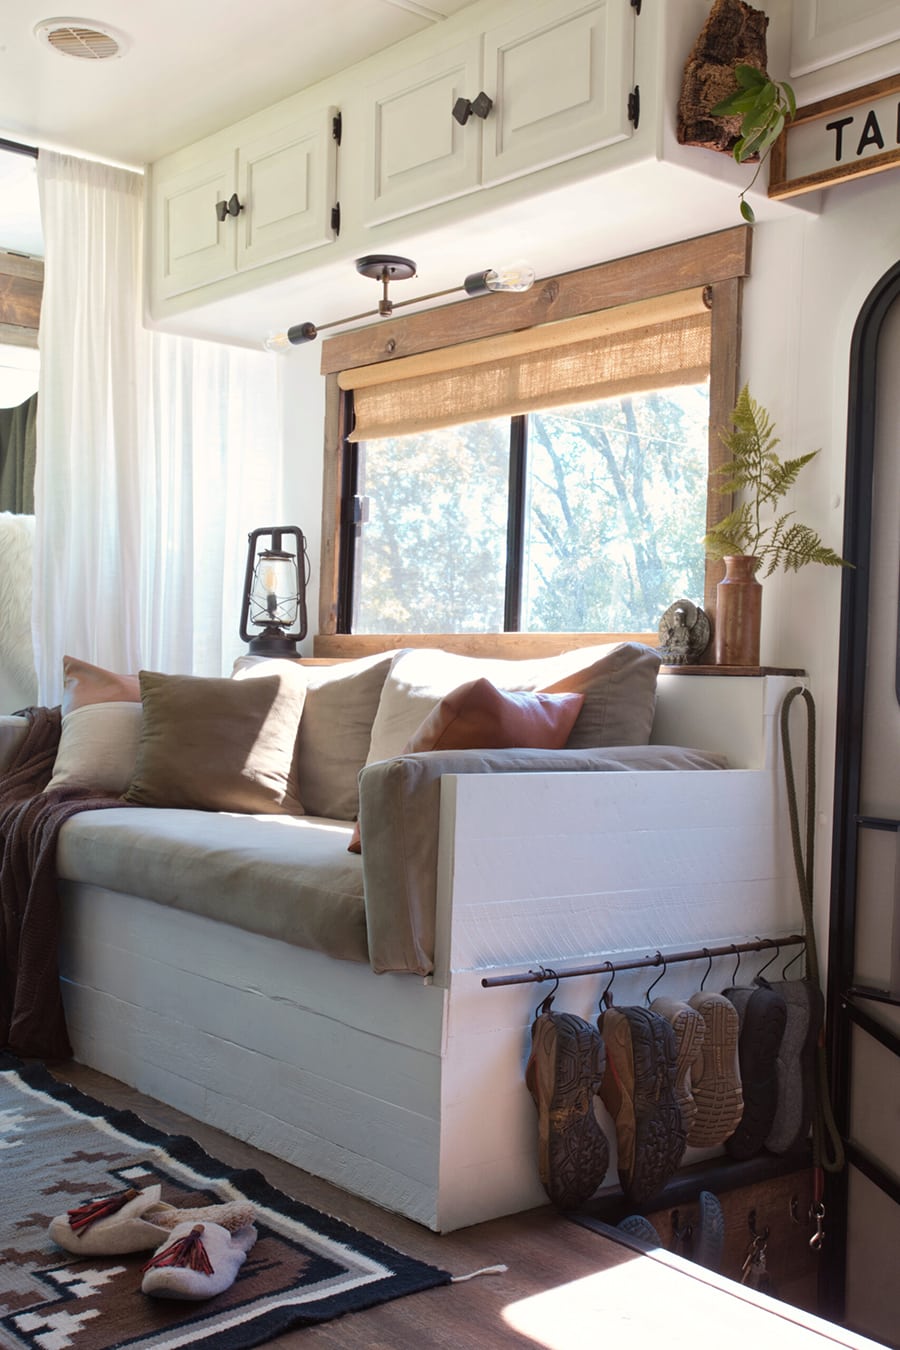
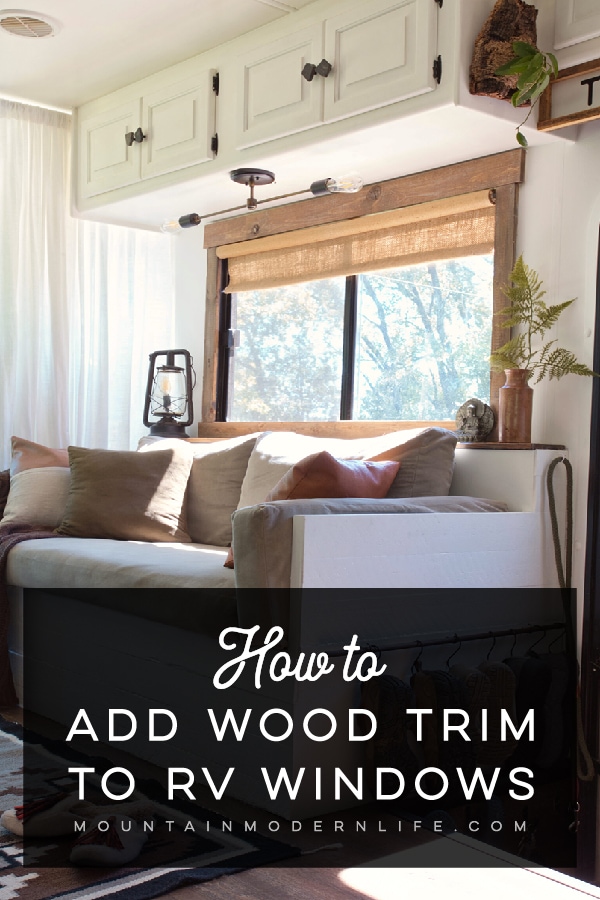
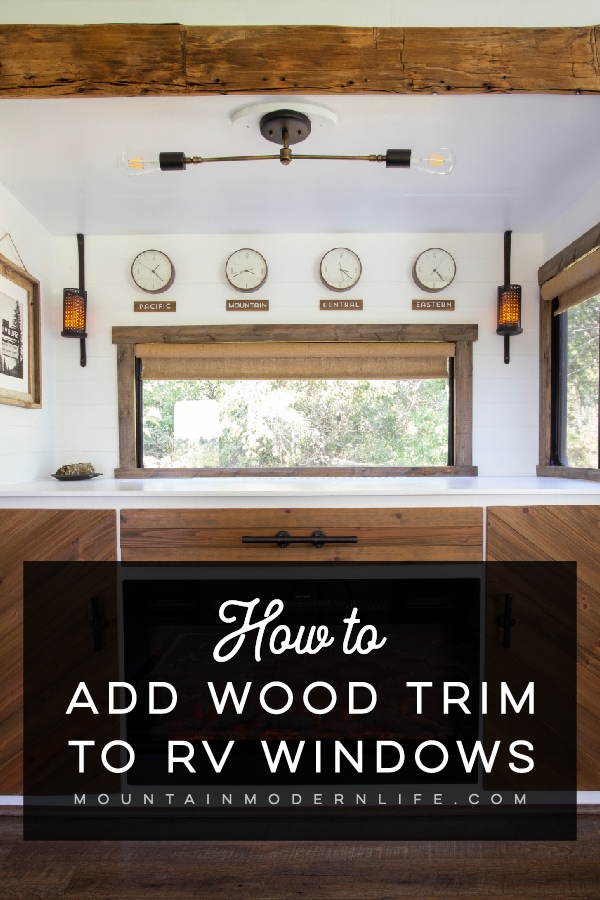
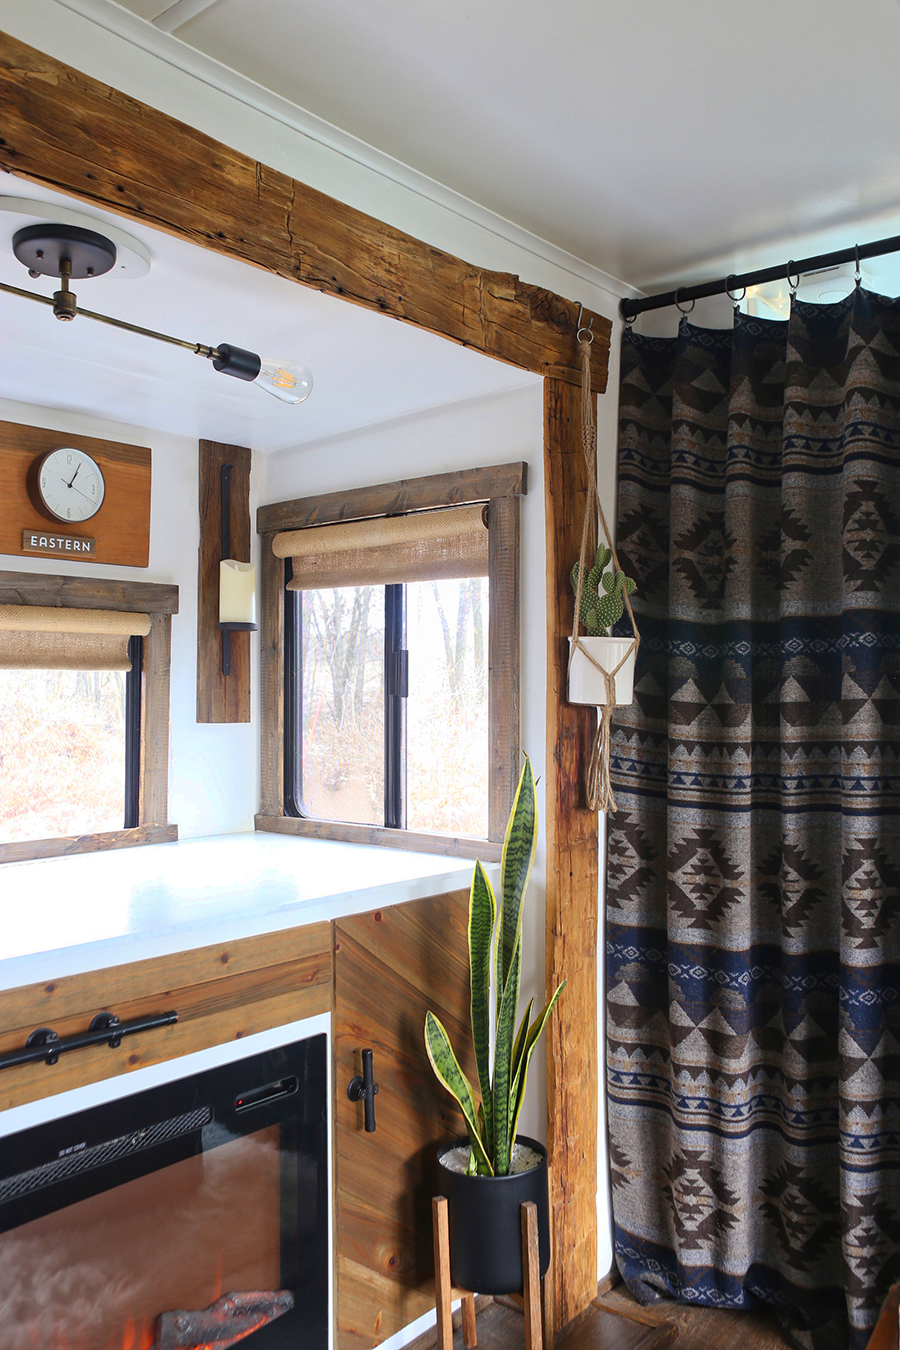
If you’re planning to renovate your RV, one project that’s sure to give it that cozy home vibe is framed-out windows. In fact, I can easily say this is one of those projects that truly transformed our RV.
Technically, our RV windows aren’t “framed out” because what we did was more decorative, but I’m still in love with the outcome and frame effect.
It now feels less like a vehicle on wheels, and more like a tiny home on wheels.
With that said, we were unable to find any tutorials or tips on the best approach to tackle this project, so we just winged it. We’re not professionals and created the trim around our windows in the most simple, yet effective way we could think of.
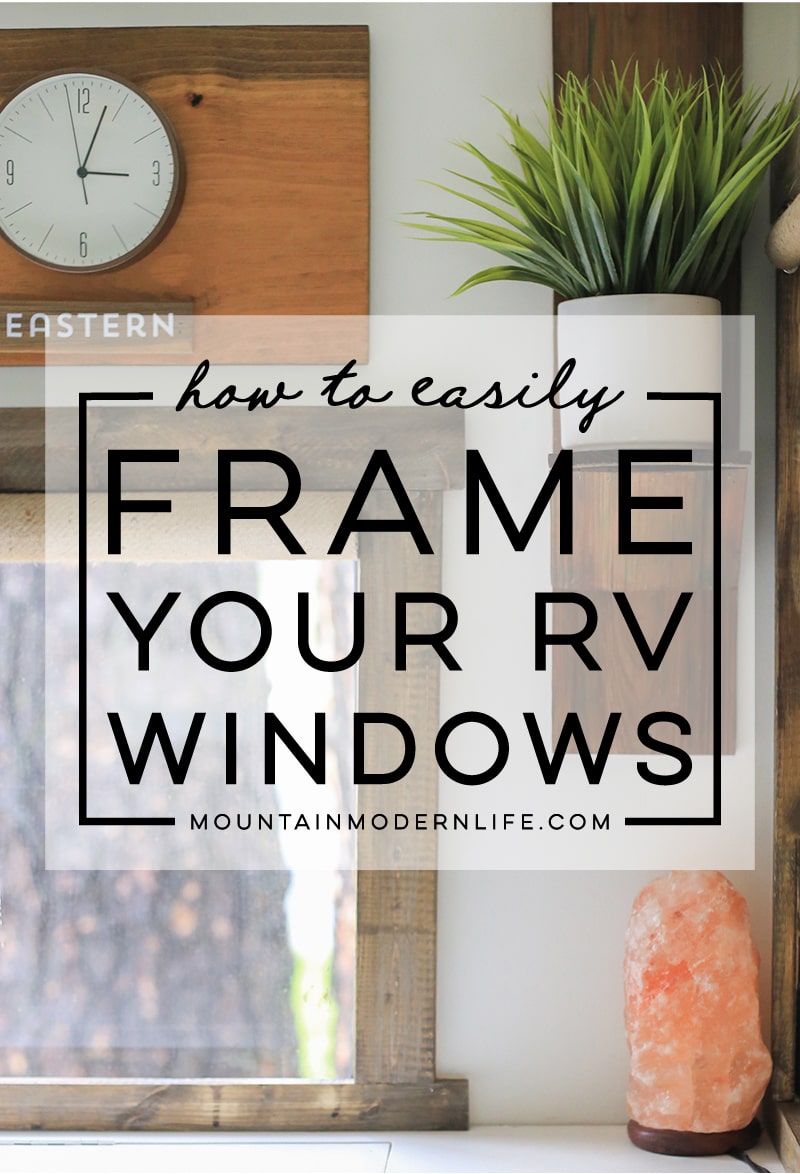
How to Frame RV Windows (by adding decorative wood trim)
When Eric and I first started renovating our motorhome I was really excited to frame out our RV windows but unfortunately, it was just one of those projects we didn’t get to until after we hit the road. Not to mention we were concerned about weight and figured it may be best to do this project after we weighed the RV.
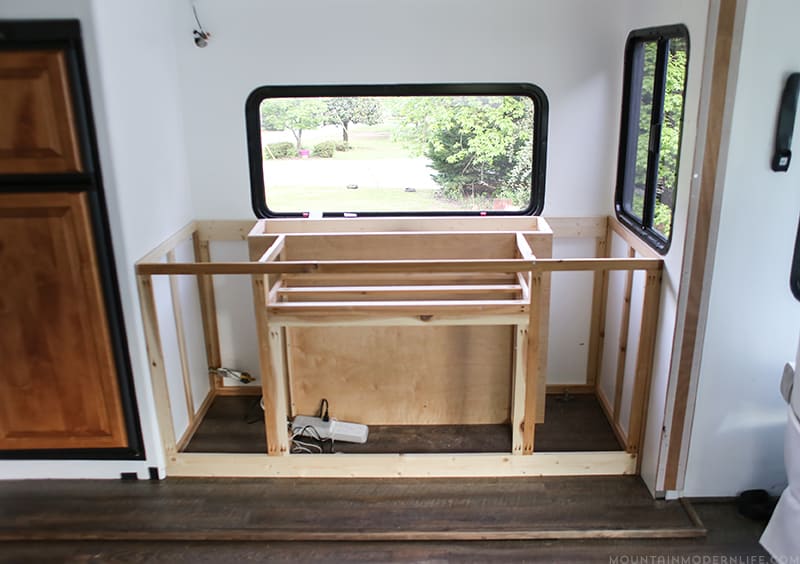
Here are a couple before photos so you can see what the windows looked like – one is a photo of the window behind our sofa and the other is inside our living room slide out, while our media cabinet was being built:
In fact, if you look at some of our much older photos you may even notice white paint on the black trim of the windows. Not to point fingers (ahem, Eric), but we thought that would be covered up so we didn’t worry too much about it, haha. Luckily, it cleaned up super easy with rubbing alcohol or a magic eraser.
Fast forward a year later and the project is finally done, woo-hoo! And don’t worry, framing out your RV windows is less daunting than you may think.
With that said, we couldn’t find any information on how to technically do this in an RV, so we don’t know if this is the most legit way. They’ve held up great so far (it’s now been 5 months since we did this project which we first showed in our Christmas tour), but if you have other suggestions for how to frame RV windows we’d love to hear them in the comments below!
As with any renovation project, use your best judgment and do what you’re comfortable with. If nothing else, we hope this serves as a guide or inspiration to frame your own RV windows!
VIDEO: How to add wood trim to RV windows
You can check out the video below where Eric shows how we trimmed out our RV windows for that rustic, cabin vibe.

- Wood for frames
- Bass Wood/Thin Crafting Wood (optional)
- Stain
- Saw – we used our circular saw
- Nail gun
- Measuring Tape
- Square
- Pencil
- Level
- Caulk
Step 1: Choose your style
Before you begin framing out your windows I recommend honing in on the style you want. Are you looking for a rustic, cabin vibe? Traditional? Farmhouse? Modern?
If you’re unsure I’d look at photos of homes you love (Pinterest and Houzz can be a great resource for this!) and pay attention to the window details. I’m inspired by rustic cabins and mountain homes, and one detail I love about the framed windows I found in some of these homes is that the top and bottom pieces will be longer than the sides. Not gonna lie, I also liked that this would allow more flexibility with imperfections in our measurements or wood.
Step 2: Pick Your Wood
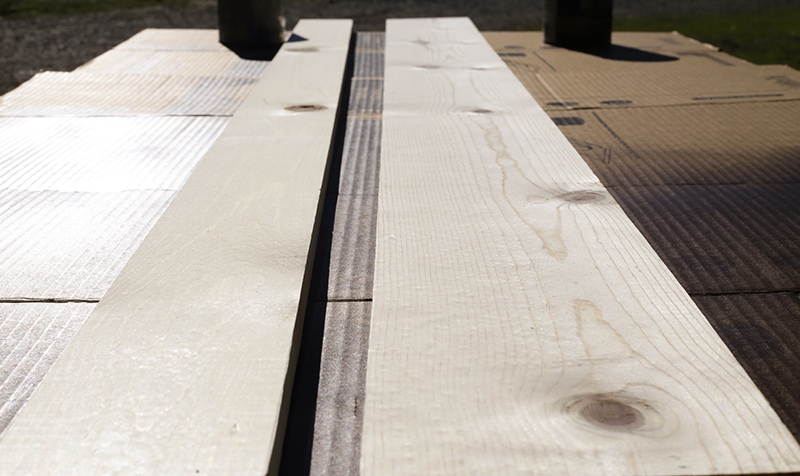
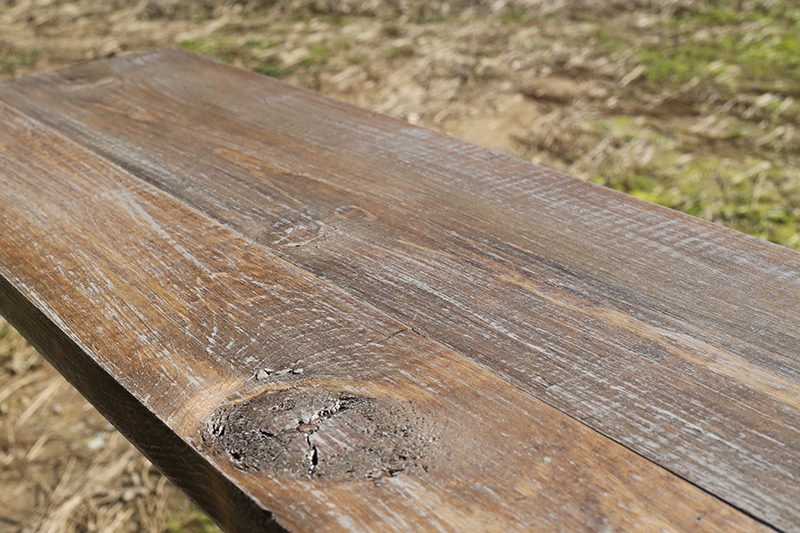
As you may already know, it’s important to be aware of the weight you add to your RV so we recommend using a lighter wood like cedar or pine if possible. If you have some amazing reclaimed wood but it’s too thick you may want to consider getting it milled down. This is what we did for the cypress wood we used on our RV bedroom slide-out.
You don’t want to use anything too thick, but I would also avoid going too thin or you may not get the look you want. We used 1 x 2, 1 x 3, and 1 x 4 pine boards mostly because it was more cost-effective than cedar.
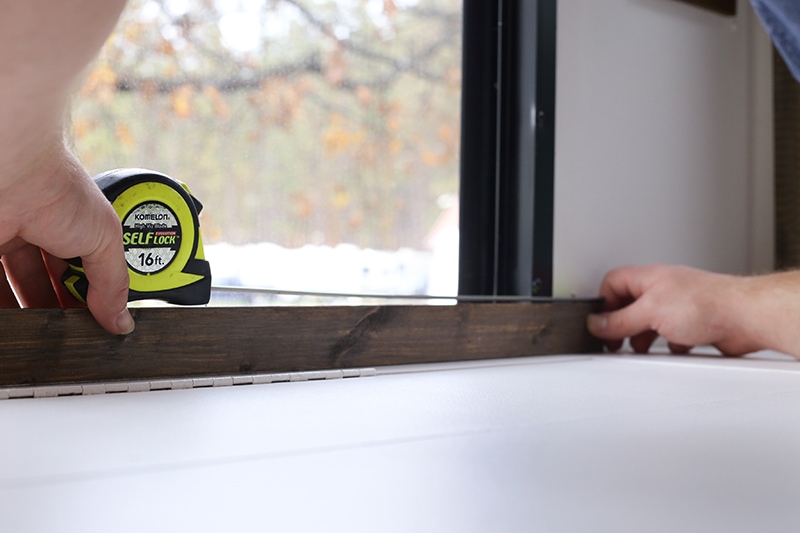
Step 3: Measure and Cut
Jot down your window measurements and it’s always a good idea to measure twice (or in our case more like 4 times) and cut once. You may want to use all the same widths for your windows, or you may need to make adjustments depending on the layout and furniture in your RV.
For example, there are a few windows in our RV where we had to make the bottom wood piece a 1 x 2 vs. 1 x 3 due to lack of space with built-in furniture (like our media cabinet), or where we chose to make the top piece a 1 x 4 vs. 1 x 3 because the window was really large (in our hallway), or because the window was really close to the ceiling and we thought it would look better touching the ceiling vs. leaving a gap.

Step 4: Stain or Paint
You may prefer a painted frame, but we opted for a rustic stain. I actually used several layers of stain followed by a dry brushed taupe paint, and then another layer of stain in an attempt to create a more rustic, imperfect color. Also, I recommend staining/painting the back of your wood because part of it may show through from outside. We learned this the hard way.
Step 5: Attach Wood
Once your bottom piece is cut and ready to go you’ll want to attach it to the wall, making sure it’s level. This step will be much easier if you have someone to help you.
We originally considered a couple of options such as screws or pop rivets to attach our wood, but ultimately decided to use our nail gun. That’s because it’s easy to use, fast, and still removable without creating much damage.
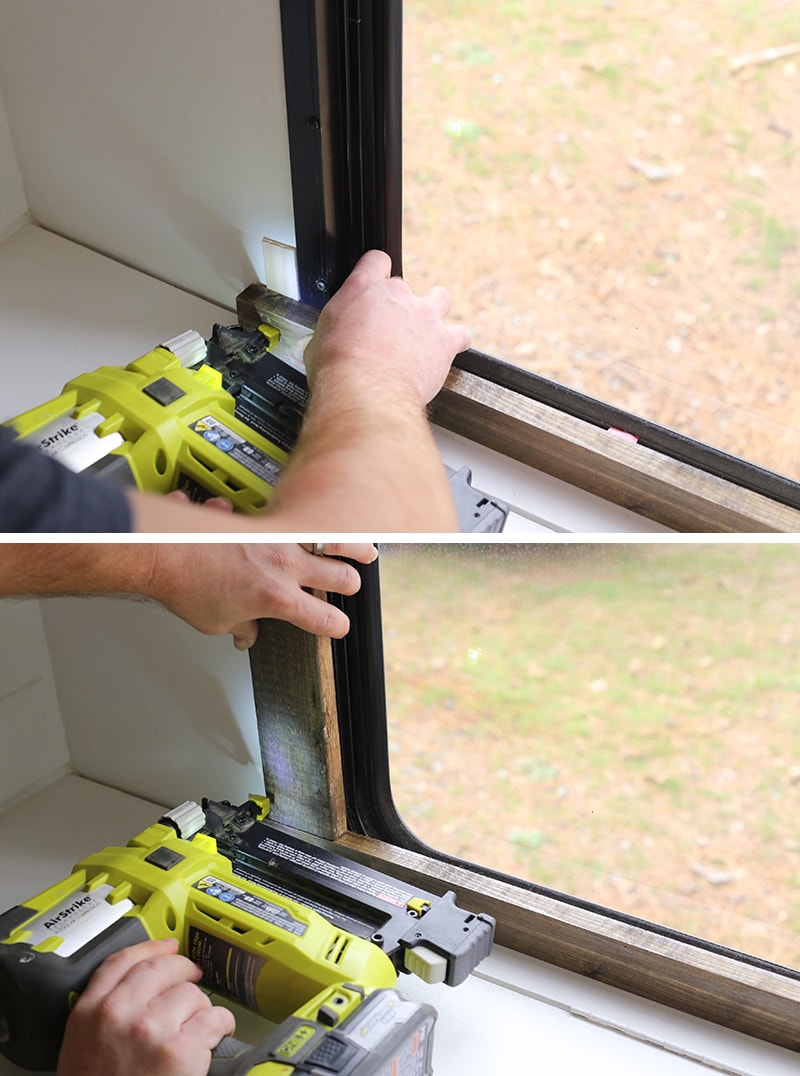
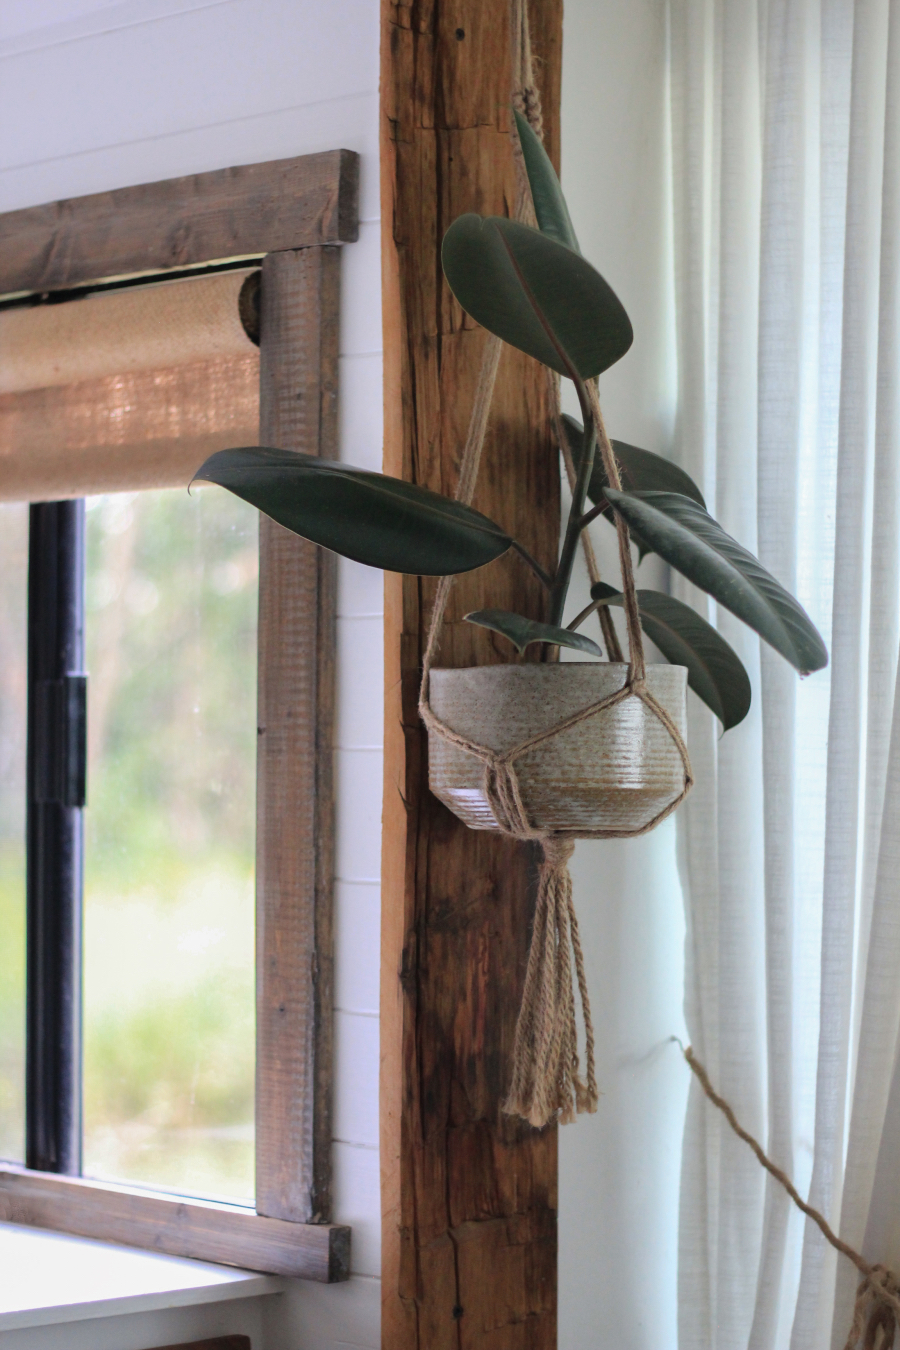
I don’t know how the window frames look in your RV but ours stick out 1/8 to 1/4 of an inch from the wall so we decided to add a small piece of craft (bass) wood to the corners of the frame. I picked this stuff up from a local craft store and it was super easy to cut down with scissors.
This step may not be necessary, but we thought it could help the nail secure the wood into the wall, otherwise, there would have been a slight gap between the wood and the wall. You can see Eric do this in the video at the top of the post.
On the first couple windows, Eric had the basswood sticking out just slightly from the edges as you can see below and then used his pocket knife to cut off the excess. As we framed more windows we made sure the basswood didn’t stick out so we wouldn’t have to add this extra step.

For each window we first attached the bottom piece, then the sides, and lastly the top piece.
However, if you have a window that’s really close to the ceiling I recommend attaching the top piece first (and making sure you measure your wood accordingly), that way you can have the frame go against the ceiling vs. leaving a gap. This will also make your window appear larger.
In the video, you’ll see we use a 1 x 3 for the top piece of the window frame above our sofa but we later changed that out to a 1 x 4 because we didn’t like the gap it left between the frame and ceiling. Unfortunately, there’s still a tiny gap but had we measured and installed the frame starting from the top for that specific window it would look much better.
Step 6: Caulk
Once your wood is installed your frames are pretty much done and you’ll probably be feeling pretty giddy at this point. At least I know I was! The last step will be to caulk any gaps left between the wall and wood which will then give your windows a more finished look.
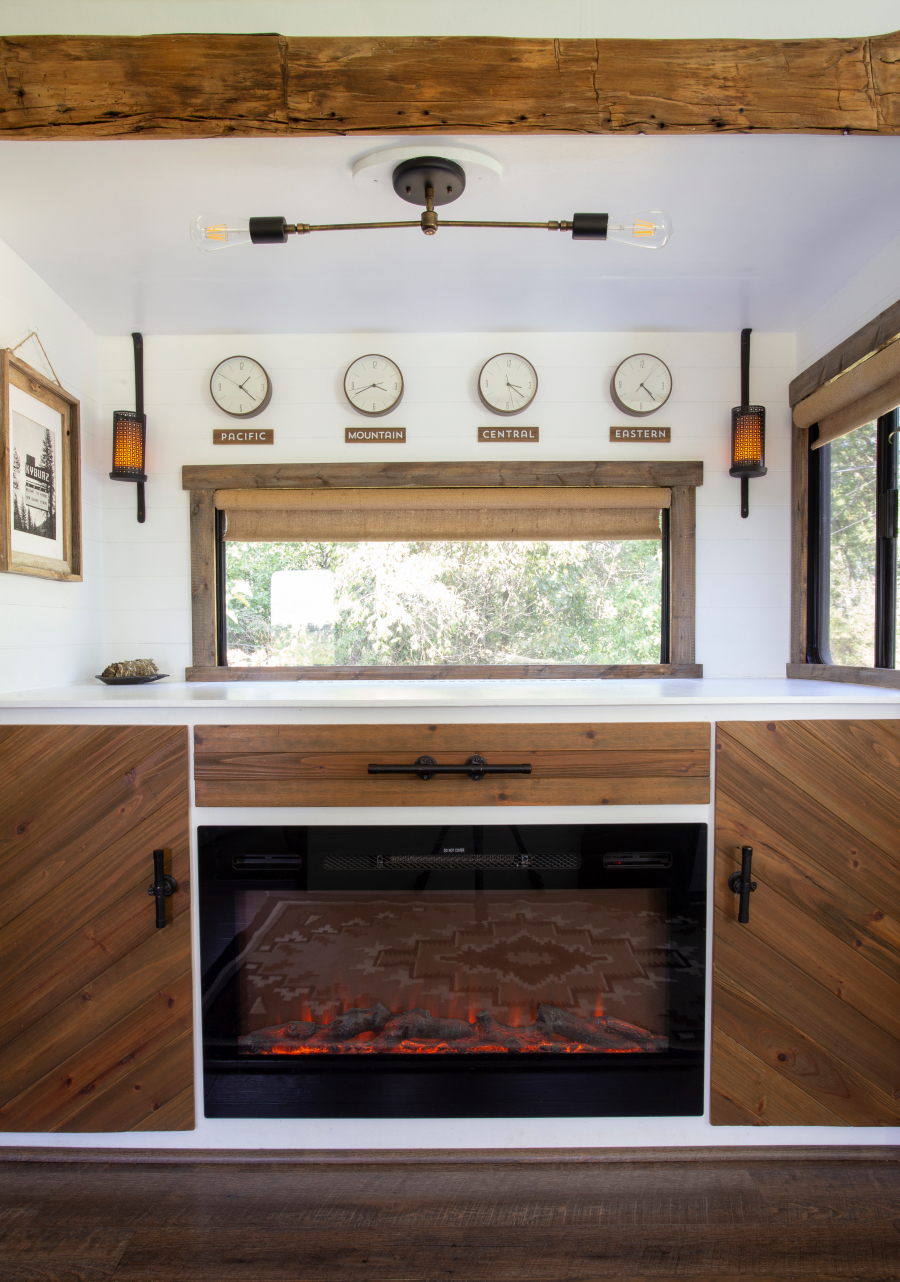
Here are some updated photos of our framed out RV windows:
That about wraps it up for how to frame RV windows. We absolutely love the way this project turned out and hope this post will help you decide if this is something you want to do in your own tiny home on wheels!
If you’re planning an RV reno we think this is one of those projects that can easily transform your tiny home on wheels without much money, time, or skill.

If possible, we recommend framing out your RV windows before building or installing furniture, especially if you’re going to truly “frame” them out. Otherwise, you may need to make some adjustments due to spacing.
For example, we had to use furring strips at the bottom of some windows vs. 1 x 3 boards since there wasn’t enough space. This wasn’t a big deal, just something to keep in mind.
We also recommend staining the back of the wood as some of it may show from the outside. We learned this the hard way.
If we were to do this again we may consider using 1 x 4 boards vs. 1 x 3 because we think the wider boards look better, especially at the top. Since shooting the video we have updated a couple of the top pieces of our windows, including the window behind the sofa and our window in the hallway.
You may also want to consider installing the top piece about an inch lower to cover the top black section of the screen that shows on one side of the window. Although, now that we have our roller shades installed as inside-mounted shades you actually don’t notice this as much.

How to remove RV window valences
Post +Video: How to Make Burlap Roller Shades
Update: Many other RVers have since added wood trim to their windows or legit framed them out, and I’m sure have figured out a better system. While there still aren’t a ton of tutorials out there, here are a few videos I recently came across that may help you with this project:
How to frame windows in a van conversion | 40 Hours of Freedom
How to create custom window trim | Camp Lovesick
Building DIY Window Frames for Camper Van | Mathers on the Map
Have you framed out your RV windows or added decorative wood trim? If you did it differently or have any tips we would love for you to share them in the comments below to help any other RVers planning to tackle this project.
Great job!! The look is incredible!! Thanks for sharing!!
Thanks Mike and Gerri!
Annnnnd now I have just added one more thing to my list of things I want to do if/when we fully renovate!
If it does end up on your list, I definitely don’t think you’ll be disappointed!
What kind of shades did you use inside your windows? Did framing the windows make it easier!? Your reno is amazing
We actually just cut down our roller shades and then recently transformed them into burlap roller shades. We have a video about them here:
https://www.youtube.com/watch?v=KmgY7skHfnM
I wouldn’t say the framing made the roller shade installation easier, because in my opinion getting the measurements exact is much more challenging with inside mounted shades vs. outside mounted shades, but I prefer the look so it was worth it 🙂
Katie
This is beautiful! You two just keep upping the design game one project at a time. I would love to do this with our windows at some point – maybe even create a windowsill. What a great tutorial!
Thanks Hylin! I know Robyn from Tiny House Taylor (https://www.instagram.com/tinyhousetaylor/) added a windowsill to hers, which is pretty awesome! We had a lot of project ideas but some didn’t get done in time and others were postponed while we figured out the whole weight/how we live in the space thing. Ultimately, I think a home gets better over time anyway, as layers are added and memories are created 🙂
The hardware that came with my roller shades don’t fit inside the wood frames I did like yours. Did you buy a different kind of hardware. My hardware sticks way pass the frames a make the shades stand out too far from the frame. Love all your ideas and makes the trailer feel more like home.
Hi Thea! We actually had to pick up inside mounted brackets to use with our shades once we cut them down to size. Sorry, I completely forgot to mention that and will need to add it to the post. Most hardware stores sell the brackets and I think they were maybe $2 each. Hope that helps!
Katie
I am so grateful for your post and awesome idea to frame out RV windows. I gutted and am renovating a 1978 49 ft steel hull houseboat. I finished the walls with v board and my son in law suggested I cut out plywood to frame the windows in one piece……daunting to say the least . After seeing your window transformation I am no longer holding on to the desire to keep the window shapes. . I love the clean lines and simplicity, I might even attempt to add a few window sills . Thank you thank you for taking the time to share a game changer for me
Wow Cate, that sounds like an awesome reno you’re working on! Keep us posted on how your windows turn out!
How did this handle the window condensation in winter?
We have a dehumidifier we try to use once a week, and that we use more often when it’s especially humid inside or rainy/wet outside. It helps tremendously, but there are more compact moisture absorbing products out there, like charcoal infused bamboo (which is eco-friendly) or dry-rid (not so eco-friendly). You can also use a wireless weather station to monitor the humidity inside the RV, which is another item we have on hand. Hope that helps!
I love the look of these frames! Were you worried about the nails compromising the outer shell of the cabin? Leaks are such a huge issue I would be worried putting nails into the side like that. What are your thoughts?
Hey Maureen, I’m not too worried about it mainly because I measured each piece of material the nail would be going through. Then with having the thickness of my material I chose a nail that wouldn’t go too deep into the wall. By doing it this way I know that my nails would not be long enough to penetrate the outer wall of the RV, it would only be penetrating the thin wood paneling on the wall. Does that make sense? By using the wood of the frame and the bass wood, along with the thin wood paneling there should be enough friction put on the nail to create a strong hold. The wood we used for the frame was 3/4″ thick, the bass wood was 1/4″ thick and the wood paneling is 1/4″ thick. We used 1 1/4″ nails therefore meaning when we sunk the nail it would at most stick out of the back of the wall paneling at like and 1/8 of 1/16″ of an inch. Does that make sense? Anyway let me know if I can explain better 🙂 Also one of our readers had thought of using a table saw to cut out a lip for the wood, in turn eliminating the need for the bass wood, anyway just a thought. Best Wishes, Eric
We are hoping to do this in our trailer, bUt we have alreadY had to re-caulk one of our windows and we’re wondering how it can be done with the permanent installation of these frames.