UPDATE: All new featured RV tours will be posted on my other website, Wanderful RV Interiors. Existing tours will slowly be moved to the new website, and anything already moved will automatically redirect.
Disclaimer: This post may contain affiliate links, meaning, if you click through and make a purchase we (or those featured in this post) may earn a commission at no additional cost to you. View our full-disclosure here.
If there’s one question we get asked the most about our tiny home on wheels, it would be how the heck did we update our RV interior lighting?
The good news is it’s much easier than you think.
Whether you want to update only the light bulbs in your RV, switch out entire light fixtures, or perhaps a combination of both, I hope this post will help point you in the right direction.
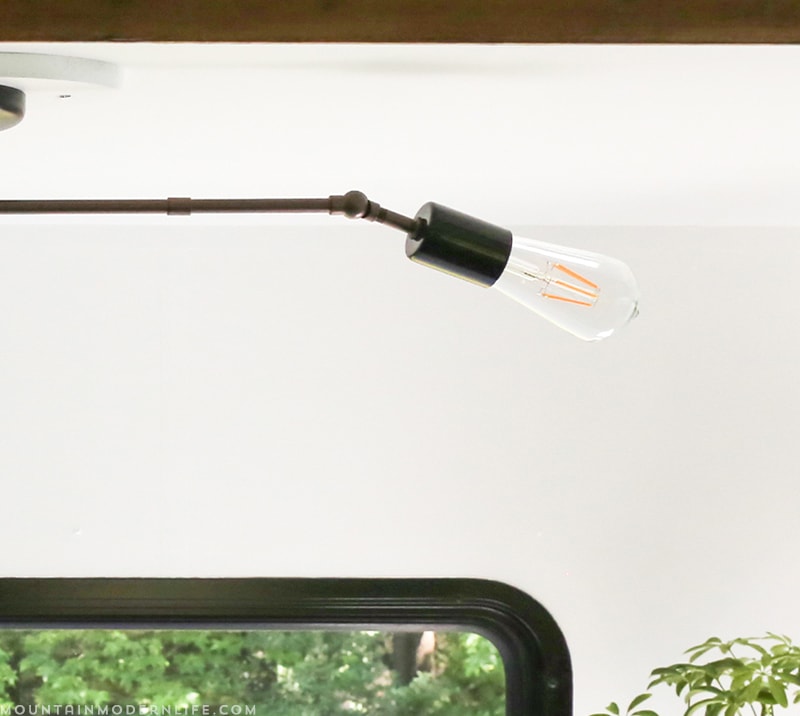
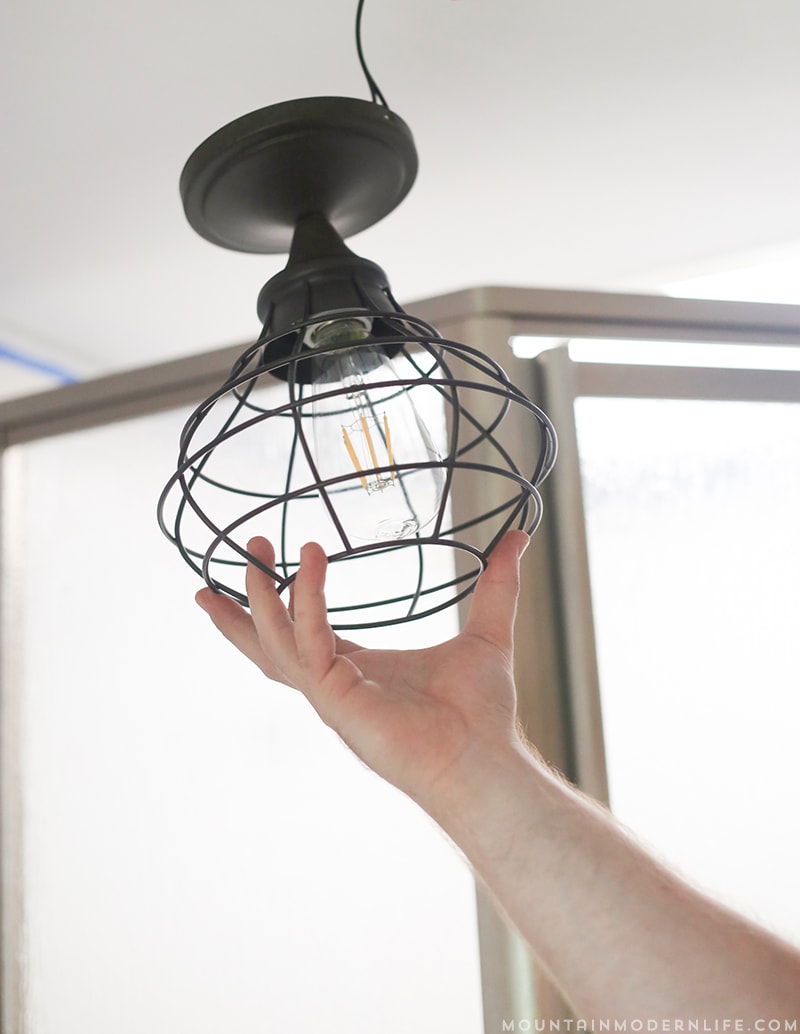
Side Note: The light fixture shown above was originally installed above our media cabinet, then switched with the one above our sofa.
How to Update RV Interior Lighting
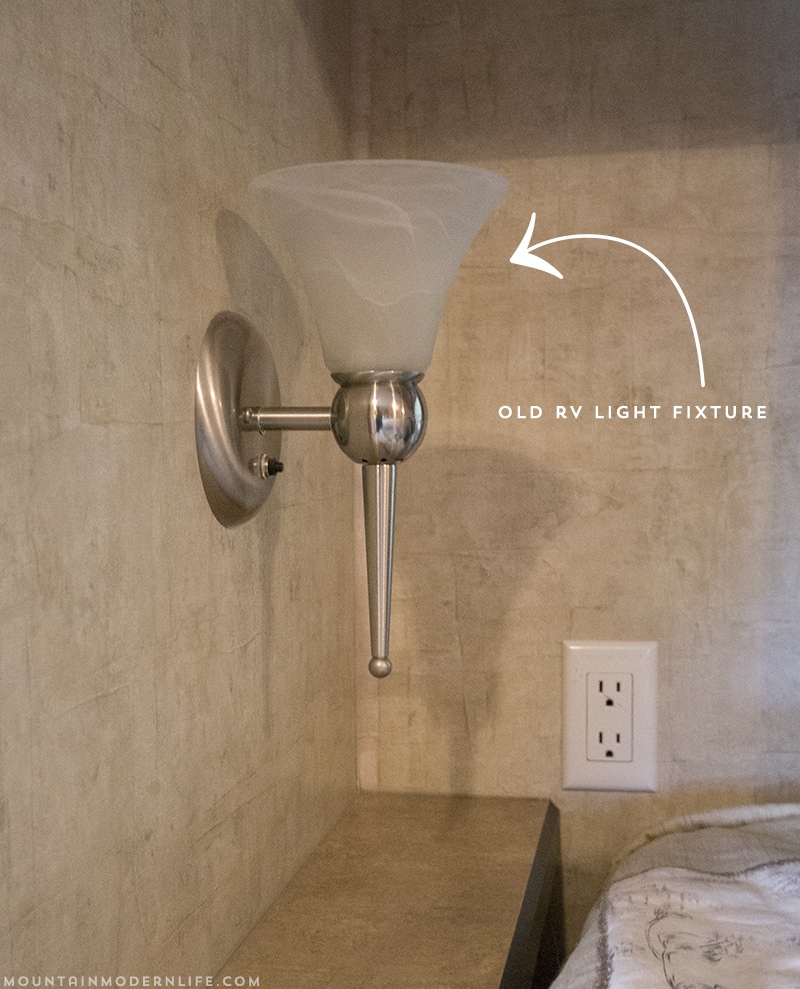
We had two main issues with the light fixtures that came with our RV:
- They were boring and didn’t have much going for them in the style department.
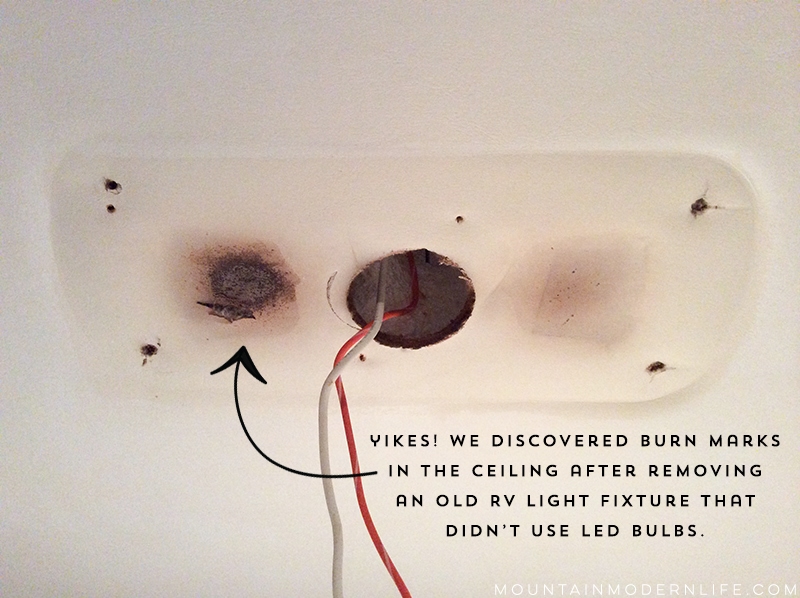
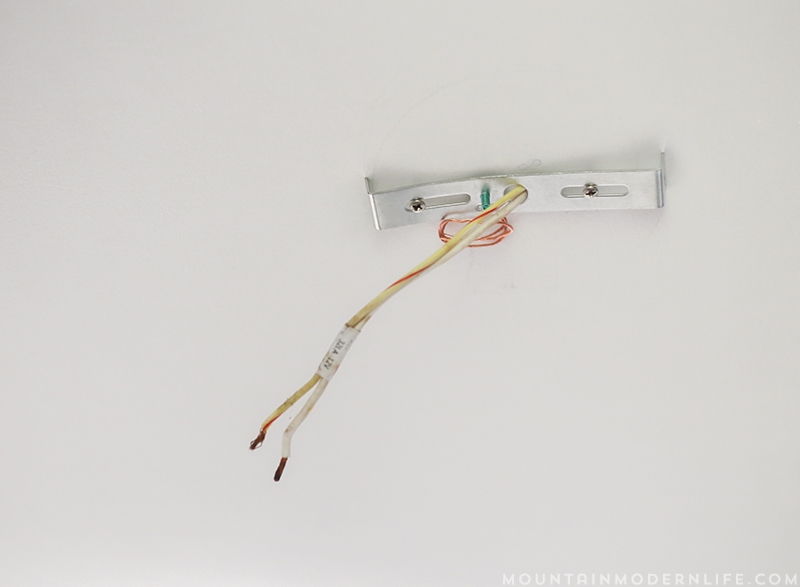
- The bulbs weren’t LED, meaning they were total energy sucks AND they would get really hot when left on for a while. We even found some burn marks in the ceiling after removing some of the light fixtures. Yikes, now that’s scary.
Update: See how we replaced our old dome light fixtures with new LED versions here.
Disclaimer: I’m not an electrician and anything I’ve learned about light fixtures has either been found online, from my mom, or through experience. Please use your best judgment when dealing with electricity, or if you’re unsure of something please consult with an electrician.
Watch the video – Quick Tip: How to Update RV Light Fixtures:
The basic understanding I have is that some RV’s include two types of lights:
- 120v – these lights only work with a generator or when plugged into shore power and is similar to most sticks and bricks homes.
- 12v – these lights run off the batteries and some RV’s only have these types of lights, at least that was the case for us.
At first we considered just switching out the bulbs in the old light fixtures to LED, and updating the fixtures later on. I think that’s mainly because every time I started to research “RV” 12v light fixtures everything I found was just as lame as the ones we wanted to remove. Ugh.
 It’s all about the bulb
One day after yet another google search, I came across an RV forum (I can’t remember if it was iRV2 or TiffinRVNetwork) where someone mentioned being able to use ANY light fixture in a RV, as long as you use the correct light bulbs.
Whaaaaa?!!!
Yes, apparently the light fixture doesn’t matter so much, what does matter is the light bulb you put inside the light fixture.
For example, if you have a 120v light you can use any light fixture as long as you can screw in a 120v light bulb, and if you have a 12v light, you can use any light fixture as long as you can screw in a 12v light bulb.
This was music to my ears, but my excitement was short-lived.
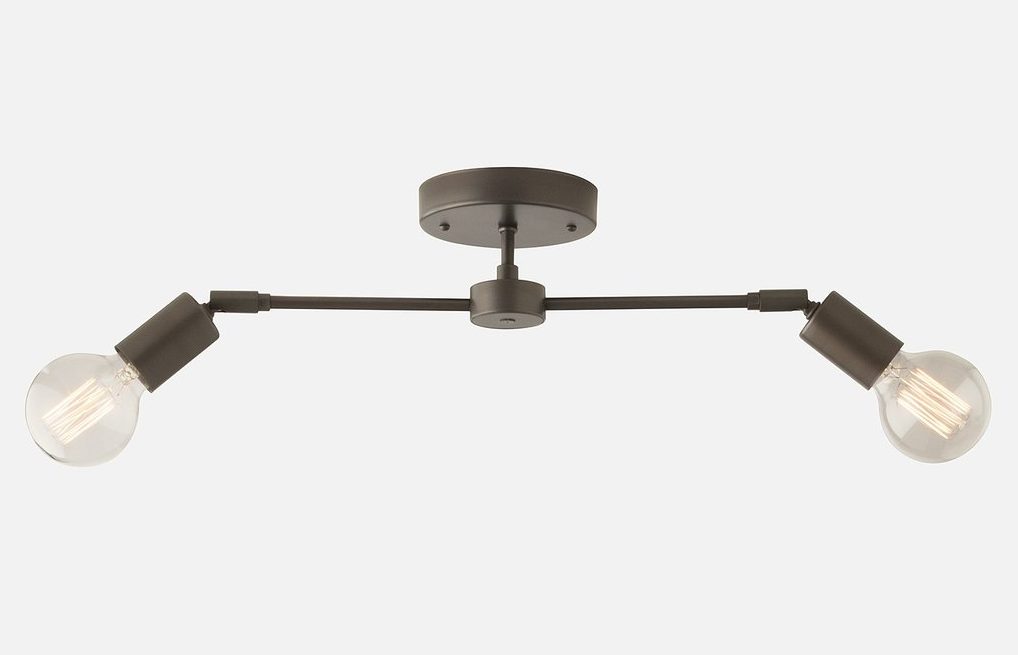
You see, the light fixtures I had in mind required “exposed” light bulbs and I realllllly wanted vintage-style Edison bulbs. You can see one of the light fixtures from Schoolhouse Electric that I was drooling over at the time.
Whodathunk finding 12v LED Edison bulbs would be such a difficult task? I think our entire renovation constantly felt like we were taking one step forward and ten two steps back.
It was exhausting. And my brain hurt.
Check out our video on How to Make a Mason Jar Wall Light Fixture below:
It’s totally normal to have 30 browser tabs open, right?
Every couple of weeks I would search again, hoping something would pop up, only to end my search hours later with about 30 browser tabs open, and a feeling of disappointment. (Fun fact, I currently have 44 tabs open, yes I just counted. Shhh don’t tell Eric.)
Then one day the perfect bulbs finally appeared on my screen and I was excited and annoyed at the same time. Mainly because they showed up with a simple google search, the same search I had been doing for over a month.
I was doing this light bulb search a year ago, but the good news is that the 12v LED light bulb market has started to pick up over the past year and it’s no longer a nightmare to find them. Yay tiny house movement!
I had purchased my first batch of bulbs through SuperBrightLEDs since Amazon didn’t carry them at the time, but later purchased through Amazon once they became available.
If you don’t care for Edison-style bulbs but need a standard base light bulb, you can find other 12V LED bulbs or go with non-LED 12v Bulbs. I recommend switching to LED if possible, even if you can only do it a few bulbs at a time. This will save on power, heat, and last longer than non LED light bulbs.
Buy or DIY
To be honest, I’d recommend buying the light fixtures if they’re within your budget because it will make everything soooooo much easier. Plus you can find some really great options on Amazon and Etsy. You may also want to compare the pricing of buying the lighting you like vs. creating something similar and see if making your own will be worth it once you take parts and time into account.
And if you’re looking for a project and want to get creative, you may discover you love making your own lighting or even create a business making light fixtures geared towards RVers. Who knows?
And don’t be afraid to think outside the box when it comes to making a light fixture. You can turn almost anything into a light fixture so look around and see what you may be able to repurpose, including baskets, serving bowls, planters, jars, lanterns, and decorative objects.
Installation
As far as installing light fixtures in your RV, it’s similar to installing a light in your home. You can find videos online that walk you through the process of installing a light fixture in an RV, but if you’re unsure or nervous about the process then I’d recommend hiring an electrician.
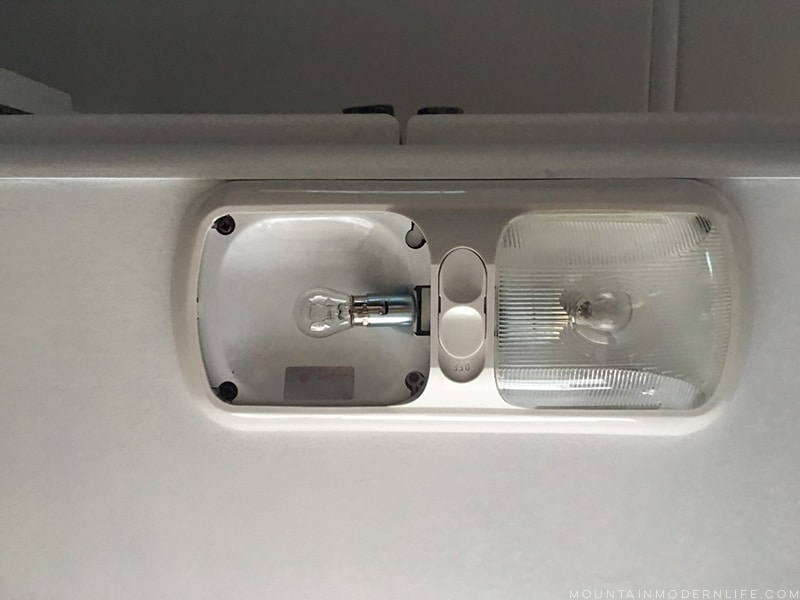
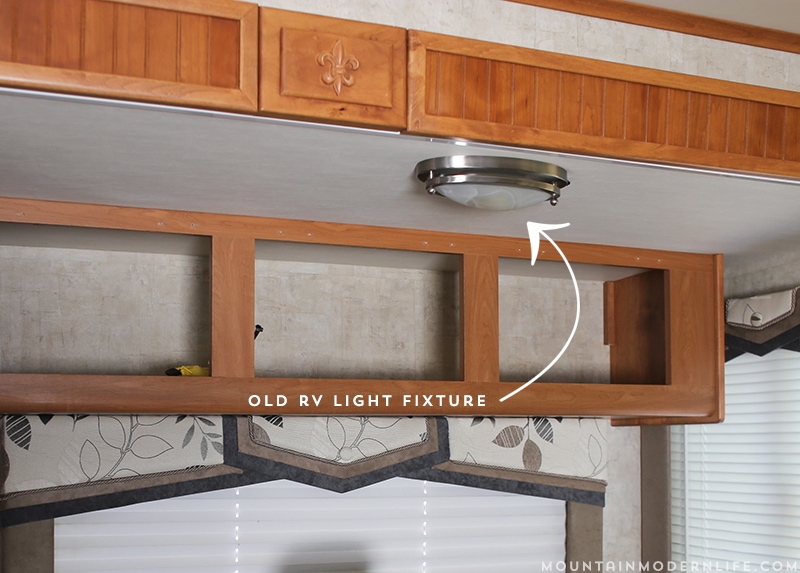
Aside from the “fancier” dome light above the sofa, this is what the 12v light fixtures looked like in our RV before we replaced them:
Don’t have a wall switch?
Don’t forget you’ll need a way to turn the light on and off! If the light fixture you’re replacing doesn’t have a light switch on the wall to control it, you’ll need to either
a. Replace it with a light fixture that HAS a light switch on it
or
b. Add a light switch to the fixture <— this is what we did.
Depending on your fixture you may be able to remove the switch and re-use it with a new fixture, or you may need to purchase new switches. Then if your new light fixture doesn’t have a wall switch, you can just drill a hole into the ceiling canopy for the switch to fit through. It was a lot easier than it may sound.
I hope that makes sense and am including a photo showing the toggle switch we added to the side of the canopy:
About our Updated RV Interior Lighting
Once I realized we had a total of 13 light fixtures throughout our RV, I knew replacing them all at once could get pricey, especially since the ones I liked most cost $100-300 each. Instead, we decided to replace 6 of the light fixtures, 5 of which we made ourselves to save on the cost. I probably spent around $300 on materials to make the light fixtures (not including the light bulbs), but that includes buying extra lighting parts that I didn’t need or use.
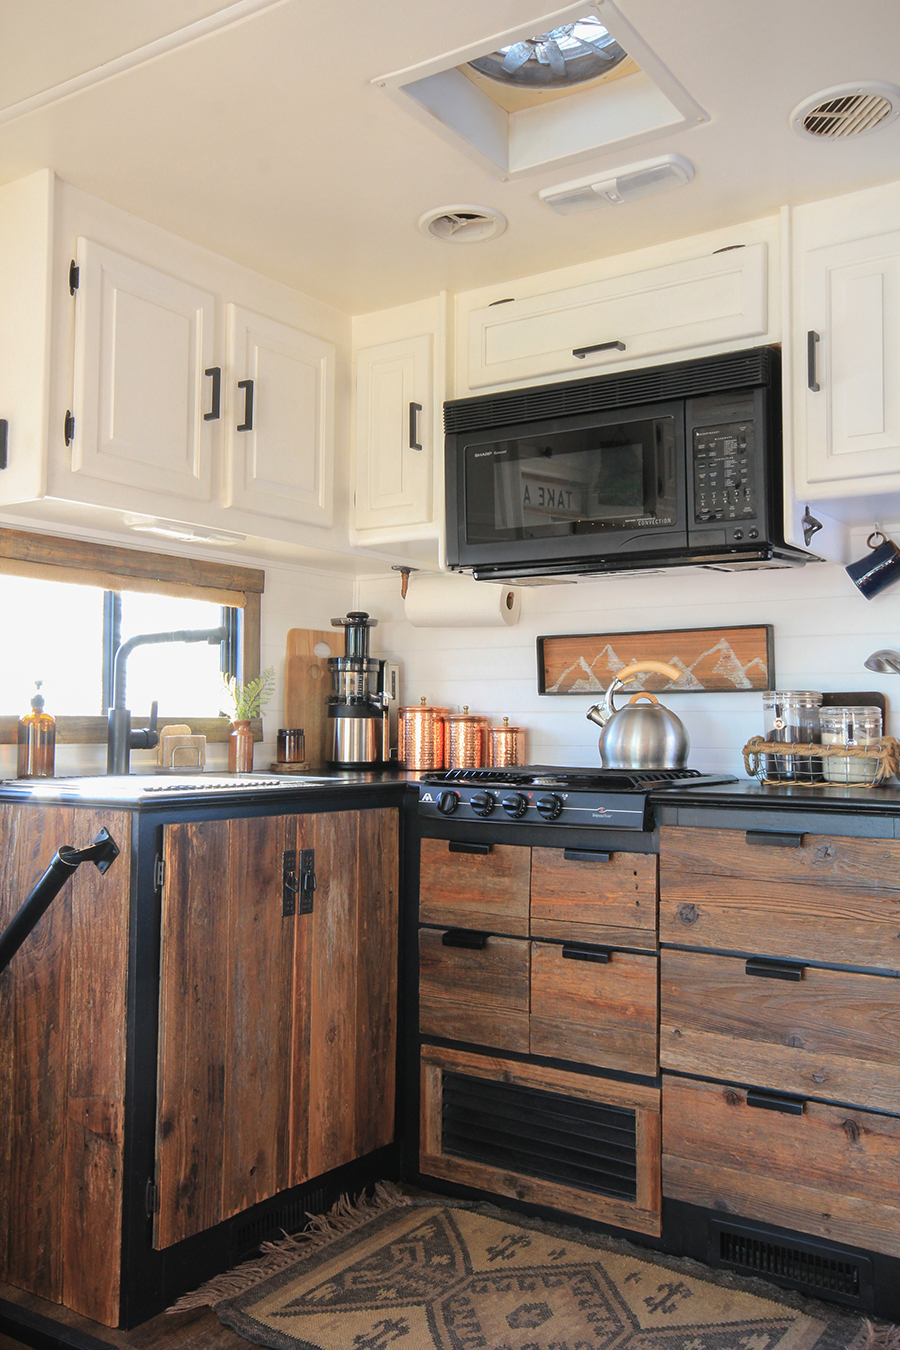
This left us with just the ceiling dome lights in the RV, which I don’t mind as much because they tend to disappear into the ceiling, which you can see in our kitchen photo below. We figured we could update the bulbs or change to newer dome lights later on. (Update – check out the video at the bottom of the post to see how we installed our new LED dome lights).
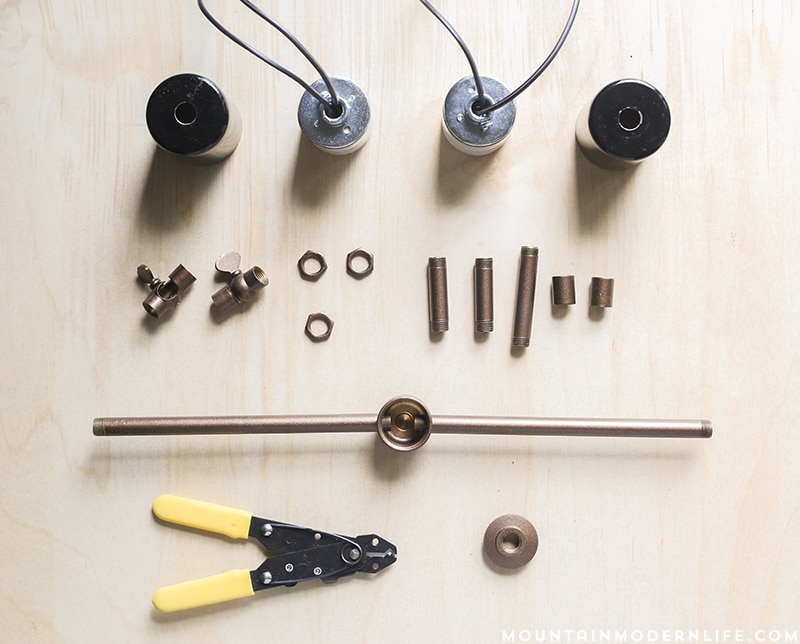
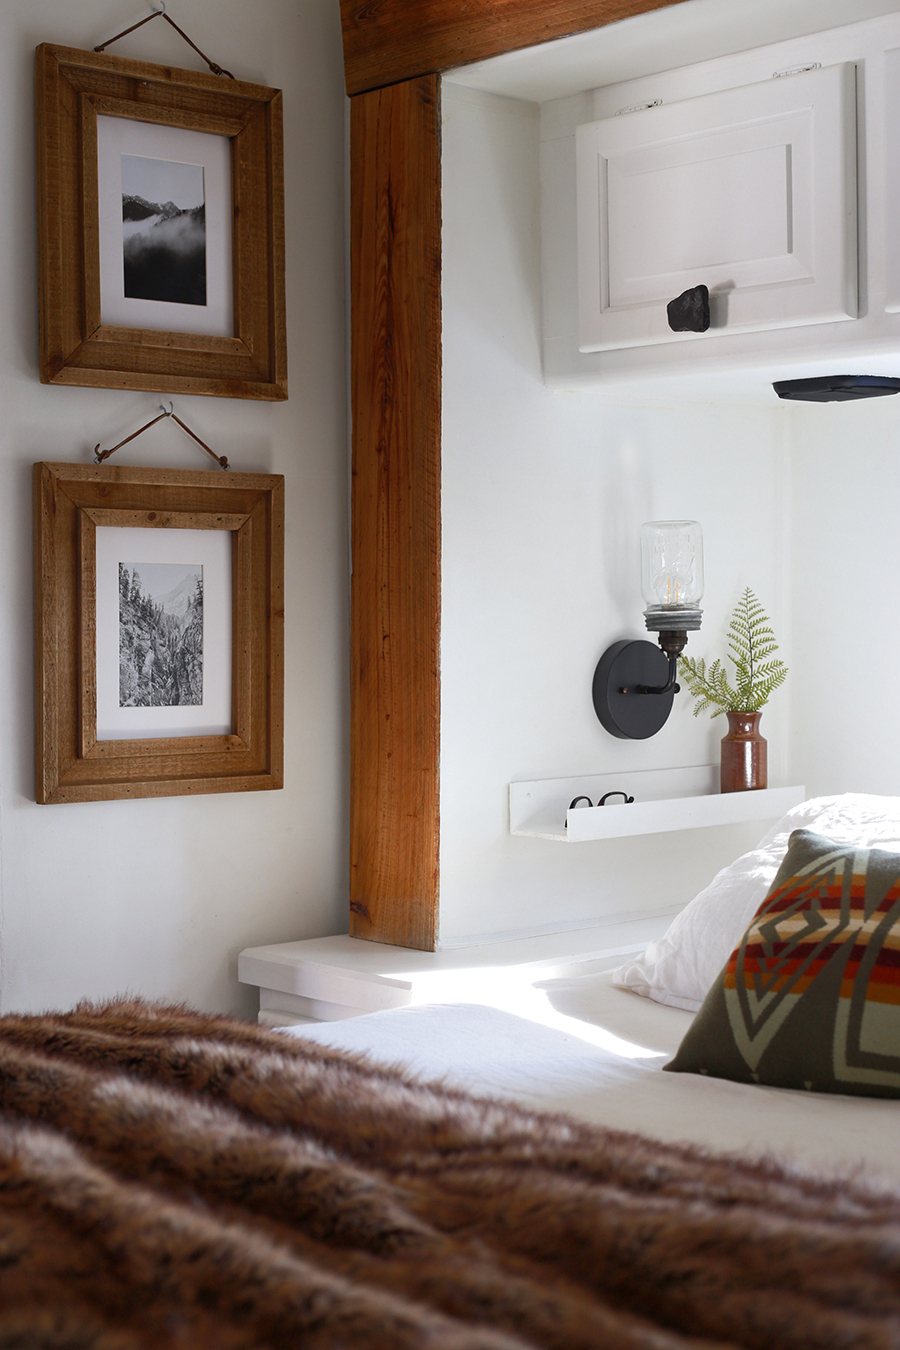
The light fixtures we made include the one above the media cabinet, the one above our sofa, the one in the hallway, and the mason jar sconces in our bedroom. You may have caught glimpses of these in one of our RV Tours.
By the way, most of the lighting parts I used were purchased from Grand Brass and this Etsy shop.
Update: Check out this post and video for how we made our own light fixtures.
They’re not perfect and since there’s no telling if or when I’ll get around to that you can find the DIY light fixtures that inspired me here, most of which include tutorials on how to make them.
The light fixture above was previously located above the dinette booth, which has been replaced with our custom media cabinet. You can see a photo of the updated space, including the light fixture I made below:
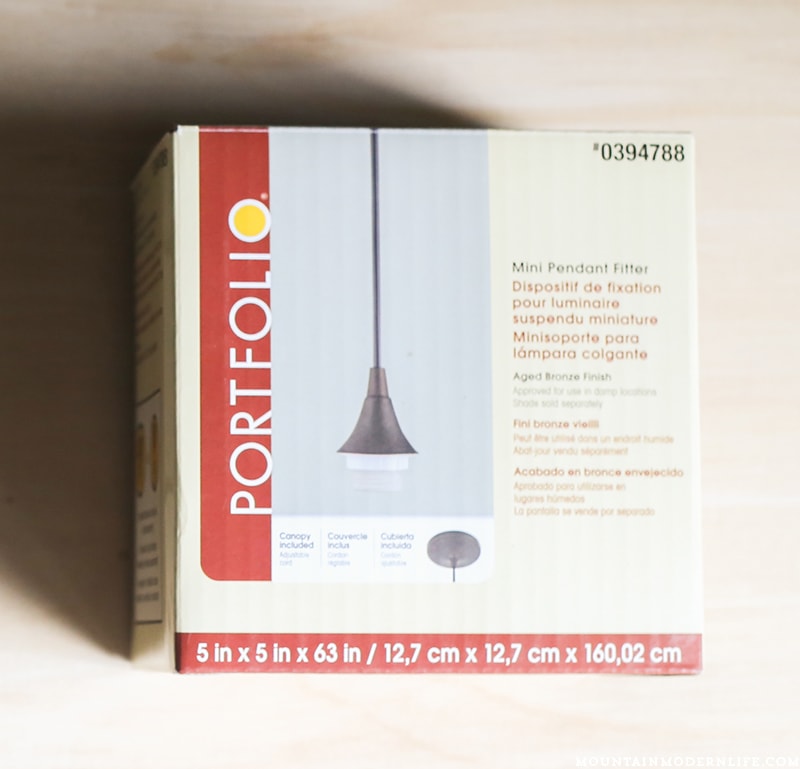
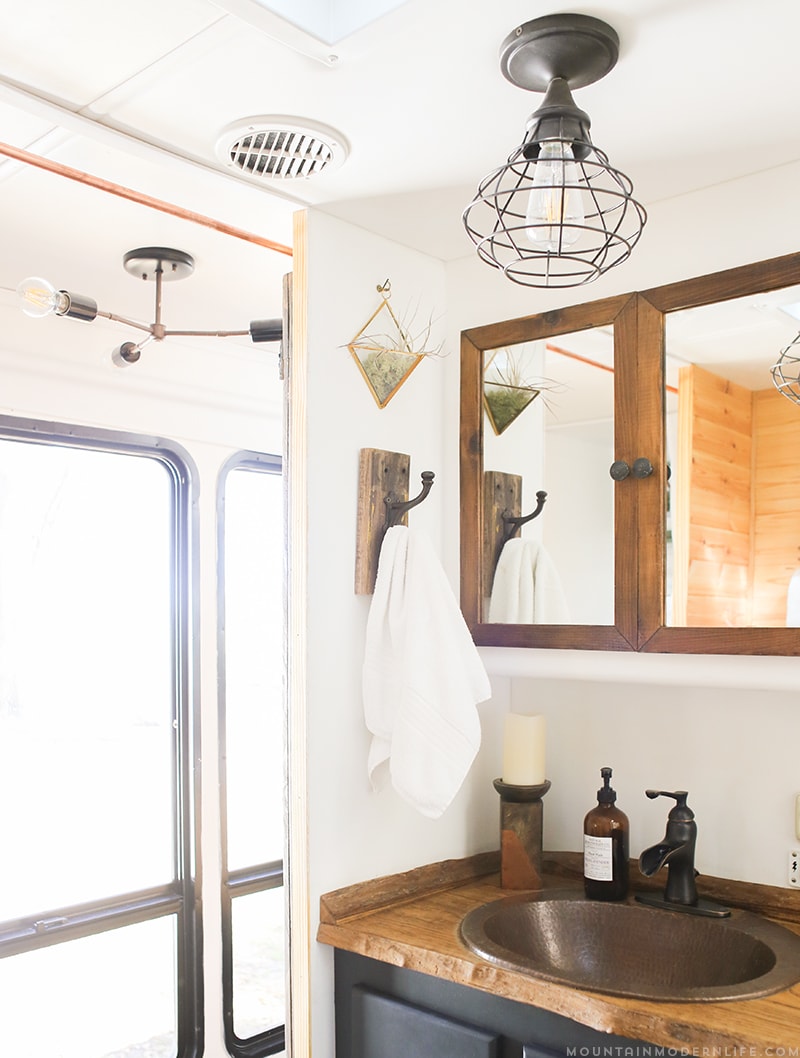
The only light fixture we replaced but didn’t make was the cage light in our bathroom, which we purchased from Lowe’s and paired with a mini pendant fitter. We only used part of it and probably could have bought the parts separately for less, but were impatient and on a time crunch so we made it work.
We did have to make some changes to the wiring to get it to sit flush against the ceiling rather than hang down, but you can buy light fixtures this way (look for flushmount or semi-flushmount lighting) so you don’t have to make additional changes. We were impatient and short on time so we made do with what we could find locally.
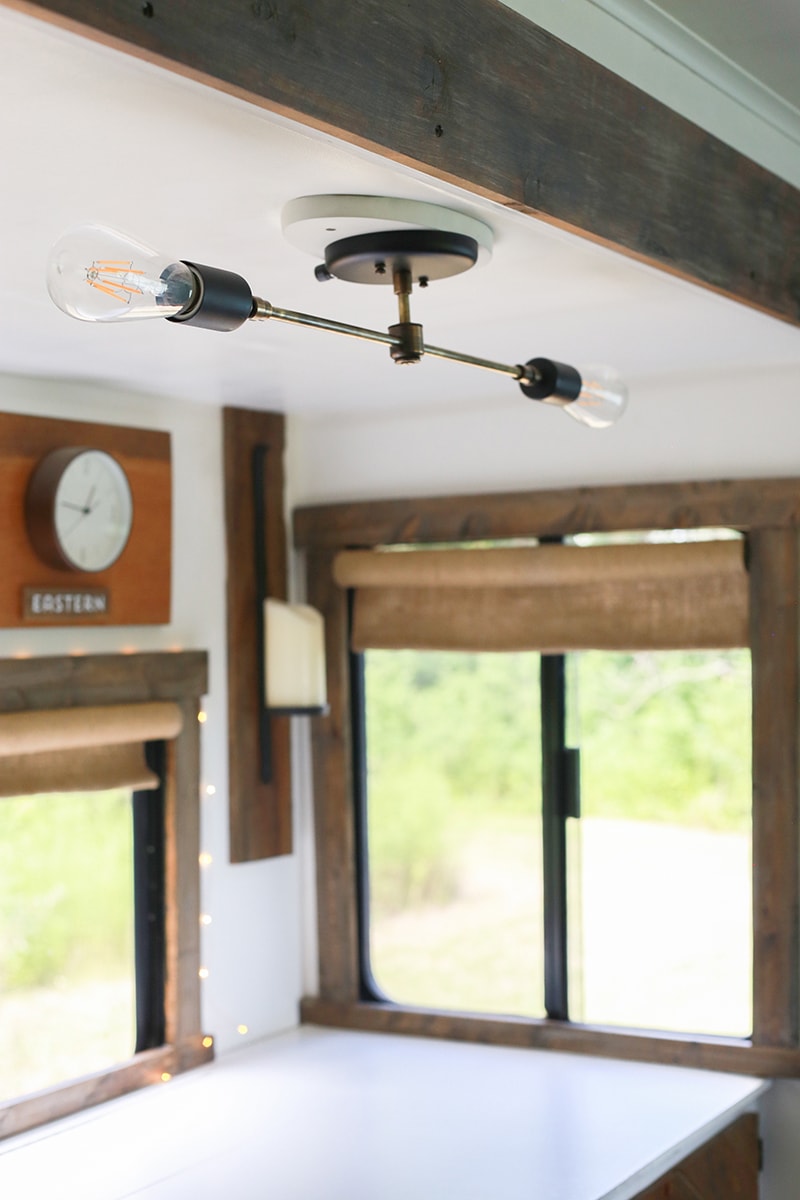
You can see the bathroom cage light and 3 arm light fixture I made for the hallway in the image below:
The Moral of the Story
I know this is a long post but the moral of the story is yes you can buy a standard light fixture from your local hardware or lighting store, Amazon, Etsy, World Market, etc. and install it in your RV, just as long as you make sure your light bulb matches the voltage of the existing fixture.
While we created more work by making some of the light fixtures for our RV, you can certainly save time by purchasing ready made fixtures.
Watch the video below where we show how to install RV LED Dome Lights:
Here are some additional tips and lessons we learned after updating our RV interior lighting:
Measure, Measure, Measure
My advice when it comes to installing light fixtures in your RV is to measure, measure, measure! Think about the space the light fixture will be going into and take proportion into consideration. While a standard light fixture may seem like a “typical” size in the store, it’s amazing how large it may look in your tiny home.
How will you use the space?
Think about how you’ll use the space. Don’t get me wrong I LOVE the exposed bulbs in our RV, but they may not be the most practical lights in an RV. We don’t have kids but I’d think it would be a bit more dangerous if we did, especially since the ceilings in a RV aren’t nearly as high as those in a residential home. One of our light fixtures with exposed bulbs is located in a slide-out and another is below a cabinet so that doesn’t help since they’re nearly 1-2 feet below the ceiling.
While we don’t walk under the light fixture above the media cabinet we still have to be careful when moving things around in that area. In fact, back when we were still renovating I had my camera sitting on the media cabinet and when I went to pick it up I lifted it in the air to get the strap around my neck and smacked it into one of the bulbs which shattered all over the place. Woops. This was nearly a year ago and I haven’t broken a bulb since (knock on wood), but that’s definitely something to keep in mind.
The same thing goes for the light fixture above our sofa. We don’t jump or stand on it so it shouldn’t be a problem, but we did build a narrow sofa table behind it so whenever we go to put stuff in or out of that storage compartment we have to be extra careful.
Luckily the light fixture in the hallway comes down from the ceiling so it’s higher than the other two light fixtures with exposed bulbs, but I probably should have made each arm a tad shorter so that it wouldn’t get so close to the sliding bathroom door, which brings me to my next tip….
Consider the Bulbs
We’re currently using 3 different types of 12v LED bulbs in our RV (A19, ST18, and G45) because each style is a different length. I ordered shorter bulbs for the light fixture in the hallway, otherwise the bulbs would have made the light fixture too wide for the space. I probably should have measured better and taken into account the light bulbs when I made the light fixture, woops.
Also, I had to order smaller 12v LED bulbs for our mason jar sconces because the other styles were either too long or too wide to fit inside the jar.
Plan to Buy LED Lights? Test before buying in Bulk
If you plan to order LED 12v bulbs to replace the current bulbs in your RV light fixtures, you may want to consider ordering a few different options so you can test the color temperatures. This will help you decide if you’d rather have the lighting be warmer white, pure white, or cooler white. You can also visit a lighting store to get a better idea, but the lighting could look slightly different in your own space. Plus you’ll want to make sure the new lights completely cover the indent from the old ones.
Dome Lights
While I think it’s a great idea to update the outdated sconces and any other accent lights in your RV, I really don’t mind dome lights. We still have 7 dome lights throughout our RV, but they blend in for the most part. I like the idea of having a couple star “light fixtures”, otherwise all of the fixtures may compete with one another, especially in such a small space.
That doesn’t mean you can’t update the dome light with a newer one, especially if the color is dingy. You can paint them, order new LED bulbs for the dome lights, or just order completely new LED dome lights.
Get a Dimmer or 3-way Switch when Possible
I’m all about ambient lighting so one other item I wish I would have incorporated into our lights is either a dimmer or three-way switch. Just something for you to think about during the process.
I hope you found this post helpful, but if you have any questions or tips about RV interior lighting, we’d love to hear about them in the comments below!
Light Fixtures You Won’t Believe are DIY
How to replace RV LED Dome Lights
Learn more about LED Bulbs | Energy Earth
Learn to Speak Lighting Lingo | HGTV
RV Forums: IRV2 and TiffinRVNetwork
Specific 12v LED Bulbs we purchased:
ST64 Edison Style 12v LED bulbs | G45 Edison Style 12v LED bulbs | A19 Edison Style 12v LED bulbs (we prefer warm white)

 It’s all about the bulb



Thank you for creating this post! I have been wondering how you updated the lighting in your RV. I have a quick question though… My husband and I are currently doing a RV Remodel and we have a few lights that are only able to be turned off and on by the switch that is located on them (there is no wall light switch). How do you replace those types of lights? Thanks for any advice you can give! Love your remodel by the way!
Great question! I completely forgot about that so I’ll need to update the post, but once you remove the light fixture you’ll notice a third wire that’s attached to that switch, which you’ll need to remove. Depending on your fixture you may be able to remove the switch and re-use it with a new fixture, or you may need to purchase new switches. Then if your new light fixture doesn’t have a switch, you can just drill a hole into the ceiling canopy for the switch to fit through. It was a lot easier then it may sound. I hope that makes sense!
Katie
Thank you Katie and Eric,
This has been a tremendous help. My husband was totally baffled when he first saw your RV makeover and noticed the lighting. “How can they do that?” Now we have the answer. We appreciate your generosity in sharing your knowledge and resources.
Victoria
Yay, I’m so happy you were both able to find this post helpful 🙂 I know we scratch our heads A LOT when it comes to figuring stuff out with our RV, haha.
This is great inspiration! Thank you for all the thorough details. You have a fabulous eye for design. After fulltiming for two years and RVing for 4, it is rare that I’ve found such an inspiring RV makeover!
Wow, thanks Jenn that’s the best compliment ever!
This is so cute and so creative. Thank you for your wonderful inspirations.
Thank you so much Rumah!
This is so great. I actually commented on another post asking all the questions you answered here. Thanks!
I love the mix of metals in your lighting! What did you use?
Thanks! I bought the lamp parts and then ended up spray painting the pipes in dark copper. You can find them in bronze but at the time I was having trouble finding all the parts I needed in the color I wanted.
How did you get that pendant to sit flush against the ceiling mount for it? Just wondering if you used any kind of adhesive or simply pulled the wire taught. Thanks! Awesome post!
We mixed the cage light with a mini pendant fitter – and only used some of the parts – not the long wire cord. So we were able to keep the wires short and have it go flush with the ceiling, if that makes sense. We sorta just made it work with what we could find locally, and so far so good 🙂
Late to the party here but a question about on/off switches. Did any of the lights you replaced in the ceiling have an on/off switch in the dome? Or were they controlled by a wall switch? I am wanting to replace a few ceiling dome lights but they have on/off switches in the dome.
Trying to figure out how to get a switch if I plan to use a more residential fixture. Have you run into this?
Hey Andy! I know I responded to your question on Instagram a while back, but realized I never approved and answered the question here. So for anyone else with the question, I did mention this at the bottom of the post, but we basically drilled a hole into the “ceiling canopy” and added a toggle switch. This solved the problem for us anyway 🙂
Hi. I was excited to read your post about using any light fixture in my rv as long as I used 12v bulbs. However, as I’ve been shopping for light fixtures I keep getting salespeople telling me not to use 12v bulbs in 120v fixtures, and now I’m afraid it won’t work, or might even cause a fire hazard of some kind. I don’t know anything about electricity, but it sounds ominous when everyone is telling me not to do it, and that I should buy 12v fixtures (which, as you know, are all ugly). Can you tell me if you’ve had any issues with your lights? Do the bulbs burn out more quickly than they are supposed to? Do things get hot? Thanks! Carla
Hi Carla! I definitely feel your frustration and we aren’t electricians so I would say you have to do what you are comfortable with. With that said, we learned about this from fellow RV’ers and haven’t had an issue since hitting the road a year and a half ago. I was also told the bulbs could burn out more quickly but we have 12v led bulbs and not one has flickered or gone out, although I’ve heard using a voltage regulator wire can help with this. Our light fixtures also never get hot but again, we use LED lights, where as the previous bulbs installed by the RV manufacturer even left burn marks in the ceiling! I was contacted by someone a few months ago who is planning to create stylish RV-specific lighting (finally!) so I do believe more options will be available soon 🙂
Great post, I have been endlessly looking for upgraded lighting for my boat, and then the “light bulb came on” I took a trip to home depot and thought why wouldn’t that work. I read this about 15 minutes after I got home, thanks for backing me up with my wife.
That’s so awesome that you’re updating the lighting in a boat! We’re no electricians, this was just a tip we had read about on a few different RV forums and it’s worked for us over a year with no issues. I know other RV’ers that have done the same without issues so it definitely seems to work. I’ve heard adding a wire regulator can help the bulbs last longer, but again we haven’t had any issues so far.
Hi, we are updating our RV for full time living. We’ll always be hooked up to electricity and never boondock. Would you say that only 12v lights would work in an RV or would you say that I could use 120v LED lights?
Hi Jung,
I definitely would not use 120v light bulbs unless your lights are 120v. We are almost always hooked up to electric at the campgrounds we stay but since our lighting in the RV is all 12v, we only use 12v LED light bulbs. I hope that makes sense!
Katie
I have a question about the weight of the residential lights. Did you have to add any reinforcement or anchors to support the weight of residential light fixtures vs the traditional RV lights? I’m worried about going down the road and they fall bc the tiny screws won’t support the new nights. Next question (related to last one)… Do RV’s/Campers have good support/material around lights to screw into things?
Hey Abby, Those are great questions! As for the first one we haven’t had any problems with movement or them falling, though I do think it’s important to mention that our residential light fixture in the bathroom isn’t really that heavy. It’s not as lightweight as the normal RV light fixtures but still not that heavy. As for the support to screw into that can be kind of tricky as well, mainly because every RV is constructed differently. But with ours the ceiling panels are adhered very well to the ceiling studs with contact points everywhere, making the ceiling panel extremely secure. So I think as long as your light fixture isn’t really heavy and your screws don’t completely strip out you should be fine. Anyway, I hope this helps and let me know if I can give more detail.
hi,
New to this whole RV thing haha. So I have a most likely stupid question, how do I know whether my lights are 120v or 12v? we just bought a 2008 22FT coachman freedom express. it only has dome lights….so many dome lights. I would like to just get rid of/ cover some and change others to something pretty! Thanks for not judging my newness haha and your time.
Amber
Hey Amber that is not a stupid question at all! To be honest no questions are stupid when it comes to RVs mainly because every manufacturer does it differently. I think a general rule of thumb is that all the light fixtures in most RVs are 12-Volt, this is mainly because they are designed to be used even when the RV isn’t hooked up to power or running off a generator. The way we found out for sure is by having no power connected and turning on all of the lights, we then found our 12-volt cut off switch (a lot of RVs have a switch that will disconnect power coming from the battery, though some don’t) then turned it off. When we did that all of the lights went out, once we flipped it back on they all came back on. Anyway I hope this was helpful, but please let me know if you have any other questions.
OKAY… SO I’M THE KIND OF PERSON THAT HAS TO REPEAT YOUR ANSWER BACK TO MAKE SURE I KNOW THAT I UNDERSTAND WHAT YOU ARE SAYING HAHA.. A LITTLE BIT OF OCD I GUESS. SO… MY CAMPER CURRENTLY HAS ALL 12V LIGHT FIXTURES/BULBS.. BASED ON THIS ARTICLE, YOU ARE SAYING THAT I CAN REPLACE THE 12V FIXTURES/BULBS WITH 120V FIXTURES/BULBS AND I SHOULDN’T HAVE ANY PROBLEMS?? I HOPE THIS IS THE CASE!
Hey Morgan, no worries at all I’m the same way haha 🙂 Your answer was close, the light fixture can be either 12v or 120V but the bulb has to be the same as the power source, in this case, 12v. So if you’re looking to do this you could use a 120v light fixture but you’ll need 12v light bulbs. Does that make sense?
Yes that makes sense! Thanks a bunch!
No worries at all Morgan, make sure to let us know how it turns out 🙂
Hi, sorry to bug y’all with a potentially dumb question. Do all of your light fixtures have built on switches? or does your rv have regular light switches like in a house? ours is very old so i wasn’t sure what the new ones had. I got this great light fixture from Grand Brass and now i’m noticing that it doesn’t have a switch on it so i don’t think i can use it
:(, also not sure why this is in all caps.
Can you post the link where you bought the tOggle Switch??
Sorry, just realized I never post the link so here it is:
https://www.grandbrass.com/item/sw720tbp/switches_fixture_and_powercord-fixture_switch-toggle_style/
This just changed my world!!! Thank you so much for taking the time to write it. We’re updating a 2004 rialta and i’ve been pulling my hair out trying to find light fixtures. This Makes me so happy 🙏🙏🙏
Yay, I’m so happy it helped! Light fixtures make such a difference in a space and give it that personal touch, so it’s definitely nice to have the option to switch them up!
OK. I ordered the new fixtures ai wanted and the 12v LED bulbs to fit them. I think I already know the answer but want to verify. All the 12v bulbs say DO NOT use in a standard 120v fixture but I am guessing that it is ok in this case because the fixture is wired to 12v. Is that correct?
Hi Vikki,
I’m gonna be honest and say I have no idea how or why it works, I just know that it does and we’ve never had an issue since installing our light fixtures (it’s now been a few years). We read this tip in an RV forum back in 2015 and it worked awesome for us so we wanted to share it with others. With that said, we are not electricians, so I definitely recommend contacting a professional if you feel unsure about it.
Katie
Hello! Do you have any experience replacing the recessed LED lights on the ceilings? Thanks!
Hey Fatima P, to be honest, we haven’t actually had to replace any recessed lighting in our RV so I’m not exactly sure how that works. If you’d like to send us some pictures to info@mountainmodernlife.com I can look into it a bit more and see if I can help with some tips. Anyway, let me know 🙂
Hi, lovely home you have there. So I just bought 120v light fixtures from home depot for my camper but was told by the local rv dealer that unless I rewired the entire electrical system to accommodate 120v, my camper would burn down. By the way What is a 120v bulb? I bought some 60 watt Edison bulbs and some LED, but neither say 120v or 12v that I can see. This stuff is so confusing please help
Hey Dina, I’m so sorry for the confusion, but I know how you feel because we’ve been there. To be honest I haven’t found 12v light bulbs any aside from Amazon or online. The trick is that you can use 120v light fixtures but you have to have a 12v bulb. If you search 12v Edison light bulbs on Amazon you’ll find some that will give you a better idea of what they are. So once you install your 120v light fixture you’ll go ahead and screw in your 12v light bulb and it will work just fine. Not all RV’s are the same so some may be wired differently so you’ll want to take a look in your owners manual to see what they say. At the same time if you are worried or don’t feel confident in the approach you may want to have an electrician come out. I hope though that this cleared it up a bit, however if you have any other questions please feel free to let me know.