UPDATE: All new featured RV tours will be posted on my other website, Wanderful RV Interiors. Existing tours will slowly be moved to the new website, and anything already moved will automatically redirect.
Disclaimer: This post may contain affiliate links, meaning, if you click through and make a purchase we (or those featured in this post) may earn a commission at no additional cost to you. View our full-disclosure here.
Eric and I had no idea what we were doing back when we started renovating our RV, but we didn’t let that stop us and neither should you.
There’s nothing more rewarding than watching your vision come to life after countless hours of blood, sweat, and tears. And nothing like being crammed into a small space with your spouse to see what you’re really made of, eh?
RV Renovation Flops
I know how easy it is to be misguided by social media or blog posts and feel like other people have it all together, perfectly clean homes 24/7, and perfect projects. Let me tell you, that’s definitely not us!
If you were to swing over on a whim, chances are there would be dishes in the sink, pet fur lingering on our sofa or clothes (fingers crossed the furminators I recently purchased really do help out in this department), and imperfections at every turn. Oh and let’s not forget I may or may not be wearing pajamas.
Most of our renovation was filled with projects we were doing for the very first time, so mistakes were made and lessons were learned. Ya know, life stuff.
That’s why we wanted to share a few of our RV renovation flops with you. This way you can see how certain projects have held up after nearly 2 years, and hopefully learn from some of our mistakes.
I’ll mention the RV flops below, or you can watch the video for more info and close-up shots of the projects.
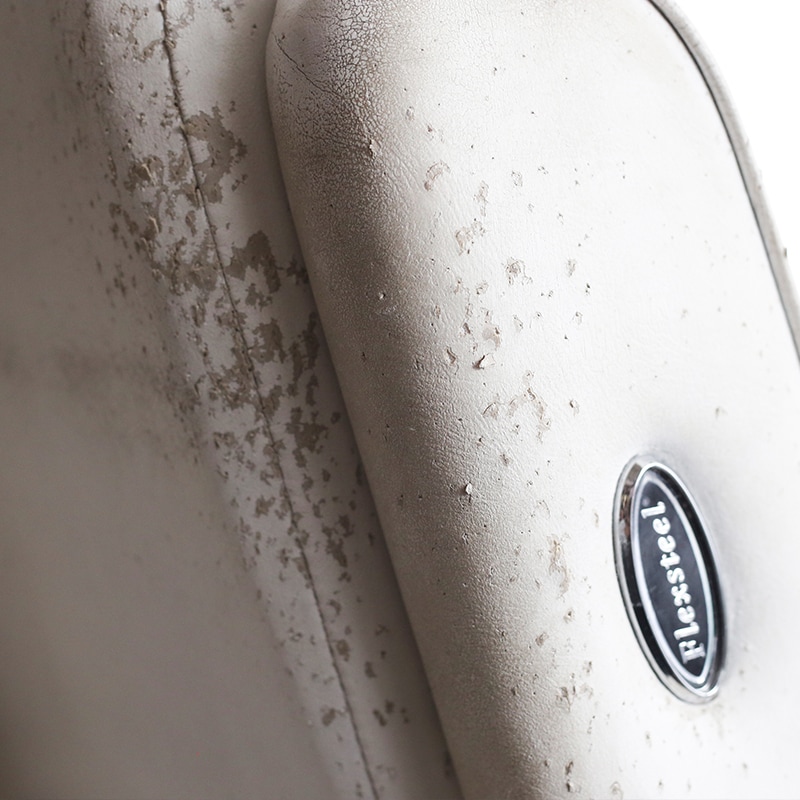
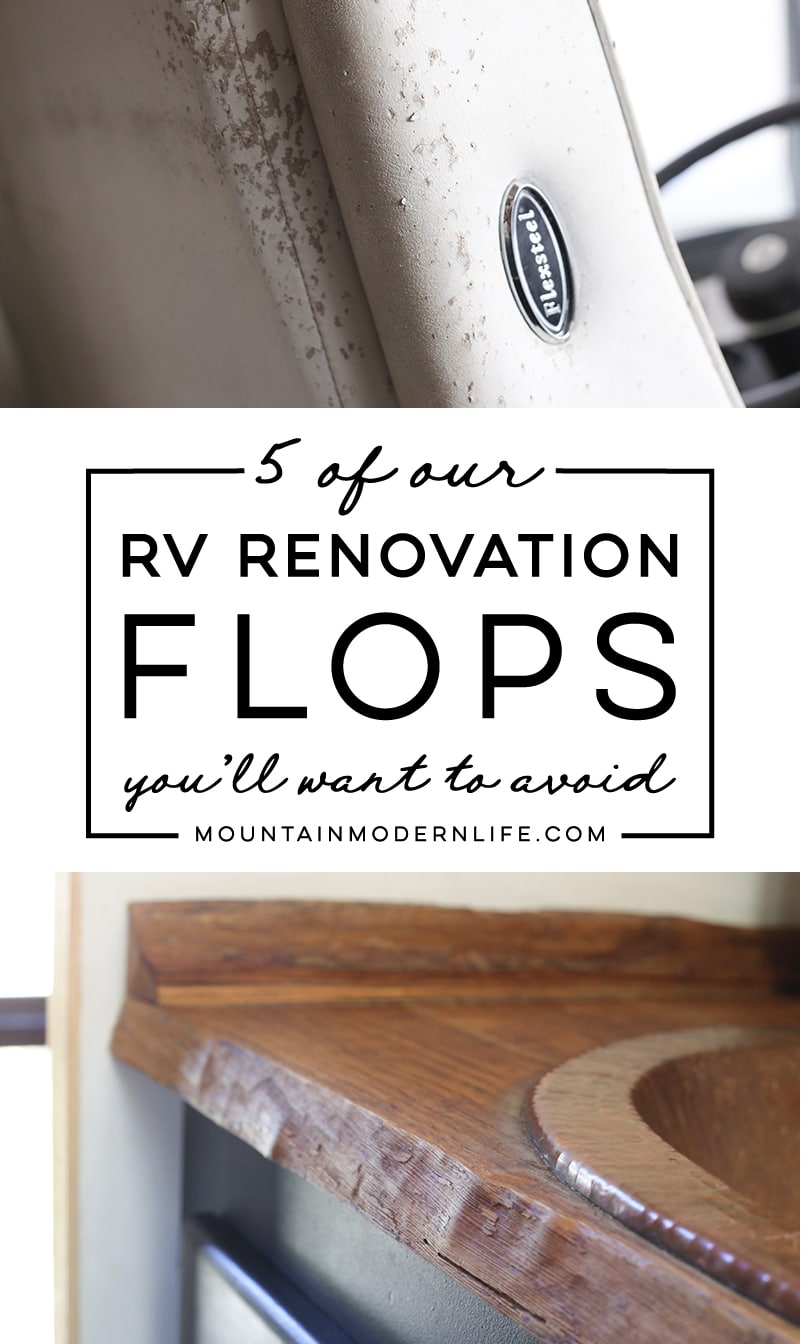
1. RV Renovation Flop: Captain’s Chairs
After inhaling too many fumes painting the walls of our RV, I had the great idea to paint our Captain’s chairs in an attempt to brighten up our RV even more. I think I was more excited to be the guinea pig since I hadn’t seen anyone else do this before. I knew it was a toss-up but was up for the challenge.
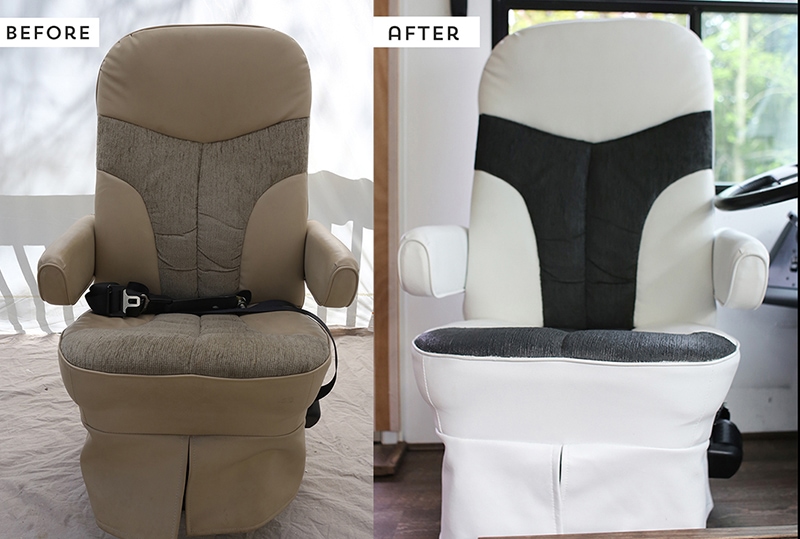
You can see how we painted the chairs here, but the paint has definitely scratched off in certain areas, especially where a couple, ahem, kitties have used it as a scratching post. On top of that, the original beige fabric color is seeping through in certain areas, making the chairs look even dirtier than they are. We mostly blame this flop on the humidity in the RV mixed with normal wear and tear, and our cats, Duckie and Kobe.
Overall, this was a BIG flop, and you’ll really see that if you watch the video above. Even worse, we didn’t even need to paint them in the first place. Ouch.
Yeah, looking back we realized the beige color would have been fine and definitely wouldn’t look like such a hot mess today. We painted these early on in the renovation process so if you do decide to make updates to your captain’s chairs, I’d say not to have it be a top priority and instead leave them as one of the last projects.
Who knows, you may realize you don’t need to update them right away after all, especially if you’re going to hang curtains behind them like we do. We also do most of our living behind the chairs so while we plan to update them in the future, I don’t see it happening anytime in the near future.
Moral of the story? We don’t recommend painting your captain’s chairs unless it’s an absolute last resort and you’re gonna get rid of them or reupholster them anyway. Some other options would be to buy seat covers, throw a faux fur rug over them, or buy new (or gently used) chairs.
A couple readers have suggested using a fabric dye or a fabric specific spray paint, so you may want to give those a try if you are going to paint yours. We tried a vinyl spray paint on one of the chairs but it was super glossy which is why we opted for chalk paint.
Have you made any updates to your Captain’s chairs? If you’ve had success painting them or can recommend any seat covers or custom upholstery, we’d love to hear about it in the comments!
2. RV Renovation Flop: Slide-out Trim
Overall, we’re really happy with the way our slide-out flooring and trim is holding up 2 years later. Sure there are some scratches in the stain, but nothing too major. The problem is more with how we attached the trim – using our nail gun.
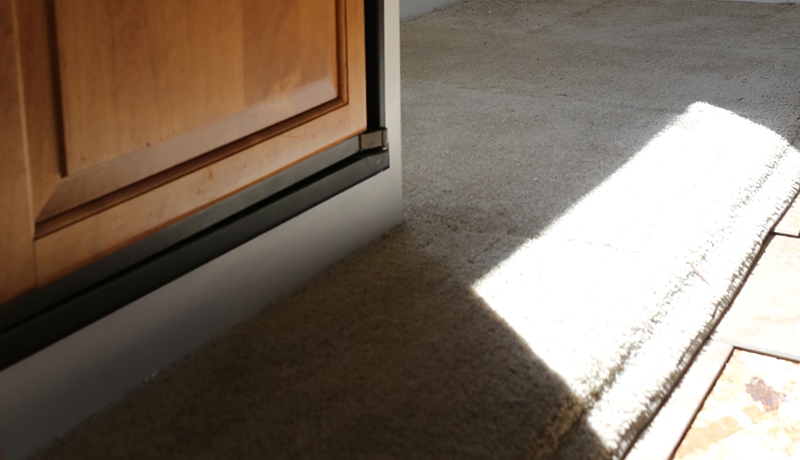
We’re guessing the friction of bringing the slide in and out, along with us walking on it has created a few nails to slightly pop up over time. They don’t come up much, but enough to snag my socks every so often. It’s not like we’ve ever gotten hurt, but it’s definitely annoying and I can only imagine how nerve-wracking it could be if you have small children.
We’ve always just nailed them back down when this happens but someday may reattach the trim with Contact Cement Adhesive or a different strong adhesive. That’s what we used for the stair nose trim of our stairs and it’s worked great. If you have had success with any other options, we’d love to hear about them!
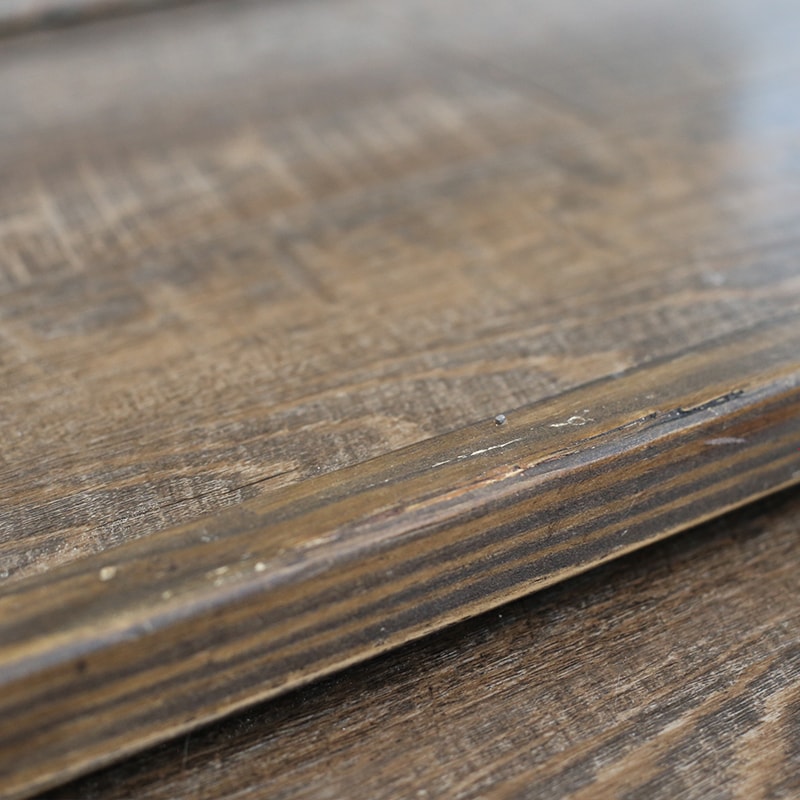
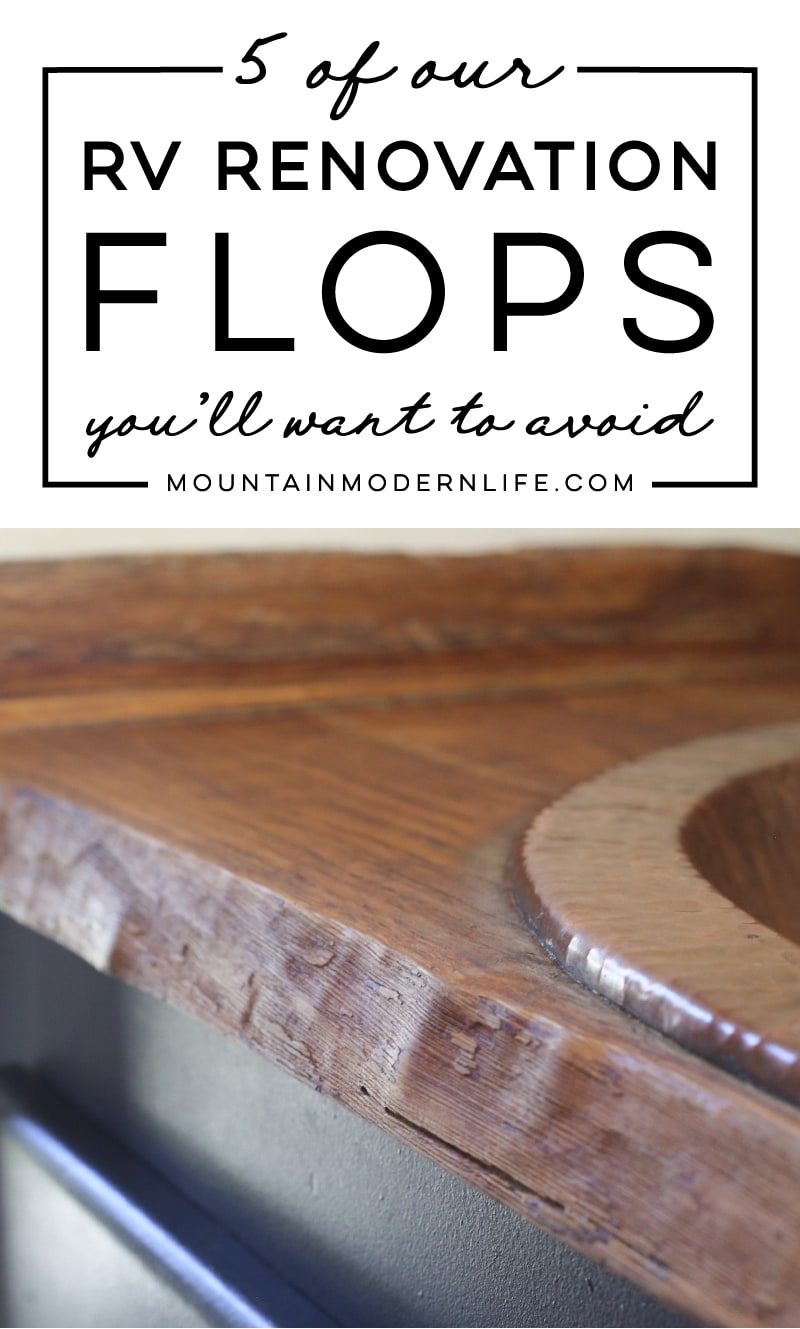
3. RV Renovation Flop: Wood Bathroom Countertop
This is one of our favorite projects because the wood we used for the countertop is from the 1800s, pulled out of a barn in North Carolina, and it was the first time we ever got to work with live-edge wood. You can watch our video on how we made the countertop here.
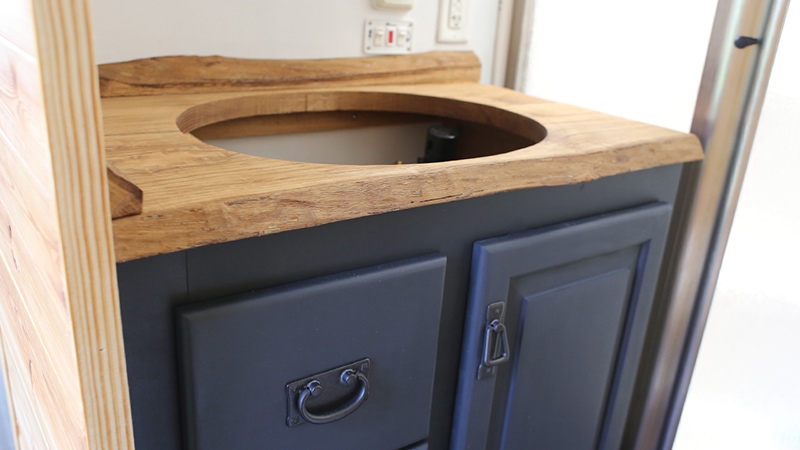
The main problem is on the left where you can see we have discoloration that kind of hugs the sink. We’re not sure if that’s a result of the Tung Oil we used to seal the counter, or if we just didn’t seal the sink good enough and it’s hard water stains.
I also want to mention how hard water can be super annoying in the RV, especially when you have a copper sink. Copper sinks are beautiful, but keep in mind that they require more maintenance. We knew this before we purchased the copper sink, and wouldn’t change a thing but it’s definitely something to keep in mind.
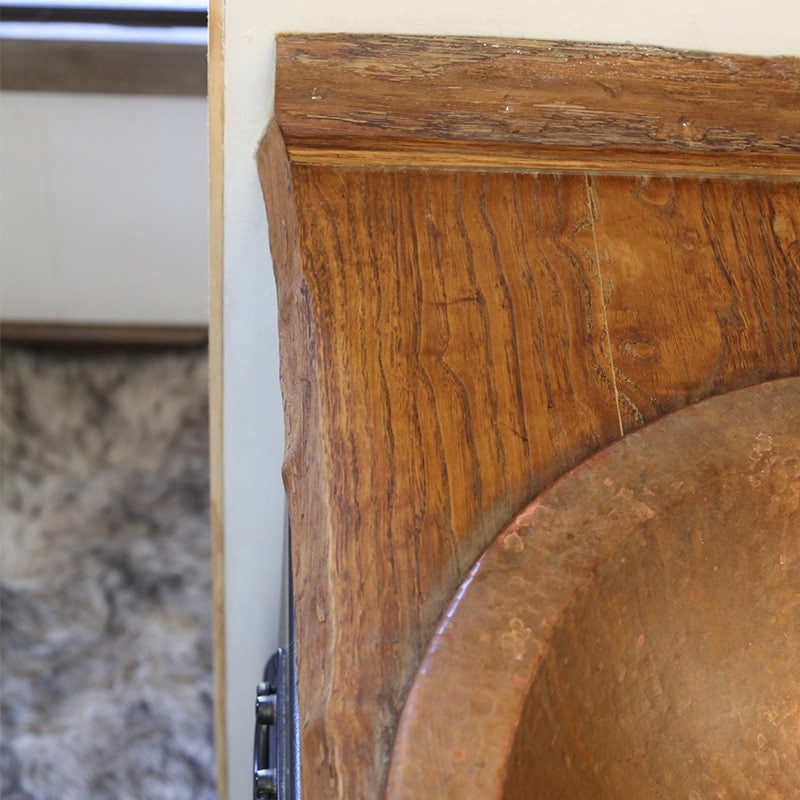
Update: We ended up removing the sink, sanding down the counter, staining it with General Finishes Golden Oak, followed by General Finishes High-Performance Top Coat. We then re-installed and re-caulked the sink. It’s been about 4 months since we did this and the counter and sink have held up awesome. We are now HUGE fans of the GF High-Performance Top Coat and use it for everything (we prefer the flat or satin finish).
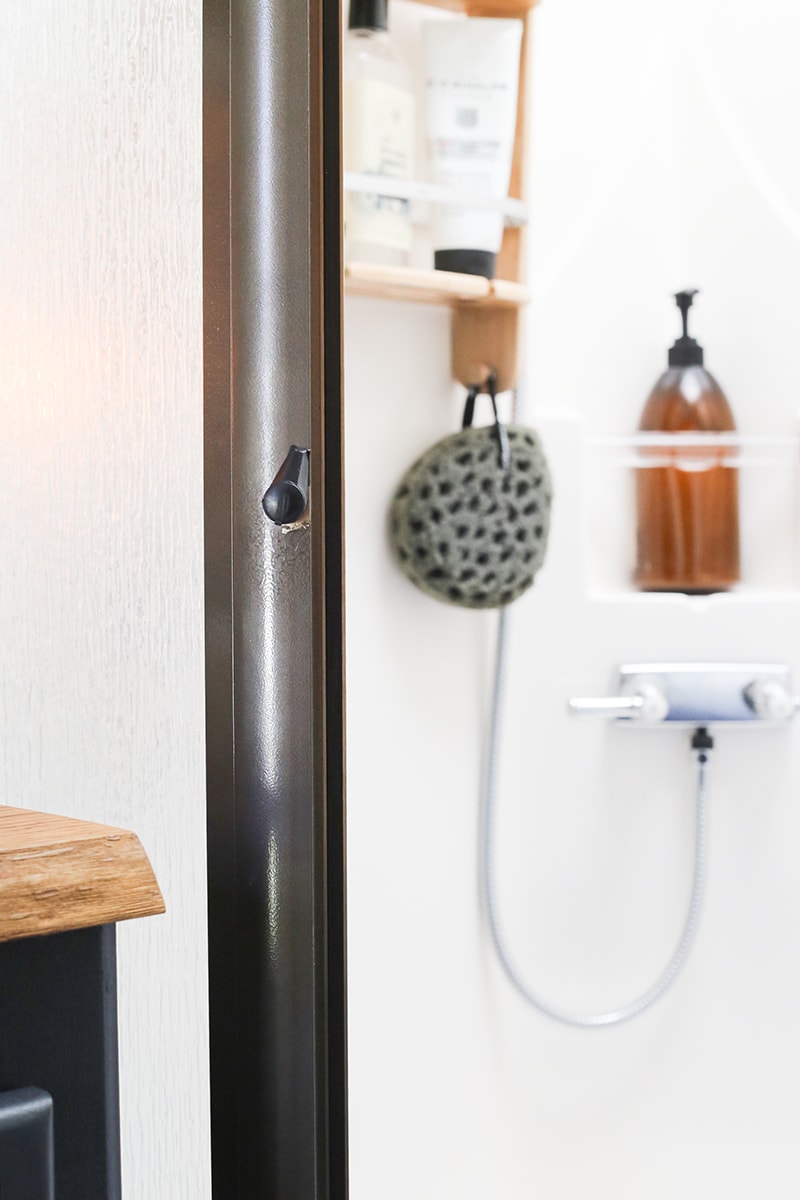
4. RV Renovation Flop: Painted RV Shower Frame
We don’t have a post or video about this but two months after we hit the road we ended up taking the metal shower frame out (to paint the side of our new linen closet), and figured it was the perfect opportunity to paint the frame while we were at it.
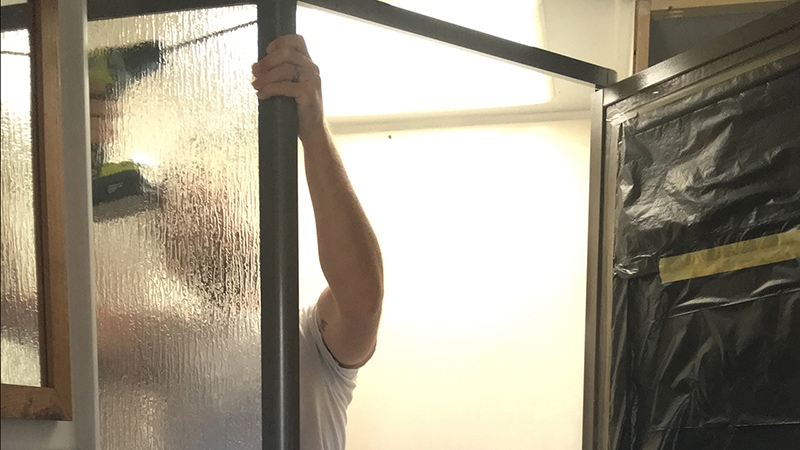
Overall, I think our painted shower frame turned out pretty good, especially considering we didn’t prime OR seal it. Oops. Also, Eric picked up the wrong spray paint color (I wanted it much darker) and I didn’t realize it until AFTER we were done painting. It is darker than the old silver color, but not by much. Just another reason I prefer to paint in natural light during the day, haha.
There are areas where the paint has chipped but the most annoying part is the bottom of the frame where the paint will sometimes or flakes off. I think this is because it’s where the water hits, but I’m pretty sure spraying a lacquer sealer on top of the paint would have helped with this.
Do we recommend you paint your metal frame? Absolutely, especially because it’s a budget-friendly way to change the look of your RV shower. With that said, we would suggest using a primer beforehand and we absolutely recommend using a lacquer sealer afterwards.
If you’ve painted your RV shower frame and had had success and aren’t experiencing any chipping, we’d love to hear about what you did!
I plan to touch up the little scratches and just haven’t gotten around to it yet.
On the plus side, our new RV shower head and faucet are AMAZING which you can sorta see in the background.
5. RV Renovation Flop: Painted Outdoor Rug
Last year, Eric’s parents gave us their old RV patio rug because they had gotten a new one. It had a little bit of damage but I thought it would be fun to try and bring some new life into it. While this is more of a decor project and not so much an RV renovation project, we thought it was important to add in here because it can really highlight the question of whether you should buy or DIY.
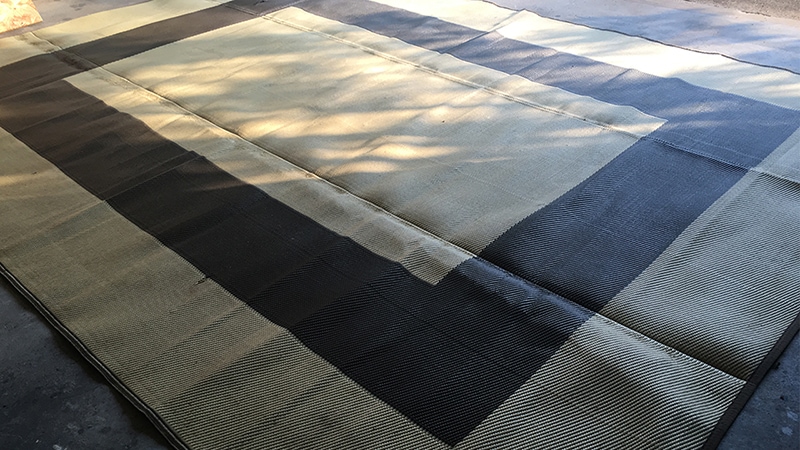
When I first painted this rug, it looked pretty decent, plus I really enjoyed the process. A few years ago I updated an indoor rug with sharpies, and later painted another plain rug for our dining room. Those rugs held up pretty well, all things considered, so I thought it would be fun to try painting this patio rug.
Unfortunately, it didn’t take long for the paint to chip and at one point Eric even dropped black paint on the corner and I had to re-paint that section. Also, since I had to purchase outdoor specific paint, this project wasn’t nearly as cost-effective as I original thought. Womp womp.
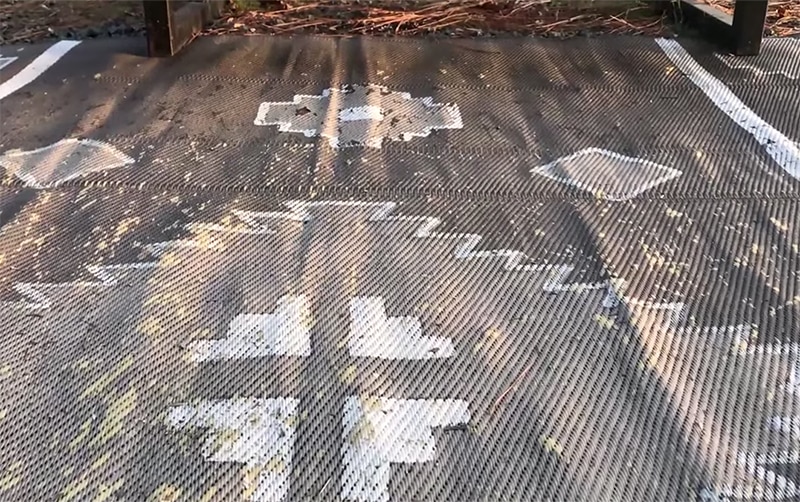
I never took any good photos of the rug while it was still looking decent and blame the flop on the type of vinyl material the rug was made of, mixed with all the folding when we traveled, dog claws, and gravel getting scrapped across it. If we would have weighed our options a little bit more in the beginning, we probably would have gone with buy vs. DIY.
Ultimately, we ended up purchasing a new rug which you might have seen in our RV Christmas tour. The new rug also isn’t specifically an “outdoor rug” but is made out of polypropylene, which you can supposedly use inside or out. We’ve had it for about 5 months now and it’s still holding up great despite all the stormy weather, so I guess only time will tell.
I’d recommend looking into options and comparing cost, time, or other advantages/disadvantages before deciding if you want to buy or DIY. Sometimes doing it yourself can cost more money, take more time, or create a bigger headache than paying for a product or service in the long run.
We hope our RV renovation flops don’t keep you from tackling that project you’ve never done and instead encourages you not to give up. Even if it doesn’t turn out exactly as you planned, you can chalk it up to experience and can always try again. Also, don’t be afraid to reach out for help, and that includes utilizing RV groups and forums. You’d be amazed how friendly and helpful the RV community is!
Have you experienced any RV renovation flops? Let us know in the comments below!


Thanks so much for this very useful and interesting post! We’re planning the remodel of our 29′, 2000, no-slide Georgie Boy Landau and I’m using several of your pics and posts for inspiration. (I LOVE your interior and design style.) DH has several beautiful live-edge boards and we plan to use one as our bathroom vanity top with a granite wear dishpan vessel sink. Thanks for the Waterlox tip. Our bathroom is so teeny-weenie that I want to remove the icky gold accordion-style curtain metal tracks and install a curved shower curtain bar. I must check out your shower head and faucet, too. Now… if it would only warm up around here! (Chgo. suburb)
Thanks again, and happy trails!
Yay, sounds like you have some fun projects planned! I haven’t used Waterlox before but had considered it before going with Pure Tung Oil. The tung oil worked great on our kitchen counters and other projects around the RV, like the slide-out trim and our desk, but definitely didn’t do so hot in the bathroom. I hear ya on the cold weather. We’re in Northern California and is snowed last week and we’re supposed to get more this week! I’m sooooo ready for Spring!
Katie
That thing with the nails popping up out of the floor trim happened to us all the time in this one spot at our old house. My husband tore holes in a lot of pairs of socks that way!
I just wanna know how Eric doesn’t snag his socks, only me! Oh I guess he does tell me not to walk on the slide-out, hahaha.
We all make DIY mistakes, but I find that it is all part of the fun
Table top, or marine Epoxy for the bathroom counter top. Ting oil is not durable enough for a wet area. Never nail anything without first gluing, flex and expansion will get you every time. Did you treat and prime the leather/vinyl chairs before painting? I did some boat seats and they sat in outdoor storage for 5 years (project was abandoned) but seats were still in good shape when we disposed of them. Should have tried a dye on the rug. Aluminum painted? Not so much. You can buy shower components fairly inexpensively to replace (using old parts as a template) instead of trying to paint them. From a long time cabinet maker, refinished, remodeler, tinkerer, and avid DIYer,
Great tips about the marine epoxy, and everything in general! We did test the paint on the chairs first but after the first one it was looking good and just sitting in our garage before the weather got too humid. I did the prep for what I read was best practice with using chalk paint, but those tutorials were based on leather furniture in a home vs. a humid RV. And it wasn’t until months after being in the RV that the chairs started to get rough, and the paint really chipping didn’t happen until a year in. Oh well, live and learn. I’m curious, what type of paint did you use on your boat chairs?
I have used Waterlox on a walnut butcher block island we installed in our new build kitchen I built owner-builder. I had to apply 4 coats before it looked good with a 24 between coats dry time. There is a 30 day cure after your final application before it is fully cured and can be used. When you apply it, make sure to wear a mask or you’ll lose a bunch of brain cells. I put a 5 gallon plastic storage bucket on it 6 months after the cure date and it noticibly scratched the finish. This product was recommended by the manufacturer of the butcher block, but I’m not too happy with it. I’m not sure of what a better alternative might be. It has protected the wood around the sink, so it does work but it also does scratch. I tried to use 0000 steel wool to “polish” it out and it only left a dull spot. I have been told by the woodshop I bought it at to just recoat a couple of times, and let it recure to get rid of the damaged area. Waterlox is self leveling so there is not a problem with brush strokes. Hope this helps.
Thanks for sharing your experience Leslie! Man, the more I read about the different options the more I think we may just want to go with poly. I originally wanted something more environmentally-friendly, but I also want something that’s going to work and look good for years to come. Decisions, decisions…