This DIY expanding table can collapse in seconds (and is perfect for RV living!)
This post was originally posted in 2016, but updated in 2023.
Disclaimer: This post may contain affiliate links, meaning, if you click through and make a purchase we (or those featured in this post) may earn a commission at no additional cost to you. View our full-disclosure here.
Whether you live in an RV or just want some space-saving ideas, we hope you can find some inspiration from this post.
Although we created this transforming table inside our motorhome, it could easily be re-created in a home office, guest room, apartment, or small nook where you need some extra workspace.

This DIY expanding table was a project we had planned for a while, but despite building the media cabinet and installing the telescoping slides before hitting the road, we didn’t get around to building out the tabletop until after.
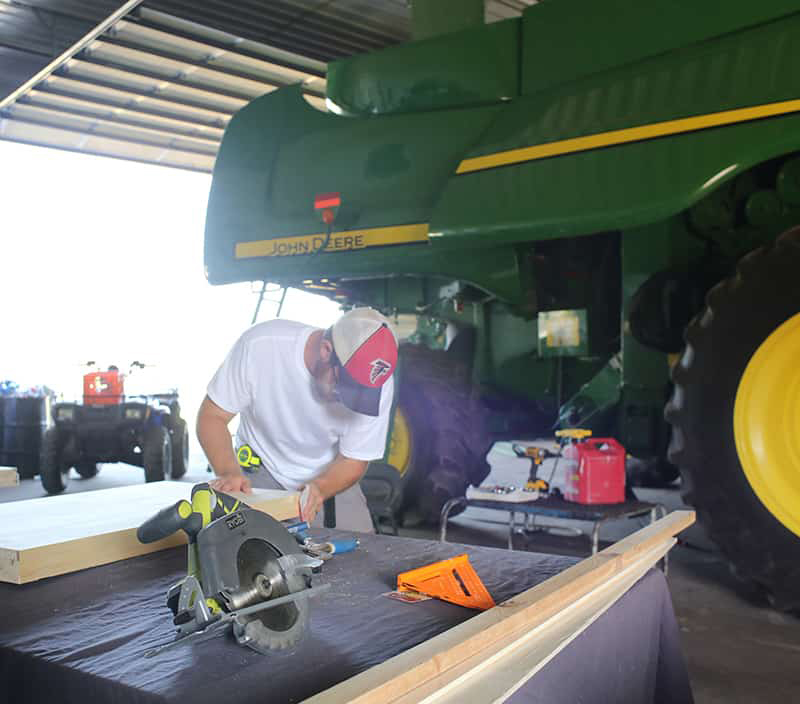
Thankfully, Eric’s extended family in Wisconsin has a shop on the farm and let us use it while we were visiting them for a few months.
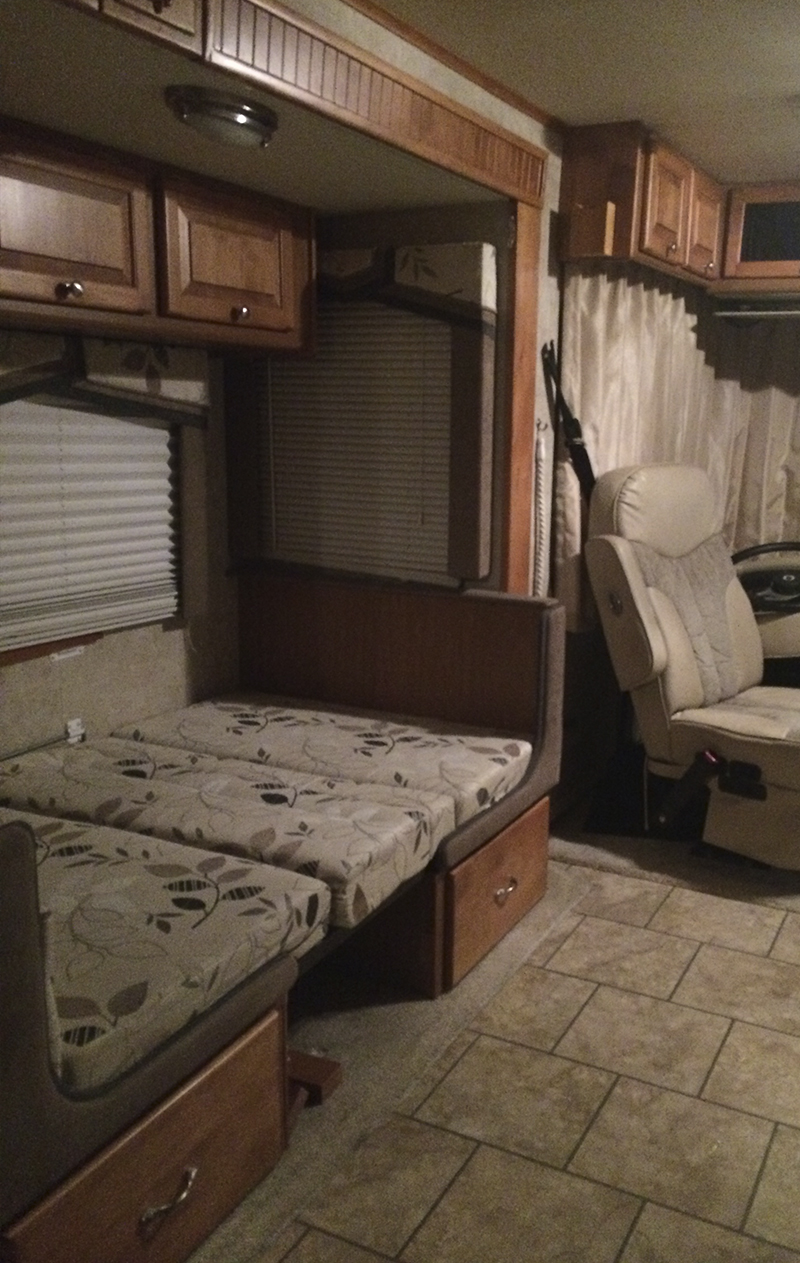
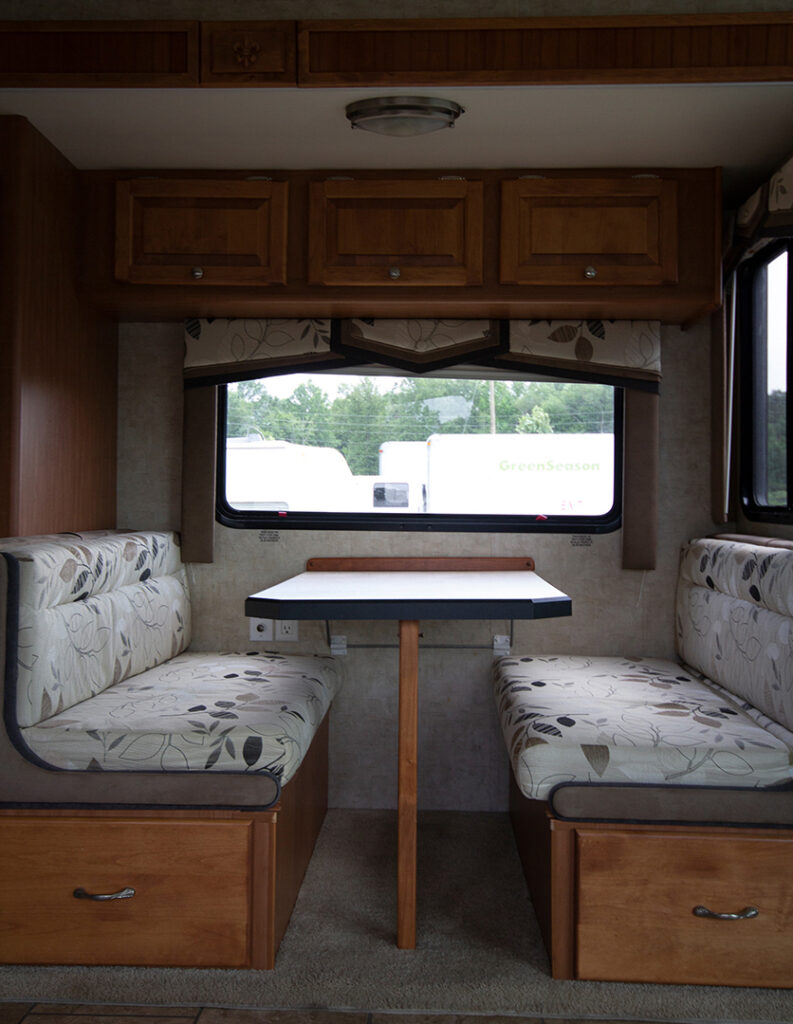
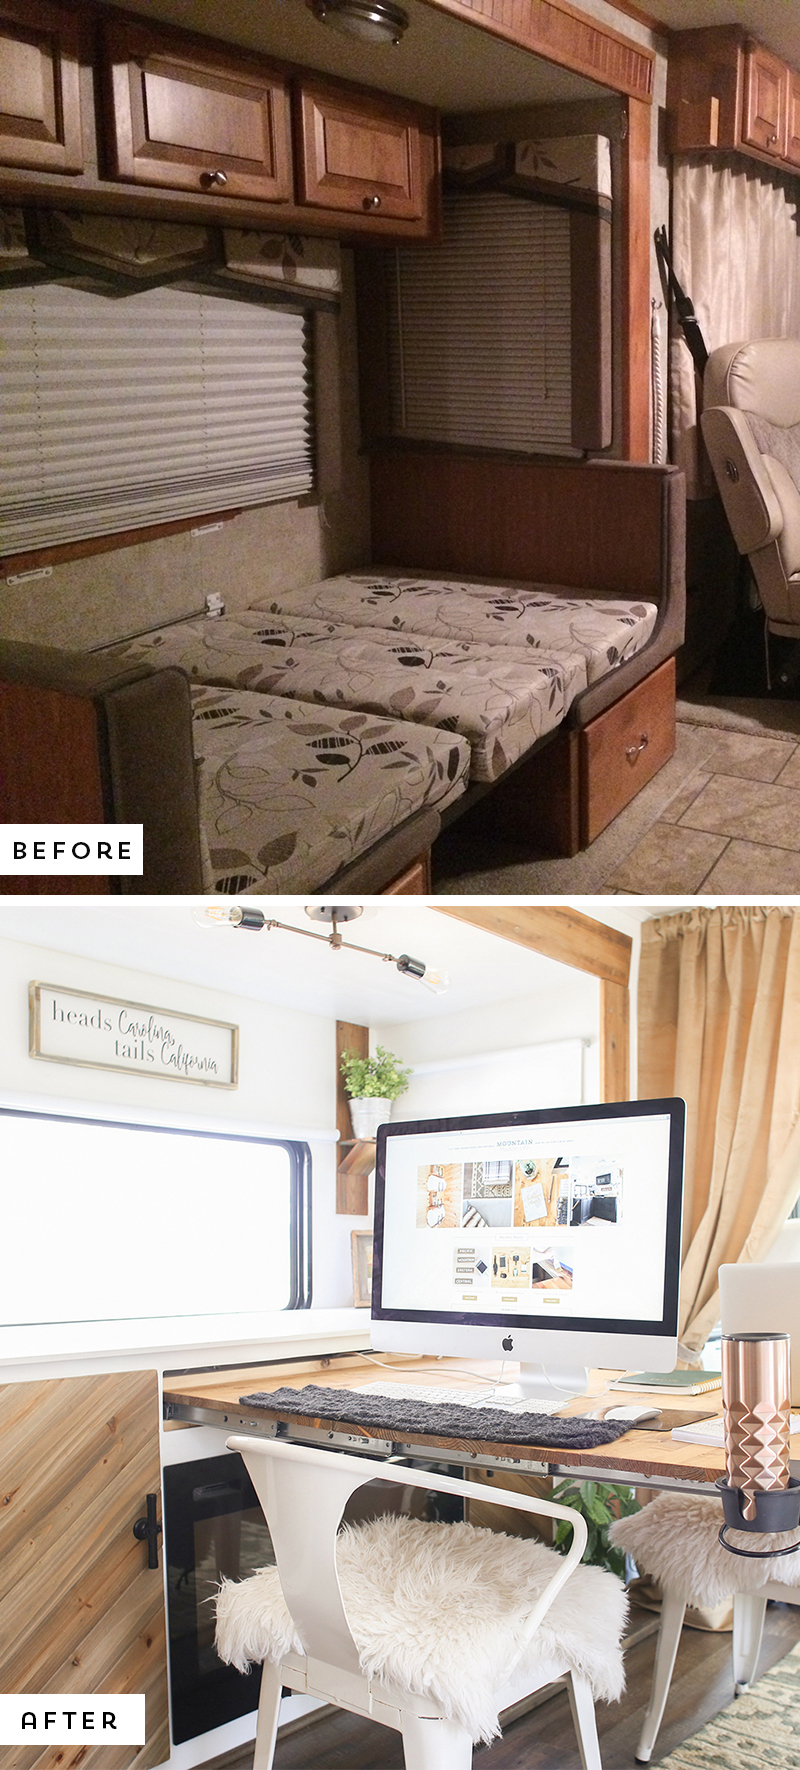
Replacing the RV Dinette Booth
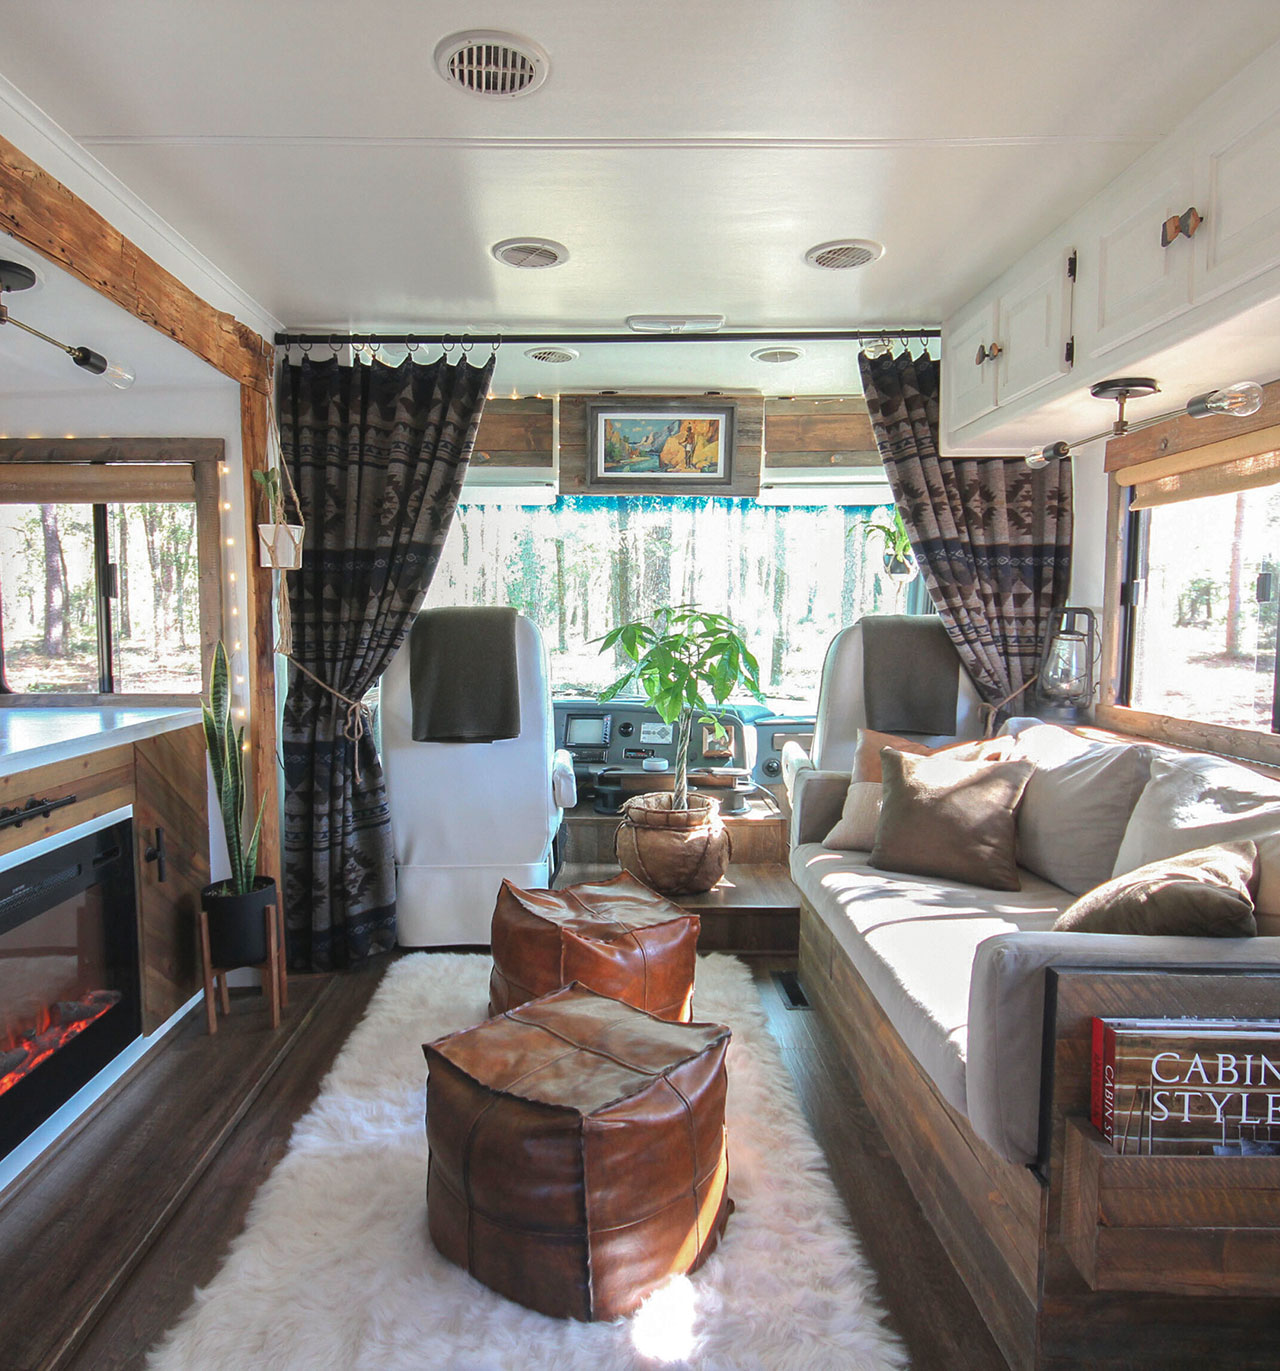
Ever since we brought our RV home, we knew we would replace the dinette booth with a custom media cabinet. The plan was to create a custom cabinet that would not only hide our TV and include a fireplace, but also have a collapsible table that could double as a desk.
Here’s a before photo of our RV dinette booth area, so you can see what we were working with.
Unfortunately, I struggled finding any information that could help guide our DIY extendable table build or tell us what products to purchase. Ultimately, we sorta just figured it out on our own. With that said, we’re pretty excited about how it turned out.
That’s not to say improvements couldn’t be made to the design (some of which I’ll share at the bottom of this post), but we hope to give you a starting off point to create something similar. There are lots of custom variations that can be made depending on your needs and space limitations.
The Inspiration
If you live in a small space then you know just how important it is for furniture to serve multiple purposes. Our DIY transforming table was originally inspired by this pull-out drawer table and the Goliath table I originally saw in this youtube video. Both show innovative furniture designs that transform from a narrow console table into a massive dining table in less than a minute.
Here’s a video showing the Goliath table in action:
Before long I was obsessed with space-saving table designs that could expand, fold, collapse, or transform in one way or another. They were so innovative and beautiful. However, I also discovered styles were limited and price-points high.
In fact, the only expanding tables I could find at the time were designed in Europe and cost thousands of dollars, which wasn’t in our budget. Not to mention we would need something custom and lightweight. I imagine more designs will continue to become accessible in the US as time passes and the tiny house movement grows.
While this won’t be a step by step tutorial on how to build this table, I’ll link to the main supplies we used as a reference.
Supplies/Tools
Here are the supplies you’ll need to make your own burlap roller shades:
- Extension Slides
- Removable Wooden Legs (or consider adjustable or Clamp-style legs)
- Wood leg Attachment Plates
- Table Locks or Lever Latches (1-2 per table extension)
- Wooden Dowel Kit or alignment pins (optional)
- Paint/Stain – we used dark tung oil
- Tabletop (we used 3 edge-glued wood panels)
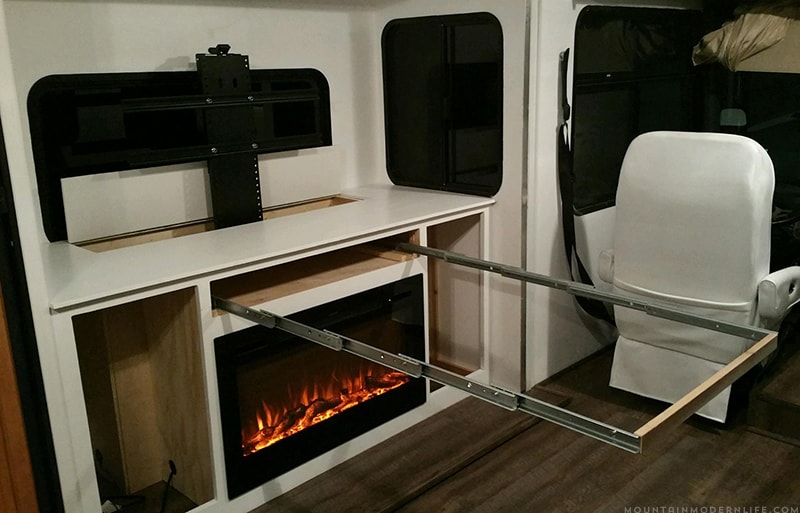
You can see how we created the custom media cabinet here.
The search for telescoping drawer slides
After spending countless hours looking at telescoping table and drawer slides, I realized they were either too big for the space they needed to be hidden in or were a bit more expensive then we wanted to spend.
Then when I finally found a pair of slides that would work, the company wasn’t getting back to me, which was really frustrating. I finally called and was told (rather rudely) that they only sold wholesale. It would have been nice if they would have emailed me this, but on the plus side, they did give me the contact number for a company that sold the same slides, yay!
When I called the company the owner answered and was so nice and helpful that as soon as we hung up I ordered the metal console extension slides from his website. I really just liked the vibe I got from this company and can definitely recommend them. I had also ordered the folding table leg hinges, but we decided not to go that route.
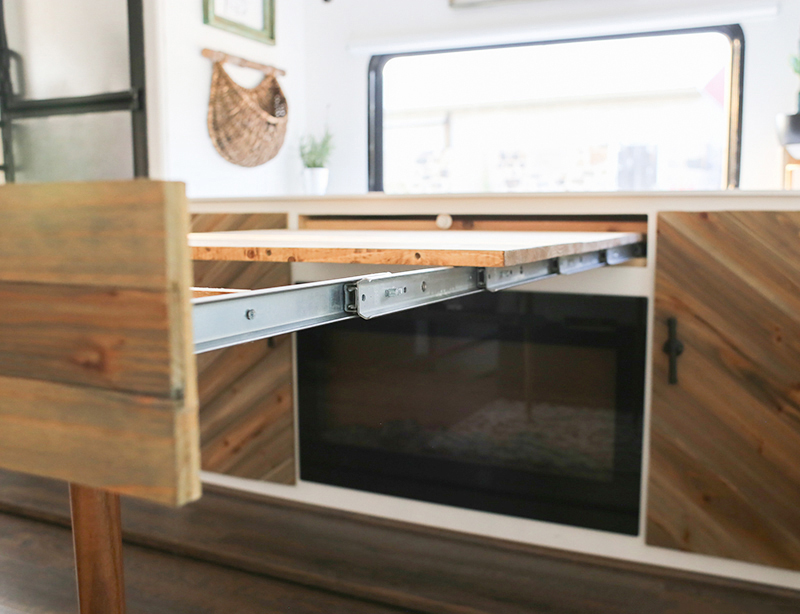
What’s great about these slides is that they’re made for a console table and are only 14″ closed, yet they extend up to 64″, meaning there is 54″ of space available for table leaves.
The slides were basically installed like regular drawer slides inside the media cabinet.
The search for removable table legs
One of the other aspects I spent WAY too much time researching, was what table legs to use.
I originally wanted u-shaped telescoping legs like the ones shown in the modern European designs, like the Goliath table video above. However, I couldn’t find any companies that sold them locally. Most of the ones I did find were located in another country and crazy expensive. Others were too big even when collapsed, or too bulky and not exactly what I wanted design-wise. I knew we could attach wooden legs but wanted to see what other options were out there first.
At this point, I wish I knew how to weld, or knew someone that could make them for me. I even considered contacting metal fabricators. Instead, I moved onto other table leg designs and quickly became obsessed with more industrial style table legs that could easily be attached to any surface to create a table or desk.
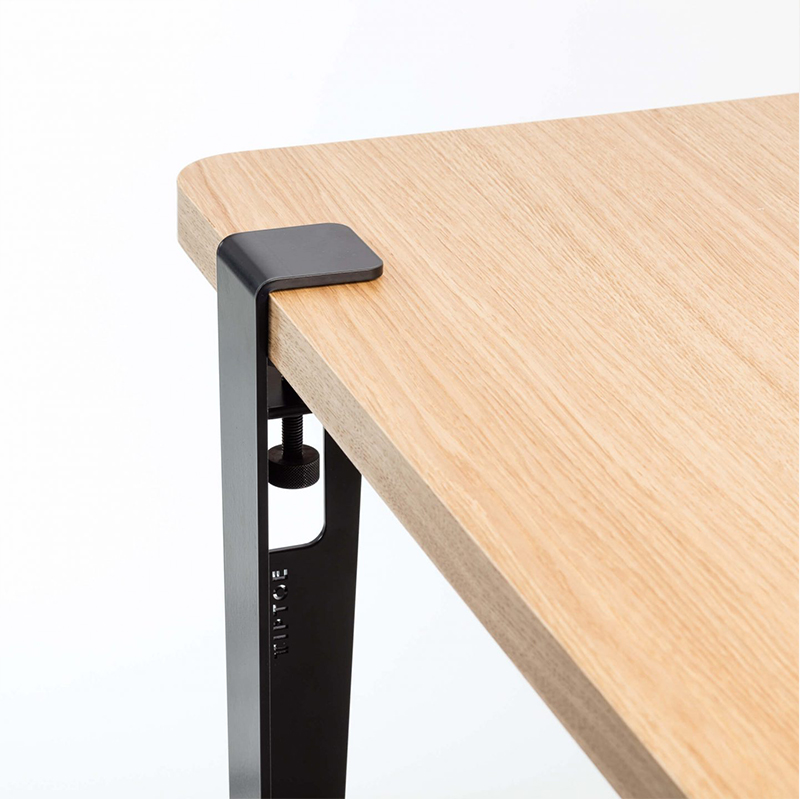
I especially fell in love with the clamp-style legs from Floyd, but they only sold the legs in a 4-pack and were out of stock. Luckily, I came across Tiptoe, another shop that sold clamp-on table legs. Only they were located in France, which meant shipping would take a while and we wouldn’t get them before hitting the road.

I ordered them anyway and had them shipped to my dad’s house out of state since we planned to swing through on our way to Wisconsin.
Well, it didn’t matter because they got lost in the mail and we never got them.
Booooo.
Luckily I was able to cancel the order and get my money back, but I was still pretty bummed. I felt so fancy ordering something from France and was excited to incorporate the innovative design into our RV.
In the end, we picked up two 28″ wooden legs and attachment plates at a local hardware store. We also picked up 3 edge-glued spruce boards for $16 each. We considered plywood and other wood options, but now that we don’t have all of our tools with us, we decided the spruce panels would be the best plan of attack.
While we had to make some compromises on the table legs, the approach we ended up taking was WAY cheaper, not to mention easier to attach and put away. Everything happens for a reason, right?
Creating the extending tabletop
Each project panel was 1 x 18 x 48 so we had to cut them down to 1 x 18 x 34.5. Depending on the wood you purchase, and the length of your table, you may or may not need to cut them down.
We thought about painting the tabletop sections white but instead used Dark Tung Oil leftover from when we sealed our bathroom counter.
If you live near an Ikea, I recommend checking out their tabletop options. Just keep in mind that some of the lightweight options are made with a cardboard honeycomb interior, which will make it difficult to screw into and leave unfinished edges if cut down. However, if you find the exact size you need, you may be able to make it work.

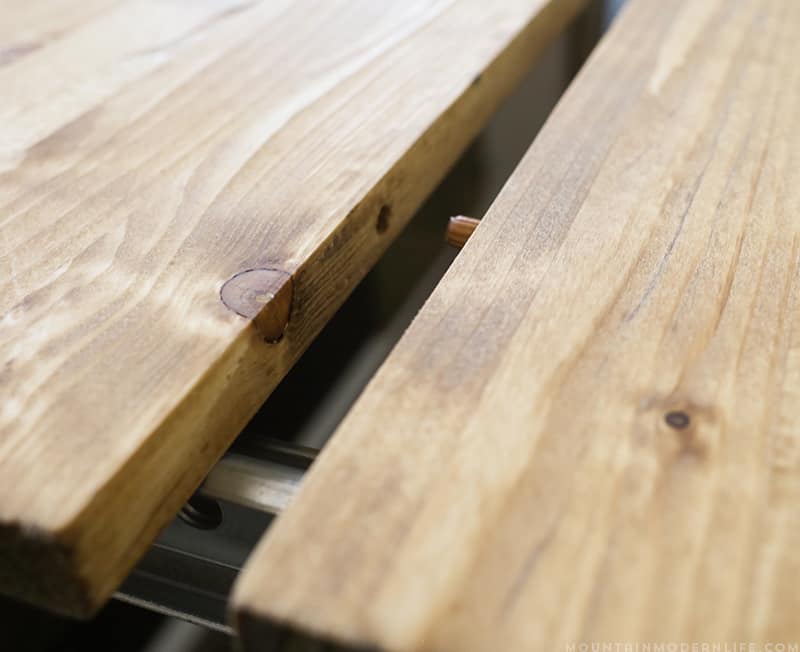
Interlocking leaf extensions
We originally planned to use table locks to connect the table leaf extensions to one another, but Eric wanted to play around with wooden dowels so he purchased a kit. The dowels worked well but if you use the table locks it’s not necessary, and honestly creates more work.
We later added table locks to each table leaf anyway since our cats jumping up and off the table was causing the dowels to be less effective than we hoped. Now they lock in place and don’t move unless we unlock them.
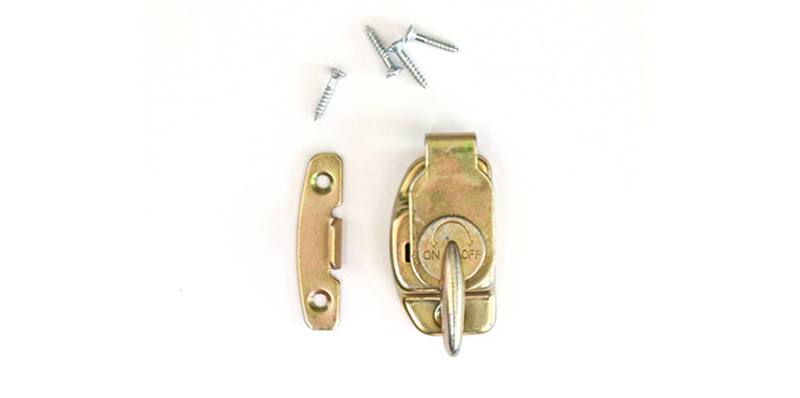
We actually installed sash locks meant for windows since that’s all we could find locally at the time, and they work well, but I still recommend using actual table locks or level latch locks. We’ve used them for other projects and they are my preference if given a choice.
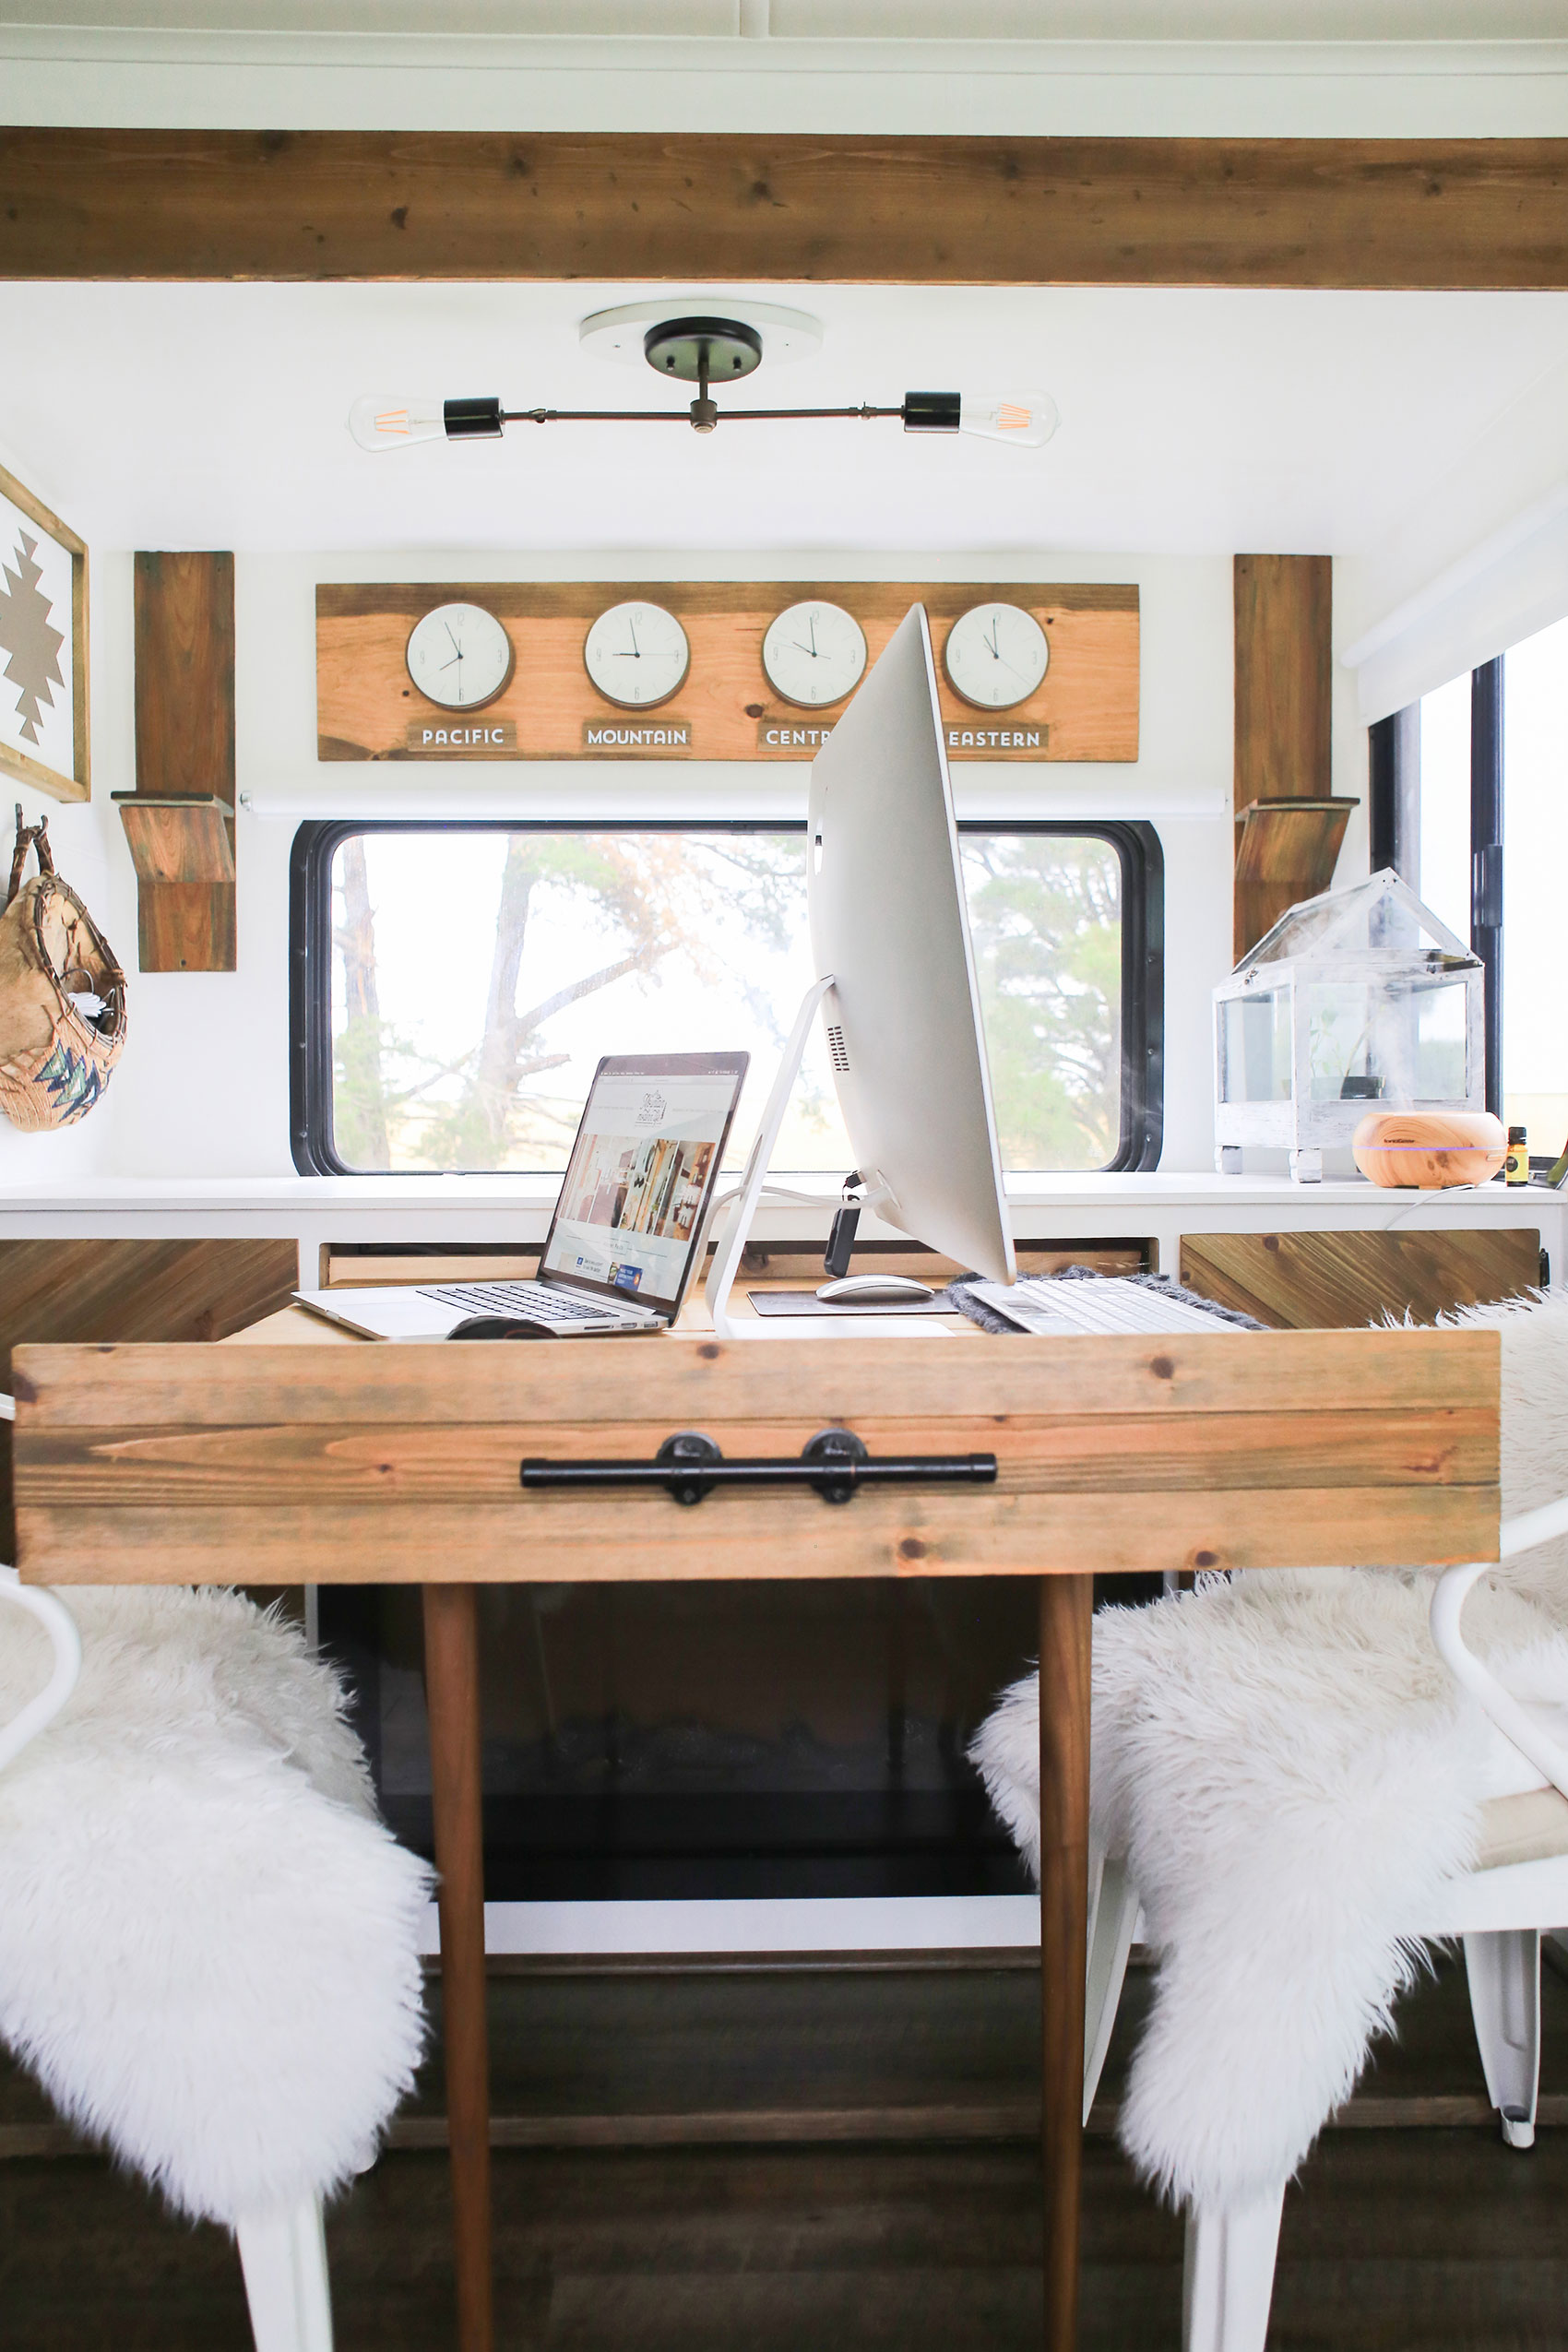
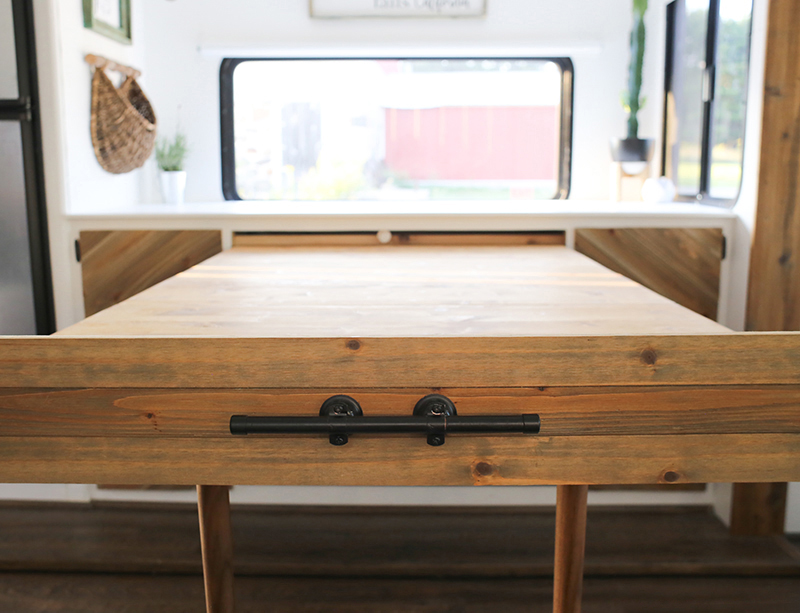
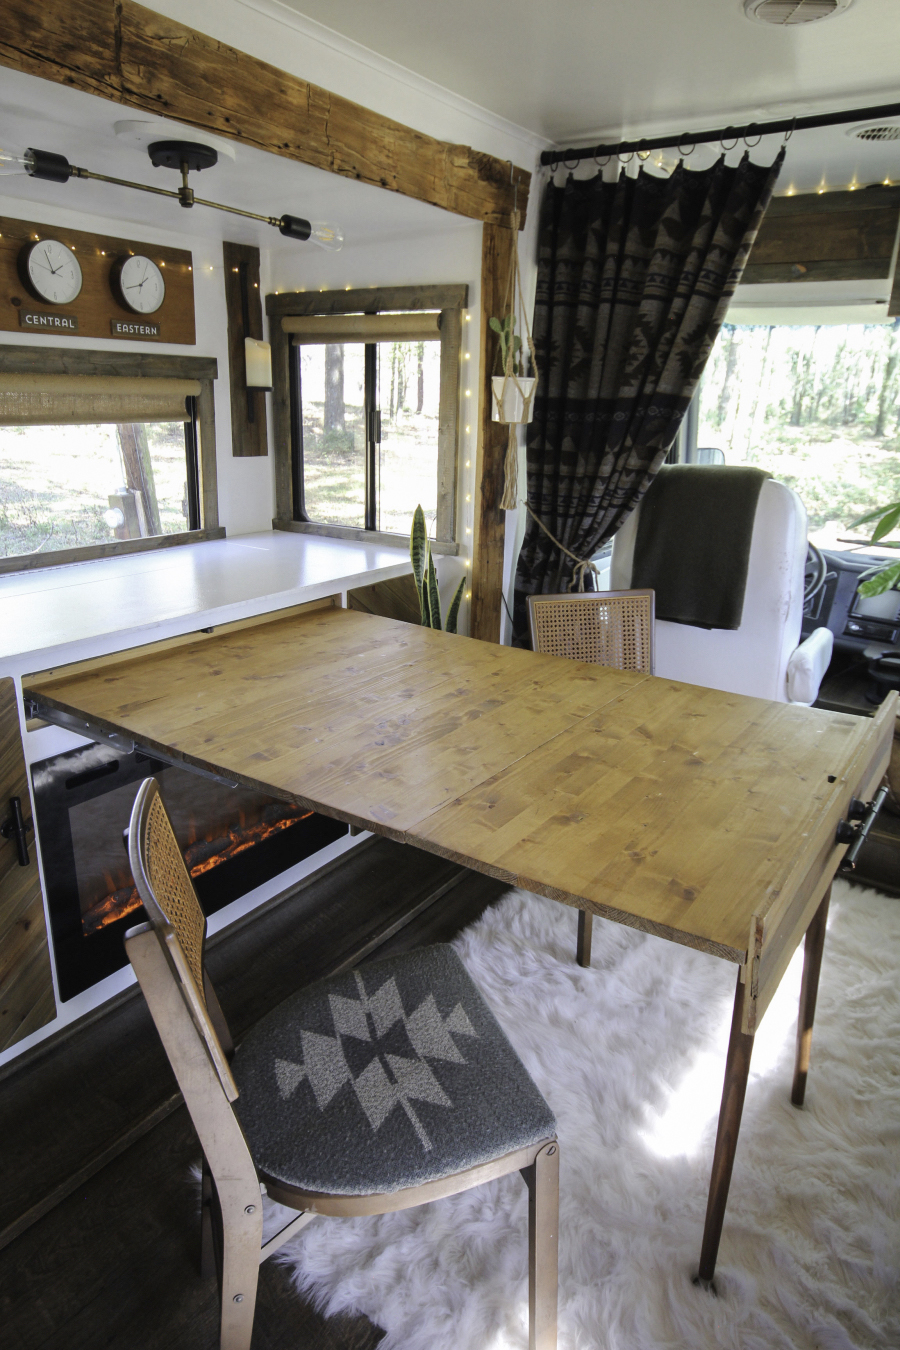
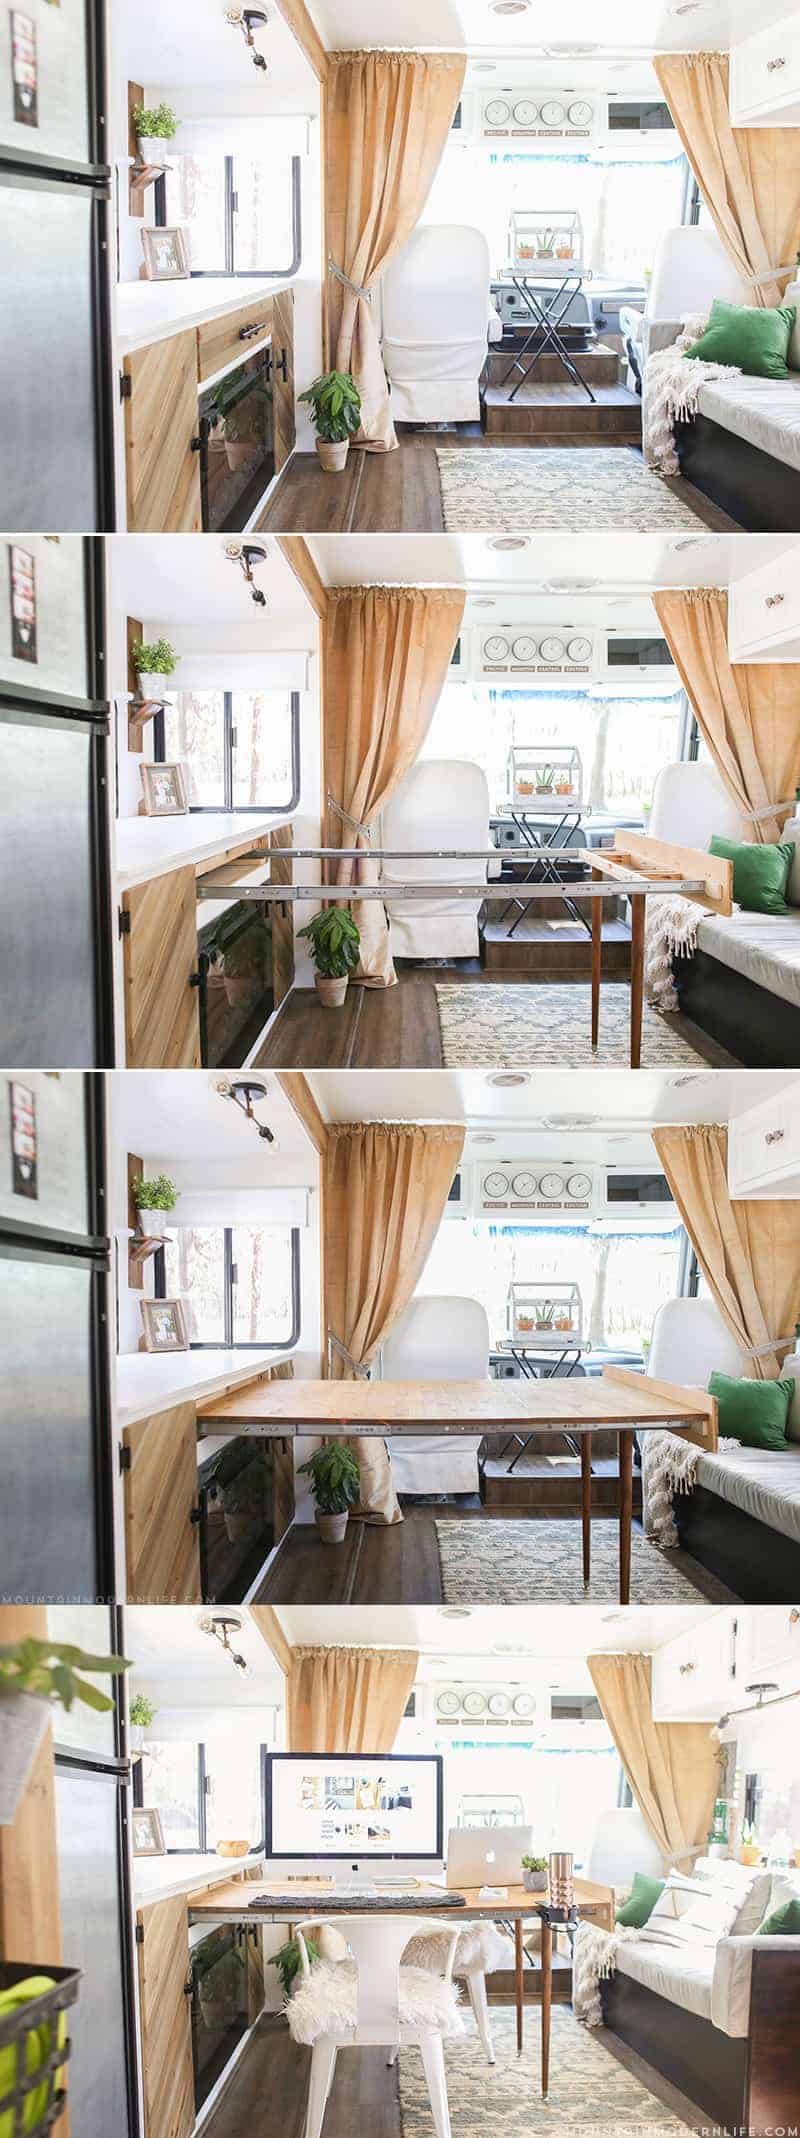
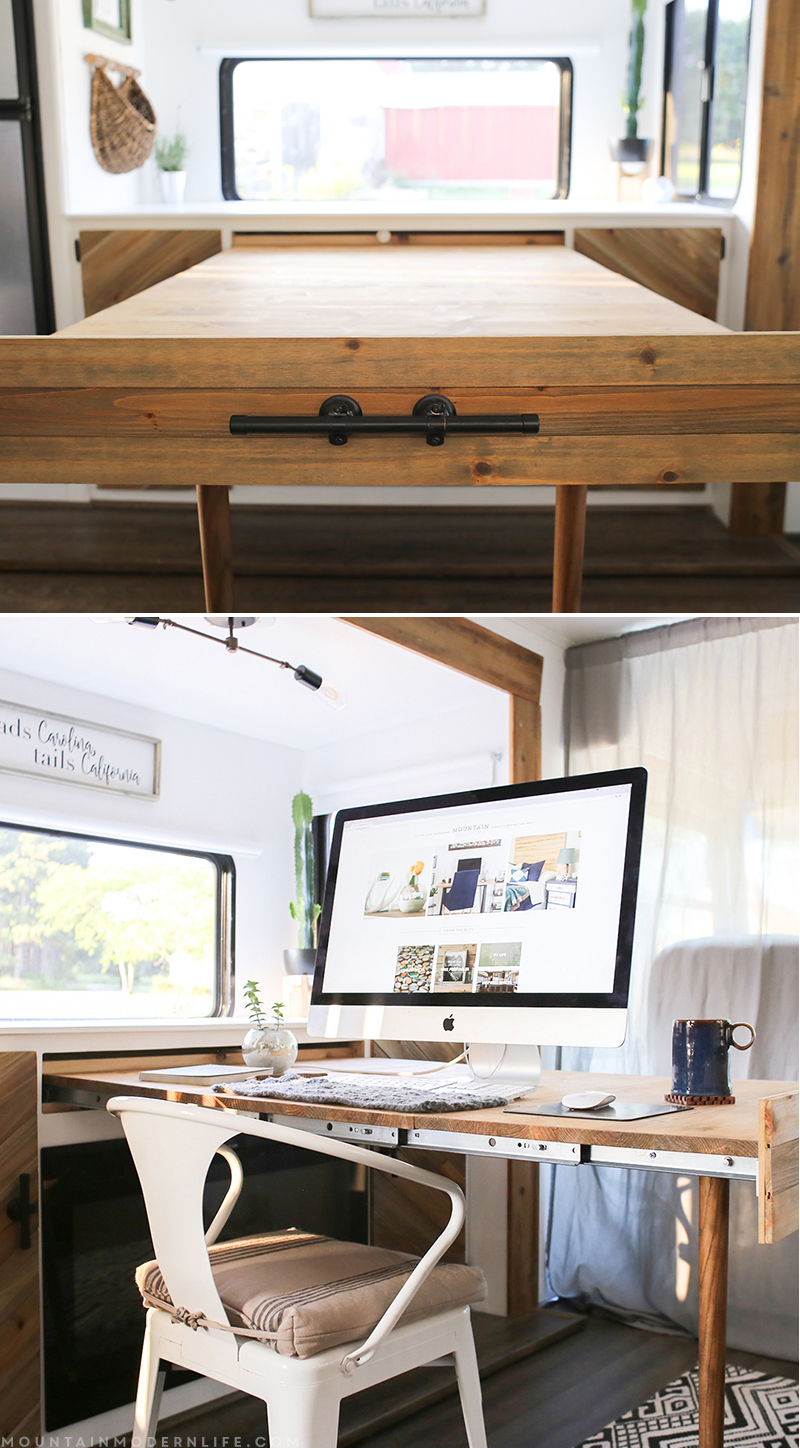
DIY Expanding Table Setup
I love how this table is hidden when not in use, but takes just 3 steps to set it up.
- Pull out drawer
- Attach wooden legs
- Place and lock table leaf extensions
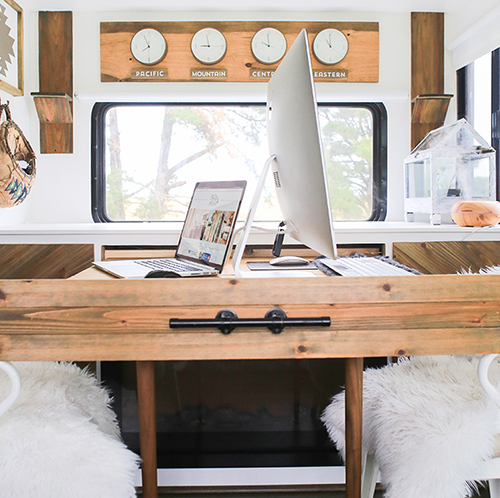
It’s like Magic
Every time we pull the drawer out it feels like magic.
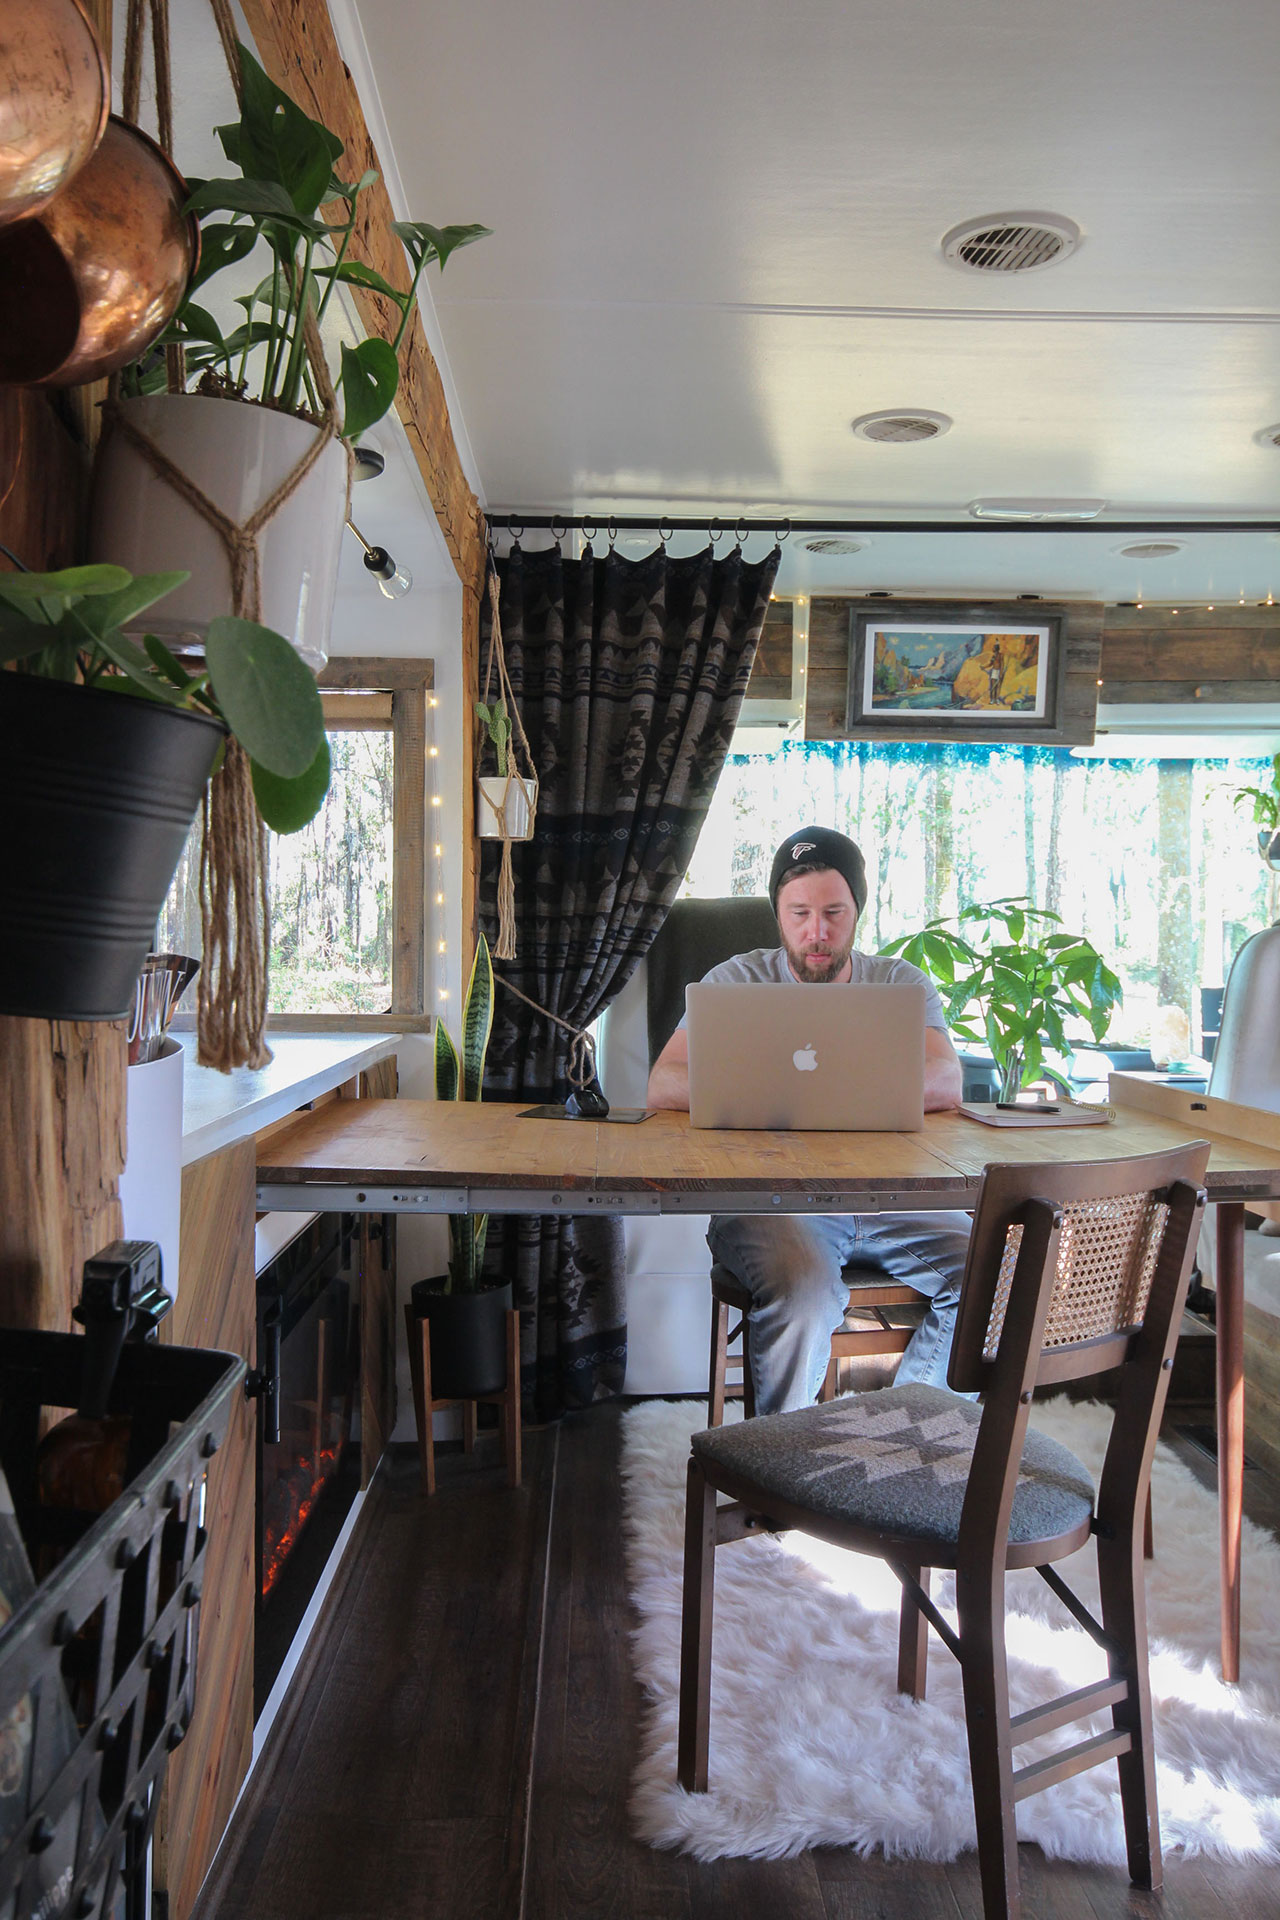
We drilled a hole inside the inner wall of the left cabinet that goes into the top drawer compartment. Our surge protector/extension cord is in there and this is where we have my computer plugged in. This way we can just feed the cord on top of the desk and skip cables on the floor.
Eric and I have both been working at this table for a week now and LOVE it! There’s more than enough space for me to be on my computer while he works on his laptop. It has definitely made working in the RV a lot more manageable.
You can see the before/after below:

Watch Eric assemble the table in the video below:
I was worried about the amount of time it would take to get this table set up, but it literally takes less than a minute! Eric even made a video showing how easy it is to put together or takedown, which you can watch below.
(This video is from 2017 and was before we added our table locks underneath. You can watch our updated RV video tour here.)
Updated Photos of our transforming desk/table:
Here are some updated photos of our DIY expandable desk/table after a few years on the road:
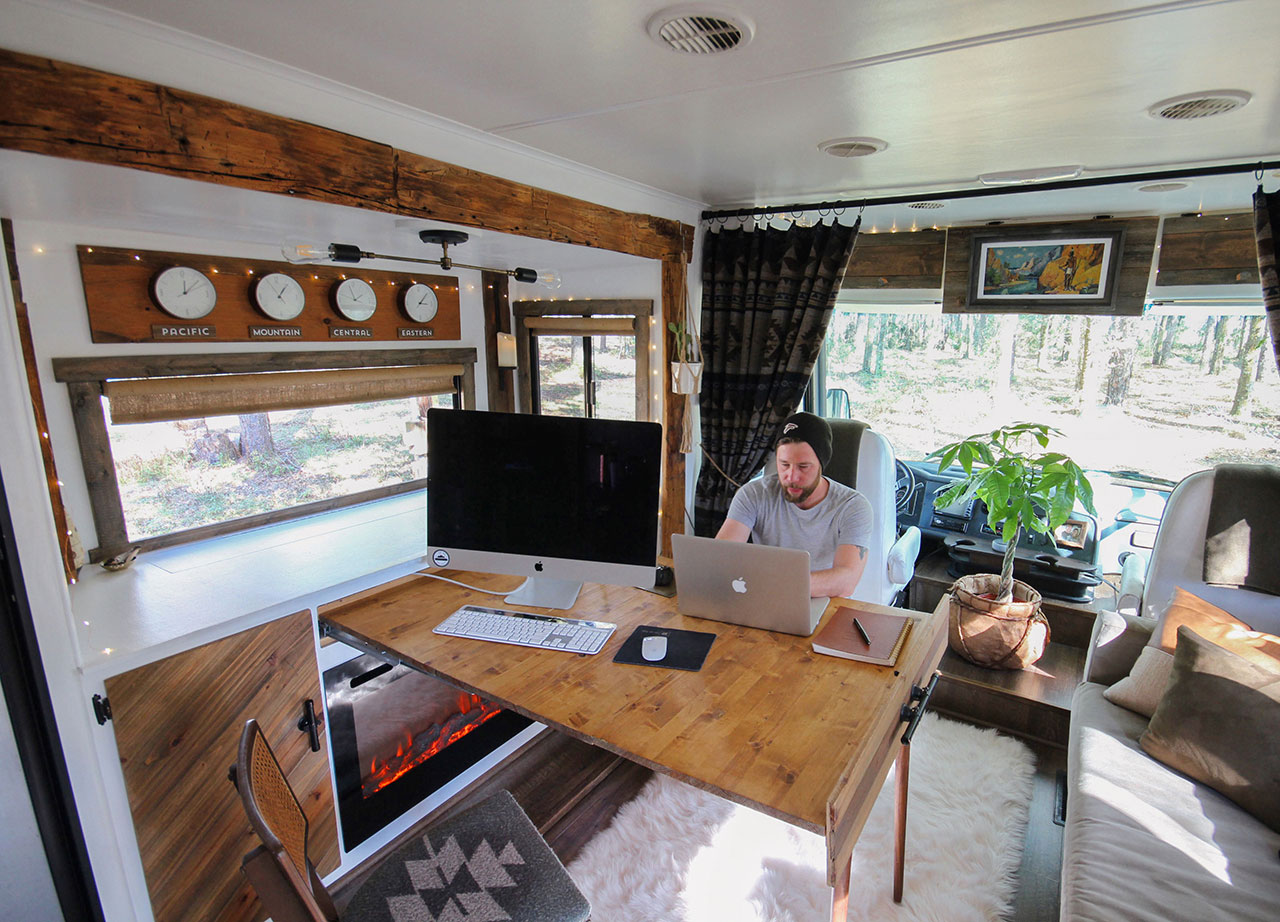
Table Leaf Panels and Leg Storage
We originally planned to store the leaf extensions and legs inside the custom storage we built behind the sofa. While this works, it became inconvenient. Instead, we end up storing them beside the sofa (behind the passenger chair) or between the driver’s chair and window. It keeps them out of the way (and pretty hidden) yet easy to access.
Lessons Learned
This transforming table has been AWESOME, but here are a few things we’ve learned over the last 3+ years…
1. Definitely add table locks. We waited because we used the wooden dowel method, but the locks work so much better, especially with pets that like to jump up on our desk when least expected. We use the dowels too, but they aren’t necessary with locks.
2. Consider adding a lip or edge to each table leaf. The metal extension slides have gotten caught on my pajama pants on multiple occasions. A lip would cover that area up, and be safer, especially if you have little ones around. It would also give the table a more finished look.
3. Install the slides closer together. This may help them not stand out so much and prevent snagged pajamas.
4. Add additional legs. Depending on the length of your table, adding an additional table leg (or two) in the center can add more support and help prevent warping. Or installing them in the center/vertically aligned (like the inspiration video) vs side by side horizontally.
5. See if there is a way to store folding legs or the table leaf panels inside the desk/table. While this didn’t work for our specific situation because of the overall dimensions of the cabinet (and fireplace/tv inside), it’s definitely worth brainstorming over before beginning your build. We technically can squeeze the legs inside, but it’s a tight squeeze since we also keep a surge protector in there to easily plug in our computers.
6. Attach the faux drawer front to the cabinet and not the sliding table. To make this DIY expanding table more usable we could have attached the faux drawer front to the media cabinet instead of the actual sliding drawer mechanism. Then it could have flipped down (staying attached to the cabinet) before sliding the table out, and the end of our table would be flush with the rest of it. This would allow us to use the table when sitting on the sofa, or sit at the end of the table and eat without a funky drawer front in the way. The drawer front and cabinet pull take up a couple of inches of dead space (and visual space) that could be better utilized if they weren’t there.
An Alternative Design I wish we would have considered:
The main reason we created an expanding table in the first place was to have enough space for both my desktop computer and Eric’s laptop since we work on the road. Our media cabinet is installed on our RV slide-out, which has a lip and there wasn’t enough space for our chairs on the slide-out. Sitting on the main flooring and using the media cabinet as a desk or table would have been awkward because our knees would hit the cabinet.
With that said, a completely different design option I wish we would have considered is to have the top of the media cabinet slide out and become our desk/table – similar to this desk. Then we wouldn’t need to store table legs or table leaf extensions (although that’s not a huge deal). However, it also would have allowed us to keep a big chunk of our living room and could be set up or put away in even less time.
Anyway, those are just some ideas to think about if you’re looking for space-saving solutions or plan to create a table or desk in an RV slide-out.
Overall, I love the modular design of this DIY extendable table. It’s super functional and we love it!
We hope this post has inspired or encouraged you to think of creative ways to make tiny living more efficient. Have you created or purchased space-saving furniture you couldn’t live without? Tell us about it in the comments.

My great-aunt had an old free-standing dining room buffet that was essentially the same design. Its pull-out table could seat eight! Yours is a beautiful modern equivalent.
That is the best compliment you could give us! We were definitely inspired by some of the older kitchen table designs, along with the more modern versions. Thanks for stopping by to check it out 🙂
Love it! What a transformation!
Thank you so much Kassie! Although I miss the custom dining table and desk we had at our old house, this new pull-out table certainly checks all of the boxes for us 🙂
Gorgeous job!!!! That is an amazing multi purpose slide out!!! Thanks so much for sharing your work!!!
Thank you! I’ve been trying to figure out if I don’t like putting things away or I’m just lazy because this table literally takes 2 minutes to set up and some nights I just want to keep it up so it’s ready for me to work in the morning, haha.
Katie
Wow! What an incredible transformation, I showed it to my husband and he said, “It looks like they need to get a life! I don’t need that many projects to do.”
I told him this was your life and was your home, he said he thought it looked good before you started. He never would admit that it looks so much nicer now! But secretly I think he does like it, because he stood and looked at it for quite awhile before he would let me back at my computer. HA HA
Again, another winner, I love how the TV is on a lift and the table pulls out, and you still have a fireplace too. You are doing such an amazing job! I am soooo jealous
Your husband does have somewhat of a point there, hahaha.
This is the only table that I can comfortably sit at with my computer due to the screen size, although I do sometimes set it up on the media cabinet as a stand up desk. The cabinet with the fireplace, tv lift, and table is definitely our most functional and most used piece of furniture in the RV. It was a lot of work, and we definitely learned a lot along the way, but I’m just happy we’re actually getting good use of it 🙂
Hi Katie! I love this whole set up! My husband and I are hitting the road this year and were looking for good ways to incorporate a desk – this is perfect! I have one question – where do you keep your monitor when you’re not using it?
Happy travels!!
Julie
Thanks Julie! How exciting! Do you have any specific areas in mind you plan to visit?
We originally planned to travel with my computer in the lower left compartment of the media cabinet and I purchased a monitor sleeve from Amazon that I slide over it when not in use. If I want it moved out of the way I’ll put it inside the cabinet, but when we travel I actually put it in our Jeep. I like to use the flip-up desk in our bedroom too, but it was a little tight with my monitor so a few weeks ago we added on an additional 6 inches. I’ll set my computer back there in the bedroom too, which is nice because I can also leave it up. On the downside it covers a good chunk of our bedroom window, so sometimes I’ll just set it underneath the desk when I’m not using it in there. We plan to do an update on all this in the future, but I hope that helps 🙂
Katie
Wow! Thank you for this!! My husband and I deal with architectural plans for our business and while a single monitor is okay, it isn’t ideal. We just got bit by the RV bug and are in the beginning stages of planning a full time lifestyle (our business doesn’t require us to be in any particular place, so why should we be stationary!). I’ve been looking at tv lifts and trying to convince my husband that this is the way to go, and your post just did it. The RV we’re looking at has a long slide out for the banquette and the small sofa, and I”m thinking that we should be able to fit at least three monitors in that space and three desk surfaces, with the center one doubling as a table (so we don’t have to eat counter style) and office chairs that have a foot rest so we’re not really giving up the extra seating. I was thinking a simple fold up on hinges for the desks, but this seems so much more elegant!
One question: the tv lift is awesome for one tv, but can really add up for multiple screens. Did you consider any manual options?
Hey Christien Hoss I’m sorry I thought I wrote a very long comment back to you but I guess it didn’t go through, oh well what are you going to do haha. Anyway we didn’t really look into manual options for our tv lift, though we did look into multiple screen lifts. I know I have seen touchstone (the company we used) share pictures of their lifts with multiple screens going up and down, as well as computers and other various items on them. They are a really good company to work with and were great for us. You may want to reach out to them to see what options they have, at least to start off with and get an idea of what’s out there. Hope this helps. And good luck on your guys journey, I think you’re completely right, if you can work from anywhere at anytime then why stay stationary, safe travels. Best Wishes, Eric
This is perfect! I’m a costume and clothing designer and have been searching for a way to fit my sewing machine and serger into our camper. I think this will be my way to go. It looks like we’ll be tearing out our dinette set soon.
A few questions- do you have a numbered, step by step diy? I’m pretty handy, but I need more details for a project like this. Is there any way I could email you to purchase (or trade 🙂 ) a detailed step by step if you don’t have one publicly available?
Thanks so much!
Oh my gosh I am so in love with this!
I wish we were handy enough to attempt such a task. We have a 2018 Coachmen Chaparral and my husband bought it right before we got married. We are full timing it. I would so have rather had just a table and chair version, but we ended up with a booth. He’s 6’2″ and we have a 4th grader, so the table just doesn’t fit our needs.
If only manufacturers were a bit more conscious of the full timing community!
That transformation is just beautiful! I’m so glad I came upon this post. We’ve been searching for a class c rv to purchase for about a year now. We don’t really care for a dinette and felt terrible about spending a lot of money and not being comfortable with that tight space. You have given us inspiration and removed the guilt about doing a modification!
Happy travels,
Judy and John
Thanks Judy and John, we really love the way it turned out and get a ton more use out of it than we would’ve the dinette booth. Make sure to let us know how your modification turns out 🙂
Where did you buy the drawer slides?
Hey Randy! We include a link in the post but will add the link below as well. I believe they have different options/sizes you may wanna check out:
https://www.hardwaretree.com/proddetail.php?prod=DTL-3506U
Hope that helps!
Katie
Incredible idea! Definitely taking this as inspiration for a table I will be making in a n e conversion next month 🙂
Yay, that’s awesome! Keep us posted!
I’m curious as to the lip at the end of your table (the drawer front) if it gets in your way at all? Would it have been more difficult to create your table flush with the top of the drawer?
Where do you keep the legs and table leads when not set up?
We originally built the sofa table to store the legs and table, but realized that was more of a pain to take out for something we use all the time. Now we just put them next to the driver’s chair/window or in between the sofa/passenger chair.
Where do you keep the chairs when you are traveling?
We generally just stack them in the bedroom, sandwiched between the desk and bed -which is nice and snug once the slideout is pulled in 🙂
Hi, I just wanted to say that I think your media stand is awesome! And I wanted to ask, does the heat from the fireplace cause any issues when you tv isn’t elevated? Is there an insulation barrier between the two?
Hey Danette and thank you very much! We haven’t had any issues with the heat from the fireplace, they do recommend in the owners manual that you have the TV I believe 12 or 15 inches behind the fireplace, which is the distance we have. With that said I looked very closely at it while it running and noticed that the back area of the fireplace really doesn’t get hot. So while I don’t know if it’s really necessary to provide that area a space behind it I still think it’s a good approach to take. I hope that answers your question but feel free to let me know if I can clarify something better.
Best idea i’ve seen yet
Thank you so much for the kind words Kendra 🙂
How did you get the tv cable to this location? Also ow do you know what is in the walls to screw your cabinet framing to? I love it!
Hey Linda, sorry for the delayed response, but those are some good questions 🙂 So we actually don’t have antenna tv coming to this tv, mainly because we were about to hit the road and I didn’t have time to figure out how to wire it into the slide-out. Though to be honest that has been on my to-do list since we finished the cabinet and I plan to get to it within the next couple of months. If I really do need to have cable tv to this tv I’ll run a co-axial cable over the driver’s chair to it which is few and far between because of the pain it causes 🙂 Even though we don’t have cable tv over there, we do have multiple wireless options that allow us to watch all of our online tv options. As far as the walls go that is also a tricky question. When we first started I went to our owners manual and they had a grid picture that showed where most of the wires were suppose to be (though I’m not sure how accurate it is) since I did know how accurate it was we’d use a thumb tack where we planned to screw in and poke a hole first, this allowed us a tiny peak behind where we were planning to put the screw. That approach worked for us as we never hit any wires, though our RV doesn’t have wood studs but metal ones, so once and a while we would come across one of them. Anyway, I hope this helps but please feel free to let me know if you have any other questions.
Where do you store the table top pieces when the table is folded? Is the height of the drawer face to the table pullout needed? or if I attempted this myself could i get it to be a flat surface?
We actually built the “sofa table” to store the leaves, but never use it for that purpose, ha! Instead, we store them between the captain’s chair and the window. We created the “drawer” face for the table more for the design vs. function, but you can definitely modify it however you want 🙂 Keep us posted on whatever you do!
Katie
I can’t believe I found your site! I’m gonna rip that awful booth out tomorrow! Since I’m a grandma on my own and don’t have tools, I’m just going to get small drop leaf table and a couple upholstered dining chairs for the space. Love what you did though and thank you for all the sharing : ))
That’s awesome! Let us know how it went!